ECO mode CADILLAC ATS 2015 1.G CUE Manual
[x] Cancel search | Manufacturer: CADILLAC, Model Year: 2015, Model line: ATS, Model: CADILLAC ATS 2015 1.GPages: 138, PDF Size: 1.05 MB
Page 3 of 138
Black plate (3,1)Cadillac CUE Infotainment System (GMNA-Localizing-U.S./Canada-
7639728) - 2015 - CRC - 9/3/14
Infotainment System 3
Introduction
Infotainment
The names, logos, emblems,
slogans, and vehicle body designs
appearing in this manual including,
but not limited to, GM, the GM logo,
CADILLAC, CADILLAC Emblem and
CADILLAC CUE are registered
trademarks of General Motors LLC.,
its subsidiaries, affiliates,
or licensors.For vehicles first sold in Canada,
substitute the name General Motors
of Canada Limited for Cadillac
Motor Division, whenever it appears
in this manual.
This manual describes features that
may or may not be on the vehicle
because of optional equipment
that was not purchased on the
vehicle, model variants, country
specifications, features/applications
that may not be available in your
region, or changes subsequent to
the printing of this manual.
Keep this manual with the owner
manual in the vehicle, so it will be
there if it is needed. If the vehicle is
sold, leave this manual in the
vehicle.
Overview
Read the following pages to
become familiar with the
infotainment system features.
{Warning
Taking your eyes off the road for
too long or too often while using
any infotainment feature can
cause a crash. You or others
could be injured or killed. Do not
give extended attention to
infotainment tasks while driving.
Limit your glances at the vehicle
displays and focus your attention
on driving. Use voice commands
whenever possible.
Litho in U.S.A.
Part No. 23191792 B Second Printing©2014 General Motors LLC. All Rights Reserved.
Page 6 of 138
Black plate (6,1)Cadillac CUE Infotainment System (GMNA-Localizing-U.S./Canada-
7639728) - 2015 - CRC - 9/3/14
6 Infotainment System
u(Previous):Press to go to the
previous Home Page.
k(Interaction Selector): Press to
display the favorites list.
Press and hold a location within the
favorites area to begin the process
of saving a favorite application.
Press the application icon to store
as a favorite, and the name of the
application will be shown in
favorites.
Home: Press to go back to the
Home Page to start a different
application.
Managing Home Page Icons
1. Press and hold any of the Home Page icons to edit that icon.
2. Drag the icon to a new location on the Home Page or to save it
to the applications tray.
3. Press
{to exit edit mode.
Steering Wheel Controls
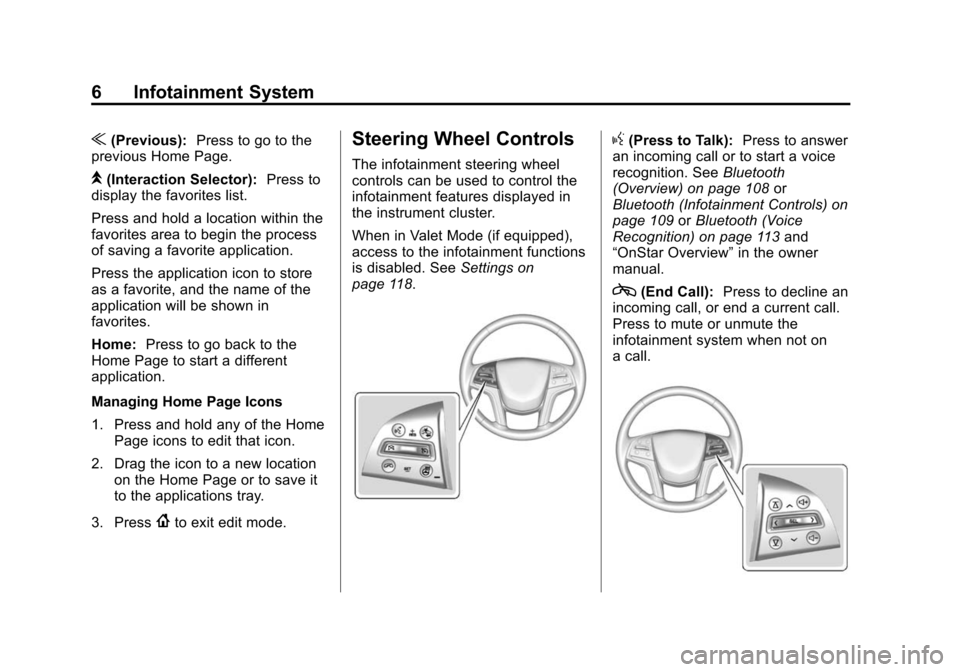
The infotainment steering wheel
controls can be used to control the
infotainment features displayed in
the instrument cluster.
When in Valet Mode (if equipped),
access to the infotainment functions
is disabled. See Settings on
page 118.
g(Press to Talk): Press to answer
an incoming call or to start a voice
recognition. See Bluetooth
(Overview) on page 108 or
Bluetooth (Infotainment Controls) on
page 109 orBluetooth (Voice
Recognition) on page 113 and
“OnStar Overview” in the owner
manual.
c(End Call): Press to decline an
incoming call, or end a current call.
Press to mute or unmute the
infotainment system when not on
a call.
Page 8 of 138
Black plate (8,1)Cadillac CUE Infotainment System (GMNA-Localizing-U.S./Canada-
7639728) - 2015 - CRC - 9/3/14
8 Infotainment System
Weather (If Equipped)
Press the WEATHER icon to display
the Weather main page. See
“SiriusXM Travel Link (If Equipped)”
underSatellite Radio on page 16.
OnStar (If Equipped)
Press the ONSTAR icon to display
the OnStar main page and start
OnStar voice recognition. See
“OnStar Overview” in the owner
manual.
Climate
Press the CLIMATE icon to display
the Climate main page. See “Dual
Automatic Climate Control System”
in the owner manual.
Rear Climate (If Equipped)
Press the R. CLIMATE icon to
display the Rear Climate main page.
See “Rear Climate Control System”
in the owner manual.
Video (If Equipped)
Press the VIDEO icon to display the
video Rear Seat Entertainment main
page. See Rear Seat Entertainment
(RSE) System on page 36 orRear
Seat Entertainment (RSE) System
(Platinum) on page 55.
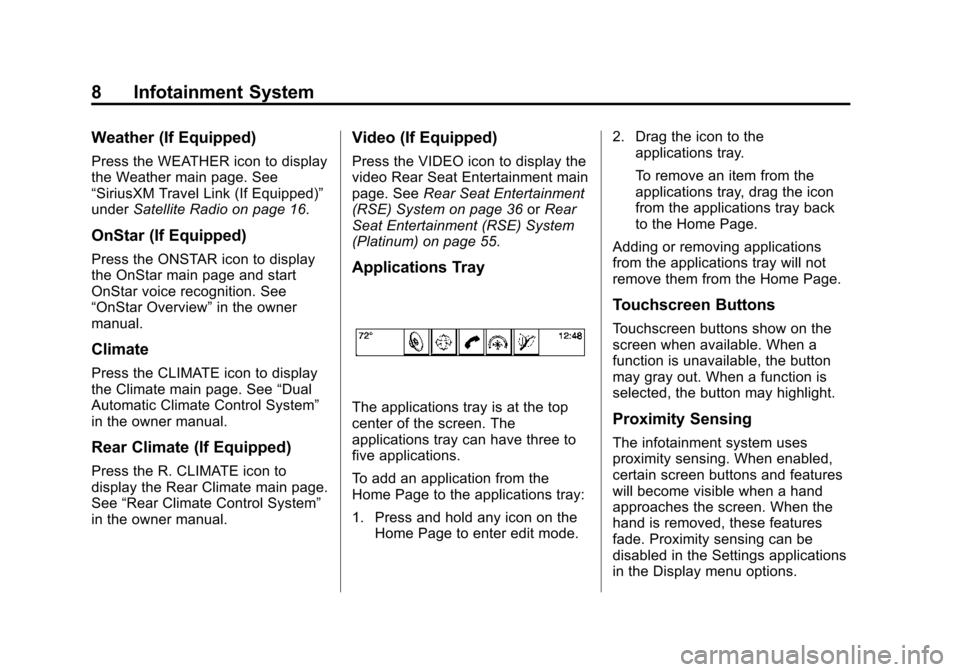
Applications Tray
The applications tray is at the top
center of the screen. The
applications tray can have three to
five applications.
To add an application from the
Home Page to the applications tray:
1. Press and hold any icon on the Home Page to enter edit mode. 2. Drag the icon to the
applications tray.
To remove an item from the
applications tray, drag the icon
from the applications tray back
to the Home Page.
Adding or removing applications
from the applications tray will not
remove them from the Home Page.
Touchscreen Buttons
Touchscreen buttons show on the
screen when available. When a
function is unavailable, the button
may gray out. When a function is
selected, the button may highlight.
Proximity Sensing
The infotainment system uses
proximity sensing. When enabled,
certain screen buttons and features
will become visible when a hand
approaches the screen. When the
hand is removed, these features
fade. Proximity sensing can be
disabled in the Settings applications
in the Display menu options.
Page 14 of 138
Black plate (14,1)Cadillac CUE Infotainment System (GMNA-Localizing-U.S./Canada-
7639728) - 2015 - CRC - 9/3/14
14 Infotainment System
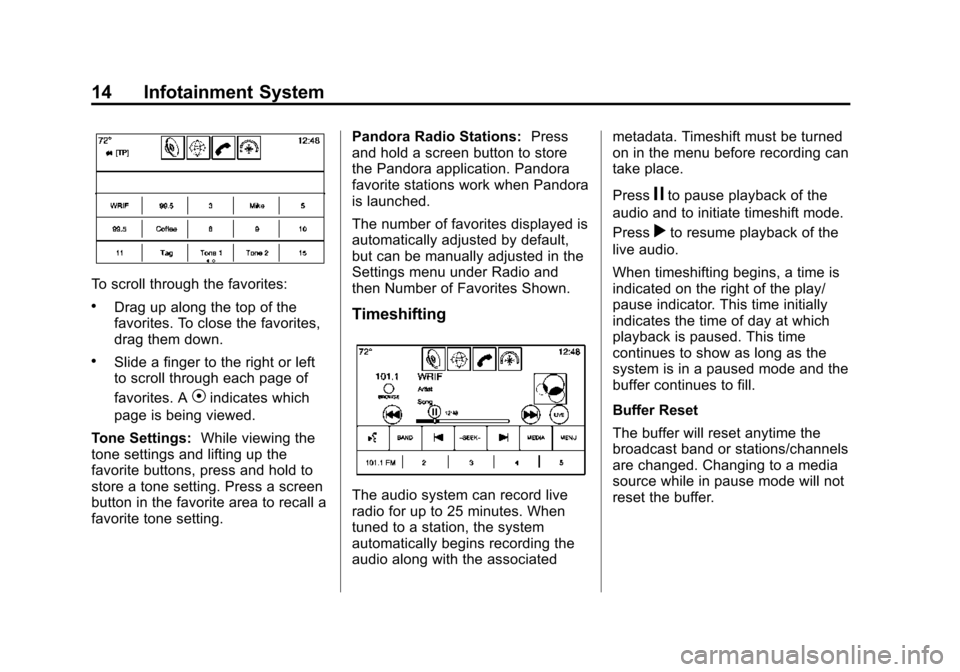
To scroll through the favorites:
.Drag up along the top of the
favorites. To close the favorites,
drag them down.
.Slide a finger to the right or left
to scroll through each page of
favorites. A
Vindicates which
page is being viewed.
Tone Settings: While viewing the
tone settings and lifting up the
favorite buttons, press and hold to
store a tone setting. Press a screen
button in the favorite area to recall a
favorite tone setting. Pandora Radio Stations:
Press
and hold a screen button to store
the Pandora application. Pandora
favorite stations work when Pandora
is launched.
The number of favorites displayed is
automatically adjusted by default,
but can be manually adjusted in the
Settings menu under Radio and
then Number of Favorites Shown.
Timeshifting
The audio system can record live
radio for up to 25 minutes. When
tuned to a station, the system
automatically begins recording the
audio along with the associated metadata. Timeshift must be turned
on in the menu before recording can
take place.
Press
jto pause playback of the
audio and to initiate timeshift mode.
Press
rto resume playback of the
live audio.
When timeshifting begins, a time is
indicated on the right of the play/
pause indicator. This time initially
indicates the time of day at which
playback is paused. This time
continues to show as long as the
system is in a paused mode and the
buffer continues to fill.
Buffer Reset
The buffer will reset anytime the
broadcast band or stations/channels
are changed. Changing to a media
source while in pause mode will not
reset the buffer.
Page 15 of 138
Black plate (15,1)Cadillac CUE Infotainment System (GMNA-Localizing-U.S./Canada-
7639728) - 2015 - CRC - 9/3/14
Infotainment System 15
Rewinding or Fast Forwarding a
Timeshifted Broadcast
.Press and hold thetindicator
to reverse playback at a rate of
15 times the rate of normal
playback.
.Press and hold theuindicator
to advance playback at a rate of
15 times the rate of normal
playback. The timeshift buffer
can be advanced up to the end
of the timeshift buffer and return
to live mode.
Returning to Live Broadcast
If listening to timeshifted radio,
press the LIVE button to return to
live radio.
Timeshifting and Station/Channel
Lists
If browsing a station/channel list is
started while listening to the
timeshift content, the list content is
shown in live time, not
buffered time. Skipping Back in a Broadcast
For programs with metadata,
pressing the previous button less
than five seconds into a program
will make the system skip to the
beginning of the previous program.
If more than five seconds into the
current song/program, the system
starts at the beginning of the current
program. If no metadata is available,
the system skips back 25 seconds.
Reaching the End of the Buffer
If the audio is paused and the
25 minute buffer is reached, the
buffer continues recording the latest
content and will erase the oldest
content. When playback is started,
the content played will be the last
25 minutes in the buffer.
HD Radio Technology
HD Radio®Technology is a free
service with features such as
static-free sound, more stations built
onto the frequency such as
HD2 and HD3, and on-screen
information such as artist and song
title.
Channel Access
To access HD Radio channels:
1. Tune the radio to the channel. If the channel is broadcasting
HD Radio Technology, the radio
will automatically switch to digital
audio, indicated with an HD logo
if HD Radio is turned on.
2. Press
toruto tune to the
previous or next HD Radio
channel.
There may be a delay before the
channel starts playing.
The HD Radio channel number is
indicated next to the logo.
Page 49 of 138
Black plate (49,1)Cadillac CUE Infotainment System (GMNA-Localizing-U.S./Canada-
7639728) - 2015 - CRC - 9/3/14
Infotainment System 49
Headphones
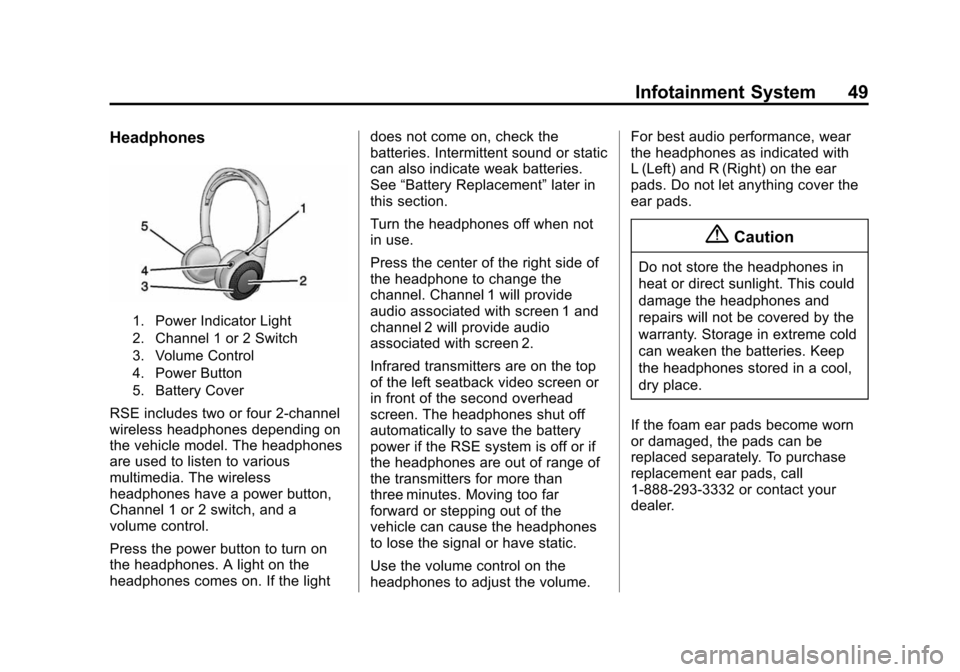
1. Power Indicator Light
2. Channel 1 or 2 Switch
3. Volume Control
4. Power Button
5. Battery Cover
RSE includes two or four 2-channel
wireless headphones depending on
the vehicle model. The headphones
are used to listen to various
multimedia. The wireless
headphones have a power button,
Channel 1 or 2 switch, and a
volume control.
Press the power button to turn on
the headphones. A light on the
headphones comes on. If the lightdoes not come on, check the
batteries. Intermittent sound or static
can also indicate weak batteries.
See
“Battery Replacement” later in
this section.
Turn the headphones off when not
in use.
Press the center of the right side of
the headphone to change the
channel. Channel 1 will provide
audio associated with screen 1 and
channel 2 will provide audio
associated with screen 2.
Infrared transmitters are on the top
of the left seatback video screen or
in front of the second overhead
screen. The headphones shut off
automatically to save the battery
power if the RSE system is off or if
the headphones are out of range of
the transmitters for more than
three minutes. Moving too far
forward or stepping out of the
vehicle can cause the headphones
to lose the signal or have static.
Use the volume control on the
headphones to adjust the volume. For best audio performance, wear
the headphones as indicated with
L (Left) and R (Right) on the ear
pads. Do not let anything cover the
ear pads.
{Caution
Do not store the headphones in
heat or direct sunlight. This could
damage the headphones and
repairs will not be covered by the
warranty. Storage in extreme cold
can weaken the batteries. Keep
the headphones stored in a cool,
dry place.
If the foam ear pads become worn
or damaged, the pads can be
replaced separately. To purchase
replacement ear pads, call
1-888-293-3332 or contact your
dealer.
Page 64 of 138
Black plate (64,1)Cadillac CUE Infotainment System (GMNA-Localizing-U.S./Canada-
7639728) - 2015 - CRC - 9/3/14
64 Infotainment System
DVD-Video Screen 4:Press the
DVD button located under 4 to
transmit IR codes for DVD mode on
Video Screen 4.
TV-Video Screen 4: This button is
not used with the system.
SOUND AROUND ON/OFF: Press
to turn the FM Transmitter power on
or off.
MUTE
>(For DVD Only): Press to
turn off the headphone sound. Press
again to turn the sound on again.
PIX (Picture Selection): Press to
adjust the picture’s On Screen
Display (OSD). Each time this
button is pressed, the picture
adjustment OSD cycles through
bars for BRIGHTNESS,
CONTRAST, COLOR, and TINT.
Use the right/left navigation arrows
to adjust the setting. This feature
automatically shuts off if another
button is pressed or adjustments
are not made within six seconds. SOUND AROUND SELECT:
Press
to select an FM transmitter channel.
The SOUND AROUND SELECT
lets the DVD audio play over the
vehicle’s sound system by tuning
the radio to one of the many FM
frequencies.
MENU: Press to enter the DVD
disc menu while the disc is playing.Q,R,q,r(Navigation Arrows):
Press to navigate through menus.
CH + (Channel): Press to change
the channel to a higher level in
sequential order.
CH −(Channel): Press to change
the channel to a lower level in
sequential order.
VOL +: Press to adjust the sound
louder.
VOL −:Press to adjust the sound
lower.
ENTER: Press to enter a selected
function or to begin playback of
the disc. REPEAT
7:
Press to repeat part
or all of a chapter, title, track, or the
entire disc after using the A-B
button to setup repeat preset
sections.
TITLE: Press to enter the disc title
mode. The title feature is
disc-specific, and may not be
available on all discs.
SUBTITLE: Press to change the
subtitle language to another
available language or to turn
subtitles off.
ANGLE: Press to select a different
viewing angle for discs that are
recorded with different camera
angles.
AUDIO: Press to select a different
language for discs that are recorded
with different languages.
0-9 (Numbers): The numbers
located on the lower left side of the
remote control can be used to enter
numbered menu options, channels,
or track numbers.
Page 66 of 138
Black plate (66,1)Cadillac CUE Infotainment System (GMNA-Localizing-U.S./Canada-
7639728) - 2015 - CRC - 9/3/14
66 Infotainment System
DISPLAY:Press to choose from
the following display options:
1. Press DISPLAY once and Single
Elapsed appears along with the
current track playing and the
length of time for that track.
2. Press DISPLAY twice and Single Remain appears along with the
current track playing and the
amount of time left on the track.
3. Press DISPLAY three times and Total Elapsed appears along
with the current track playing
and the total time that has
played on the CD.
4. Press DISPLAY four times and Total Remain appears along with
the current track playing and the
amount of time left on the CD.
REPEAT: Press to toggle between
Track and All. The default for repeat
is OFF.
.Track repeats the track that is
playing.
.All repeats the disc that is
playing.
Playing MP3 CD
MP3 is the format for storing digital
audio. An audio CD quality song
can be compressed into the MP3
format with very little loss of quality,
while taking up much less space.
CD-R/RW discs that have been
encoded in MP3 format can be
played on the DVD player.
Selecting Folders and Songs
When an MP3 disc is inserted in the
player, the navigation screen
appears. The folders and songs can
be changed by navigating through
the file system. The DVD player
plays the songs in the order they
were burned to the disc.
1. Press STOP if a disc is playing. Press the up or down navigation
arrows on the remote control to
go through the folder list on the
left side of the screen.
2. Press ENTER when the desired folder is highlighted. 3. Press the up or down navigation
arrows to go through the song
list and highlight the desired
song. Press ENTER to begin the
playback of the selected song.
Skipping a Song
NEXT: Press to go to the
next song.
PREV (Previous): Press to return
to the beginning of the song that is
currently playing. Press PREV twice
to go to the previous song.
Selecting a Play Mode
The order the songs are played can
be temporarily chosen on a disc.
The FOLDER play mode is the
default. Press the REPEAT button to
access the play mode options.
The play mode options are:
.Single —Play a selected song.
.Folder —Play the folder in the
order the songs were recorded.
Page 67 of 138
Black plate (67,1)Cadillac CUE Infotainment System (GMNA-Localizing-U.S./Canada-
7639728) - 2015 - CRC - 9/3/14
Infotainment System 67
.Shuffle—Play the songs in
random order, from within the
selected folder.
Using the REPEAT Feature
REPEAT: Press to change between
Repeat One and Repeat Folder.
.Repeat One —Repeats the
song that is playing.
.Repeat Folder —Repeats the
folder that is playing.
Tips and Troubleshooting
IR Sensor Inoperative: Check that
the batteries are good in the remote
control. Check that the remote
Control IR Sensor is not blocked.
Aim the remote control toward the
IR Sensor being controlled. Select
the correct screen, 3 or 4.
No picture: Check that the correct
video input mode is selected. Check
that the video cable is plugged into
the jack securely. No Sound:
Check that the correct
audio input mode is selected. Check
that the audio cable is securely
plugged into the jack.
Cleaning the Video Screens
The video display screens are made
of a specially coated glass and can
be scratched or damaged by
abrasive products, solvents,
or ammonia-based window
cleaners. Clean with a soft, lint-free,
cotton cloth that has been slightly
dampened with warm water. Dry the
screens by wiping with a clean dry
cotton cloth.
Cleaning the Components
Use care when touching or cleaning
the components such as the DVD
player or the discs.
Do not use DVD lens cleaners for
DVD players because the lens of
the DVD optics can become
contaminated by lubricants. Handle CDs and DVDs carefully.
Store them in their original cases or
other protective cases and away
from direct sunlight and dust. The
DVD player scans the bottom
surface of the disc. If the surface of
a CD or DVD is damaged, such as
cracked, broken, or scratched, the
CD or DVD may not play properly or
not at all. If the surface of a CD or
DVD is soiled, take a soft, lint free
cloth or dampen a clean, soft cloth
in a mild, neutral detergent solution
mixed with water, and clean it. Make
sure the wiping process starts from
the center to the edge.
Do not touch the bottom side of a
CD or DVD while handling it; this
could damage the surface. Pick up
CDs or DVDs by grasping the outer
edges or the edge of the hole and
the outer edge.
Page 71 of 138
Black plate (71,1)Cadillac CUE Infotainment System (GMNA-Localizing-U.S./Canada-
7639728) - 2015 - CRC - 9/3/14
Infotainment System 71
Audio Information On/Off
Press to turn the audio information
view on or off from the main map
view. When ON, the audio
information becomes an audio
status pane. This allows for two
lines of audio information in the
status pane and enables the use of
some Interaction Selector controls.
The audio status screen contains
the following elements:
.Station Frequency
.Artist Information
.Song Information
.r/jort/uStation and
Channel Controls
Press the
t/uStation controls to
go to the next or previous strong
signal station or digital channel.
When the audio status pane
displays Artist and Song
Information, press the
t/u
controls to go to the next or
previous track based on the current
media mode.
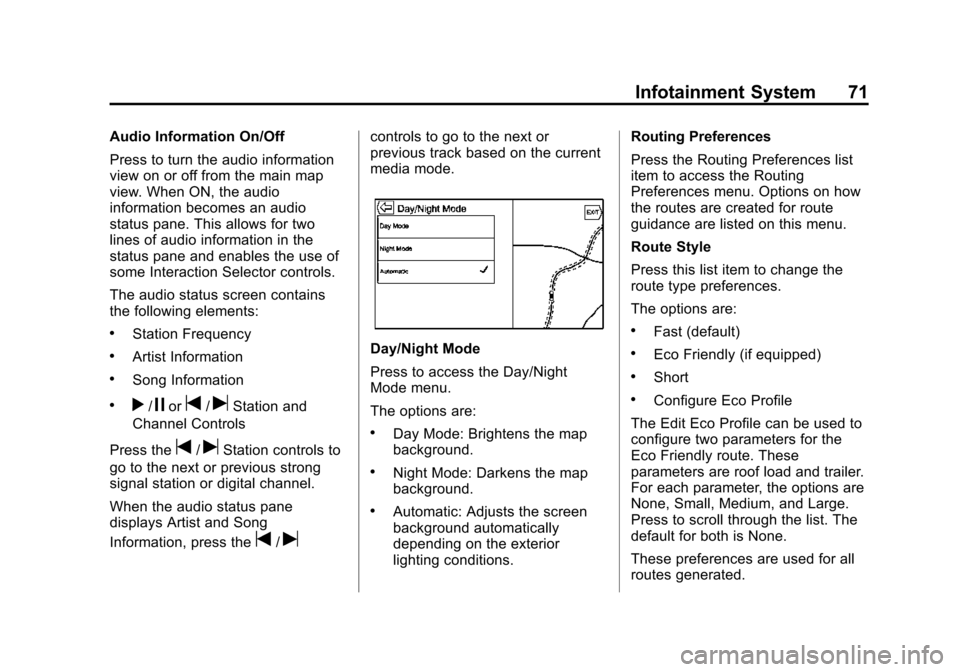
Day/Night Mode
Press to access the Day/Night
Mode menu.
The options are:
.Day Mode: Brightens the map
background.
.Night Mode: Darkens the map
background.
.Automatic: Adjusts the screen
background automatically
depending on the exterior
lighting conditions. Routing Preferences
Press the Routing Preferences list
item to access the Routing
Preferences menu. Options on how
the routes are created for route
guidance are listed on this menu.
Route Style
Press this list item to change the
route type preferences.
The options are:
.Fast (default)
.Eco Friendly (if equipped)
.Short
.Configure Eco Profile
The Edit Eco Profile can be used to
configure two parameters for the
Eco Friendly route. These
parameters are roof load and trailer.
For each parameter, the options are
None, Small, Medium, and Large.
Press to scroll through the list. The
default for both is None.
These preferences are used for all
routes generated.