Button CADILLAC CT5 2020 Workshop Manual
[x] Cancel search | Manufacturer: CADILLAC, Model Year: 2020, Model line: CT5, Model: CADILLAC CT5 2020Pages: 359, PDF Size: 6.04 MB
Page 187 of 359
Cadillac CT5 Owner Manual (GMNA-Localizing-U.S./Canada-13060105) -
2020 - CRC - 2/14/20
186 DRIVING AND OPERATING
switch on the center console to make
a mode selection. Every press will
scroll to the next available mode.
When a mode is selected, a unique
and persistent indicator will be
displayed in the driver information
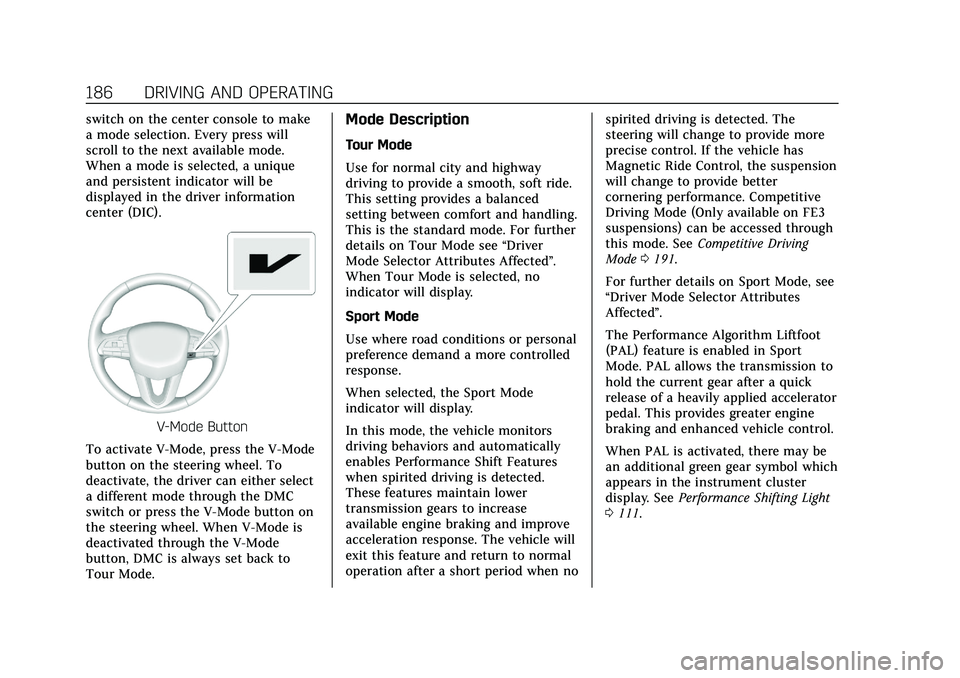
center (DIC).
V-Mode Button
To activate V-Mode, press the V-Mode
button on the steering wheel. To
deactivate, the driver can either select
a different mode through the DMC
switch or press the V-Mode button on
the steering wheel. When V-Mode is
deactivated through the V-Mode
button, DMC is always set back to
Tour Mode.
Mode Description
Tour Mode
Use for normal city and highway
driving to provide a smooth, soft ride.
This setting provides a balanced
setting between comfort and handling.
This is the standard mode. For further
details on Tour Mode see “Driver
Mode Selector Attributes Affected ”.
When Tour Mode is selected, no
indicator will display.
Sport Mode
Use where road conditions or personal
preference demand a more controlled
response.
When selected, the Sport Mode
indicator will display.
In this mode, the vehicle monitors
driving behaviors and automatically
enables Performance Shift Features
when spirited driving is detected.
These features maintain lower
transmission gears to increase
available engine braking and improve
acceleration response. The vehicle will
exit this feature and return to normal
operation after a short period when no spirited driving is detected. The
steering will change to provide more
precise control. If the vehicle has
Magnetic Ride Control, the suspension
will change to provide better
cornering performance. Competitive
Driving Mode (Only available on FE3
suspensions) can be accessed through
this mode. See
Competitive Driving
Mode 0191.
For further details on Sport Mode, see
“Driver Mode Selector Attributes
Affected”.
The Performance Algorithm Liftfoot
(PAL) feature is enabled in Sport
Mode. PAL allows the transmission to
hold the current gear after a quick
release of a heavily applied accelerator
pedal. This provides greater engine
braking and enhanced vehicle control.
When PAL is activated, there may be
an additional green gear symbol which
appears in the instrument cluster
display. See Performance Shifting Light
0 111.
Page 191 of 359
Cadillac CT5 Owner Manual (GMNA-Localizing-U.S./Canada-13060105) -
2020 - CRC - 2/14/20
190 DRIVING AND OPERATING
hold lower gears when not using
paddles. The shifts are also firmer to
increase the quickness of shifting.
Engine Sound
Adjust the volume of engine noise.
Changes when the variable exhaust
valves open.
Steering (Assist Effort)
Adjusts from a lighter steering feel in
Tour Mode to reduced assist in Sport
and Track Mode for more
steering feel.
Magnetic Ride Control (If Equipped)
Adjusts the shock dampening
firmness from a comfort tune in Tour
Mode to an optimized responsiveness
tune in Sport and Track.
Stability Control
.Competitive Mode allows less
computer control to permit some
slide and drift and is selected with
the button –only available in
Sport Mode. .
StabiliTrak/Electronic Stability
Control (ESC) can be turned off by
pressing and holding the button
for five seconds.
Brake Response
Adjusts brake pedal sensitivity by
selecting how quick or slow the brakes
reply to input.
Driver Mode Customization
The vehicle is equipped to modify
following vehicle settings based on
vehicle content. Through the
center-stack, see “Driving Mode”under
Vehicle Personalization 0124 to
customize and personalize My Mode
and/or V-Mode.
Engine Sound
Engine sound adjusts the volume of
engine noise. Setting ranges from
quietest to loudest volume as you
move from stealth through Track.
–Stealth, Tour, Sport, Track Steering
This setting adjusts the effort required
to turn the steering wheel. The
steering wheel offers better feedback
but requires more effort as you move
from Tour to Track.
–Tour, Sport, Track
Suspension
This setting adjusts the firmness of
the suspension in the vehicle.
Suspension adjust stiffness of the
shocks and / or springs. The ride is
more comfortable at lower settings
and is stiffer at higher settings for
better control.
–Tour, Sport, Track
Powertrain
This setting adjusts the throttle
response, gear shifting and engine
performance. An increased throttle
response enhances the acceleration
feel as you move towards track, but
with a comfort trade-off due to more
aggressive gear shifting.
–Tour, Sport, Track, Snow/Ice
Page 200 of 359
Cadillac CT5 Owner Manual (GMNA-Localizing-U.S./Canada-13060105) -
2020 - CRC - 2/14/20
DRIVING AND OPERATING 199
The set speed can also be increased
while the vehicle is stopped.
.If stopped with the brake applied,
press RES+ until the desired set
speed is displayed.
. Pressing RES+ when there is no
longer a vehicle ahead or the
vehicle ahead is pulling away and
the brake is not applied will cause
the ACC to resume.
When it is determined there is no
vehicle ahead or the vehicle ahead is
beyond the selected following
gap,,then the vehicle speed will
increase to the set speed.
The speedometer reading can be
displayed in either English or metric
units. See Instrument Cluster 0101.
The increment value used depends on
the units displayed.
Reducing Speed While ACC Is at a
Set Speed
If ACC is already activated, do one of
the following: .
Use the brake to get to the desired
lower speed. Release the brake and
press SET−. The vehicle will now
cruise at the lower speed.
. Press and holdSET− until the
desired lower speed is displayed,
then release it.
. To decrease speed in smaller
increments, press SET− to the first
detent. For each press, the vehicle
goes about 1 km/h (1 mph) slower.
. To decrease speed in larger
increments, press or hold SET− to
the second detent. For each press,
the vehicle speed decreases to the
next 5 km/h (5 mph) mark on the
speedometer.
The set speed can also be
decreased while the vehicle is
stopped.
. To decrease speed while the
vehicle is stopped, press SET−
until the desired set speed is
displayed. Selecting the Follow Distance Gap
When a slower moving vehicle is
detected ahead within the selected
following gap, ACC will adjust the
vehicle's speed and attempt to
maintain the follow distance gap
selected.
Press
[on the steering wheel to
adjust the following gap.
When pressed, the current gap setting
displays briefly on the instrument
cluster and the HUD (if equipped).
Subsequent presses cycle the gap
button through three settings: Far,
Medium, or Near. The gap setting will
be maintained until it is changed.
Since each gap setting corresponds to
a following time (Far, Medium,
or Near), the following distance will
vary based on vehicle speed. The
faster the vehicle speed, the further
back your vehicle will follow a vehicle
detected ahead. Consider traffic and
weather conditions when selecting the
following gap. The range of selectable
gaps may not be appropriate for all
drivers and driving conditions.
Page 208 of 359
Cadillac CT5 Owner Manual (GMNA-Localizing-U.S./Canada-13060105) -
2020 - CRC - 2/14/20
DRIVING AND OPERATING 207
The Surround Vision system can be
accessed by selecting CAMERA in the
infotainment display or when the
vehicle is shifted into R (Reverse). To
return to the previous screen sooner,
press any button on the infotainment
system, shift into P (Park), or reach a
vehicle speed of approximately
12 km/h (8 mph).
{Warning
The Surround Vision cameras have
blind spots and will not display all
objects near the corners of the
vehicle. Folding outside mirrors that
are out of position may not display
surround view correctly. Always
check around the vehicle when
parking or backing.
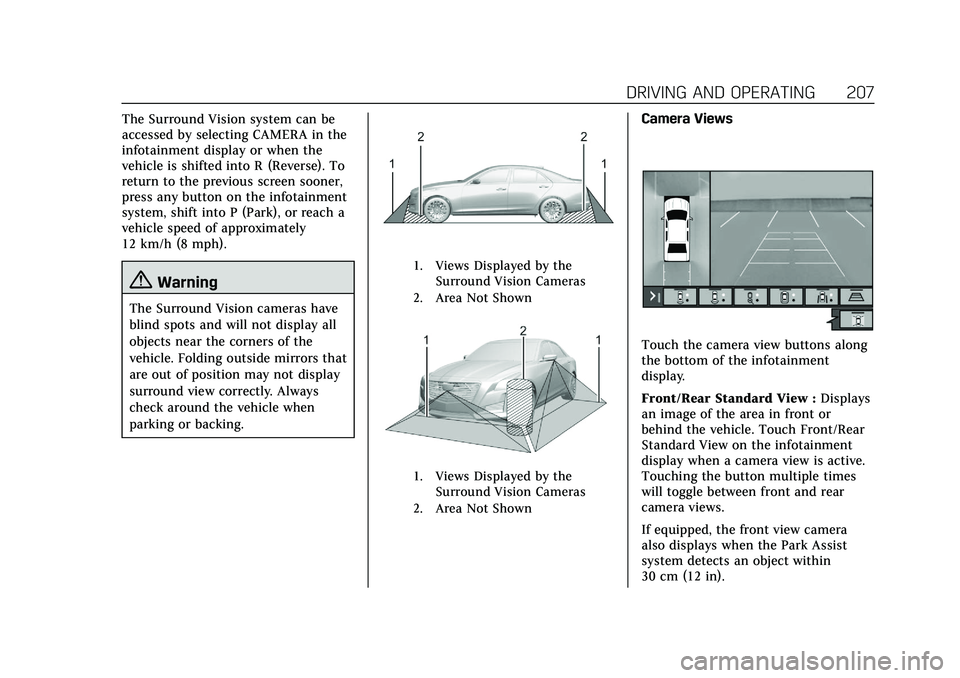
1. Views Displayed by theSurround Vision Cameras
2. Area Not Shown
1. Views Displayed by the Surround Vision Cameras
2. Area Not Shown
Camera Views
Touch the camera view buttons along
the bottom of the infotainment
display.
Front/Rear Standard View : Displays
an image of the area in front or
behind the vehicle. Touch Front/Rear
Standard View on the infotainment
display when a camera view is active.
Touching the button multiple times
will toggle between front and rear
camera views.
If equipped, the front view camera
also displays when the Park Assist
system detects an object within
30 cm (12 in).
Page 209 of 359
Cadillac CT5 Owner Manual (GMNA-Localizing-U.S./Canada-13060105) -
2020 - CRC - 2/14/20
208 DRIVING AND OPERATING
Front/Rear Overhead View :Displays
a front or rear overhead view of the
vehicle. Touching the button will
toggle between the two views.
Side Forward/Rearward View :
Displays a view that shows objects
next to the front or rear sides of the
vehicle. Touch Side Forward/Rearward
View on the infotainment display
when a camera view is active.
Touching the button multiple times
will toggle between forward and
rearward views. Rear Pedestrian Alert,
Park Assist, and RCTA are not
available when Side Forward/Rearward
view is active.
Guidance Lines : Displays available
guidelines. The horizontal markings
represent distance from the vehicle.
Top Down View : Displays an image
of the area surrounding the vehicle,
along with other views in the
infotainment display. Top Down can
be enabled or disabled by pressing the
Top Down View button multiple
times. Park Assist
The vehicle may be equipped with the
Rear Park Assist (RPA) and Front Park
Assist (FPA). The Park Assist system
may provide assistance to driver when
backing up and parking. Park Assist
uses ultrasonic sensors in the
bumpers to measure the distance
between the vehicle and objects. The
system calculates the distance
between vehicle and object via
measuring the time it takes for the
ultrasonic waves to bounce back from
the object. Park Assist works only at
speeds up to about 11 Km/h (7 mph).
An illuminated LED in the parking
assist button indicates that the
system is ready to operate. The
sensors on the bumpers may detect
objects up to 1.8m (6 ft) behind and
1.25m (4 ft) in front of the vehicle
within a zone 25 cm (10 in) high off
the ground and below bumper level.
These detection distances may be
shorter during warmer or humid
weather. Blocked sensors will not
detect objects and can also cause false
detections. Keep the sensors clean ofmud, dirt, snow, ice, and slush; and
clean sensors after a car wash in
freezing temperatures.
{Warning
The Park Assist System is no
substitute for careful and attentive
driving. The Park Assist system
does not detect children,
pedestrians, bicyclists, animals,
or objects located below the
bumper or that are too close or too
far from the vehicle. It is not
available at speeds greater than
11 km/h (7 mph). To prevent injury,
death, or vehicle damage, even with
Park Assist, always check the area
around the vehicle and check all
mirrors before moving forward or
backing.
Page 212 of 359
Cadillac CT5 Owner Manual (GMNA-Localizing-U.S./Canada-13060105) -
2020 - CRC - 2/14/20
DRIVING AND OPERATING 211
{Warning
There may be instances where
unexpected or undesired automatic
braking occurs. If this happens,
either press the brake pedal or
firmly press the accelerator pedal to
release the brakes from the RAB
system. Before releasing the brakes,
check the RVC and check the area
around the vehicle to make sure it
is safe to proceed.
Rear Cross Traffic Alert (RCTA)
If equipped, RCTA displays a red
warning triangle with a left or right
pointing arrow to warn of traffic
coming from the left or right. This
system detects objects coming from
up to 20 m (65 ft) from the left or
right side of the vehicle. When an
object is detected, either three beeps
sound from the left or right or three
Safety Alert Seat pulses occur on the
left or right side, depending on the
direction of the detected vehicle. Use caution while backing up when
towing a trailer, as the RCTA
detection zones that extend out from
the back of the vehicle do not move
further back when a trailer is towed.
See
Radio Frequency Statement 0334.
Turning the Features On or Off
TouchXon the center stack to turn
on or off the Front and Rear Park
Assist, Reverse Automatic Braking
(RAB), and the Backing Warning
System at the same time. The
indicator light next to the button
comes on when the features are on
and turns off when the features have
been disabled.
Turn off Park Assist, RCTA, and RAB
when towing a trailer.
To turn the RPA symbols or guidance
lines (on some models) on or off, see
“Rear Camera Park Assist Symbols”
under Vehicle Personalization 0124.
RCTA can also be turned on or off
through vehicle personalization. See
“Collision/Detection Systems” under
Vehicle Personalization 0124.
Automatic Parking Assist (APA)
with Braking
If equipped, APA searches for and
steers the vehicle into parallel and
perpendicular parking spots. When
using APA, you must still shift gears
while the system applies the brakes
and accelerator. A display and audible
beeps help to guide parking
maneuvers.
Do not use APA when towing a trailer.
{Warning
APA may not detect objects in the
parking space, objects that are soft
or narrow, objects high off the
ground such as flatbed trucks,
objects below ground level such as
large potholes, or moving objects
(e.g. pedestrians). Always verify that
the parking space is appropriate for
parking a vehicle. APA does not
respond to changes in the parking
space, such as movement of an
adjacent vehicle, or a person or
object entering the parking space.
(Continued)
Page 217 of 359
Cadillac CT5 Owner Manual (GMNA-Localizing-U.S./Canada-13060105) -
2020 - CRC - 2/14/20
216 DRIVING AND OPERATING
The vehicle ahead indicator will
display amber when you are following
a vehicle ahead too closely.
Selecting the Alert Timing
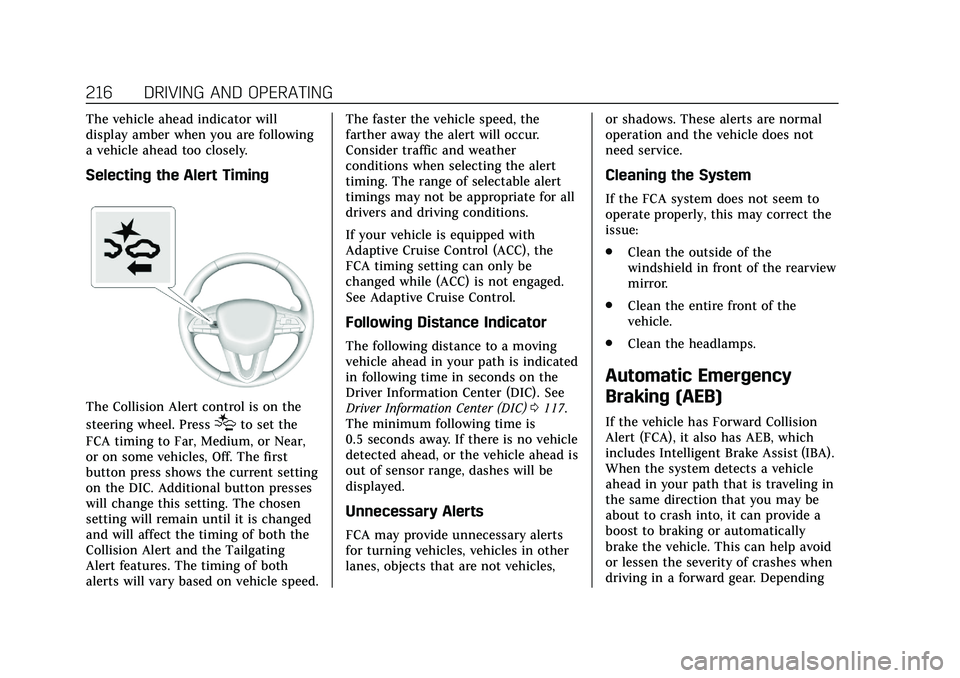
The Collision Alert control is on the
steering wheel. Press
[to set the
FCA timing to Far, Medium, or Near,
or on some vehicles, Off. The first
button press shows the current setting
on the DIC. Additional button presses
will change this setting. The chosen
setting will remain until it is changed
and will affect the timing of both the
Collision Alert and the Tailgating
Alert features. The timing of both
alerts will vary based on vehicle speed. The faster the vehicle speed, the
farther away the alert will occur.
Consider traffic and weather
conditions when selecting the alert
timing. The range of selectable alert
timings may not be appropriate for all
drivers and driving conditions.
If your vehicle is equipped with
Adaptive Cruise Control (ACC), the
FCA timing setting can only be
changed while (ACC) is not engaged.
See Adaptive Cruise Control.
Following Distance Indicator
The following distance to a moving
vehicle ahead in your path is indicated
in following time in seconds on the
Driver Information Center (DIC). See
Driver Information Center (DIC)
0117.
The minimum following time is
0.5 seconds away. If there is no vehicle
detected ahead, or the vehicle ahead is
out of sensor range, dashes will be
displayed.
Unnecessary Alerts
FCA may provide unnecessary alerts
for turning vehicles, vehicles in other
lanes, objects that are not vehicles, or shadows. These alerts are normal
operation and the vehicle does not
need service.
Cleaning the System
If the FCA system does not seem to
operate properly, this may correct the
issue:
.
Clean the outside of the
windshield in front of the rearview
mirror.
. Clean the entire front of the
vehicle.
. Clean the headlamps.
Automatic Emergency
Braking (AEB)
If the vehicle has Forward Collision
Alert (FCA), it also has AEB, which
includes Intelligent Brake Assist (IBA).
When the system detects a vehicle
ahead in your path that is traveling in
the same direction that you may be
about to crash into, it can provide a
boost to braking or automatically
brake the vehicle. This can help avoid
or lessen the severity of crashes when
driving in a forward gear. Depending
Page 224 of 359
Cadillac CT5 Owner Manual (GMNA-Localizing-U.S./Canada-13060105) -
2020 - CRC - 2/14/20
DRIVING AND OPERATING 223
Warning (Continued)
lane or give a Lane Departure
Warning (LDW) alert, even if a lane
marking is detected.
The LKA and LDW systems
may not:. Provide an alert or enough
steering assist to avoid a lane
departure or crash.
. Detect lane markings under
poor weather or visibility
conditions. This can occur if
the windshield or headlamps
are blocked by dirt, snow,
or ice; if they are not in
proper condition; or if the sun
shines directly into the
camera.
. Detect road edges.
. Detect lanes on winding or
hilly roads.
If LKA only detects lane markings
on one side of the road, it will only
assist or provide an LDW alert (Continued)
Warning (Continued)
when approaching the lane on the
side where it has detected a lane
marking. Even with LKA and LDW,
you must steer the vehicle. Always
keep your attention on the road and
maintain proper vehicle position
within the lane, or vehicle damage,
injury, or death could occur. Always
keep the windshield, headlamps,
and camera sensors clean and in
good repair. Do not use LKA in bad
weather conditions or on roads with
unclear lane markings, such as
construction zones.
{Warning
Using LKA while towing a trailer or
on slippery roads could cause loss
of control of the vehicle and a
crash. Turn the system off.
How the System Works
LKA uses a camera sensor installed on
the windshield ahead of the rearview
mirror to detect lane markings. It may
provide brief steering assist if it
detects an unintended lane departure.
It may further provide an audible alert
or the driver seat may pulse indicating
that a lane marking has been crossed.
To turn LKA on and off, press
Aon
the center stack. If equipped, the
indicator light on the button comes
on when LKA is on and turns off
when LKA is disabled.
When on,
Ais white, if equipped,
indicating that the system is not ready
to assist.
Ais green if LKA is ready
to assist. LKA may assist by gently
turning the steering wheel if the
vehicle approaches a detected lane
marking.
Ais amber when
assisting. It may also provide a Lane
Departure Warning (LDW) alert by
flashing
Aamber if the vehicle
crosses a detected lane marking.
Additionally, there may be three
beeps, or the driver seat may pulse
Page 226 of 359
Cadillac CT5 Owner Manual (GMNA-Localizing-U.S./Canada-13060105) -
2020 - CRC - 2/14/20
DRIVING AND OPERATING 225
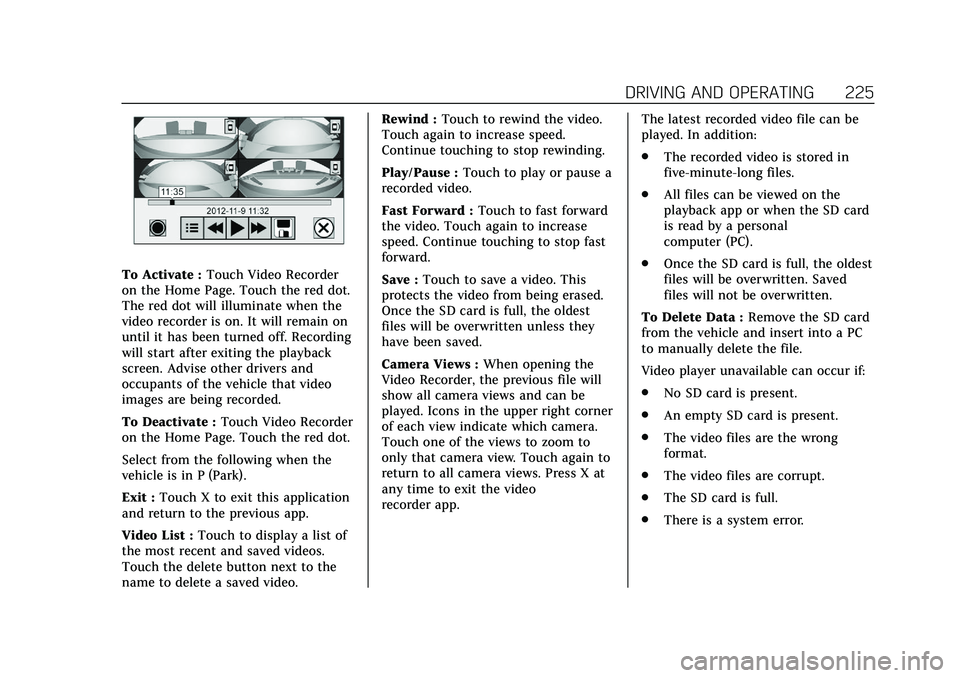
To Activate :Touch Video Recorder
on the Home Page. Touch the red dot.
The red dot will illuminate when the
video recorder is on. It will remain on
until it has been turned off. Recording
will start after exiting the playback
screen. Advise other drivers and
occupants of the vehicle that video
images are being recorded.
To Deactivate : Touch Video Recorder
on the Home Page. Touch the red dot.
Select from the following when the
vehicle is in P (Park).
Exit : Touch X to exit this application
and return to the previous app.
Video List : Touch to display a list of
the most recent and saved videos.
Touch the delete button next to the
name to delete a saved video. Rewind :
Touch to rewind the video.
Touch again to increase speed.
Continue touching to stop rewinding.
Play/Pause : Touch to play or pause a
recorded video.
Fast Forward : Touch to fast forward
the video. Touch again to increase
speed. Continue touching to stop fast
forward.
Save : Touch to save a video. This
protects the video from being erased.
Once the SD card is full, the oldest
files will be overwritten unless they
have been saved.
Camera Views : When opening the
Video Recorder, the previous file will
show all camera views and can be
played. Icons in the upper right corner
of each view indicate which camera.
Touch one of the views to zoom to
only that camera view. Touch again to
return to all camera views. Press X at
any time to exit the video
recorder app. The latest recorded video file can be
played. In addition:
.
The recorded video is stored in
five-minute-long files.
. All files can be viewed on the
playback app or when the SD card
is read by a personal
computer (PC).
. Once the SD card is full, the oldest
files will be overwritten. Saved
files will not be overwritten.
To Delete Data : Remove the SD card
from the vehicle and insert into a PC
to manually delete the file.
Video player unavailable can occur if:
. No SD card is present.
. An empty SD card is present.
. The video files are the wrong
format.
. The video files are corrupt.
. The SD card is full.
. There is a system error.
Page 250 of 359
Cadillac CT5 Owner Manual (GMNA-Localizing-U.S./Canada-13060105) -
2020 - CRC - 2/14/20
VEHICLE CARE 249
an oil change is not necessary for up
to a year. The engine oil and filter
must be changed at least once a year
and at this time the system must be
reset. Your dealer has trained service
people who will perform this work and
reset the system. It is also important
to check the oil regularly over the
course of an oil drain interval and
keep it at the proper level.
If the system is ever reset accidentally,
the oil must be changed at 5 000 km
(3,000 mi) since the last oil change.
Remember to reset the oil life system
whenever the oil is changed.
How to Reset the Engine Oil Life
System
Reset the system whenever the engine
oil is changed so that the system can
calculate the next engine oil change.
To reset the system:1. Using the DIC buttons, display REMAINING OIL LIFE on the
DIC. See Driver Information Center
(DIC) 0117. 2. Press and hold the thumbwheel
to clear the CHANGE ENGINE
OIL SOON message and reset the
oil life at 100%.
Be careful not to reset the oil life
display accidentally at any time
other than after the oil is
changed. It cannot be reset
accurately until the next oil
change.
The oil life system can also be reset as
follows: 1. Using the DIC buttons, display REMAINING OIL LIFE on the
DIC. See Driver Information Center
(DIC) 0117.
2. Fully press and release the accelerator pedal three times
within five seconds.
If the CHANGE ENGINE OIL
SOON message is not on, the
system is reset.
The system is reset when the
CHANGE ENGINE OIL SOON message
is off. If the CHANGE ENGINE OIL SOON
message comes back on when the
vehicle is started, the engine oil life
system has not been reset. Repeat the
procedure.
Automatic Transmission
Fluid
How to Check Automatic
Transmission Fluid
It is not necessary to check the
transmission fluid level.
A transmission fluid leak is the only
reason for fluid loss. If a leak occurs,
take the vehicle to your dealer and
have it repaired as soon as possible.
The vehicle is not equipped with a
transmission fluid level dipstick.
There is a special procedure for
checking and changing the
transmission fluid. Because this
procedure is difficult, this should be
done at the dealer. Contact your dealer
for additional information.