display CADILLAC CT5 2021 Owner's Manual
[x] Cancel search | Manufacturer: CADILLAC, Model Year: 2021, Model line: CT5, Model: CADILLAC CT5 2021Pages: 435, PDF Size: 8.9 MB
Page 329 of 435

Cadillac CT5 Owner Manual (GMNA-Localizing-U.S./Canada-14584312) -
2021 - CRC - 11/23/20
328 VEHICLE CARE
Caution (Continued)
expansion if freezing occurs,
which could damage the tank if
it is completely full.
Brakes
Disc brake linings have built-in wear
indicators that make a high-pitched
warning sound when the brake linings
are worn and new linings are needed.
The sound can come and go or can be
heard all the time when the vehicle is
moving, except when applying the
brake pedal firmly.
{Warning
The brake wear warning sound
means that soon the brakes will not
work well. That could lead to a
crash. When the brake wear
warning sound is heard, have the
vehicle serviced.
Caution
Continuing to drive with worn-out
brake linings could result in costly
brake repairs.
Some driving conditions or climates
can cause a brake squeal when the
brakes are first applied, clearing up
following several applications. This
does not mean something is wrong
with the brakes.
Properly torqued wheel nuts are
necessary to help prevent brake
pulsation. When tires are rotated,
inspect brake linings for wear and
evenly tighten wheel nuts in the
proper sequence to torque
specifications. See Capacities and
Specifications 0397.
Brake pads should be replaced as
complete axle sets.
Brake Pedal Travel
See your dealer if the brake pedal does
not return to normal height, or if
there is a rapid increase in pedal
travel. This could be a sign that brake
service may be required.
Replacing Brake System Parts
Always replace brake system parts
with new, approved replacement parts.
If this is not done, the brakes may not
work properly. The braking
performance can change in many
ways if the wrong brake parts are
installed or if parts are improperly
installed.
Brake Pad Life System (If
Equipped)
When to Change Brake Pads
This vehicle has a system that
estimates the remaining life of the
front and rear brake pads. Brake pad
life is displayed in the Driver
Information Center (DIC), along with
a percentage for each axle. The system
must be reset every time the brake
pads are changed.
When the system has determined that
the brake pads need to be replaced, a
message will display, which may
include mileage remaining.
Brake pads should always be replaced
as complete axle sets.
Page 330 of 435

Cadillac CT5 Owner Manual (GMNA-Localizing-U.S./Canada-14584312) -
2021 - CRC - 11/23/20
VEHICLE CARE 329
How to Reset the Brake Pad Life
System
The system will automatically detect
when significantly worn brake pads
and sensors are replaced. When the
ignition is turned on after new pads
and sensors are installed, a message
will display. Follow the prompts to
reset the system.
The brake pad life system can also be
manually reset:1. Display Brake Pad Life on the DIC. See Driver Information Center (DIC)
(Base Level) 0113 or
Driver Information Center (DIC)
(Uplevel) 0116.
2. Press the thumbwheel. Select front or rear pads as appropriate.
3. Select YES on the confirmation message. Repeat for pads on the
other axle if they were also
replaced.
How to Disable the Brake Pad
Life System
The brake pad life system can be
turned off. This may be necessary if
aftermarket brake pads without wear sensors are installed. When the
system is turned off, the front and
rear brake pad life percentages will
not display. However, the built-in wear
indicators that make a high-pitched
warning sound when the brake pads
are worn can still determine when the
pads should be replaced. See
Brakes
0 328.
To turn off the brake pad life system: 1. Display Brake Pad Life on the DIC. See Driver Information Center (DIC)
(Base Level) 0113 or
Driver Information Center (DIC)
(Uplevel) 0116.
2. Select DISABLE.
To turn the brake pad life system back
on, follow the above steps but select
ENABLE in Step 2.
Brake Fluid
The brake master cylinder reservoir is
filled with GM approved DOT 4 brake
fluid as indicated on the reservoir cap.
See Engine Compartment Overview
0 313 for the location of the reservoir.
Checking Brake Fluid
With the vehicle in P (Park) on a level
surface, the brake fluid level should be
between the minimum and maximum
marks on the brake fluid reservoir.
There are only two reasons why the
brake fluid level in the reservoir may
go down:
.Normal brake lining wear. When
new linings are installed, the fluid
level goes back up.
.A fluid leak in the brake hydraulic
system. Have the brake hydraulic
system fixed. With a leak, the
brakes will not work well.
Always clean the brake fluid reservoir
cap and the area around the cap
before removing it.
Do not top off the brake fluid. Adding
fluid does not correct a leak. If fluid is
added when the linings are worn,
there will be too much fluid when
new brake linings are installed. Add or
Page 333 of 435

Cadillac CT5 Owner Manual (GMNA-Localizing-U.S./Canada-14584312) -
2021 - CRC - 11/23/20
332 VEHICLE CARE
Caution
Allowing the wiper arm to touch
the windshield when no wiper blade
is installed could damage the
windshield. Any damage that occurs
would not be covered by the vehicle
warranty. Do not allow the wiper
arm to touch the windshield.
To replace the wiper blade assembly: 1. Pull the windshield wiper assembly away from the windshield. The
passenger side wiper arm has
limited travel.
2. Lift up on the latch in the middleof the wiper blade where the wiper
arm attaches.
3. With the latch open, pull the wiper blade down toward the windshield
far enough to release it from the
J-hooked end of the wiper arm.
4. Remove the wiper blade.
5. Reverse Steps 1–3 for wiper blade replacement.
Windshield Replacement
HUD System
The windshield is part of the HUD
system. If the windshield needs to be
replaced, a GM replacement
windshield is recommended. The
replacement windshield must be
installed according to GM
specifications for proper alignment.
If it is not, the HUD image may look
out of focus.
Driver Assistance Systems
If the windshield needs to be replaced
and the vehicle is equipped with a
front camera sensor for the Driver
Assistance Systems, a GM replacement windshield is
recommended. The replacement
windshield must be installed
according to GM specifications for
proper alignment. If it is not, these
systems may not work properly, they
may display messages, or they may
not work at all. See your dealer for
proper windshield replacement.
Acoustic Windshield
The vehicle is equipped with an
acoustic windshield. If the windshield
needs to be replaced be sure to get an
acoustic windshield so you will
continue to have the benefits an
acoustic windshield can provide.
Gas Strut(s)
This vehicle is equipped with gas
strut(s) to provide assistance in lifting
and holding open the hood/trunk/
liftgate system in full open position.
{Warning
If the gas struts that hold open the
hood, trunk, and/or liftgate fail, you
or others could be seriously injured.
(Continued)
Page 340 of 435

Cadillac CT5 Owner Manual (GMNA-Localizing-U.S./Canada-14584312) -
2021 - CRC - 11/23/20
VEHICLE CARE 339
FusesUsage
13 –
14 –
15 –
16 –
17 –
18 Display/Infotainment/ USB/Multi-function
control module
19 Airbag/ Automatic occupant sensing /
Data link connection/
Wireless charging
module/ Virtual key
module
20 Power steering column module/
Electronic steering
column lock 2
21 Driver monitor system/Performance
data recorder
22 –
23 –
24 – Fuses
Usage
25 USB
26 –
27 –
28 –
29 –
30 –
31 Headlamp level
32 –
33 Body ignition/IP ignition
34 Exhaust valve
35 Transmission control module ignition/
Engine control
module ignition/Shift
ignition/Brake
ignition
36 Shift module
37 Body control module 1/Electronic
park brake switch
38 Center stack module Fuses
Usage
39 Steering wheel controls
40 Body control module 2
41 Body control module 3
42 Body control module 4
Circuit
Breakers Usage
CB1 Auxiliary power outlet 1
CB2 Auxiliary power outlet 2
Relays Usage
1 Run after park/ Accessory
2 Run crank
3 –
4 –
5 –
Page 353 of 435
Cadillac CT5 Owner Manual (GMNA-Localizing-U.S./Canada-14584312) -
2021 - CRC - 11/23/20
352 VEHICLE CARE
operating properly. The TPMS
malfunction indicator is combined
with the low tire pressure telltale.
When the system detects a
malfunction, the telltale will flash for
approximately one minute and then
remain continuously illuminated. This
sequence will continue upon
subsequent vehicle start-ups as long
as the malfunction exists.
When the malfunction indicator is
illuminated, the system may not be
able to detect or signal low tire
pressure as intended. TPMS
malfunctions may occur for a variety
of reasons, including the installation
of replacement or alternate tires or
wheels on the vehicle that prevent the
TPMS from functioning properly.
Always check the TPMS malfunction
telltale after replacing one or more
tires or wheels on your vehicle to
ensure that the replacement or
alternate tires and wheels allow the
TPMS to continue to function
properly.
SeeTire Pressure Monitor Operation
0 352.
See Radio Frequency Statement 0410.Tire Pressure Monitor
Operation
This vehicle may have a Tire Pressure
Monitor System (TPMS). The TPMS is
designed to warn the driver when a
low tire pressure condition exists.
TPMS sensors are mounted onto each
tire and wheel assembly, excluding the
spare tire and wheel assembly. The
TPMS sensors monitor the air
pressure in the tires and transmit the
tire pressure readings to a receiver
located in the vehicle.
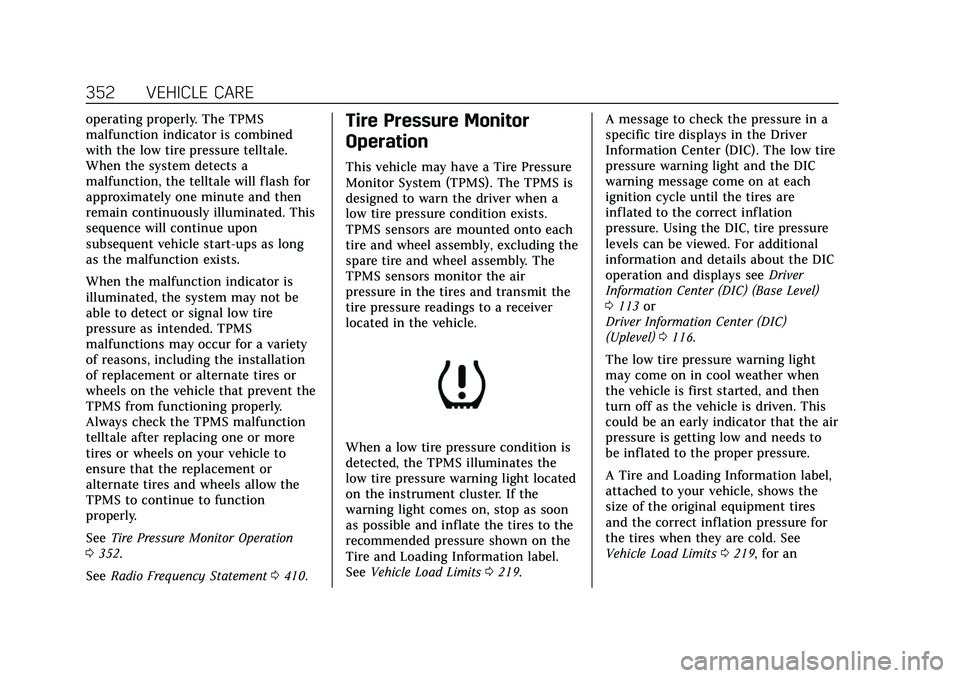
When a low tire pressure condition is
detected, the TPMS illuminates the
low tire pressure warning light located
on the instrument cluster. If the
warning light comes on, stop as soon
as possible and inflate the tires to the
recommended pressure shown on the
Tire and Loading Information label.
See Vehicle Load Limits 0219. A message to check the pressure in a
specific tire displays in the Driver
Information Center (DIC). The low tire
pressure warning light and the DIC
warning message come on at each
ignition cycle until the tires are
inflated to the correct inflation
pressure. Using the DIC, tire pressure
levels can be viewed. For additional
information and details about the DIC
operation and displays see
Driver
Information Center (DIC) (Base Level)
0 113 or
Driver Information Center (DIC)
(Uplevel) 0116.
The low tire pressure warning light
may come on in cool weather when
the vehicle is first started, and then
turn off as the vehicle is driven. This
could be an early indicator that the air
pressure is getting low and needs to
be inflated to the proper pressure.
A Tire and Loading Information label,
attached to your vehicle, shows the
size of the original equipment tires
and the correct inflation pressure for
the tires when they are cold. See
Vehicle Load Limits 0219, for an
Page 354 of 435
Cadillac CT5 Owner Manual (GMNA-Localizing-U.S./Canada-14584312) -
2021 - CRC - 11/23/20
VEHICLE CARE 353
example of the Tire and Loading
Information label and its location.
Also seeTire Pressure 0349.
The TPMS can warn about a low tire
pressure condition but it does not
replace normal tire maintenance. See
Tire Inspection 0355, Tire Rotation
0 355 and
Tires 0342.
Caution
Tire sealant materials are not all
the same. A non-approved tire
sealant could damage the TPMS
sensors. TPMS sensor damage
caused by using an incorrect tire
sealant is not covered by the
vehicle warranty. Always use only
the GM approved tire sealant
available through your dealer or
included in the vehicle.
Factory-installed Tire Inflator Kits use
a GM-approved liquid tire sealant.
Using non-approved tire sealants
could damage the TPMS sensors. See
Tire Sealant and Compressor Kit 0362
for information regarding the inflator
kit materials and instructions.
TPMS Malfunction Light and
Message
The TPMS will not function properly if
one or more of the TPMS sensors are
missing or inoperable. When the
system detects a malfunction, the low
tire pressure warning light flashes for
about one minute and then stays on
for the remainder of the ignition cycle.
A DIC warning message also displays.
The malfunction light and DIC
warning message come on at each
ignition cycle until the problem is
corrected. Some of the conditions that
can cause these to come on are:
.One of the road tires has been
replaced with the spare tire. The
spare tire does not have a TPMS
sensor. The malfunction light and
DIC message should go off after the
road tire is replaced and the sensor
matching process is performed
successfully. See “TPMS Sensor
Matching Process” later in this
section.
.The TPMS sensor matching process
was not done or not completed
successfully after rotating the tires.
The malfunction light and the DIC message should go off after
successfully completing the sensor
matching process. See "TPMS
Sensor Matching Process" later in
this section.
.One or more TPMS sensors are
missing or damaged. The
malfunction light and the DIC
message should go off when the
TPMS sensors are installed and the
sensor matching process is
performed successfully. See your
dealer for service.
.Replacement tires or wheels do not
match the original equipment tires
or wheels. Tires and wheels other
than those recommended could
prevent the TPMS from functioning
properly. See
Buying New Tires
0 357.
.Operating electronic devices or
being near facilities using radio
wave frequencies similar to the
TPMS could cause the TPMS
sensors to malfunction.
If the TPMS is not functioning
properly it cannot detect or signal a
low tire pressure condition. See your
Page 356 of 435
Cadillac CT5 Owner Manual (GMNA-Localizing-U.S./Canada-14584312) -
2021 - CRC - 11/23/20
VEHICLE CARE 355
tire/wheel position after rotating the
tires or replacing one or more of the
TPMS sensors. When a tire is
installed, the vehicle must be
stationary for about 20 minutes before
the system recalculates. The following
relearn process takes up to
10 minutes, driving at a minimum
speed of 20 km/h (12 mph). A dash (-)
or pressure value will display in the
DIC. SeeDriver Information Center
(DIC) (Base Level) 0113 or
Driver Information Center (DIC)
(Uplevel) 0116. A warning message
displays in the DIC if a problem
occurs during the relearn process.
Tire Inspection
We recommend that the tires,
including the spare tire, if the
vehicle has one, be inspected for
signs of wear or damage at least
once a month.
Replace the tire if:
.The indicators at three or more
places around the tire can
be seen.
.There is cord or fabric showing
through the tire's rubber.
.The tread or sidewall is cracked,
cut, or snagged deep enough to
show cord or fabric.
.The tire has a bump, bulge,
or split.
.The tire has a puncture, cut,
or other damage that cannot be
repaired well because of the size
or location of the damage.
Tire Rotation
Tires should be rotated every
12 000 km (7,500 mi). See
Maintenance Schedule 0383.
Tires are rotated to achieve a
more uniform wear for all tires.
The first rotation is the most
important.
Anytime unusual wear is noticed,
rotate the tires as soon as
possible, check for proper tire
inflation pressure, and check for
damaged tires or wheels. If the
unusual wear continues after the rotation, check the wheel
alignment. See
When It Is Time for
New Tires 0356 and
Wheel Replacement 0360.
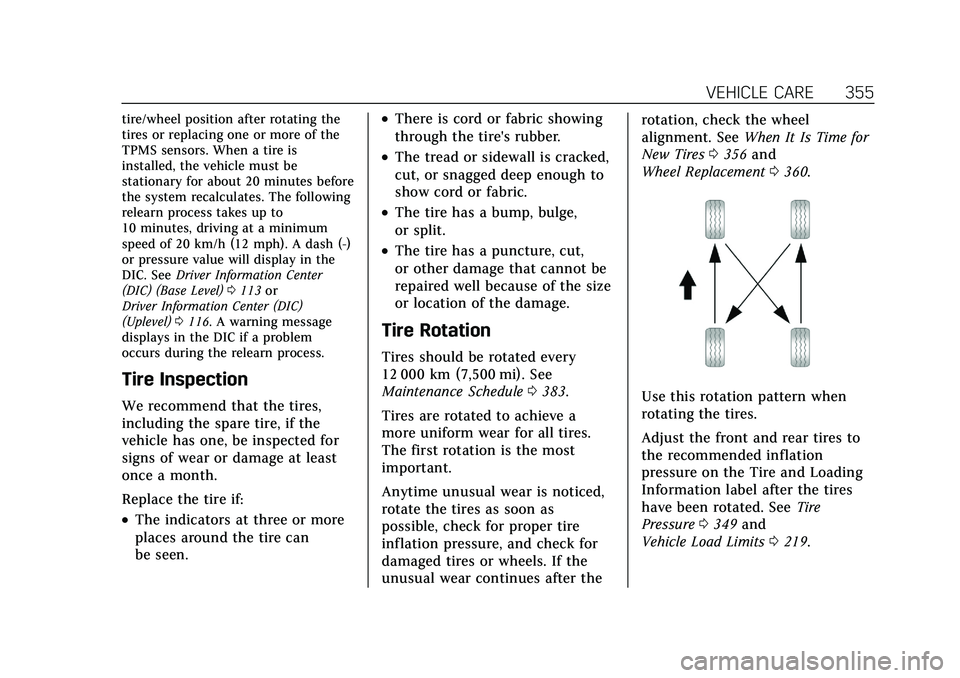
Use this rotation pattern when
rotating the tires.
Adjust the front and rear tires to
the recommended inflation
pressure on the Tire and Loading
Information label after the tires
have been rotated. See Tire
Pressure 0349 and
Vehicle Load Limits 0219.
Page 379 of 435

Cadillac CT5 Owner Manual (GMNA-Localizing-U.S./Canada-14584312) -
2021 - CRC - 11/23/20
378 VEHICLE CARE
Fabric/Carpet/Suede
Start by vacuuming the surface using
a soft brush attachment. If a rotating
vacuum brush attachment is being
used, only use it on the floor carpet.
Before cleaning, gently remove as
much of the soil as possible:
.Gently blot liquids with a paper
towel. Continue blotting until no
more soil can be removed.
.For solid soils, remove as much as
possible prior to vacuuming.
To clean: 1. Saturate a clean, lint-free colorfast cloth with water. Microfiber cloth is
recommended to prevent lint
transfer to the fabric or carpet.
2. Remove excess moisture by gently wringing until water does not drip
from the cleaning cloth.
3. Start on the outside edge of the soil and gently rub toward the
center. Fold the cleaning cloth to a
clean area frequently to prevent
forcing the soil in to the fabric. 4. Continue gently rubbing the soiled
area until there is no longer any
color transfer from the soil to the
cleaning cloth.
5. If the soil is not completely removed, use a mild soap solution
followed only by plain water.
If the soil is not completely removed,
it may be necessary to use a
commercial upholstery cleaner or spot
lifter. Test a small hidden area for
colorfastness before using a
commercial upholstery cleaner or spot
lifter. If ring formation occurs, clean
the entire fabric or carpet.
After cleaning, use a paper towel to
blot excess moisture.
Cleaning High Gloss Surfaces
and Vehicle Information and
Radio Displays
Use a microfiber cloth on high gloss
surfaces or vehicle displays. First, use
a soft bristle brush to remove dirt that
can scratch the surface. Then gently
clean by rubbing with a microfiber
cloth. Never use window cleaners or
solvents. Periodically hand wash the
microfiber cloth separately, using mild soap. Do not use bleach or fabric
softener. Rinse thoroughly and air dry
before next use.
Caution
Do not attach a device with a
suction cup to the display. This may
cause damage and would not be
covered by the vehicle warranty.
Instrument Panel, Leather, Vinyl,
Other Plastic Surfaces, Low
Gloss Paint Surfaces, and
Natural Open Pore Wood
Surfaces
Use a soft microfiber cloth dampened
with water to remove dust and loose
dirt. For a more thorough cleaning,
use a soft microfiber cloth dampened
with a mild soap solution.
Caution
Soaking or saturating leather,
especially perforated leather, as well
as other interior surfaces, may
cause permanent damage. Wipe
excess moisture from these surfaces
(Continued)
Page 384 of 435
Cadillac CT5 Owner Manual (GMNA-Localizing-U.S./Canada-14584312) -
2021 - CRC - 11/23/20
SERVICE AND MAINTENANCE 383
Maintenance Schedule
Owner Checks and Services
Check the engine oil level. SeeEngine
Oil 0316.
Once a Month
.Check the tire inflation pressures.
See Tire Pressure 0349.
.Inspect the tires for wear. See Tire
Inspection 0355.
.Check the windshield washer fluid
level. See Washer Fluid 0327.
Engine Oil Change
When the CHANGE ENGINE OIL
SOON message displays, have the
engine oil and filter changed within
the next 1 000 km (600 mi). If driven
under the best conditions, the engine
oil life system may not indicate the
need for vehicle service for up to a
year. The engine oil and filter must be
changed at least once a year and the
oil life system must be reset. Your
trained dealer technician can perform
this work. If the engine oil life system
is reset accidentally, service the vehicle within 5 000 km (3,000 mi)
since the last service. Reset the oil life
system when the oil is changed. See
Engine Oil Life System
0318.
Air Conditioning Desiccant
(Replace Every Seven Years)
The air conditioning system requires
maintenance every seven years. This
service requires replacement of the
desiccant to help the longevity and
efficient operation of the air
conditioning system. This service can
be complex. See your dealer.
Tire Rotation and Required
Services Every 12 000 km
(7,500 mi)
Rotate the tires, if recommended for
the vehicle, and perform the following
services. See Tire Rotation0355.
.Check engine oil level and oil
life percentage. If needed, change
engine oil and filter, and reset oil
life system. See Engine Oil0316 and
Engine Oil Life System 0318.
.If equipped, check the air filter
life percentage. If necessary, replace
the engine air filter and reset the
engine air filter life system. See
Engine Air Filter Life System 0319.
If the vehicle is not equipped with
the engine air filter life system,
inspect the engine air cleaner filter.
See Engine Air Cleaner/Filter 0320.
.Check engine coolant level. See
Cooling System 0322.
.Check windshield washer fluid level.
See Washer Fluid 0327.
.Check tire inflation pressures. See
Tire Pressure 0349.
.Inspect tire wear. See Tire Inspection
0 355.
.Visually check for fluid leaks.
.Inspect brake system. See Exterior
Care 0372.
.Visually inspect steering,
suspension, and chassis
components for damage, including
cracks or tears in the rubber boots,
loose or missing parts, or signs of
wear at least once a year. See
Exterior Care 0372.
Page 415 of 435
Cadillac CT5 Owner Manual (GMNA-Localizing-U.S./Canada-14584312) -
2021 - CRC - 11/23/20
414 ONSTAR
OnStar
OnStar Overview
OnStar Overview . . . . . . . . . . . . . . . . . . 414
OnStar Services
Emergency . . . . . . . . . . . . . . . . . . . . . . . . 415
Security . . . . . . . . . . . . . . . . . . . . . . . . . . . 415
OnStar Additional Information
OnStar AdditionalInformation . . . . . . . . . . . . . . . . . . . . . 415
OnStar Overview
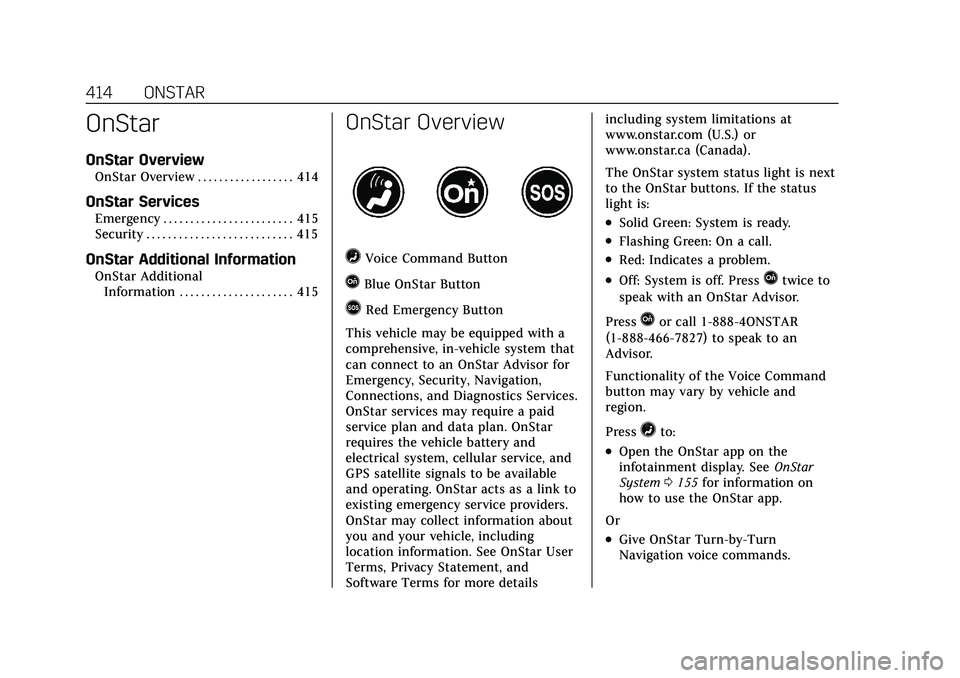
=Voice Command Button
QBlue OnStar Button
>Red Emergency Button
This vehicle may be equipped with a
comprehensive, in-vehicle system that
can connect to an OnStar Advisor for
Emergency, Security, Navigation,
Connections, and Diagnostics Services.
OnStar services may require a paid
service plan and data plan. OnStar
requires the vehicle battery and
electrical system, cellular service, and
GPS satellite signals to be available
and operating. OnStar acts as a link to
existing emergency service providers.
OnStar may collect information about
you and your vehicle, including
location information. See OnStar User
Terms, Privacy Statement, and
Software Terms for more details including system limitations at
www.onstar.com (U.S.) or
www.onstar.ca (Canada).
The OnStar system status light is next
to the OnStar buttons. If the status
light is:
.Solid Green: System is ready.
.Flashing Green: On a call.
.Red: Indicates a problem.
.Off: System is off. PressQtwice to
speak with an OnStar Advisor.
Press
Qor call 1-888-4ONSTAR
(1-888-466-7827) to speak to an
Advisor.
Functionality of the Voice Command
button may vary by vehicle and
region.
Press
=to:
.Open the OnStar app on the
infotainment display. See OnStar
System 0155 for information on
how to use the OnStar app.
Or
.Give OnStar Turn-by-Turn
Navigation voice commands.