CADILLAC CT6 2017 1.G Owners Manual
Manufacturer: CADILLAC, Model Year: 2017, Model line: CT6, Model: CADILLAC CT6 2017 1.GPages: 337, PDF Size: 3.89 MB
Page 241 of 337

Cadillac CT6 Owner Manual (GMNA-Localizing-MidEast-10293390) - 2017 -
CRC - 6/21/16
240 DRIVING AND OPERATING
Fuel
Use the recommended fuel for proper
vehicle maintenance.
For the LGW 3.0L V6 twin turbo
engine, use unleaded petrol with a
posted octane rating of 95 RON or
higher. If the octane is less than
95 RON, the engine could be damaged
and repairs would not be covered by
the vehicle warranty. If heavy
knocking is heard when using petrol
rated at 95 RON octane, the engine
needs service.
For the LGX 3.6L V6 engine, use
unleaded petrol with a posted octane
rating of 91 RON or higher, otherwise
an audible knocking noise may be
heard. If heavy knocking is heard
when using gasoline rated at 91 RON
or higher, the engine needs service.
Caution
Do not use fuels with any of the
following conditions; doing so may
damage the vehicle and void its
warranty:(Continued)
Caution (Continued)
.Fuel with any amount of
methanol, methylal, and
aniline. These fuels can
corrode metal fuel system
parts or damage plastic and
rubber parts.
. Fuel containing metals such
as methylcyclopentadienyl
manganese tricarbonyl
(MMT), which can damage
the emissions control system
and spark plugs.
. Fuel with a posted octane
rating of less than the
recommended fuel. Using this
fuel will lower fuel economy
and performance, and may
decrease the life of the
emissions catalyst.
Fuel Additives
Gasoline should contain detergent
additives that help prevent engine and
fuel system deposits from forming.
Clean fuel injectors and intake valves
will allow the emission control system to work properly. Some gasoline does
not contain sufficient quantities of
additives to keep fuel injectors and
intake valves clean. To make up for
this lack of detergency, consult your
dealer for the GM approved additive
treatment. Add this additive to the
fuel tank at every engine oil change or
every 15 000 km (9,000 mi), whichever
occurs first.
Filling the Tank
{Warning
Fuel vapors and fuel fires burn
violently and can cause injury or
death.
. To help avoid injuries to you
and others, read and follow
all the instructions on the
fuel pump island.
. Turn off the engine when
refueling.
. Keep sparks, flames, and
smoking materials away
from fuel.
(Continued)
Page 242 of 337

Cadillac CT6 Owner Manual (GMNA-Localizing-MidEast-10293390) - 2017 -
CRC - 6/21/16
DRIVING AND OPERATING 241
Warning (Continued)
.Do not leave the fuel pump
unattended.
. Do not use a cell phone while
refueling.
. Do not reenter the vehicle
while pumping fuel.
. Keep children away from the
fuel pump and never let
children pump fuel.
. Fuel can spray out if the
refueling nozzle is inserted
too quickly. This spray can
happen if the tank is nearly
full, and is more likely in hot
weather. Insert the refueling
nozzle slowly and wait for any
hiss noise to stop prior to
beginning to flow fuel.
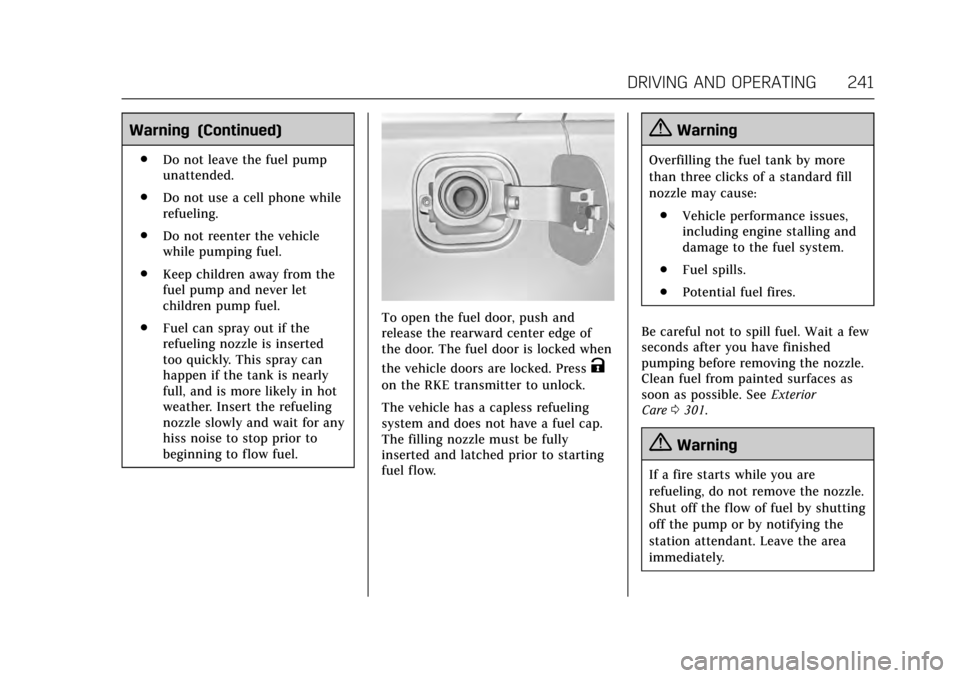
To open the fuel door, push and
release the rearward center edge of
the door. The fuel door is locked when
the vehicle doors are locked. Press
K
on the RKE transmitter to unlock.
The vehicle has a capless refueling
system and does not have a fuel cap.
The filling nozzle must be fully
inserted and latched prior to starting
fuel flow.
{Warning
Overfilling the fuel tank by more
than three clicks of a standard fill
nozzle may cause:
. Vehicle performance issues,
including engine stalling and
damage to the fuel system.
. Fuel spills.
. Potential fuel fires.
Be careful not to spill fuel. Wait a few
seconds after you have finished
pumping before removing the nozzle.
Clean fuel from painted surfaces as
soon as possible. See Exterior
Care 0301.
{Warning
If a fire starts while you are
refueling, do not remove the nozzle.
Shut off the flow of fuel by shutting
off the pump or by notifying the
station attendant. Leave the area
immediately.
Page 243 of 337

Cadillac CT6 Owner Manual (GMNA-Localizing-MidEast-10293390) - 2017 -
CRC - 6/21/16
242 DRIVING AND OPERATING
When replacing the fuel cap, turn it
clockwise until it clicks. Make sure the
cap is fully installed.
Filling the Tank with a Portable
Gas Can
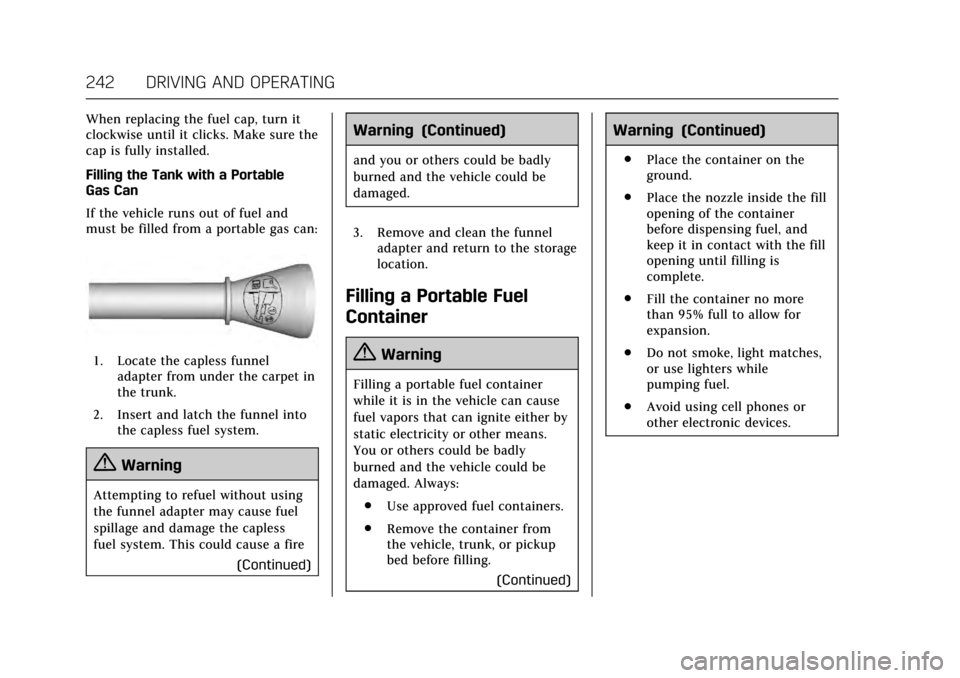
If the vehicle runs out of fuel and
must be filled from a portable gas can:
1. Locate the capless funneladapter from under the carpet in
the trunk.
2. Insert and latch the funnel into the capless fuel system.
{Warning
Attempting to refuel without using
the funnel adapter may cause fuel
spillage and damage the capless
fuel system. This could cause a fire
(Continued)
Warning (Continued)
and you or others could be badly
burned and the vehicle could be
damaged.
3. Remove and clean the funnel adapter and return to the storage
location.
Filling a Portable Fuel
Container
{Warning
Filling a portable fuel container
while it is in the vehicle can cause
fuel vapors that can ignite either by
static electricity or other means.
You or others could be badly
burned and the vehicle could be
damaged. Always:
. Use approved fuel containers.
. Remove the container from
the vehicle, trunk, or pickup
bed before filling.
(Continued)
Warning (Continued)
.Place the container on the
ground.
. Place the nozzle inside the fill
opening of the container
before dispensing fuel, and
keep it in contact with the fill
opening until filling is
complete.
. Fill the container no more
than 95% full to allow for
expansion.
. Do not smoke, light matches,
or use lighters while
pumping fuel.
. Avoid using cell phones or
other electronic devices.
Page 244 of 337

Cadillac CT6 Owner Manual (GMNA-Localizing-MidEast-10293390) - 2017 -
CRC - 6/21/16
DRIVING AND OPERATING 243
Trailer Towing
General Towing
Information
The vehicle is neither designed nor
intended to tow a trailer.
Conversions and
Add-Ons
Add-On Electrical
Equipment
{Warning
The Data Link Connector (DLC) is
used for vehicle service and
Emission Inspection/Maintenance
testing. SeeMalfunction Indicator
Lamp (Check Engine Light) 0127.
A device connected to the DLC —
such as an aftermarket fleet or
driver-behavior tracking device —
may interfere with vehicle systems.
This could affect vehicle operation
and cause a crash. Such devices
may also access information stored
in the vehicle’s systems.
Caution
Some electrical equipment can
damage the vehicle or cause
components to not work and would
not be covered by the vehicle
warranty. Always check with your
dealer before adding electrical
equipment.
Add-on equipment can drain the
vehicle's 12-volt battery, even if the
vehicle is not operating.
The vehicle has an airbag system.
Before attempting to add anything
electrical to the vehicle, see Servicing
the Airbag-Equipped Vehicle 083 and
Adding Equipment to the
Airbag-Equipped Vehicle 084.
Page 245 of 337

Cadillac CT6 Owner Manual (GMNA-Localizing-MidEast-10293390) - 2017 -
CRC - 6/21/16
244 VEHICLE CARE
Vehicle Care
General Information
General Information . . . . . . . . . . . . . 245
Accessories andModifications . . . . . . . . . . . . . . . . . . . 245
Vehicle Checks
Doing Your OwnService Work . . . . . . . . . . . . . . . . . . . . 245
Hood . . . . . . . . . . . . . . . . . . . . . . . . . . . . . . 246
Engine Compartment Overview . . . . . . . . . . . . . . . . . . . . . . . . . 247
Engine Oil . . . . . . . . . . . . . . . . . . . . . . . . . 250
Engine Oil Life System . . . . . . . . . . . 252
Automatic Transmission Fluid . . . . . . . . . . . . . . . . . . . . . . . . . . . . . 253
Engine Air Cleaner/Filter . . . . . . . . . 254
Cooling System . . . . . . . . . . . . . . . . . . . 255
Engine Coolant . . . . . . . . . . . . . . . . . . . 256
Engine Overheating . . . . . . . . . . . . . . 259
Washer Fluid . . . . . . . . . . . . . . . . . . . . . 260
Brakes . . . . . . . . . . . . . . . . . . . . . . . . . . . . . 261
Brake Fluid . . . . . . . . . . . . . . . . . . . . . . . 262
Battery . . . . . . . . . . . . . . . . . . . . . . . . . . . . 263
All-Wheel Drive . . . . . . . . . . . . . . . . . . 264
Starter Switch Check . . . . . . . . . . . . . 264
Automatic Transmission Shift Lock Control Function
Check . . . . . . . . . . . . . . . . . . . . . . . . . . . . 264 Park Brake and P (Park)
Mechanism Check . . . . . . . . . . . . . . 265
Wiper Blade Replacement . . . . . . . 265
Windshield Replacement . . . . . . . . 266
Headlamp Aiming
Headlamp Aiming . . . . . . . . . . . . . . . . 266
Bulb Replacement
Bulb Replacement . . . . . . . . . . . . . . . . 267
LED Lighting . . . . . . . . . . . . . . . . . . . . . 267
License Plate Lamp . . . . . . . . . . . . . . 267
Replacement Bulbs . . . . . . . . . . . . . . . 267
Electrical System
Electrical System Overload . . . . . . 268
Fuses and Circuit Breakers . . . . . . 269
Engine Compartment Fuse Block . . . . . . . . . . . . . . . . . . . . . . . . . . . . 269
Instrument Panel Fuse Block . . . . 272
Rear Compartment Fuse Block . . . . . . . . . . . . . . . . . . . . . . . . . . . . 274
Wheels and Tires
Tires . . . . . . . . . . . . . . . . . . . . . . . . . . . . . . . 276
All-Season Tires . . . . . . . . . . . . . . . . . . 277
Winter Tires . . . . . . . . . . . . . . . . . . . . . . 277
Low-Profile Tires . . . . . . . . . . . . . . . . . 278
Summer Tires . . . . . . . . . . . . . . . . . . . . 278
Tire Pressure . . . . . . . . . . . . . . . . . . . . . . 279
Tire Pressure for High-SpeedOperation . . . . . . . . . . . . . . . . . . . . . . . . 280 Tire Pressure Monitor System . . . 280
Tire Pressure Monitor
Operation . . . . . . . . . . . . . . . . . . . . . . . . 281
Tire Inspection . . . . . . . . . . . . . . . . . . . 284
Tire Rotation . . . . . . . . . . . . . . . . . . . . . 284
When It Is Time for New Tires . . . . . . . . . . . . . . . . . . . . . . . . . . . . . 286
Buying New Tires . . . . . . . . . . . . . . . . 286
Different Size Tires and Wheels . . . . . . . . . . . . . . . . . . . . . . . . . . 288
Wheel Alignment and Tire Balance . . . . . . . . . . . . . . . . . . . . . . . . . . 288
Wheel Replacement . . . . . . . . . . . . . . 288
Tire Chains . . . . . . . . . . . . . . . . . . . . . . . 289
If a Tire Goes Flat . . . . . . . . . . . . . . . . 289
Tire Changing . . . . . . . . . . . . . . . . . . . . . 291
Compact Spare Tire . . . . . . . . . . . . . . 295
Jump Starting
Jump Starting . . . . . . . . . . . . . . . . . . . . . 296
Towing the Vehicle
Towing the Vehicle . . . . . . . . . . . . . . . 299
Recreational Vehicle Towing . . . . 299
Appearance Care
Exterior Care . . . . . . . . . . . . . . . . . . . . . . 301
Interior Care . . . . . . . . . . . . . . . . . . . . . . 305
Floor Mats . . . . . . . . . . . . . . . . . . . . . . . . 308
Page 246 of 337

Cadillac CT6 Owner Manual (GMNA-Localizing-MidEast-10293390) - 2017 -
CRC - 6/21/16
VEHICLE CARE 245
General Information
For service and parts needs, visit your
dealer. You will receive genuine parts
and trained and supported service
people.
Accessories and
Modifications
Adding non-dealer accessories or
making modifications to the vehicle
can affect vehicle performance and
safety, including such things as
airbags, braking, stability, ride and
handling, emissions systems,
aerodynamics, durability, and
electronic systems like antilock
brakes, traction control, and stability
control. These accessories or
modifications could even cause
malfunction or damage not covered by
the vehicle warranty.Damage to suspension components
caused by modifying vehicle height
outside of factory settings will not be
covered by the vehicle warranty.
Damage to vehicle components
resulting from modifications or the
installation or use of non-GM certified
parts, including control module or
software modifications, is not covered
under the terms of the vehicle
warranty and may affect remaining
warranty coverage for affected parts.
GM Accessories are designed to
complement and function with other
systems on the vehicle. See your
dealer to accessorize the vehicle using
genuine GM Accessories installed by a
dealer technician.
Also, see
Adding Equipment to the
Airbag-Equipped Vehicle 084.
Vehicle Checks
Doing Your Own
Service Work
{Warning
It can be dangerous to work on
your vehicle if you do not have the
proper knowledge, service manual,
tools, or parts. Always follow
owner’s manual procedures and
consult the service manual for your
vehicle before doing any
service work.
If doing some of your own service
work, use the proper service manual.
It tells you much more about how to
service the vehicle than this
manual can.
This vehicle has an airbag system.
Before attempting to do your own
service work, see Airbag System
Check 084.
Keep a record with all parts receipts
and list the mileage and the date of
any service work performed.
Page 247 of 337

Cadillac CT6 Owner Manual (GMNA-Localizing-MidEast-10293390) - 2017 -
CRC - 6/21/16
246 VEHICLE CARE
Caution
Even small amounts of
contamination can cause damage to
vehicle systems. Do not allow
contaminants to contact the fluids,
reservoir caps, or dipsticks.
Hood
{Warning
Gas struts and other metal
components under the hood can get
hot after running the engine. Do
not touch these components as
they can burn unprotected skin and
could cause serious injury.Clear any snow from the hood before
opening.
To open the hood:
1. Pull the hood release handle. It is
on the lower left side of the
instrument panel between the
door and the steering wheel.
2. Release the handle, then pull the handle again to fully open
the hood.
3. Go to the front of the vehicle and lift the hood open.
Caution
Be sure the hood is completely
closed before driving. Damage may
occur if it is not.
To close the hood: 1. Before closing the hood, be sure all filler caps are properly
installed.
2. Lower the hood approximately 46 cm (18 in) from the closed
position.
3. Then push the front center of the hood with a swift, firm motion.
4. Check to make sure the hood is closed. If not, release the hood
from inside and repeat Steps 1–3.
Page 248 of 337

Cadillac CT6 Owner Manual (GMNA-Localizing-MidEast-10293390) - 2017 -
CRC - 6/21/16
VEHICLE CARE 247
Engine Compartment Overview
3.0L V6 Twin Turbo Engine
Page 249 of 337

Cadillac CT6 Owner Manual (GMNA-Localizing-MidEast-10293390) - 2017 -
CRC - 6/21/16
248 VEHICLE CARE
1. Engine Coolant Surge Tank andPressure Cap. See Cooling
System 0255.
2. Engine Air Cleaner/Filter 0254.
3. Engine Cooling Fan (Out of View). See Cooling System 0255.
4. Engine Oil Fill Cap. See Engine
Oil 0250. 5. Engine Oil Dipstick. See
Engine
Oil 0250.
6. Remote Positive (+) Battery Terminal. See Jump
Starting 0296.
7. Engine Compartment Fuse
Block 0269. 8. Brake Fluid Reservoir. See
Brake
Fluid 0262.
9. Windshield Washer Fluid Reservoir. See Washer
Fluid 0260.
10. Remote Negative (-) Battery Terminal. See Jump
Starting 0296.
Page 250 of 337

Cadillac CT6 Owner Manual (GMNA-Localizing-MidEast-10293390) - 2017 -
CRC - 6/21/16
VEHICLE CARE 249
3.6L V6 Engine