Infotainment CADILLAC CT6 2018 1.G User Guide
[x] Cancel search | Manufacturer: CADILLAC, Model Year: 2018, Model line: CT6, Model: CADILLAC CT6 2018 1.GPages: 445, PDF Size: 7.7 MB
Page 69 of 445
Cadillac CT6 Owner Manual (GMNA-Localizing-U.S./Canada-11292458) -
2018 - crc - 2/15/17
68 SEATS AND RESTRAINTS
Uplevel Lumbar and Upper Back
Support Adjustment
If equipped, the ignition must be on
to use all uplevel seat features.
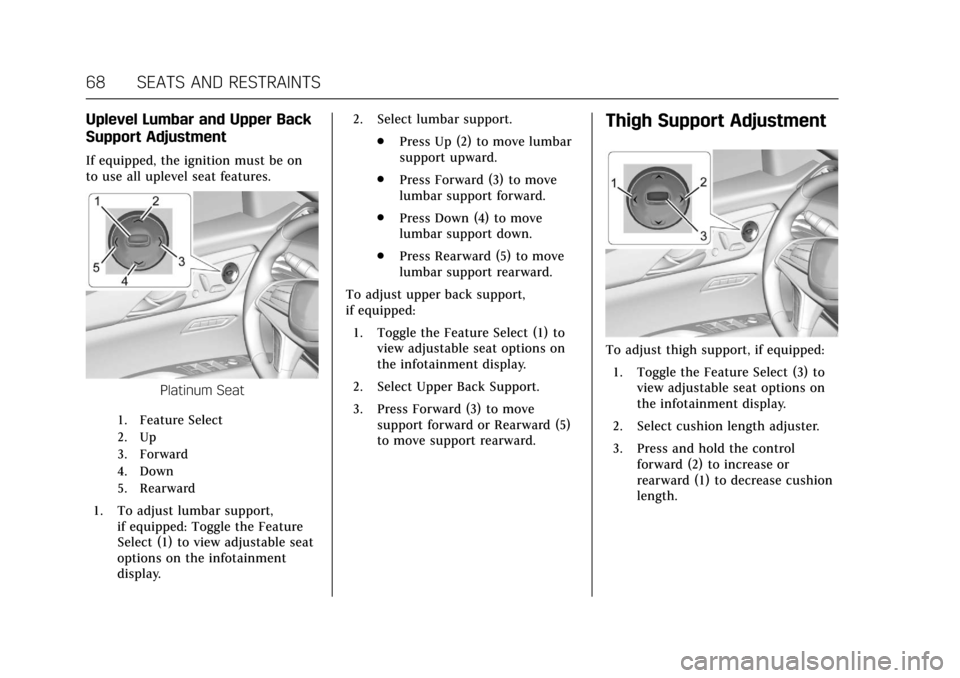
Platinum Seat
1. Feature Select
2. Up
3. Forward
4. Down
5. Rearward
1. To adjust lumbar support,if equipped: Toggle the Feature
Select (1) to view adjustable seat
options on the infotainment
display. 2. Select lumbar support.
.Press Up (2) to move lumbar
support upward.
. Press Forward (3) to move
lumbar support forward.
. Press Down (4) to move
lumbar support down.
. Press Rearward (5) to move
lumbar support rearward.
To adjust upper back support,
if equipped: 1. Toggle the Feature Select (1) to view adjustable seat options on
the infotainment display.
2. Select Upper Back Support.
3. Press Forward (3) to move support forward or Rearward (5)
to move support rearward.
Thigh Support Adjustment
To adjust thigh support, if equipped:
1. Toggle the Feature Select (3) to view adjustable seat options on
the infotainment display.
2. Select cushion length adjuster.
3. Press and hold the control forward (2) to increase or
rearward (1) to decrease cushion
length.
Page 75 of 445
Cadillac CT6 Owner Manual (GMNA-Localizing-U.S./Canada-11292458) -
2018 - crc - 2/15/17
74 SEATS AND RESTRAINTS
Massage
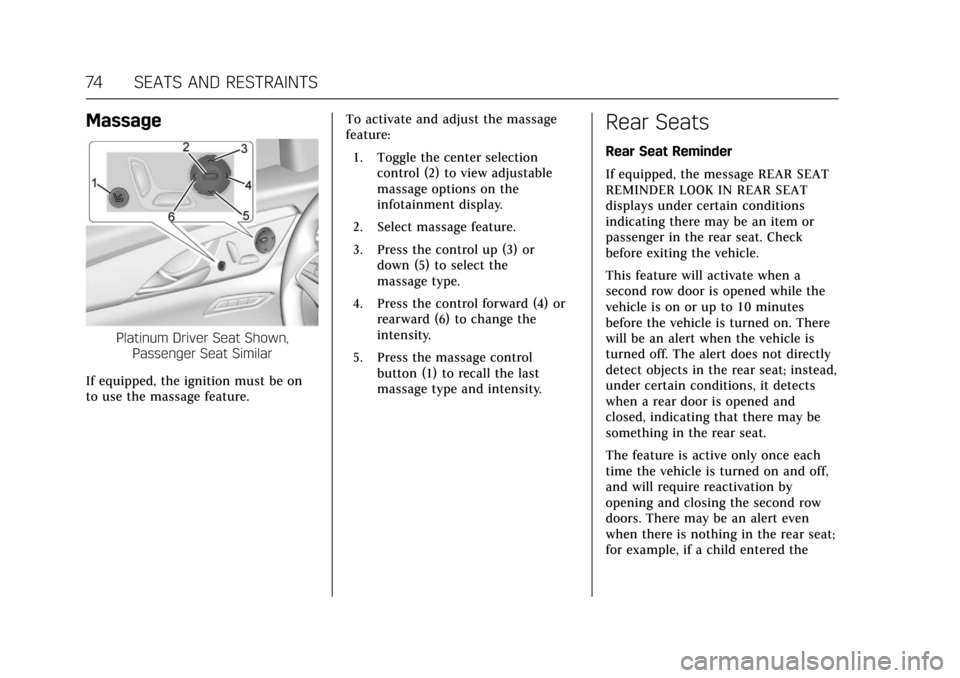
Platinum Driver Seat Shown,Passenger Seat Similar
If equipped, the ignition must be on
to use the massage feature. To activate and adjust the massage
feature:
1. Toggle the center selection control (2) to view adjustable
massage options on the
infotainment display.
2. Select massage feature.
3. Press the control up (3) or down (5) to select the
massage type.
4. Press the control forward (4) or rearward (6) to change the
intensity.
5. Press the massage control button (1) to recall the last
massage type and intensity.
Rear Seats
Rear Seat Reminder
If equipped, the message REAR SEAT
REMINDER LOOK IN REAR SEAT
displays under certain conditions
indicating there may be an item or
passenger in the rear seat. Check
before exiting the vehicle.
This feature will activate when a
second row door is opened while the
vehicle is on or up to 10 minutes
before the vehicle is turned on. There
will be an alert when the vehicle is
turned off. The alert does not directly
detect objects in the rear seat; instead,
under certain conditions, it detects
when a rear door is opened and
closed, indicating that there may be
something in the rear seat.
The feature is active only once each
time the vehicle is turned on and off,
and will require reactivation by
opening and closing the second row
doors. There may be an alert even
when there is nothing in the rear seat;
for example, if a child entered the
Page 117 of 445
Cadillac CT6 Owner Manual (GMNA-Localizing-U.S./Canada-11292458) -
2018 - crc - 2/14/17
116 STORAGE
Armrest Storage
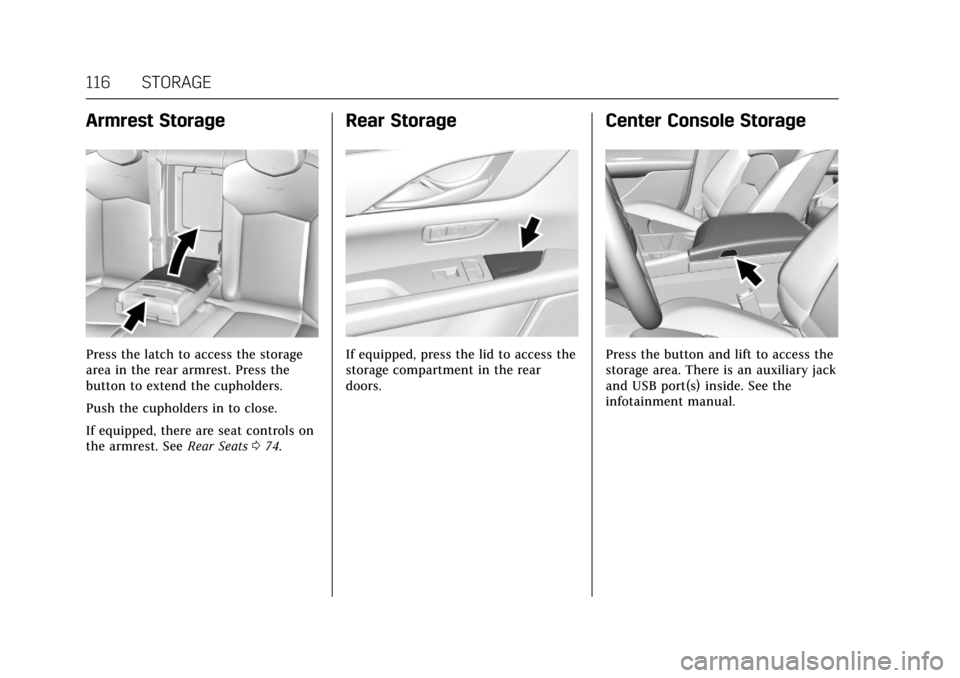
Press the latch to access the storage
area in the rear armrest. Press the
button to extend the cupholders.
Push the cupholders in to close.
If equipped, there are seat controls on
the armrest. SeeRear Seats074.
Rear Storage
If equipped, press the lid to access the
storage compartment in the rear
doors.
Center Console Storage
Press the button and lift to access the
storage area. There is an auxiliary jack
and USB port(s) inside. See the
infotainment manual.
Page 120 of 445
Cadillac CT6 Owner Manual (GMNA-Localizing-U.S./Canada-11292458) -
2018 - crc - 2/14/17
INSTRUMENTS AND CONTROLS 119
Driver InformationCenter (DIC) . . . . . . . . . . . . . . . . . . . . . 162
Head-Up Display (HUD) . . . . . . . . . 165
Vehicle Messages
Vehicle Messages . . . . . . . . . . . . . . . . . 169
Engine Power Messages . . . . . . . . . . 169
Vehicle Speed Messages . . . . . . . . . 169
Vehicle Personalization
Vehicle Personalization . . . . . . . . . . 170
Universal Remote System
Universal Remote System . . . . . . . . 179
Universal Remote System Programming . . . . . . . . . . . . . . . . . . . 179
Universal Remote System Operation . . . . . . . . . . . . . . . . . . . . . . . . 181
Controls
Steering Wheel Adjustment
Power Tilt and Telescoping Steering
Wheel
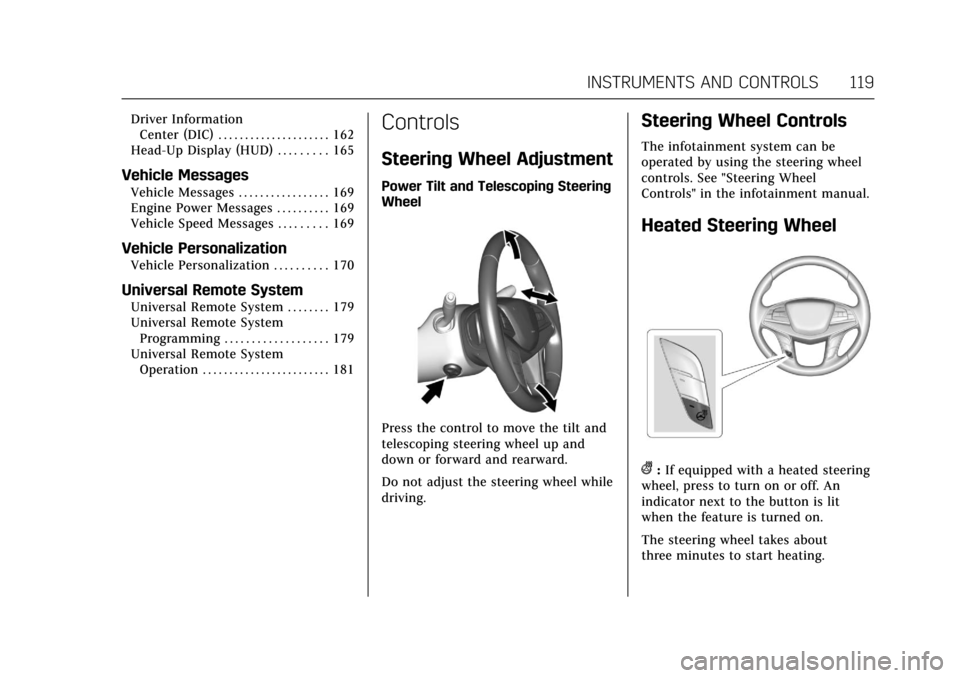
Press the control to move the tilt and
telescoping steering wheel up and
down or forward and rearward.
Do not adjust the steering wheel while
driving.
Steering Wheel Controls
The infotainment system can be
operated by using the steering wheel
controls. See "Steering Wheel
Controls" in the infotainment manual.
Heated Steering Wheel
(:If equipped with a heated steering
wheel, press to turn on or off. An
indicator next to the button is lit
when the feature is turned on.
The steering wheel takes about
three minutes to start heating.
Page 123 of 445
Cadillac CT6 Owner Manual (GMNA-Localizing-U.S./Canada-11292458) -
2018 - crc - 2/14/17
122 INSTRUMENTS AND CONTROLS
With Rainsense, if the transmission is
in N (Neutral) and the vehicle speed is
very slow, the wipers will
automatically stop at the base of the
windshield.
The wiper operations return to normal
when the transmission is no longer in
N (Neutral) or the vehicle speed has
increased.
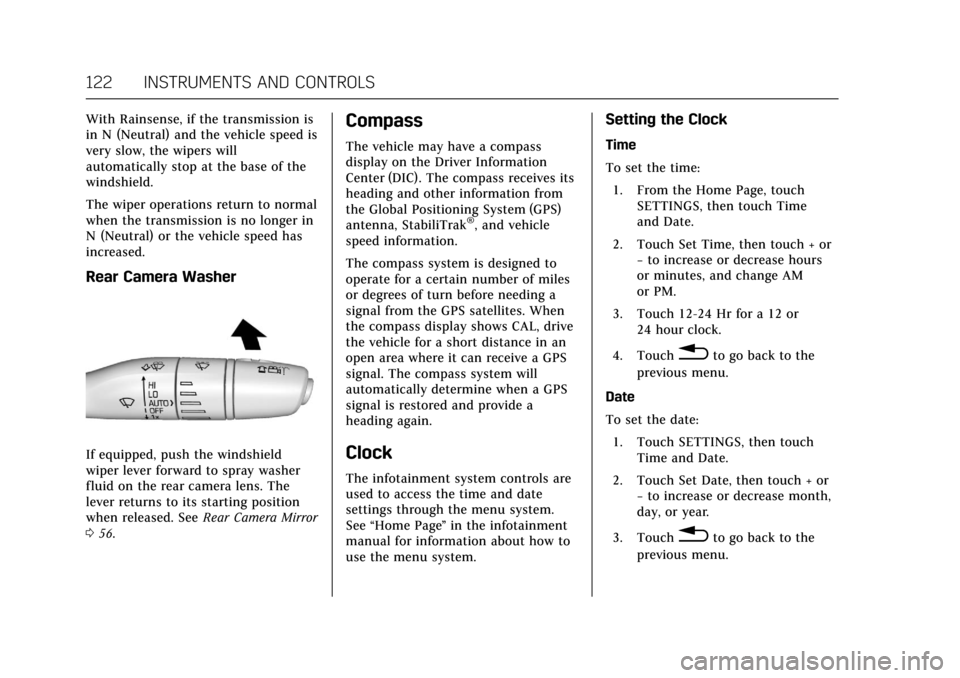
Rear Camera Washer
If equipped, push the windshield
wiper lever forward to spray washer
fluid on the rear camera lens. The
lever returns to its starting position
when released. SeeRear Camera Mirror
0 56.
Compass
The vehicle may have a compass
display on the Driver Information
Center (DIC). The compass receives its
heading and other information from
the Global Positioning System (GPS)
antenna, StabiliTrak
®, and vehicle
speed information.
The compass system is designed to
operate for a certain number of miles
or degrees of turn before needing a
signal from the GPS satellites. When
the compass display shows CAL, drive
the vehicle for a short distance in an
open area where it can receive a GPS
signal. The compass system will
automatically determine when a GPS
signal is restored and provide a
heading again.
Clock
The infotainment system controls are
used to access the time and date
settings through the menu system.
See “Home Page ”in the infotainment
manual for information about how to
use the menu system.
Setting the Clock
Time
To set the time:
1. From the Home Page, touch SETTINGS, then touch Time
and Date.
2. Touch Set Time, then touch + or −to increase or decrease hours
or minutes, and change AM
or PM.
3. Touch 12-24 Hr for a 12 or 24 hour clock.
4. Touch
0to go back to the
previous menu.
Date
To set the date: 1. Touch SETTINGS, then touch Time and Date.
2. Touch Set Date, then touch + or −to increase or decrease month,
day, or year.
3. Touch
0to go back to the
previous menu.
Page 124 of 445
Cadillac CT6 Owner Manual (GMNA-Localizing-U.S./Canada-11292458) -
2018 - crc - 2/14/17
INSTRUMENTS AND CONTROLS 123
Auto Set
When on, the time and date will
automatically update.
To set auto set:1. Touch SETTINGS, then touch Time and Date.
2. Touch Set Time or Set Date.
3. Touch Auto Set, then select On-Cell Network or Off-Manual
to manually set the time
and date.
4. Touch
0to go back to the
previous menu.
If auto set is on, the time displayed on
the clock may not update immediately
when driving into a new time zone.
Clock Display
When on, the digital clock will appear
on the infotainment display.
To set the clock display:
1. Touch SETTINGS, then touch Time and Date.
2. Touch Clock Display, then select Off or On. 3. Touch
0to go back to the
previous menu.
Power Outlets
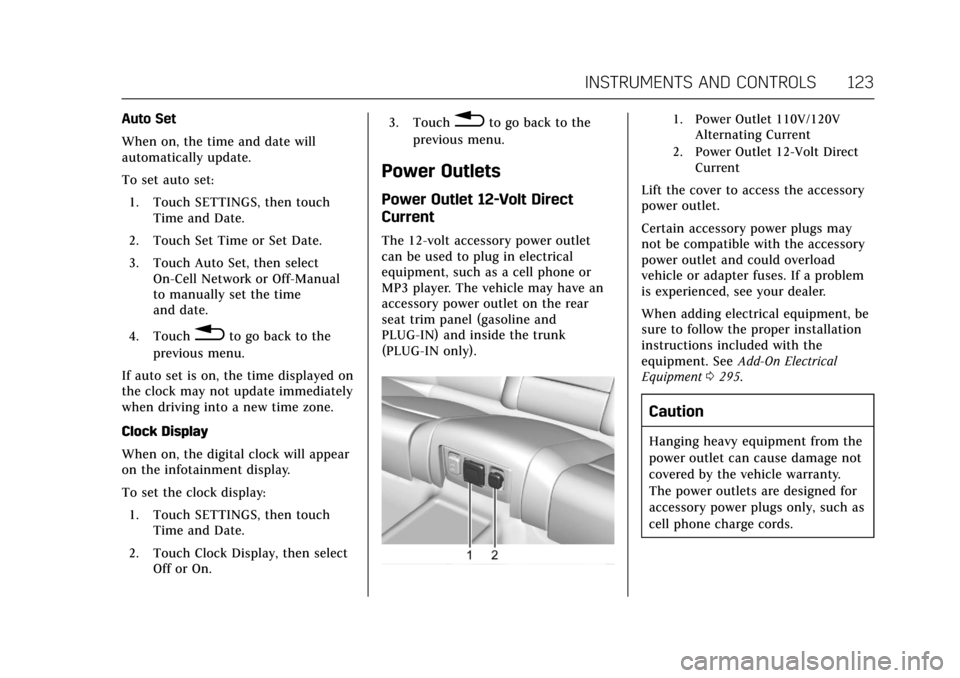
Power Outlet 12-Volt Direct
Current
The 12-volt accessory power outlet
can be used to plug in electrical
equipment, such as a cell phone or
MP3 player. The vehicle may have an
accessory power outlet on the rear
seat trim panel (gasoline and
PLUG-IN) and inside the trunk
(PLUG-IN only).
1. Power Outlet 110V/120V Alternating Current
2. Power Outlet 12-Volt Direct Current
Lift the cover to access the accessory
power outlet.
Certain accessory power plugs may
not be compatible with the accessory
power outlet and could overload
vehicle or adapter fuses. If a problem
is experienced, see your dealer.
When adding electrical equipment, be
sure to follow the proper installation
instructions included with the
equipment. See Add-On Electrical
Equipment 0295.
Caution
Hanging heavy equipment from the
power outlet can cause damage not
covered by the vehicle warranty.
The power outlets are designed for
accessory power plugs only, such as
cell phone charge cords.
Page 126 of 445
Cadillac CT6 Owner Manual (GMNA-Localizing-U.S./Canada-11292458) -
2018 - crc - 2/14/17
INSTRUMENTS AND CONTROLS 125
{Warning
Remove all objects from the
charging pad before charging your
mobile device. Objects, such as
coins, keys, rings, paper clips,
or cards, between the phone and
charging pad will become very hot.
On the rare occasion that the
charging system does not detect an
object, and the object gets wedged
between the phone and charger,
remove the phone and allow the
object to cool before removing it
from the charging pad, to prevent
burns.
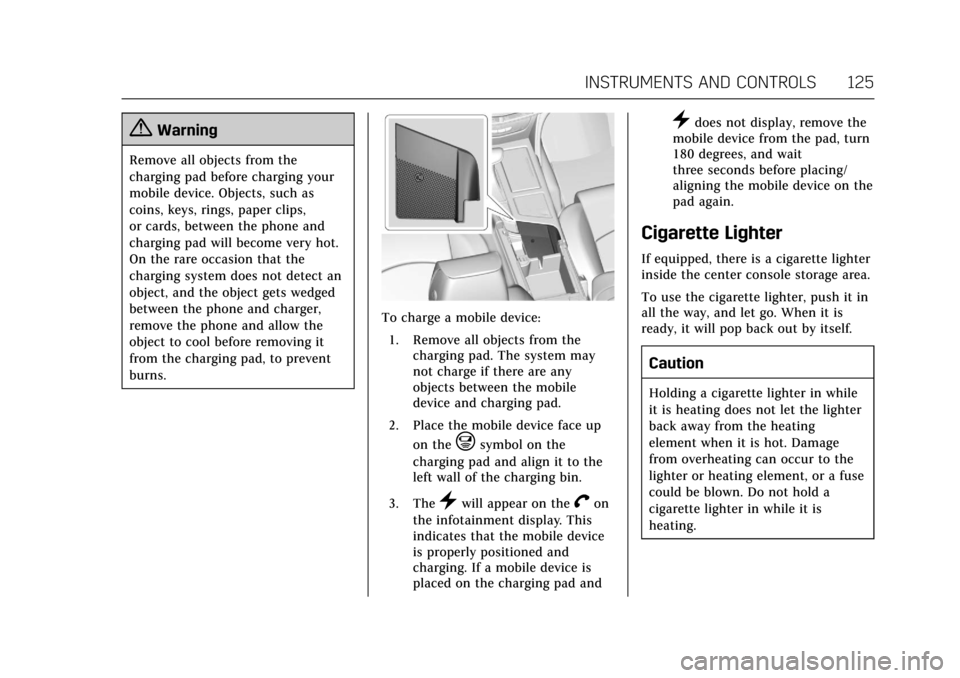
To charge a mobile device:1. Remove all objects from the charging pad. The system may
not charge if there are any
objects between the mobile
device and charging pad.
2. Place the mobile device face up on the
@symbol on the
charging pad and align it to the
left wall of the charging bin.
3. The
}will appear on theVon
the infotainment display. This
indicates that the mobile device
is properly positioned and
charging. If a mobile device is
placed on the charging pad and
}does not display, remove the
mobile device from the pad, turn
180 degrees, and wait
three seconds before placing/
aligning the mobile device on the
pad again.
Cigarette Lighter
If equipped, there is a cigarette lighter
inside the center console storage area.
To use the cigarette lighter, push it in
all the way, and let go. When it is
ready, it will pop back out by itself.
Caution
Holding a cigarette lighter in while
it is heating does not let the lighter
back away from the heating
element when it is hot. Damage
from overheating can occur to the
lighter or heating element, or a fuse
could be blown. Do not hold a
cigarette lighter in while it is
heating.
Page 153 of 445
Cadillac CT6 Owner Manual (GMNA-Localizing-U.S./Canada-11292458) -
2018 - crc - 2/14/17
152 INSTRUMENTS AND CONTROLS
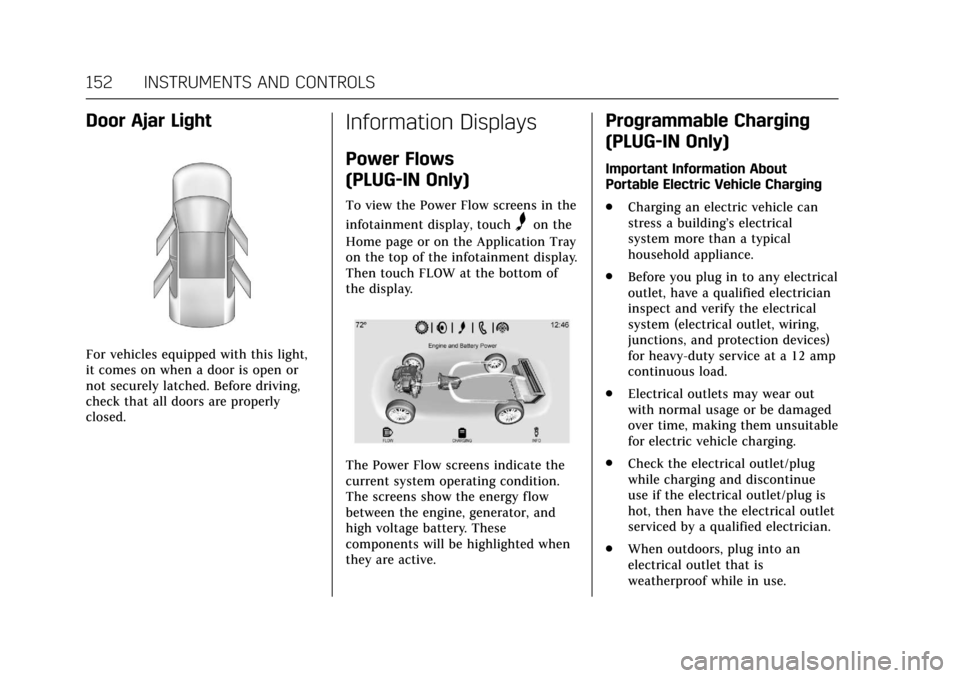
Door Ajar Light
For vehicles equipped with this light,
it comes on when a door is open or
not securely latched. Before driving,
check that all doors are properly
closed.
Information Displays
Power Flows
(PLUG-IN Only)
To view the Power Flow screens in the
infotainment display, touch
Uon the
Home page or on the Application Tray
on the top of the infotainment display.
Then touch FLOW at the bottom of
the display.
The Power Flow screens indicate the
current system operating condition.
The screens show the energy flow
between the engine, generator, and
high voltage battery. These
components will be highlighted when
they are active.
Programmable Charging
(PLUG-IN Only)
Important Information About
Portable Electric Vehicle Charging
. Charging an electric vehicle can
stress a building’s electrical
system more than a typical
household appliance.
. Before you plug in to any electrical
outlet, have a qualified electrician
inspect and verify the electrical
system (electrical outlet, wiring,
junctions, and protection devices)
for heavy-duty service at a 12 amp
continuous load.
. Electrical outlets may wear out
with normal usage or be damaged
over time, making them unsuitable
for electric vehicle charging.
. Check the electrical outlet/plug
while charging and discontinue
use if the electrical outlet/plug is
hot, then have the electrical outlet
serviced by a qualified electrician.
. When outdoors, plug into an
electrical outlet that is
weatherproof while in use.
Page 154 of 445

Cadillac CT6 Owner Manual (GMNA-Localizing-U.S./Canada-11292458) -
2018 - crc - 2/14/17
INSTRUMENTS AND CONTROLS 153
.Mount the charging cord to reduce
strain on the electrical outlet/plug.
{Danger
Improper use of portable electric
vehicle charge cords may cause a
fire, electrical shock, or burns, and
may result in damage to property,
serious injury, or death.
. Do not use extension cords,
multi-outlet power strips,
splitters, grounding adaptors,
surge protectors, or similar
devices.
. Do not use an electrical outlet
that is worn or damaged,
or will not hold the plug
firmly in place.
. Do not use an electrical outlet
that is not properly grounded.
. Do not use an electrical outlet
that is on a circuit with other
electrical loads.
See the charge cord user guide.
Programmable Charge Modes
This vehicle has three programmable
charge modes. To view the current
charge mode status in the
infotainment display, touch
[in
the infotainment display and then
touch CHARGING at the bottom of
the display.
The Charge Start and Charge
Complete time estimates are also
displayed on the screen. These
estimates are most accurate when the
vehicle is plugged in and in moderate
temperature conditions. Also, to get
an accurate time estimate, the vehicle
uses an internal clock for
programmable charging, not the clock
in the infotainment display.
Charge Mode Status
Immediately : The vehicle starts
charging as soon as it is connected to
an electrical outlet. See Plug-In
Charging (PLUG-IN Only) 0274.
Delay Charge Based on Departure
Time : The vehicle estimates the
charging start time considering the
programmed departure time for the
current day of the week. Charging
begins at the start time and is
complete by the departure time only if
sufficient time is allowed after the
charge cord is plugged in.
Page 155 of 445
Cadillac CT6 Owner Manual (GMNA-Localizing-U.S./Canada-11292458) -
2018 - crc - 2/14/17
154 INSTRUMENTS AND CONTROLS
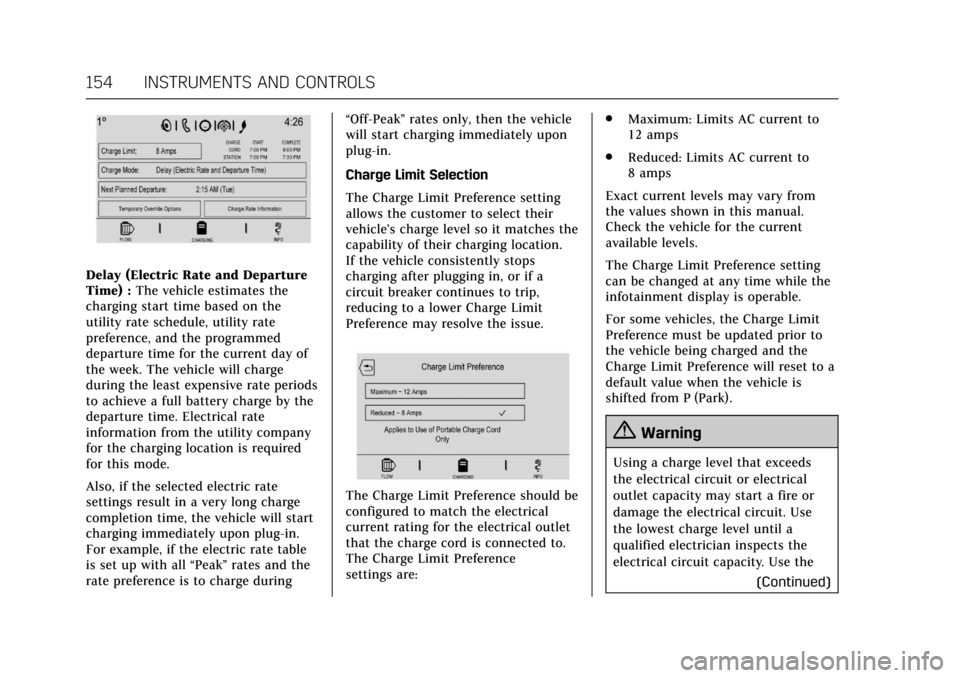
Delay (Electric Rate and Departure
Time) :The vehicle estimates the
charging start time based on the
utility rate schedule, utility rate
preference, and the programmed
departure time for the current day of
the week. The vehicle will charge
during the least expensive rate periods
to achieve a full battery charge by the
departure time. Electrical rate
information from the utility company
for the charging location is required
for this mode.
Also, if the selected electric rate
settings result in a very long charge
completion time, the vehicle will start
charging immediately upon plug-in.
For example, if the electric rate table
is set up with all “Peak”rates and the
rate preference is to charge during “Off-Peak”
rates only, then the vehicle
will start charging immediately upon
plug-in.
Charge Limit Selection
The Charge Limit Preference setting
allows the customer to select their
vehicle’s charge level so it matches the
capability of their charging location.
If the vehicle consistently stops
charging after plugging in, or if a
circuit breaker continues to trip,
reducing to a lower Charge Limit
Preference may resolve the issue.
The Charge Limit Preference should be
configured to match the electrical
current rating for the electrical outlet
that the charge cord is connected to.
The Charge Limit Preference
settings are: .
Maximum: Limits AC current to
12 amps
. Reduced: Limits AC current to
8 amps
Exact current levels may vary from
the values shown in this manual.
Check the vehicle for the current
available levels.
The Charge Limit Preference setting
can be changed at any time while the
infotainment display is operable.
For some vehicles, the Charge Limit
Preference must be updated prior to
the vehicle being charged and the
Charge Limit Preference will reset to a
default value when the vehicle is
shifted from P (Park).
{Warning
Using a charge level that exceeds
the electrical circuit or electrical
outlet capacity may start a fire or
damage the electrical circuit. Use
the lowest charge level until a
qualified electrician inspects the
electrical circuit capacity. Use the (Continued)