tow CADILLAC CTS 2009 2.G Owners Manual
[x] Cancel search | Manufacturer: CADILLAC, Model Year: 2009, Model line: CTS, Model: CADILLAC CTS 2009 2.GPages: 490, PDF Size: 2.68 MB
Page 1 of 490

Seats and Restraint System............................. 1-1
Head Restraints
......................................... 1-2
Front Seats
............................................... 1-4
Rear Seats
..............................................1-13
Safety Belts
.............................................1-14
Child Restraints
.......................................1-34
Airbag System
.........................................1-58
Restraint System Check
............................1-74
Features and Controls..................................... 2-1
Keys
........................................................ 2-3
Doors and Locks
......................................2-16
Windows
.................................................2-22
Theft-Deterrent Systems
............................2-26
Starting and Operating Your Vehicle
...........2-30
Mirrors
....................................................2-52
Object Detection Systems
..........................2-54
OnStar
®System
......................................2-56
Universal Home Remote System
................2-60
Storage Areas
.........................................2-64
Sunroof
..................................................2-65
Instrument Panel............................................. 3-1
Instrument Panel Overview
.......................... 3-4
Climate Controls
......................................3-24
Warning Lights, Gages, and Indicators
........3-30
Driver Information Center (DIC)
..................3-50
Audio System(s)
.......................................3-85Driving Your Vehicle....................................... 4-1
Your Driving, the Road, and the Vehicle
....... 4-2
Towing
...................................................4-26
Service and Appearance Care.......................... 5-1
Service
..................................................... 5-3
Fuel
......................................................... 5-5
Checking Things Under the Hood
...............5-12
All-Wheel Drive
........................................5-51
Rear Axle
...............................................5-52
Headlamp Aiming
.....................................5-53
Bulb Replacement
....................................5-57
Windshield Wiper Blade Replacement
.........5-59
Tires
......................................................5-61
Appearance Care
...................................5-106
Vehicle Identi�cation
...............................5-114
Electrical System
....................................5-114
Capacities and Speci�cations
...................5-127
Maintenance Schedule..................................... 6-1
Maintenance Schedule
................................ 6-2
Customer Assistance Information.................... 7-1
Customer Assistance and Information
........... 7-2
Reporting Safety Defects
...........................7-14
Vehicle Data Recording and Privacy
...........7-16
Index................................................................ 1
2009 Cadillac CTS/CTS-V Owner ManualM
Page 17 of 490

To recline the seatback:
1. Lift the recline lever.
2. Move the seatback to the desired position, then
release the lever to lock the seatback in place.
3. Push and pull on the seatback to make sure it
is locked.
To return the seatback to an upright position:
1. Lift the lever fully without applying pressure to the
seatback and the seatback will return to the upright
position.
2. Push and pull on the seatback to make sure it
is locked.Power Reclining Seatbacks
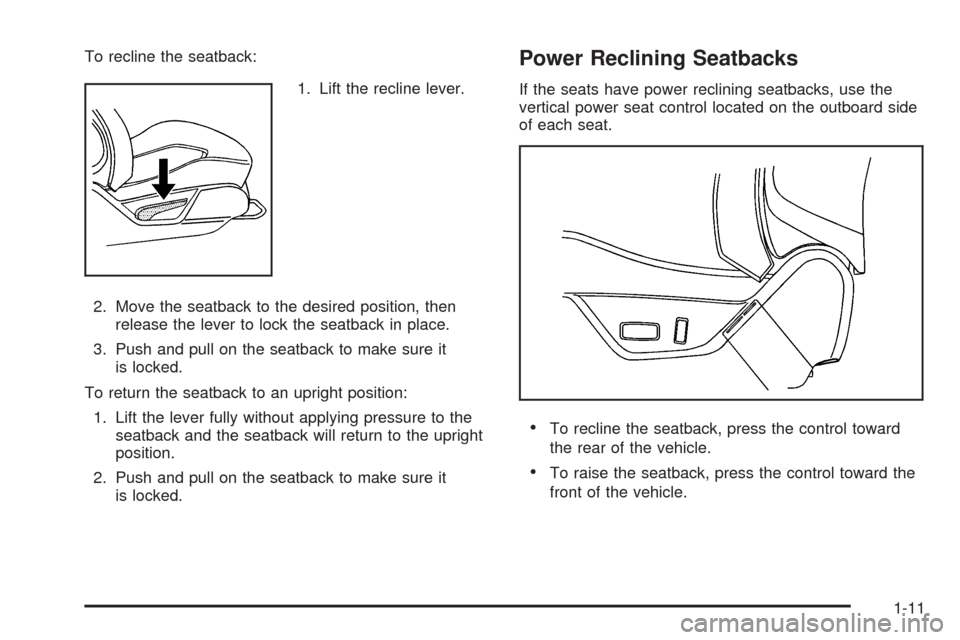
If the seats have power reclining seatbacks, use the
vertical power seat control located on the outboard side
of each seat.
To recline the seatback, press the control toward
the rear of the vehicle.
To raise the seatback, press the control toward the
front of the vehicle.
1-11
Page 19 of 490

Rear Seats
Split Folding Rear Seat
The vehicle may have a split folding rear seat.
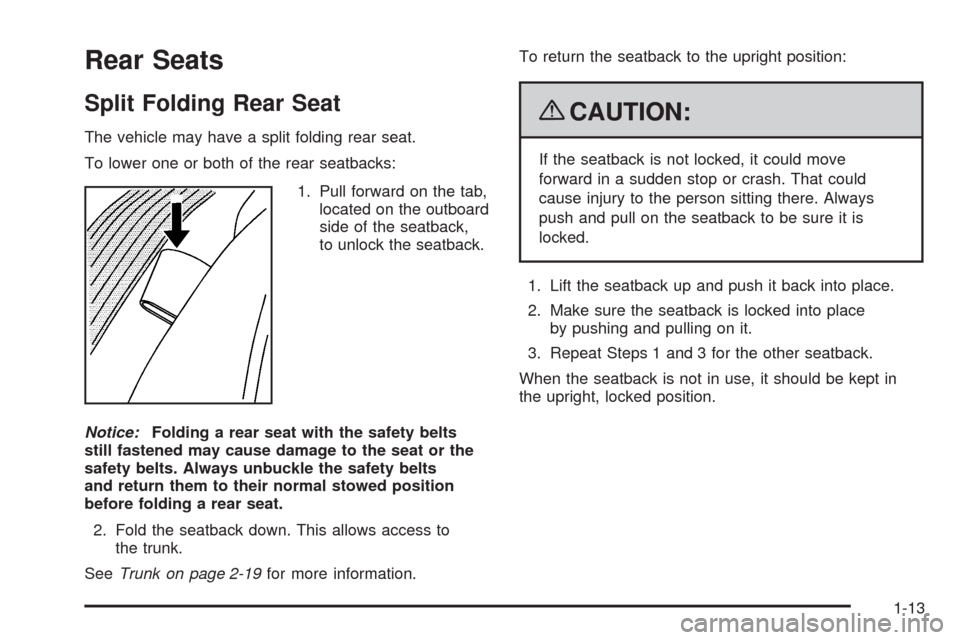
To lower one or both of the rear seatbacks:
1. Pull forward on the tab,
located on the outboard
side of the seatback,
to unlock the seatback.
Notice:Folding a rear seat with the safety belts
still fastened may cause damage to the seat or the
safety belts. Always unbuckle the safety belts
and return them to their normal stowed position
before folding a rear seat.
2. Fold the seatback down. This allows access to
the trunk.
SeeTrunk on page 2-19for more information.To return the seatback to the upright position:
{CAUTION:
If the seatback is not locked, it could move
forward in a sudden stop or crash. That could
cause injury to the person sitting there. Always
push and pull on the seatback to be sure it is
locked.
1. Lift the seatback up and push it back into place.
2. Make sure the seatback is locked into place
by pushing and pulling on it.
3. Repeat Steps 1 and 3 for the other seatback.
When the seatback is not in use, it should be kept in
the upright, locked position.
1-13
Page 35 of 490

5. To make the lap part tight, pull up on the
shoulder belt.
It may be necessary to pull stitching on the safety
belt through the latch plate to fully tighten the
lap belt on smaller occupants.To unlatch the belt, push the button on the buckle.
The belt should return to its stowed position.
Before a door is closed, be sure the safety belt is out
of the way. If a door is slammed against a safety
belt, damage can occur to both the safety belt and
the vehicle.
1-29
Page 55 of 490

{CAUTION:
Do not attach more than one child restraint to a
single anchor. Attaching more than one child
restraint to a single anchor could cause the anchor
or attachment to come loose or even break during a
crash. A child or others could be injured. To reduce
the risk of serious or fatal injuries during a crash,
attach only one child restraint per anchor.
{CAUTION:
Children can be seriously injured or strangled if a
shoulder belt is wrapped around their neck and the
safety belt continues to tighten. Buckle any unused
safety belts behind the child restraint so children
cannot reach them. Pull the shoulder belt all the
way out of the retractor to set the lock, if your
vehicle has one, after the child restraint has been
installed.Notice:Do not let the LATCH attachments rub
against the vehicle’s safety belts. This may damage
these parts. If necessary, move buckled safety
belts to avoid rubbing the LATCH attachments.
Do not fold the empty rear seat with a safety belt
buckled. This could damage the safety belt or
the seat. Unbuckle and return the safety belt to its
stowed position.
1. Attach and tighten the lower attachments to the
lower anchors. If the child restraint does not have
lower attachments or the desired seating position
does not have lower anchors, secure the child
restraint with the top tether and the safety belts.
Refer to your child restraint manufacturer
instructions and the instructions in this manual.
1.1. Find the lower anchors for the desired
seating position.
1.2. Put the child restraint on the seat.
1.3. Attach and tighten the lower attachments on
the child restraint to the lower anchors.
1-49
Page 59 of 490

5. To tighten the belt, push down on the child restraint,
pull the shoulder portion of the belt to tighten the
lap portion of the belt and feed the shoulder
belt back into the retractor. When installing a
forward-facing child restraint, it may be helpful to
use your knee to push down on the child restraint as
you tighten the belt.6. If the child restraint has a top tether, follow the child
restraint manufacturer’s instructions regarding the
use of the top tether. SeeLower Anchors and
Tethers for Children (LATCH) on page 1-45for
more information.
7. Push and pull the child restraint in different
directions to be sure it is secure.
To remove the child restraint, unbuckle the vehicle
safety belt and let it return to the stowed position.
If the top tether is attached to a top tether anchor,
disconnect it.
1-53
Page 63 of 490

6. To tighten the belt, push down on the child restraint,
pull the shoulder portion of the belt to tighten the
lap portion of the belt and feed the shoulder
belt back into the retractor. When installing a
forward-facing child restraint, it may be helpful to
use your knee to push down on the child restraint
as you tighten the belt.
7. Push and pull the child restraint in different
directions to be sure it is secure.If the airbags are off, the off indicator in the passenger
airbag status indicator will come on and stay on
when the vehicle is started.
If a child restraint has been installed and the on
indicator is lit, see “If the On Indicator is Lit for a
Child Restraint ” underPassenger Sensing System
on page 1-67for more information.
To remove the child restraint, unbuckle the vehicle
safety belt and let it return to the stowed position.
1-57
Page 71 of 490

What Makes an Airbag In�ate?
In a deployment event, the sensing system sends an
electrical signal triggering a release of gas from
the in�ator. Gas from the in�ator �lls the airbag
causing the bag to break out of the cover and deploy.
The in�ator, the airbag, and related hardware are all
part of the airbag module.
Frontal airbag modules are located inside the steering
wheel and instrument panel. For vehicles with
seat-mounted side impact airbags, there are airbag
modules in the side of the front seatbacks closest to the
door. For vehicles with roof-rail airbags, there are
airbag modules in the ceiling of the vehicle, near the
side windows that have occupant seating positions.
How Does an Airbag Restrain?
In moderate to severe frontal or near frontal collisions,
even belted occupants can contact the steering wheel
or the instrument panel. In moderate to severe side
collisions, even belted occupants can contact the inside
of the vehicle.
Airbags supplement the protection provided by safety
belts. Frontal airbags distribute the force of the impact
more evenly over the occupant’s upper body, stopping
the occupant more gradually. Seat-mounted side impact
and roof-rail airbags distribute the force of the impact
more evenly over the occupant’s upper body.
But airbags would not help in many types of collisions,
primarily because the occupant’s motion is not
toward those airbags. SeeWhen Should an Airbag
Inflate? on page 1-63for more information.
Airbags should never be regarded as anything more
than a supplement to safety belts.
1-65
Page 78 of 490

A wet seat can affect the performance of the passenger
sensing system. Here is how:
The passenger sensing system may turn off the
passenger airbag when liquid is soaked into the
seat. If this happens, the off indicator will be lit,
and the airbag readiness light on the instrument
panel will also be lit.
Liquid pooled on the seat that has not soaked in
may make it more likely that the passenger
sensing system will enable (turn on) the passenger
airbag while a child restraint or child occupant is
on the seat. If the passenger airbag is turned on, the
on indicator will be lit.
If the passenger seat gets wet, dry the seat immediately.
If the airbag readiness light is lit, do not install a child
restraint or allow anyone to occupy the seat. SeeAirbag
Readiness Light on page 3-36for important safety
information.
{CAUTION:
Stowing of articles under the passenger seat or
between the passenger seat cushion and seatback
may interfere with the proper operation of the
passenger sensing system.
Servicing Your Airbag-Equipped
Vehicle
Airbags affect how the vehicle should be serviced.
There are parts of the airbag system in several places
around the vehicle. Your dealer/retailer and the
service manual have information about servicing the
vehicle and the airbag system. To purchase a service
manual, seeService Publications Ordering Information
on page 7-15.
{CAUTION:
For up to 10 seconds after the ignition is turned off
and the battery is disconnected, an airbag can still
in�ate during improper service. You can be injured
if you are close to an airbag when it in�ates. Avoid
yellow connectors. They are probably part of the
airbag system. Be sure to follow proper service
procedures, and make sure the person performing
work for you is quali�ed to do so.
1-72
Page 103 of 490

Close the trunk by pulling on the handle. Do not use the
handle as a tie-down.
Rear-Seat Pass Through
If the vehicle has the rear seat-pass through door,
the trunk can be accessed through the rear seat.
This is useful when transporting long items.
To open the door, pull down the rear seat armrest.
Then pull the lever all the way down to release the door.
To close the door, push it up and back into place.
Then try to open the door without pulling up on the lever
to make sure it is locked into place.
Emergency Trunk Release Handle
Notice:Do not use the emergency trunk release
handle as a tie-down or anchor point when securing
items in the trunk as it could damage the handle.
The emergency trunk release handle is only
intended to aid a person trapped in a latched trunk,
enabling them to open the trunk from the inside.
There is a glow-in-the-dark emergency trunk release
handle located on the back wall of the trunk. This handle
will glow following exposure to light. Pull the release
handle toward the front of the vehicle to open the trunk
from the inside.
2-21