turn signal CADILLAC CTS 2011 2.G User Guide
[x] Cancel search | Manufacturer: CADILLAC, Model Year: 2011, Model line: CTS, Model: CADILLAC CTS 2011 2.GPages: 496, PDF Size: 7.71 MB
Page 179 of 496
Black plate (39,1)Cadillac CTS/CTS-V Owner Manual - 2011
Instruments and Controls 5-39
Replace Battery In Remote Key
This message displays when the
battery in the Remote Keyless Entry
(RKE) or keyless access transmitter
needs to be replaced. To replace
the battery, see“Battery
Replacement” underRemote
Keyless Entry (RKE) System
Operation (Key Access)
on
page 2‑5or Remote Keyless Entry
(RKE) System Operation (Keyless
Access) on page 2‑7.
Rotate Control To Off Position
If the vehicle has the keyless
access system, this message
displays when the ignition is in
ACC/ACCESSORY and the shift
lever has just been moved to
P (Park). The message displays as
a reminder to turn the ignition off. To
avoid draining the battery, make
sure the ignition is turned off before
leaving the vehicle.
Service Keyless Start System
If the vehicle has the keyless
access system, this message
displays when there is a problem
with this feature. See your dealer.
Lamp Messages
AFL (Adaptive Forward
Lighting) Lamps Need Service
This message displays when the
Adaptive Forward Lighting (AFL)
system is disabled and needs
service. See your dealer. See
Adaptive Forward Lighting (AFL)
on
page 6‑4for more information.
Automatic Light Control Off
This message displays when the
automatic headlamps are turned off.
Automatic Light Control On
This message displays when the
automatic headlamps are turned on.
Turn Signal On
This message displays as a
reminder to turn off the turn signal if
you drive the vehicle for more than
about 1.6 km (1 mile) with a turn
signal on. A multiple chime sounds
when this message displays.
Object Detection System
Messages
Parking Assist Off
If the vehicle has the Ultrasonic
Rear Parking Assist (URPA) system,
after the vehicle has been started,
this message displays to remind the
driver that the URPA system has
been turned off. Press the set/reset
button to acknowledge this message
and clear it from the DIC display. To
turn the URPA system back on, see
“Parking Assist” underDriver
Information Center (DIC)
on
page 5‑27. See Ultrasonic Parking
Assiston page 9‑42for more
information.
Page 195 of 496

Black plate (55,1)Cadillac CTS/CTS-V Owner Manual - 2011
Instruments and Controls 5-55
2. Hold the end of your hand-heldtransmitter about 3 to 8 cm
(1 to 3 inches) away from the
Universal Home Remote buttons
while keeping the indicator light
in view. The hand-held
transmitter was supplied by the
manufacturer of your garage
door opener receiver (motor
head unit).
3. At the same time, press and hold both the Universal Home
Remote button to be used to
control the garage door and the
hand-held transmitter button. Do
not release the Universal Home
Remote button or the hand-held
transmitter button until Step 4
has been completed.
Some entry gates and garage
door openers may require
substitution of Step 3 with the
procedure noted in “Gate
Operator and Canadian
Programming” later in this
section. 4. The indicator light on the
Universal Home Remote will
flash slowly at first and then
rapidly after Universal Home
Remote successfully receives
the frequency signal from the
hand-held transmitter. Release
both buttons.
5. Press and hold the newly-trained Universal Home Remote button
and observe the indicator light.
.If the indicator light stays
on continuously, the
programming is complete
and the garage door should
move when the Universal
Home Remote button is
pressed and released.
There is no need to
continue programming
Steps 6 through 8.
.If the Universal Home
Remote indicator light
blinks rapidly for
two seconds and then turns to a constant light, continue
with the programming
Steps 6 through 8.
It may be helpful to have
another person assist with
the remaining steps.
6. After Steps 1 through 5 have
been completed, locate inside
the garage the garage door
opener receiver (motor-head
unit). Locate the “Learn”or
“Smart” button. The name and
color of the button may vary by
manufacturer.
Page 196 of 496

Black plate (56,1)Cadillac CTS/CTS-V Owner Manual - 2011
5-56 Instruments and Controls
7. Firmly press and release the“Learn” or“Smart” button. After
you press this button, you will
have 30 seconds to complete
Step 8.
8. Immediately return to the vehicle. Firmly press and hold
the Universal Home Remote
button, selected in Step 3 to
control the garage door, for
two seconds, and then release
it. If the garage door does not
move, press and hold the same
button a second time for
two seconds, and then release
it. Again, if the door does not
move, press and hold the same
button a third time for
two seconds, and then release.
The Universal Home Remote
should now activate the
garage door. To program the remaining two
Universal Home Remote buttons,
begin with Step 2 of
“Programming
the Universal Home Remote
System.” Do not repeat Step 1, as
this will erase all previous
programming from the Universal
Home Remote buttons.
Gate Operator and Canadian
Programming
If you have questions or need
help programming the Universal
Home Remote System, call
1-800-355-3515 or go to
www.homelink.com.
Canadian radio-frequency laws
require transmitter signals to time
out or quit after several seconds of
transmission. This may not be long
enough for Universal Home Remote
to pick up the signal during
programming. Similarly, some U.S.
gate operators are manufactured to
time out in the same manner. If you live in Canada, or you are
having difficulty programming a gate
operator or garage door opener by
using the
“Programming Universal
Home Remote” procedures,
regardless of where you live,
replace Step 3 under “Programming
Universal Home Remote” with the
following:
Continue to press and hold the
Universal Home Remote button
while you press and release every
two seconds (cycle) the hand-held
transmitter button until the
frequency signal has been
successfully accepted by the
Universal Home Remote. The
Universal Home Remote indicator
light will flash slowly at first and then
rapidly. Proceed with Step 4 under
“Programming Universal Home
Remote” to complete the training
procedure.
Page 199 of 496
Black plate (1,1)Cadillac CTS/CTS-V Owner Manual - 2011
Lighting 6-1
Lighting
Exterior Lighting
Exterior Lamp Controls . . . . . . . . 6-1
Exterior Lamps OffReminder . . . . . . . . . . . . . . . . . . . . 6-2
Headlamp High/Low-Beam Changer . . . . . . . . . . . . . . . . . . . . . 6-2
Flash-to-Pass . . . . . . . . . . . . . . . . . 6-2
Daytime Running Lamps (DRL) . . . . . . . . . . . . . . . . 6-3
Automatic Headlamp System . . . . . . . . . . . . . . . . . . . . . . 6-3
Adaptive Forward Lighting (AFL) . . . . . . . . . . . . . . . 6-4
Hazard Warning Flashers . . . . . 6-4
Turn and Lane-Change Signals . . . . . . . . . . . . . . . . . . . . . . 6-4
Fog Lamps . . . . . . . . . . . . . . . . . . . . 6-5
Interior Lighting
Instrument Panel Illumination Control . . . . . . . . . . . . . . . . . . . . . . 6-5
Reading Lamps . . . . . . . . . . . . . . . 6-5
Lighting Features
Entry Lighting . . . . . . . . . . . . . . . . . 6-6
Parade Dimming . . . . . . . . . . . . . . 6-6
Battery Load Management . . . . 6-6
Battery Power Protection . . . . . . 6-7
Exterior Lighting Battery Saver . . . . . . . . . . . . . . . . . . . . . . . . 6-7
Exterior Lighting
Exterior Lamp Controls
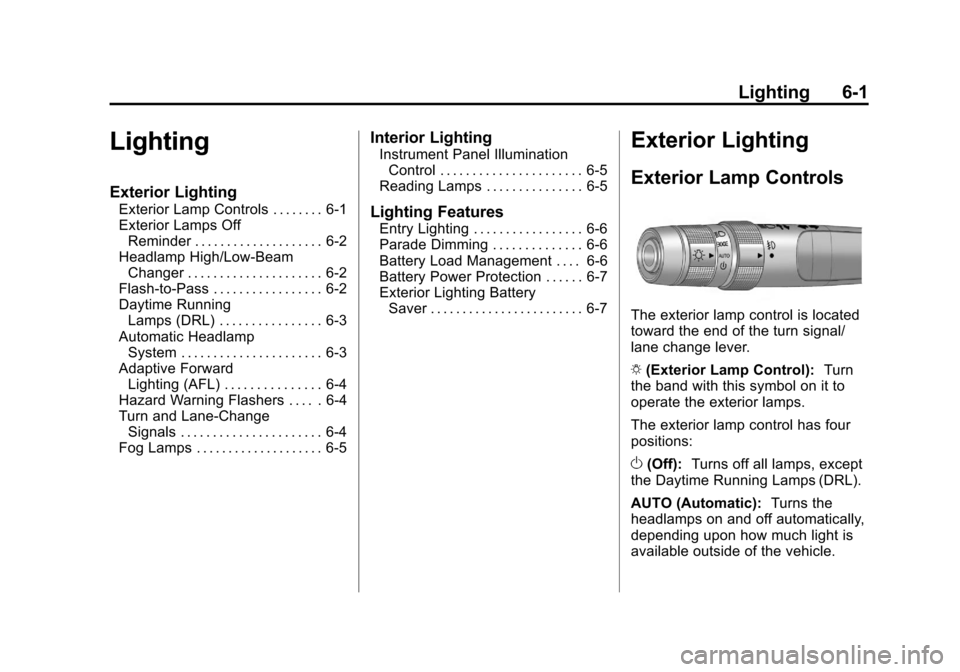
The exterior lamp control is located
toward the end of the turn signal/
lane change lever.
O (Exterior Lamp Control): Turn
the band with this symbol on it to
operate the exterior lamps.
The exterior lamp control has four
positions:
O (Off): Turns off all lamps, except
the Daytime Running Lamps (DRL).
AUTO (Automatic): Turns the
headlamps on and off automatically,
depending upon how much light is
available outside of the vehicle.
Page 200 of 496
Black plate (2,1)Cadillac CTS/CTS-V Owner Manual - 2011
6-2 Lighting
;(Parking Lamps): Turns on the
parking lamps together with the
following:
.Sidemarker Lamps
.Taillamps
.License Plate Lamps
.Instrument Panel Lights
5 (Headlamps): Turns on the
headlamps, together with the
previously listed lamps and lights.
Exterior Lamps Off
Reminder
A warning chime will sound if the
exterior lamp control is left on in
either the headlamp or parking lamp
position and the driver door is
opened with the ignition off.
Headlamp High/
Low-Beam Changer
Push the turn signal/lane change
lever away from you to turn the high
beams on. Pull the lever toward you
and then release it to return to low
beams.
If the vehicle is turned off while the
highbeams are on, they will come
on the next time the vehicle is
started.
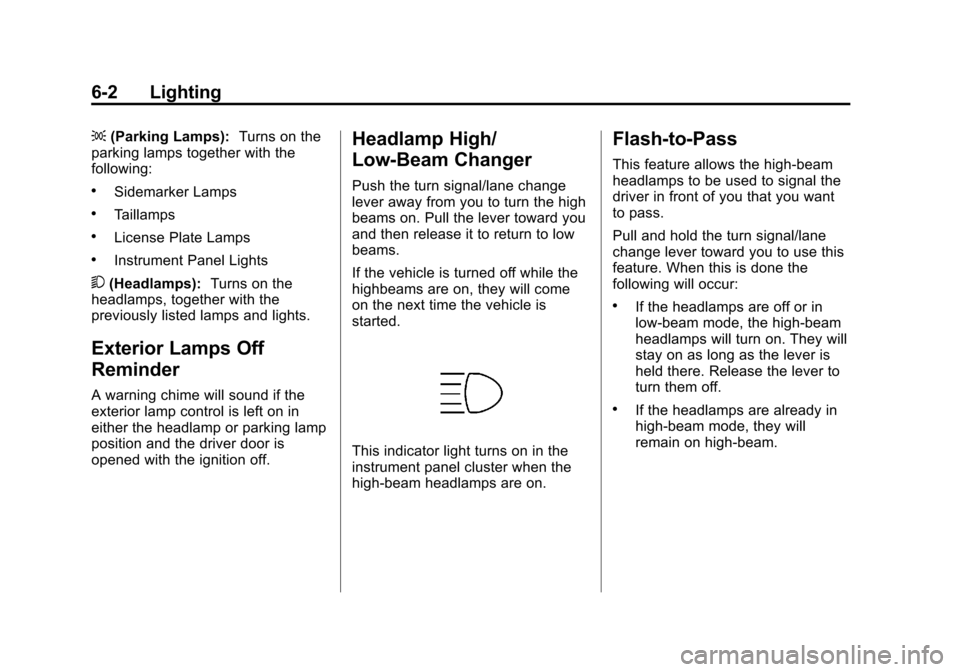
This indicator light turns on in the
instrument panel cluster when the
high‐beam headlamps are on.
Flash-to-Pass
This feature allows the high-beam
headlamps to be used to signal the
driver in front of you that you want
to pass.
Pull and hold the turn signal/lane
change lever toward you to use this
feature. When this is done the
following will occur:
.If the headlamps are off or in
low-beam mode, the high-beam
headlamps will turn on. They will
stay on as long as the lever is
held there. Release the lever to
turn them off.
.If the headlamps are already in
high-beam mode, they will
remain on high‐beam.
Page 202 of 496
Black plate (4,1)Cadillac CTS/CTS-V Owner Manual - 2011
6-4 Lighting
Adaptive Forward
Lighting (AFL)
The Adaptive Forward Lighting
System (AFL) pivots the headlamps
horizontally to provide greater road
illumination while turning. To enable
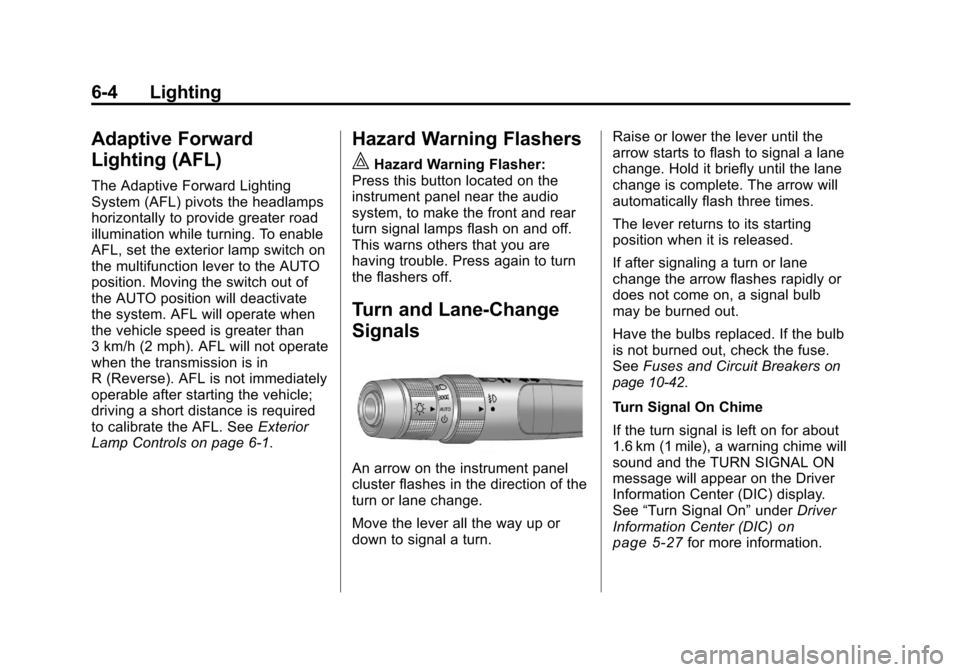
AFL, set the exterior lamp switch on
the multifunction lever to the AUTO
position. Moving the switch out of
the AUTO position will deactivate
the system. AFL will operate when
the vehicle speed is greater than
3 km/h (2 mph). AFL will not operate
when the transmission is in
R (Reverse). AFL is not immediately
operable after starting the vehicle;
driving a short distance is required
to calibrate the AFL. SeeExterior
Lamp Controls on page 6‑1.
Hazard Warning Flashers
|
Hazard Warning Flasher:
Press this button located on the
instrument panel near the audio
system, to make the front and rear
turn signal lamps flash on and off.
This warns others that you are
having trouble. Press again to turn
the flashers off.
Turn and Lane-Change
Signals
An arrow on the instrument panel
cluster flashes in the direction of the
turn or lane change.
Move the lever all the way up or
down to signal a turn. Raise or lower the lever until the
arrow starts to flash to signal a lane
change. Hold it briefly until the lane
change is complete. The arrow will
automatically flash three times.
The lever returns to its starting
position when it is released.
If after signaling a turn or lane
change the arrow flashes rapidly or
does not come on, a signal bulb
may be burned out.
Have the bulbs replaced. If the bulb
is not burned out, check the fuse.
See
Fuses and Circuit Breakers
on
page 10‑42.
Turn Signal On Chime
If the turn signal is left on for about
1.6 km (1 mile), a warning chime will
sound and the TURN SIGNAL ON
message will appear on the Driver
Information Center (DIC) display.
See “Turn Signal On” underDriver
Information Center (DIC)
on
page 5‑27for more information.
Page 203 of 496
Black plate (5,1)Cadillac CTS/CTS-V Owner Manual - 2011
Lighting 6-5
Fog Lamps
Use the fog lamps for better vision
in foggy or misty conditions. The fog
lamp control is located on the turn
signal/multifunction lever.
#(Fog Lamps): Turn the fog lamp
band on the lever up to
#and
release it, to turn the fog lamps on
or off. The band will return to its
original position.
The parking lamps must be on for
the fog lamps to work.
If the high-beam headlamps are
turned on, the fog lamps will also
turn off. They will turn back on again
when you change back to low-beam
headlamps.
Some localities have laws that
require the headlamps to be on
along with the fog lamps.
Interior Lighting
Instrument Panel
Illumination Control
The instrument panel brightness
knob is located on the instrument
panel to the left of the steering
column.
D(Instrument Panel
Brightness): Turn the knob
clockwise or counterclockwise to
brighten or dim the lights. Turn the
knob completely clockwise to turn
on the interior lamps.
Reading Lamps
The reading lamps are located on
the overhead console. These lamps
come on automatically when any
door is opened.
For manual operation, press the
button next to each lamp to turn it
on or off.
If the reading lamps are left on, they
automatically shut off 10 minutes
after the ignition has been
turned off.
Page 211 of 496
Black plate (5,1)Cadillac CTS/CTS-V Owner Manual - 2011
Infotainment System 7-5
Digital Signal
Processing (DSP)
If the radio has this feature, it has
either a Bose®sound system or a
Bose®5.1 Cabin Surround®sound
system. DSP is used to provide a
choice of different listening
experiences.
To choose a DSP setting:
1. Press the TUNE/TONE knob to
display the tone/speaker and
DSP tabs.
2. Press the softkey under the DSP tab.
3. Press the softkey below the Back tab to return to the original
tone/speaker display, or wait for
the display to time out. The DSP settings available are:
.Normal: Select for normal mode;
this provides the best sound
quality for all seating positions.
.Driver: Select to adjust the
audio for the driver to receive
the best possible sound quality.
.Rear: Select to adjust the audio
for the rear seat passengers to
receive the best possible sound
quality.
.Centerpoint®: Select to enable
Bose®Centerpoint signal
processing circuitry. Centerpoint
creates a Bose
®surround sound
listening experience from stereo
CDs, MP3s, and satellite radio.
As a result, vehicle owners enjoy
a surround sound listening
experience from many audio
sources. Simply turn it on, and it
operates automatically.
This feature is not available in
AM/FM radio mode. If the vehicle is equipped with
the Bose 5.1 Cabin Surround
sound system, the radio can
support the playback of 5.1
surround sound DVD-A discs or
DTS 5.1 surround sound CD
discs. When a 5.1 surround
sound formatted disc is playing,
DSP options available are:
‐
5.1 Surround + Normal: Best
for all seating positions.
‐ 5.1 Surround + Rear: Best for
the rear seating positions.
System Settings
CONFIG: Press to adjust the
number of favorites pages, auto
volume, XM (if equipped), and HDD
(if available) settings. The FAV,
AUTO VOL, XM (if equipped), and
HDD (if available) tabs display. The
display will time out after
approximately ten seconds.
Page 215 of 496
Black plate (9,1)Cadillac CTS/CTS-V Owner Manual - 2011
Infotainment System 7-9
Gracenote is not obligated to
provide you with new enhanced or
additional data types or categories
that Gracenote may provide in the
future and is free to discontinue its
services at any time.
GRACENOTE DISCLAIMS ALL
WARRANTIES EXPRESS OR
IMPLIED, INCLUDING, BUT
NOT LIMITED TO, IMPLIED
WARRANTIES OF
MERCHANTABILITY, FITNESS
FOR A PARTICULAR PURPOSE,
TITLE, AND NON-INFRINGEMENT.
GRACENOTE DOES NOT
WARRANT THE RESULTS THAT
WILL BE OBTAINED BY YOUR
USE OF THE GRACENOTE
SOFTWARE OR ANY
GRACENOTE SERVER. IN
NO CASE WILL GRACENOTE
BE LIABLE FOR ANY
CONSEQUENTIAL OR
INCIDENTAL DAMAGES OR
FOR ANY LOST PROFITS OR
LOST REVENUES.Radio
AM-FM Radio
Control Buttons
The buttons used to control the
radio are:
FM/AM:Press to choose between
FM and AM.
TUNE: Turn to search for stations.
MENU/SELECT: Turn clockwise or
counterclockwise to scroll through
the station list. Press the MENU/
SELECT knob to select the desired
station.
INFO: Press to display additional
information that may be available for
the current song. When information
is not available, No Information
displays.
¨SEEK or©SEEK: Press to go to
the previous or to the next radio
station and stay there. The radio only tunes into stations
with a strong signal that are in the
selected band.
FAV:
Press to change the
favorites page.
Softkeys: Press to select preset
stations.
Radio Data System (RDS)
The audio system has a Radio Data
System (RDS) feature. RDS is
available for use only on FM
stations that broadcast RDS
information. This system relies upon
receiving specific information from
these stations and only works when
the information is available. While
the radio is tuned to an FM-RDS
station, the station name or call
letters display. In rare cases, a radio
station can broadcast incorrect
information that causes the radio
features to work improperly. If this
happens, contact the radio station.
Page 221 of 496
Black plate (15,1)Cadillac CTS/CTS-V Owner Manual - 2011
Infotainment System 7-15
Pausing XM with the Vehicle
Turned Off
If XM is paused before the vehicle is
turned off, the radio will continue to
buffer the current radio station for
up to one hour. If the vehicle is
turned back on within one hour, the
radio will automatically resume
playback from the pause point.
XM Messages
XL (Explicit Language
Channels):These channels, or any
others, can be blocked at a
customer's request, by calling
1-800-929-2100.
XM Updating: The encryption code
in the receiver is being updated, and
no action is required. This process
should take no longer than
30 seconds.
No XM Signal: The system is
functioning correctly, but the vehicle
is in a location that is blocking the
XM signal. When the vehicle is
moved into an open area, the signal
should return. Loading XM:
The audio system is
acquiring and processing audio and
text data. No action is needed. This
message should disappear shortly.
Channel Off Air: This channel is
not currently in service. Tune in to
another channel.
Channel Unauth: This channel is
blocked or cannot be received with
your XM Subscription package.
Channel Unavail: This previously
assigned channel is no longer
assigned. Tune to another station.
If this station was one of the
presets, choose another station for
that preset button.
No Artist Info: No artist
information is available at this time
on this channel. The system is
working properly.
No Title Info: No song title
information is available at this time
on this channel. The system is
working properly. No CAT Info:
No category
information is available at this time
on this channel. The system is
working properly.
No Information: No text or
informational messages are
available at this time on this
channel. The system is working
properly.
CAT Not Found: There are no
channels available for the selected
category. The system is working
properly.
XM Radio ID: If tuned to channel 0,
this message alternates with the XM
Radio 8‐digit radio ID label. This
label is needed to activate the
service.
Unknown: If this message is
received when tuned to channel 0,
there could be a receiver fault.
Consult with your dealer.