ECO mode CADILLAC CTS 2011 2.G Owner's Manual
[x] Cancel search | Manufacturer: CADILLAC, Model Year: 2011, Model line: CTS, Model: CADILLAC CTS 2011 2.GPages: 496, PDF Size: 7.71 MB
Page 256 of 496

Black plate (4,1)Cadillac CTS/CTS-V Owner Manual - 2011
8-4 Climate Controls
Recirculation is not available in the
defrost mode and automatically
turns off 10 minutes after defog is
selected. This helps to limit window
fogging in the vehicle.
Using recirculation for long periods
of time could cause the air inside
the vehicle to become too dry or
stuffy. To prevent this from
happening, after the air in the
vehicle has cooled, select outside
air or press the auto button.
F(Outside Air):Press to turn
on the outside air. An indicator light
turns on. The outside air mode pulls
fresh air from outside the vehicle.
Outside air is always selected in
defrost mode to prevent fogging.
Rear Window Defogger
The rear window defogger uses a
warming grid to remove fog or frost
from the rear window. It only works
when the ignition is in ON/RUN.
=(Rear Window Defogger):
Press to turn the rear window
defogger on or off.
The rear window defogger stays on
for about 15 minutes, before turning
off if the vehicle is moving at a
slower speed. At higher speeds, the
rear window defogger may stay on
continuously. With each additional
press, the defogger runs for about
10 minutes. The defogger can also
be turned off by turning off the
engine.
The heated outside rearview mirrors
turn on when the rear window
defogger button is on and helps to
clear fog or frost from the surface of
the mirrors. See Heated Mirrors
on
page 2‑27.
Notice: Do not try to clear frost
or other material from the inside
of the front windshield and rear
window with a razor blade or
anything else that is sharp. This
may damage the rear window
defogger grid and affect your radio's ability to pick up stations
clearly. The repairs wouldn't be
covered by your warranty.
z/{(Heated and Ventilated
Seats): Press to heat or ventilate
the seat. See Heated and Ventilated
Front Seats on page 3‑12.
Remote Start Climate Control
Operation: For vehicles with
remote vehicle start, the climate
control system automatically heats
and cools the vehicle based on the
temperature inside and outside of
the vehicle. The climate control
displays will be blank. See Remote
Vehicle Start on page 2‑11.
In cold weather the windshield
defroster and/or rear window
defogger automatically turn on.
If the vehicle has heated seats, they
will also turn on.
When the ignition is turned to ON/
RUN, the climate control system
returns to the settings used before
the vehicle was last turned off. The
heated seats will turn off,
if equipped.
Page 257 of 496
Black plate (5,1)Cadillac CTS/CTS-V Owner Manual - 2011
Climate Controls 8-5
Sensors
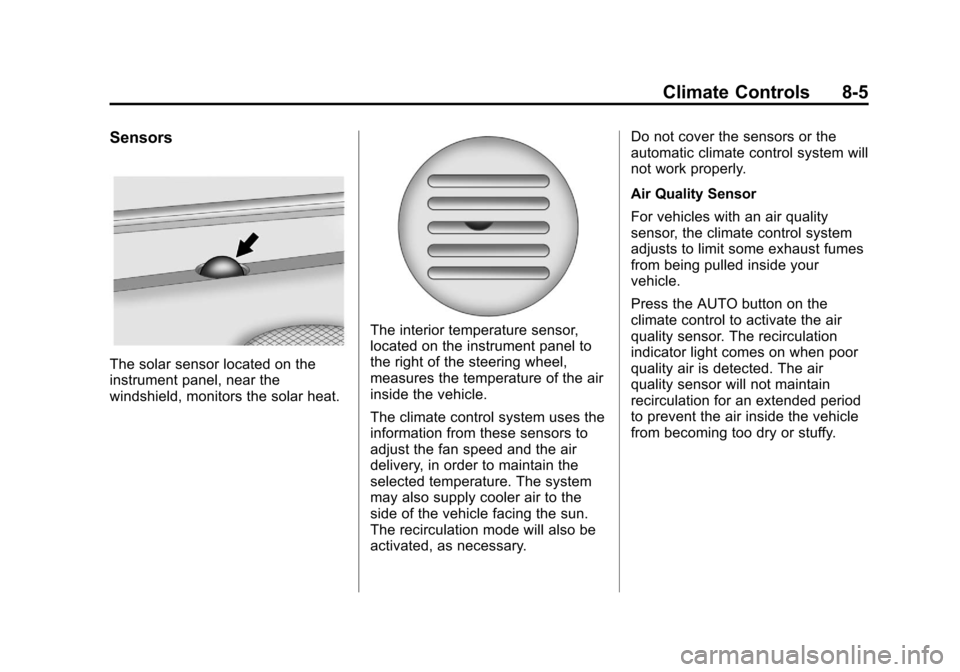
The solar sensor located on the
instrument panel, near the
windshield, monitors the solar heat.
The interior temperature sensor,
located on the instrument panel to
the right of the steering wheel,
measures the temperature of the air
inside the vehicle.
The climate control system uses the
information from these sensors to
adjust the fan speed and the air
delivery, in order to maintain the
selected temperature. The system
may also supply cooler air to the
side of the vehicle facing the sun.
The recirculation mode will also be
activated, as necessary.Do not cover the sensors or the
automatic climate control system will
not work properly.
Air Quality Sensor
For vehicles with an air quality
sensor, the climate control system
adjusts to limit some exhaust fumes
from being pulled inside your
vehicle.
Press the AUTO button on the
climate control to activate the air
quality sensor. The recirculation
indicator light comes on when poor
quality air is detected. The air
quality sensor will not maintain
recirculation for an extended period
to prevent the air inside the vehicle
from becoming too dry or stuffy.
Page 261 of 496

Black plate (1,1)Cadillac CTS/CTS-V Owner Manual - 2011
Driving and Operating 9-1
Driving and
Operating
Driving Information
Defensive Driving . . . . . . . . . . . . . 9-2
Drunk Driving . . . . . . . . . . . . . . . . . 9-2
Control of a Vehicle . . . . . . . . . . . 9-3
Braking . . . . . . . . . . . . . . . . . . . . . . . 9-3
Steering . . . . . . . . . . . . . . . . . . . . . . . 9-4
Off-Road Recovery . . . . . . . . . . . . 9-5
Loss of Control . . . . . . . . . . . . . . . . 9-6
Competitive Driving . . . . . . . . . . . 9-7
Driving on Wet Roads . . . . . . . . . 9-7
Highway Hypnosis . . . . . . . . . . . . 9-8
Hill and Mountain Roads . . . . . . 9-8
Winter Driving . . . . . . . . . . . . . . . . . 9-9
If the Vehicle is Stuck . . . . . . . . 9-11
Vehicle Load Limits . . . . . . . . . . 9-11
Starting and Operating
New Vehicle Break-In . . . . . . . . 9-16
Ignition Positions (KeyAccess) . . . . . . . . . . . . . . . . . . . . 9-16
Ignition Positions (Keyless Access) . . . . . . . . . . . . . . . . . . . . 9-18 Retained Accessory
Power (RAP) . . . . . . . . . . . . . . . 9-19
Starting the Engine . . . . . . . . . . 9-19
Engine Coolant Heater . . . . . . . 9-21
Shifting Into Park . . . . . . . . . . . . 9-22
Shifting Out of Park . . . . . . . . . . 9-23
Parking (Manual Transmission) . . . . . . . . . . . . . . 9-24
Parking Over Things That Burn . . . . . . . . . . . . . . . . . . 9-24
Engine Exhaust
Engine Exhaust . . . . . . . . . . . . . . 9-24
Running the Vehicle WhileParked . . . . . . . . . . . . . . . . . . . . . 9-25
Automatic Transmission
Automatic Transmission . . . . . 9-26
Manual Mode . . . . . . . . . . . . . . . . 9-28
Manual Transmission
Manual Transmission . . . . . . . . 9-30
Drive Systems
All-Wheel Drive . . . . . . . . . . . . . . 9-32
Brakes
Antilock BrakeSystem (ABS) . . . . . . . . . . . . . . 9-32
Parking Brake (Manual) . . . . . . 9-33
Parking Brake (Electric) . . . . . . 9-34
Brake Assist (Except CTS-V) . . . . . . . . . . . . 9-36
Ride Control Systems
Traction ControlSystem (TCS) . . . . . . . . . . . . . . 9-37
StabiliTrak System . . . . . . . . . . . 9-38
Competitive Driving Mode . . . 9-39
Magnetic Ride Control . . . . . . . 9-39
Limited-Slip Rear Axle . . . . . . . 9-40
Cruise Control
Cruise Control . . . . . . . . . . . . . . . 9-40
Object Detection Systems
Ultrasonic Parking Assist . . . . 9-42
Rear Vision Camera (RVC) . . . . . . . . . . . . . 9-44
Page 276 of 496
Black plate (16,1)Cadillac CTS/CTS-V Owner Manual - 2011
9-16 Driving and Operating
Starting and
Operating
New Vehicle Break-In
Follow these recommended
guidelines during the first
2 414 km (1,500 miles) of driving
this vehicle. Parts have a break-in
period and performance will be
better in the long run.
For the first 2 414 km (1,500 miles):
.Avoid full throttle starts and
abrupt stops.
.Do not exceed 4,000
engine rpm.
.Avoid driving at any one
constant speed, fast or slow.
.Avoid downshifting to brake or
slow the vehicle when the
engine speed will exceed
4000 rpm.
.Do not let the engine labor.
Never lug the engine in high
gear at low speeds. With amanual transmission, shift to the
next lower gear. This rule
applies at all times, not just
during the break-in period.
.Do not participate in track
events, sport driving schools,
or similar activities during this
break–in period.
.Check engine oil with every
refueling and add if necessary.
Oil and fuel consumption may be
higher than normal during the
first 2 414 km (1,500 miles).
.To break in new tires, drive at
moderate speeds and avoid
hard cornering for the first
322 km (200 miles). New tires do
not have maximum traction and
may tend to slip.
.New brake linings also need a
break–in period. Avoid making
hard stops during the first
322 km (200 miles). This is
recommended every time brake
linings are replaced.
Ignition Positions
(Key Access)
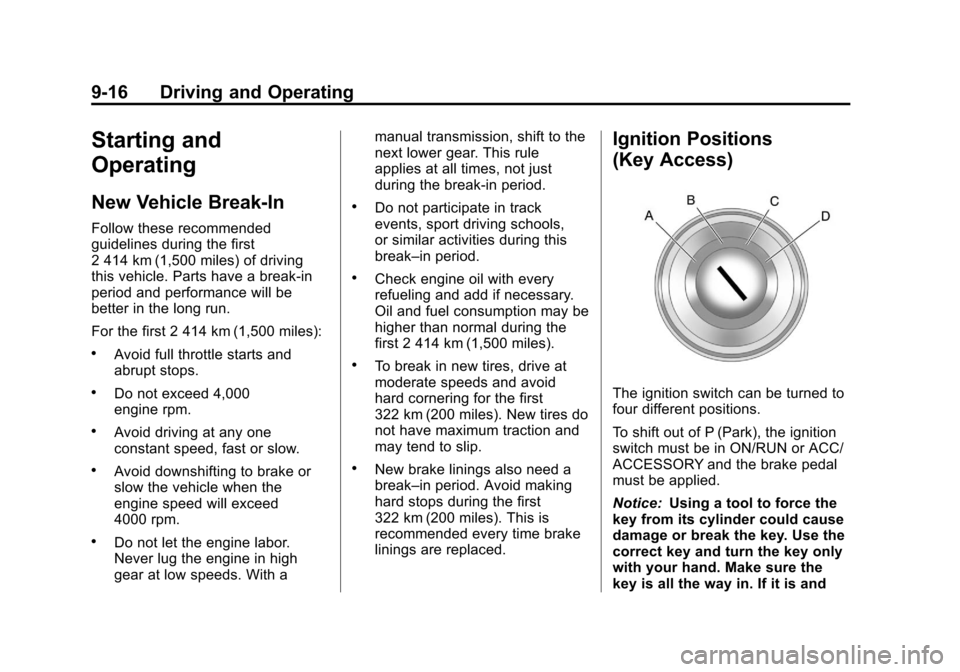
The ignition switch can be turned to
four different positions.
To shift out of P (Park), the ignition
switch must be in ON/RUN or ACC/
ACCESSORY and the brake pedal
must be applied.
Notice:
Using a tool to force the
key from its cylinder could cause
damage or break the key. Use the
correct key and turn the key only
with your hand. Make sure the
key is all the way in. If it is and
Page 287 of 496

Black plate (27,1)Cadillac CTS/CTS-V Owner Manual - 2011
Driving and Operating 9-27
N (Neutral):In this position, the
engine does not connect with the
wheels. To restart when the vehicle
is already moving, use N (Neutral)
only. You can also use N (Neutral)
when the vehicle is being towed.
{WARNING
Shifting into a drive gear while the
engine is running at high speed is
dangerous. Unless your foot is
firmly on the brake pedal, the
vehicle could move very rapidly.
You could lose control and hit
people or objects. Do not shift
into a drive gear while the engine
is running at high speed.
Notice: Shifting out of P (Park) or
N (Neutral) with the engine
running at high speed may
damage the transmission. The
repairs would not be covered by
the vehicle warranty. Be sure the
engine is not running at high
speed when shifting the vehicle. D (Drive):
This position is for
normal driving. It provides the best
fuel economy. If you need more
power for passing, and you are:
.Going less than 55 km/h
(35 mph), push the accelerator
pedal about halfway down.
.Going about 55 km/h (35 mph) or
more, push the accelerator all
the way down.
The transmission will shift down
to a lower gear and have more
power.
Downshifting the transmission in
slippery road conditions could result
in skidding; see “Skidding”under
Loss of Control on page 9‑6 While in D (Drive), the CTS‐V
vehicle's first forward gear
automatic shift after starting the
vehicle will be from 1 (First).
Afterwards, the CTS‐V vehicles will
always start in 2 (Second) gear.
While in M (Manual Mode), for
increased performance, the vehicle
will start in 1 (First) gear.
M (Manual Mode):
This position
allows the driver to select the range
of gears appropriate for current
driving conditions. See Driver Shift
Control (DSC) later in this section.
Notice: Spinning the tires or
holding the vehicle in one place
on a hill using only the
accelerator pedal may damage
the transmission. If you are stuck,
do not spin the tires. When
stopping on a hill, use the brakes
to hold the vehicle in place.
Page 289 of 496

Black plate (29,1)Cadillac CTS/CTS-V Owner Manual - 2011
Driving and Operating 9-29
The tachometer display indicates
which gear the vehicle is in. The
number indicates the requested
gear range when moving the shift
lever forward or rearward.
CTS-V vehicles use tracer lights
around the outside of the
tachometer as a performance
up‐shift light. These tracers flash to
indicate when to shift to the next
higher gear to avoid the engine
speed limit. SeeTachometer
on
page 5‑13for more information. While using the DSC feature, the
vehicle will have firmer, quicker
shifting. You can use this for sport
driving or when climbing or
descending hills, to stay in gear
longer, or to downshift for more
power or engine braking.
The transmission will only allow
you to shift into gears appropriate
for the vehicle speed and engine
revolutions per minute (RPM). The
transmission will not automatically
shift to the next lower gear if the
engine rpm is too high, nor to the
next higher gear when the maximum
engine rpm is reached.
If shifting is prevented for any
reason, the currently selected gear
will flash multiple times, indicating
that the transmission has not shifted
gears.
While in the DSC mode, the CTS
automatic transmission will
automatically downshift when the
vehicle comes to a stop. This will
allow for more power during
acceleration.
The CTS-V automatic transmission
will not automatically downshift on
hard acceleration when in
DSC mode.
When accelerating the vehicle from
a stop in snowy and icy conditions,
it is suggested to shift into second
gear. A higher gear allows the
vehicle to gain more traction on
slippery surfaces.
Page 313 of 496
Black plate (53,1)Cadillac CTS/CTS-V Owner Manual - 2011
Driving and Operating 9-53
Pulling A Trailer
Here are some important points:
.There are many laws, including
speed limit restrictions that apply
to trailering. Check for legal
requirements with state or
provincial police.
.Do not tow a trailer at all during
the first 1 600 km (1,000 miles)
the new vehicle is driven. The
engine, axle, or other parts could
be damaged.
.During the first 800 km
(500 miles) that a trailer is
towed, do not drive over 80 km/h
(50 mph) and do not make starts
at full throttle. This reduces wear
on the vehicle.
.Vehicles with automatic
transmissions can tow in
D (Drive) but M (Manual Mode)
is recommended. SeeManual
Mode
on page 9‑28for more
information. Use a lower gear if
the transmission shifts too often. For vehicles with a manual
transmission, it is better not to
use the highest gear.
.Use the cruise control when
towing.
.Obey speed limit restrictions. Do
not drive faster than the
maximum posted speed for
trailers, or no more than 90 km/h
(55 mph), to reduce wear on the
vehicle.
Driving with a Trailer
Towing a trailer requires experience.
Get familiar with handling and
braking with the added trailer
weight. The vehicle is now longer
and not as responsive as the
vehicle is by itself.
Check all trailer hitch parts and
attachments, safety chains,
electrical connectors, lamps, tires,
and mirror adjustments. If the trailer
has electric brakes, start the vehicle
and trailer moving and then apply
the trailer brake controller by hand
to be sure the brakes are working.During the trip, check regularly to be
sure that the load is secure, and the
lamps and trailer brakes are working
properly.
Towing with a Stability Control
System
When towing, the sound of the
stability control system might be
heard. The system is reacting to the
vehicle movement caused by the
trailer, which mainly occurs during
cornering. This is normal when
towing heavier trailers.
Following Distance
Stay at least twice as far behind the
vehicle ahead as you would when
driving the vehicle without a trailer.
This can help to avoid situations
that require heavy braking and
sudden turns.
Page 314 of 496
Black plate (54,1)Cadillac CTS/CTS-V Owner Manual - 2011
9-54 Driving and Operating
Passing
More passing distance is needed
when towing a trailer. Because the
rig is longer, it is necessary to go
much farther beyond the passed
vehicle before returning to the lane.
Backing Up
Hold the bottom of the steering
wheel with one hand. Then, to move
the trailer to the left, move that hand
to the left. To move the trailer to the
right, move your hand to the right.
Always back up slowly and,
if possible, have someone
guide you.
Making Turns
Notice:Making very sharp turns
while trailering could cause the
trailer to come in contact with the
vehicle. The vehicle could be
damaged. Avoid making very
sharp turns while trailering.
When turning with a trailer, make
wider turns than normal. Do this so
the trailer won't strike soft shoulders, curbs, road signs, trees
or other objects. Avoid jerky or
sudden maneuvers. Signal well in
advance.
Turn Signals When Towing a
Trailer
The arrows on the instrument panel
flash whenever signaling a turn or
lane change. Properly hooked up,
the trailer lamps also flash, telling
other drivers the vehicle is turning,
changing lanes, or stopping.
When towing a trailer, the arrows on
the instrument panel flash for turns
even if the bulbs on the trailer are
burned out. For this reason you may
think other drivers are seeing the
signal when they are not. It is
important to check occasionally to
be sure the trailer bulbs are still
working.
Driving On Grades
Reduce speed and shift to a
lower gear before starting down a
long or steep downgrade. If the
transmission is not shifted down, thebrakes might have to be used so
much that they would get hot and no
longer work well.
Vehicles with an automatic
transmission can tow in D (Drive)
but M (Manual Mode) is
recommended. Shift the
transmission to a lower gear if the
transmission shifts too often under
heavy loads and/or hilly conditions.
For vehicles with a manual
transmission, it is better not to use
the highest gear.
When towing at high altitude on
steep uphill grades, consider the
following: Engine coolant will boil at
a lower temperature than at normal
altitudes. If the engine is turned off
immediately after towing at high
altitude on steep uphill grades, the
vehicle may show signs similar to
engine overheating. To avoid this,
let the engine run while parked,
preferably on level ground, with the
automatic transmission in P (Park)
for a few minutes before turning the
engine off. For vehicles with manual
transmissions, let the engine run
Page 390 of 496

Black plate (72,1)Cadillac CTS/CTS-V Owner Manual - 2011
10-72 Vehicle Care
GAWR FRT:Gross Axle Weight
Rating for the front axle. See
Vehicle Load Limits
on
page 9‑11
.
GAWR RR
:Gross Axle Weight
Rating for the rear axle. See
Vehicle Load Limits
on
page 9‑11
.
Intended Outboard Sidewall
:
The side of an asymmetrical tire,
that must always face outward
when mounted on a vehicle.
Kilopascal (kPa)
:The metric
unit for air pressure.
Light Truck (LT‐Metric) Tire
:A
tire used on light duty trucks and
some multipurpose passenger
vehicles.
Load Index
:An assigned
number ranging from 1 to 279
that corresponds to the load
carrying capacity of a tire. Maximum Inflation Pressure
:
The maximum air pressure to
which a cold tire can be inflated.
The maximum air pressure is
molded onto the sidewall.
Maximum Load Rating
:The
load rating for a tire at the
maximum permissible inflation
pressure for that tire.
Maximum Loaded Vehicle
Weight
:The sum of curb
weight, accessory weight,
vehicle capacity weight, and
production options weight.
Normal Occupant Weight
:The
number of occupants a vehicle
is designed to seat multiplied by
68 kg (150 lbs). See Vehicle
Load Limits
on page 9‑11.
Occupant Distribution
:
Designated seating positions. Outward Facing Sidewall
:The
side of an asymmetrical tire that
has a particular side that faces
outward when mounted on a
vehicle. The side of the tire that
contains a whitewall, bears
white lettering, or bears
manufacturer, brand, and/or
model name molding that is
higher or deeper than the same
moldings on the other sidewall
of the tire.
Passenger (P-Metric) Tire
:A
tire used on passenger cars and
some light duty trucks and
multipurpose vehicles.
Recommended Inflation
Pressure
:Vehicle
manufacturer's recommended
tire inflation pressure as shown
on the tire placard. See Tire
Pressure
on page 10‑74and
Vehicle Load Limits
on
page 9‑11
.
Page 398 of 496
Black plate (80,1)Cadillac CTS/CTS-V Owner Manual - 2011
10-80 Vehicle Care
3. Press the Remote Keyless Entry(RKE) transmitter's lock and
unlock buttons at the same time
for approximately five seconds.
The horn sounds twice to signal
the receiver is in relearn mode
and Tire Learning Active
message displays on the DIC
screen.
4. Start with the driver side front tire.
5. Remove the valve cap from the valve stem. Activate the TPMS
sensor by increasing or
decreasing the tire's air pressure
for 10 seconds, or until a horn
chirp sounds. The horn chirp,
which can take up to 30 seconds
to sound, confirms that the
TPMS sensor identification code
has been matched to this tire
position.
6. Proceed to the passenger side front tire, and repeat the
procedure in Step 5. 7. Proceed to the passenger side
rear tire, and repeat the
procedure in Step 5.
8. Proceed to the driver side rear tire, and repeat the procedure in
Step 5.
9. After hearing the confirming horn chirp, for the driver side rear tire,
the horn sounds two more times
to signal the tire learning mode
is no longer active. Turn the
ignition switch to LOCK/OFF.
10. Set all four tires to the recommended air pressure
level as indicated on the tire
and loading information label.
11. Put the valve caps back on the valve stems.
Tire Inspection
We recommend that you
regularly inspect your vehicle's
tires, including the spare tire,
if the vehicle has one, for signs
of wear or damage at least once
a month. Always remove the tires if any of
the following statements
are true:
.You can see the indicators at
three or more places around
the tire.
.You can see cord or fabric
showing through the tire's
rubber.
.The tread or sidewall is
cracked, cut, or snagged
deep enough to show cord or
fabric.
.The tire has a bump, bulge,
or split.
.The tire has a puncture, cut,
or other damage that cannot
be repaired well because of
the size or location of the
damage.