display CADILLAC CTS 2014 Workshop Manual
[x] Cancel search | Manufacturer: CADILLAC, Model Year: 2014, Model line: CTS, Model: CADILLAC CTS 2014Pages: 400, PDF Size: 4.53 MB
Page 166 of 400
Black plate (54,1)Cadillac CTS Owner Manual (GMNA-Localizing-U.S./Canada/Mexico-
6081492) - 2014 - CRC 2nd Edition - 11/18/13
5-54 Instruments and Controls
Display
Select and the following may
display:
.Mode
.Proximity Sensing
.Calibrate Touchscreen
.Turn Display Off
Mode
Select to change the display screen
for day or night driving.
Select Auto, Day, or Night.
Proximity Sensing
When on, certain screen buttons
and features will become visible
when a hand approaches the
screen.
Select Off, On, or On - Map Only.
Calibrate Touchscreen
Select to calibrate the touchscreen,
then follow the prompts. Turn Display Off
Select to turn the display off. Press
anywhere on the display area or any
faceplate button to turn the
display on.
Rear Camera
Select and the following may
display:
.Guidance Lines
.Rear Cross Traffic Alert
.Rear Park Assist Symbols
Guidance Lines
Select to turn Off or On. See
Assistance Systems for Parking or
Backing on page 9-46.
Rear Cross Traffic Alert
Select to turn Off or On. See
Assistance Systems for Parking or
Backing on page 9-46.
Rear Park Assist Symbols
Select to turn Off or On. See
Assistance Systems for Parking or
Backing on page 9-46.
Return to Factory Settings
Select and the following may
display:
.Restore Vehicle Settings
.Clear All Private Data
.Restore Radio Settings
Restore Vehicle Settings
This allows selection of restoring
vehicle settings.
Select Restore or Cancel.
Clear All Private Data
This allows selection to clear all
private information from the vehicle.
Select Delete or Cancel.
Restore Radio Settings
This allows selection to restore
radio settings.
Select Restore or Cancel.
Software Information
Select to view the infotainment
system current software information.
Page 176 of 400
Black plate (6,1)Cadillac CTS Owner Manual (GMNA-Localizing-U.S./Canada/Mexico-
6081492) - 2014 - CRC 2nd Edition - 11/18/13
6-6 Lighting
Raise or lower the lever until the
arrow starts to flash to signal a lane
change. Hold it there until the lane
change is completed. If the lever is
briefly pressed and released, the
turn signal flashes three times.
The turn and lane-change signal
can be turned off manually by
moving the lever back to its original
position.
If after signaling a turn or lane
change, the arrow flashes rapidly or
does not come on, a signal bulb
might be burned out.
Replace any burned out bulbs. If a
bulb is not burned out, check the
fuse. SeeFuses and Circuit
Breakers on page 10-32.Interior Lighting
Instrument Panel
Illumination Control
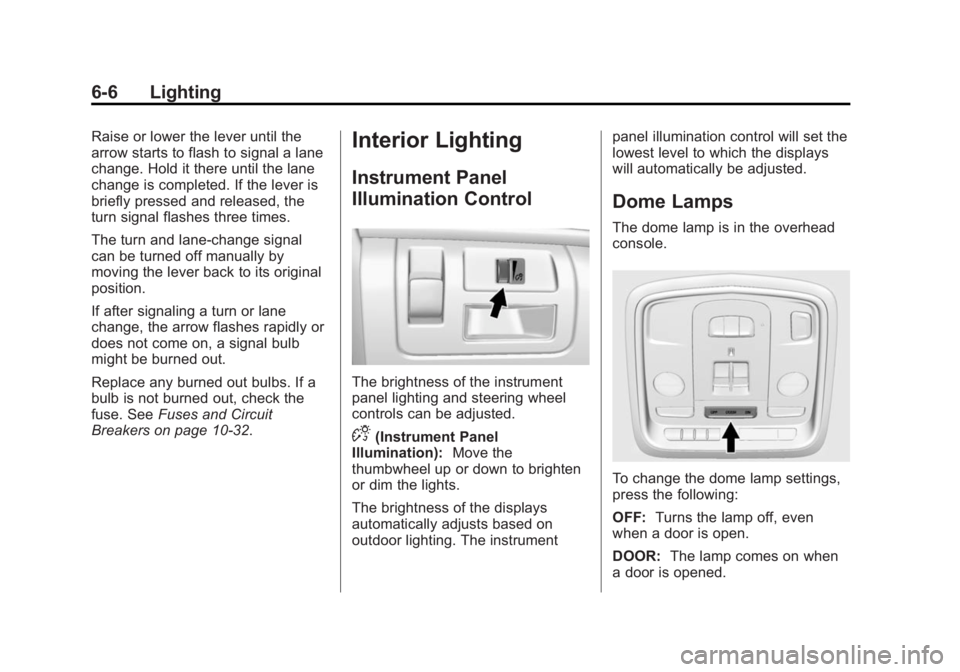
The brightness of the instrument
panel lighting and steering wheel
controls can be adjusted.
D(Instrument Panel
Illumination): Move the
thumbwheel up or down to brighten
or dim the lights.
The brightness of the displays
automatically adjusts based on
outdoor lighting. The instrument panel illumination control will set the
lowest level to which the displays
will automatically be adjusted.
Dome Lamps
The dome lamp is in the overhead
console.
To change the dome lamp settings,
press the following:
OFF:
Turns the lamp off, even
when a door is open.
DOOR: The lamp comes on when
a door is opened.
Page 178 of 400

Black plate (8,1)Cadillac CTS Owner Manual (GMNA-Localizing-U.S./Canada/Mexico-
6081492) - 2014 - CRC 2nd Edition - 11/18/13
6-8 Lighting
removed from the ignition. The
dome lamps also come on when the
key is removed from the ignition.
The exterior lamps and dome lamps
remain on after the door is closed
for a set amount of time, then
automatically turn off.
If equipped with Keyless Access,
the exterior lamps and dome lamps
automatically turn on when the
driver door is opened after the
ignition is turned off. SeeIgnition
Positions on page 9-16.
The exterior lamps turn off
immediately by turning the exterior
lamp control off.
This feature can be changed. See
Vehicle Personalization on
page 5-48.
Battery Load
Management
The vehicle has Electric Power
Management (EPM), which
estimates the battery's temperature and state of charge. It then adjusts
the voltage for best performance
and extended life of the battery.
When the battery's state of charge
is low, the voltage is raised slightly
to quickly bring the charge back up.
When the state of charge is high,
the voltage is lowered slightly to
prevent overcharging. If the vehicle
has a voltmeter gauge or a voltage
display on the Driver Information
Center (DIC), you may see the
voltage move up or down. This is
normal. If there is a problem, an
alert will be displayed.
The battery can be discharged at
idle if the electrical loads are very
high. This is true for all vehicles.
This is because the generator
(alternator) may not be spinning fast
enough at idle to produce all the
power that is needed for very high
electrical loads.
A high electrical load occurs when
several of the following are on, such
as: headlamps, high beams, fog
lamps, rear window defogger,climate control fan at high speed,
heated seats, engine cooling fans,
trailer loads, and loads plugged into
accessory power outlets.
EPM works to prevent excessive
discharge of the battery. It does this
by balancing the generator's output
and the vehicle's electrical needs.
It can increase engine idle speed to
generate more power, whenever
needed. It can temporarily reduce
the power demands of some
accessories.
Normally, these actions occur in
steps or levels, without being
noticeable. In rare cases at the
highest levels of corrective action,
this action may be noticeable to the
driver. If so, a DIC message might
be displayed. If a battery message
is displayed, it is recommended that
the driver reduce the electrical loads
as much as possible. See
Driver
Information Center (DIC) on
page 5-30.
Page 184 of 400
Black plate (2,1)Cadillac CTS Owner Manual (GMNA-Localizing-U.S./Canada/Mexico-
6081492) - 2014 - CRC 2nd Edition - 11/18/13
8-2 Climate Controls
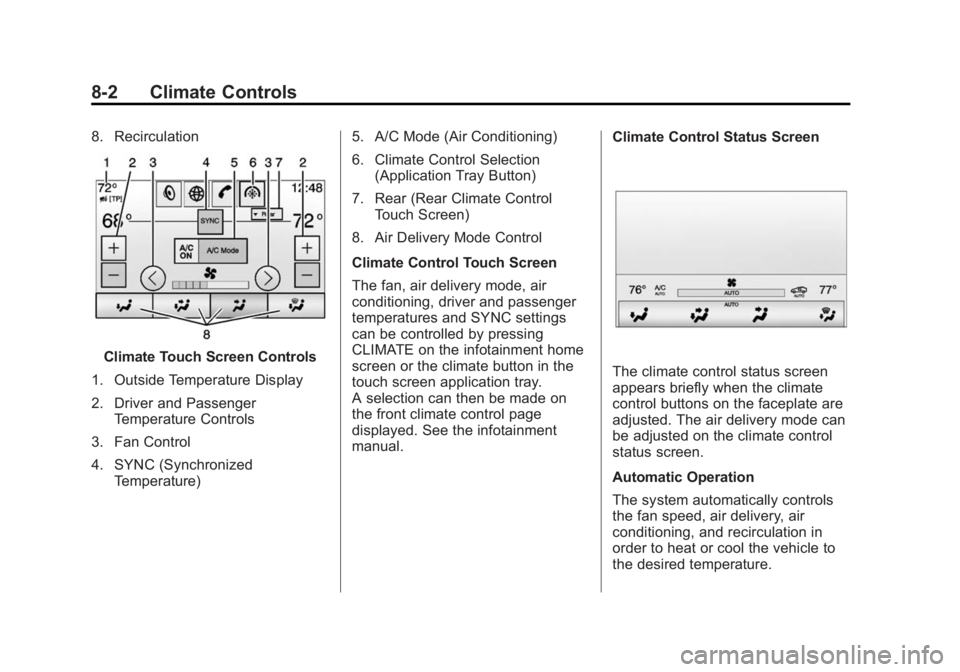
8. Recirculation
Climate Touch Screen Controls
1. Outside Temperature Display
2. Driver and Passenger Temperature Controls
3. Fan Control
4. SYNC (Synchronized Temperature) 5. A/C Mode (Air Conditioning)
6. Climate Control Selection
(Application Tray Button)
7. Rear (Rear Climate Control Touch Screen)
8. Air Delivery Mode Control
Climate Control Touch Screen
The fan, air delivery mode, air
conditioning, driver and passenger
temperatures and SYNC settings
can be controlled by pressing
CLIMATE on the infotainment home
screen or the climate button in the
touch screen application tray.
A selection can then be made on
the front climate control page
displayed. See the infotainment
manual. Climate Control Status ScreenThe climate control status screen
appears briefly when the climate
control buttons on the faceplate are
adjusted. The air delivery mode can
be adjusted on the climate control
status screen.
Automatic Operation
The system automatically controls
the fan speed, air delivery, air
conditioning, and recirculation in
order to heat or cool the vehicle to
the desired temperature.
Page 185 of 400

Black plate (3,1)Cadillac CTS Owner Manual (GMNA-Localizing-U.S./Canada/Mexico-
6081492) - 2014 - CRC 2nd Edition - 11/18/13
Climate Controls 8-3
When the indicator light is on or
AUTO is displayed on the touch
screen, the system is in full
automatic operation. If the air
delivery mode or fan setting is
manually adjusted, the auto
indicator turns off and the display
will show the selected settings. Auto
operation can be turned off
individually for climate settings.
For automatic operation:
1. Press AUTO.
2. Set the temperature. Allow thesystem time to stabilize. Then
adjust the temperature as
needed for best comfort.
To improve fuel efficiency and to
cool the vehicle faster, recirculation
may be automatically selected in
warm weather. The recirculation
light will not come on. Press
@to
select recirculation; press it again to
select outside air. English units can be changed to
metric units through the instrument
cluster. See
“Cluster Settings Menu”
under Instrument Cluster on
page 5-10.
OFF (Fan): Press to turn the fan on
or off. The temperature control and
air delivery mode can still be
adjusted.
w/x(Driver and Passenger
Temperature Controls): The
temperature can be adjusted
separately for the driver and the
passenger. Press to increase or
decrease the temperature. Press
and hold to rapidly increase or
decrease the temperature.
The driver and passenger
temperatures can also be adjusted
by pressing the controls on the
touch screen.
SYNC (Synchronized
Temperature): Press SYNC on the
touch screen to link all climate zone
settings to the driver settings. Adjust
the driver side temperature control
to change the linked temperature. When the passenger settings are
adjusted, the SYNC button is
displayed when the temperatures
are unlinked.
Rear (If Equipped):
Press this
button on the front climate control
touch screen to open the rear
climate control screen. The rear
climate control settings can now be
adjusted from the front
passenger area.
Manual Operation
z 9 y(Fan Control): Press the
fan control buttons or the touch
screen fan control, to increase or
decrease the fan speed. Press and
hold the buttons or the touch screen
control to adjust speed more
quickly. The fan speed setting
displays. Pressing either button
cancels automatic fan control and
the fan can be controlled manually.
Press AUTO to return to automatic
operation. To turn off the fan and
climate control system, press and
hold the fan down button or touch
screen fan control until it is off.
Page 186 of 400
Black plate (4,1)Cadillac CTS Owner Manual (GMNA-Localizing-U.S./Canada/Mexico-
6081492) - 2014 - CRC 2nd Edition - 11/18/13
8-4 Climate Controls
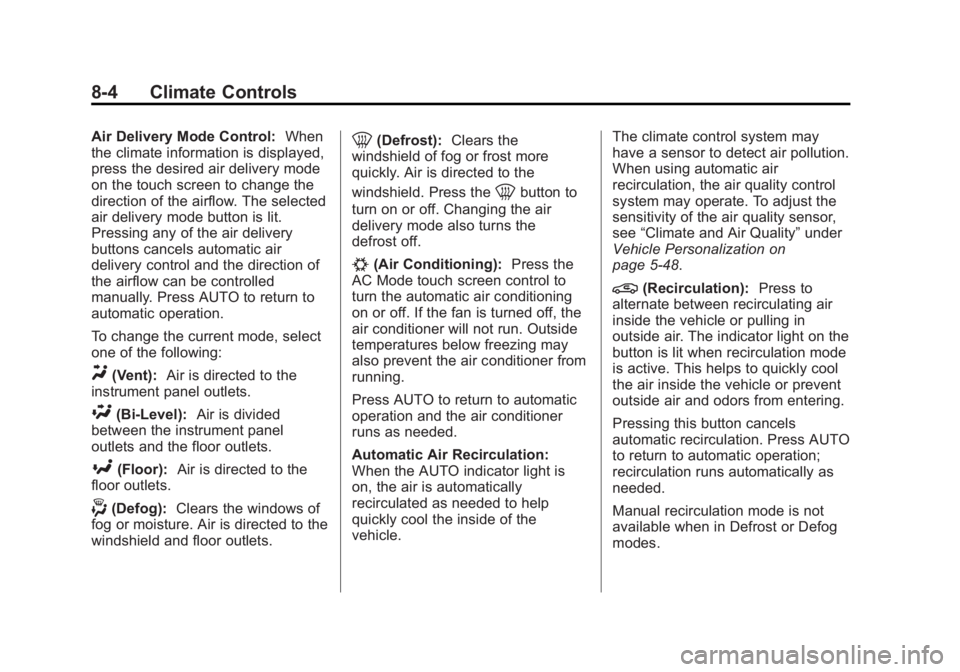
Air Delivery Mode Control:When
the climate information is displayed,
press the desired air delivery mode
on the touch screen to change the
direction of the airflow. The selected
air delivery mode button is lit.
Pressing any of the air delivery
buttons cancels automatic air
delivery control and the direction of
the airflow can be controlled
manually. Press AUTO to return to
automatic operation.
To change the current mode, select
one of the following:
Y(Vent): Air is directed to the
instrument panel outlets.
\(Bi-Level): Air is divided
between the instrument panel
outlets and the floor outlets.
[(Floor): Air is directed to the
floor outlets.
-(Defog): Clears the windows of
fog or moisture. Air is directed to the
windshield and floor outlets.
0(Defrost): Clears the
windshield of fog or frost more
quickly. Air is directed to the
windshield. Press the
0button to
turn on or off. Changing the air
delivery mode also turns the
defrost off.
#(Air Conditioning): Press the
AC Mode touch screen control to
turn the automatic air conditioning
on or off. If the fan is turned off, the
air conditioner will not run. Outside
temperatures below freezing may
also prevent the air conditioner from
running.
Press AUTO to return to automatic
operation and the air conditioner
runs as needed.
Automatic Air Recirculation:
When the AUTO indicator light is
on, the air is automatically
recirculated as needed to help
quickly cool the inside of the
vehicle. The climate control system may
have a sensor to detect air pollution.
When using automatic air
recirculation, the air quality control
system may operate. To adjust the
sensitivity of the air quality sensor,
see
“Climate and Air Quality” under
Vehicle Personalization on
page 5-48.
@(Recirculation): Press to
alternate between recirculating air
inside the vehicle or pulling in
outside air. The indicator light on the
button is lit when recirculation mode
is active. This helps to quickly cool
the air inside the vehicle or prevent
outside air and odors from entering.
Pressing this button cancels
automatic recirculation. Press AUTO
to return to automatic operation;
recirculation runs automatically as
needed.
Manual recirculation mode is not
available when in Defrost or Defog
modes.
Page 189 of 400

Black plate (7,1)Cadillac CTS Owner Manual (GMNA-Localizing-U.S./Canada/Mexico-
6081492) - 2014 - CRC 2nd Edition - 11/18/13
Climate Controls 8-7
5. Temperature Control
Rear Climate Touch ScreenControls
1. Outside Temperature Display
2. Rear Climate Temperature Control
3. SYNC (Synchronized Temperatures)
4. REAR
O(On/Off)
5. Rear AUTO (Automatic Operation)
6. Front (Front Climate Control Touch Screen) 7. Rear Control Lockout
8. Air Delivery Mode Control
Rear:
Press this button on the front
climate control touch screen to open
the rear climate control screen. The
rear climate control settings can
now be adjusted from the front
passenger area.
O(On/Off): Press theObutton or
REAR
Oon the touch screen to turn
the rear climate control on or off.
If the rear climate control is turned
off using REAR
Oon the touch
screen, the
Obutton on the rear
climate control faceplate must be
pressed twice to turn the system
back on.
SYNC: Press SYNC on the touch
screen to match the rear climate
control temperature to the front
climate control driver temperature.
The SYNC button will be lit. Press
the TEMP, MODE, or AUTO button
twice to unlink the set driver and
rear temperatures. The SYNC
button turns off. Rear Control Lockout:
Press to
lock or unlock control of the rear
climate control system from the rear
seat passengers. When locked, the
rear climate control can only be
adjusted from the front seat.
Automatic Operation
Rear AUTO: Press to turn on or off.
The air delivery is controlled
automatically. The AUTO indicator
appears on the display. If any of the
climate control settings are manually
adjusted, this cancels full automatic
operation.
Manual Operation
S A T(Fan Control): Press or
press and hold the front climate
control buttons or touch screen to
increase or decrease the rear
climate airflow.
+/− (Temperature Control): Press
or press and hold the rear
temperature control buttons or touch
screen to adjust the rear passenger
temperature. Press + for warmer air
and press −for cooler air.
Page 208 of 400
Black plate (16,1)Cadillac CTS Owner Manual (GMNA-Localizing-U.S./Canada/Mexico-
6081492) - 2014 - CRC 2nd Edition - 11/18/13
9-16 Driving and Operating
Ignition Positions
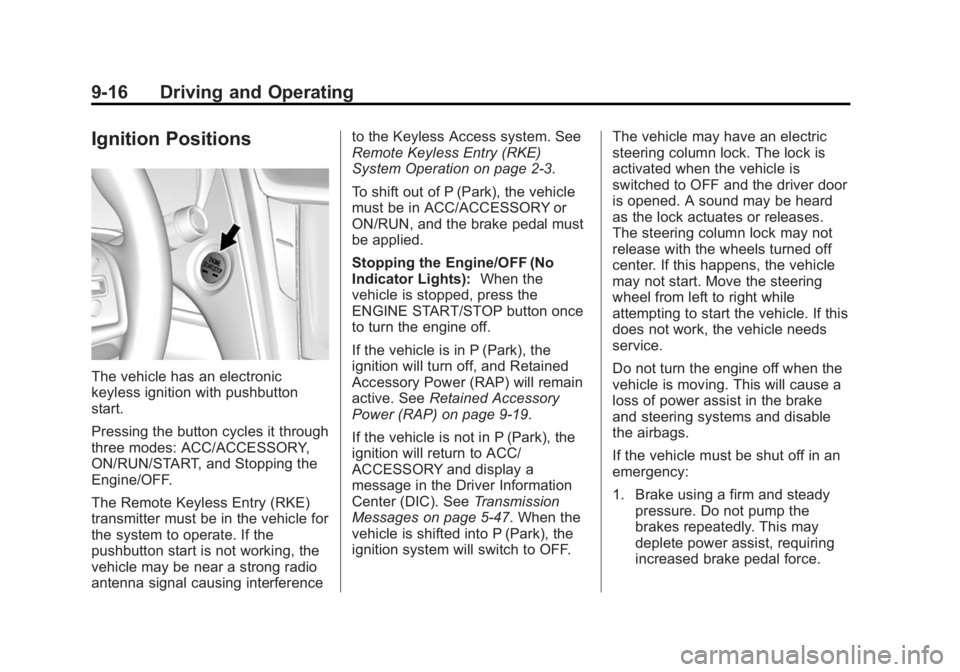
The vehicle has an electronic
keyless ignition with pushbutton
start.
Pressing the button cycles it through
three modes: ACC/ACCESSORY,
ON/RUN/START, and Stopping the
Engine/OFF.
The Remote Keyless Entry (RKE)
transmitter must be in the vehicle for
the system to operate. If the
pushbutton start is not working, the
vehicle may be near a strong radio
antenna signal causing interferenceto the Keyless Access system. See
Remote Keyless Entry (RKE)
System Operation on page 2-3.
To shift out of P (Park), the vehicle
must be in ACC/ACCESSORY or
ON/RUN, and the brake pedal must
be applied.
Stopping the Engine/OFF (No
Indicator Lights):
When the
vehicle is stopped, press the
ENGINE START/STOP button once
to turn the engine off.
If the vehicle is in P (Park), the
ignition will turn off, and Retained
Accessory Power (RAP) will remain
active. See Retained Accessory
Power (RAP) on page 9-19.
If the vehicle is not in P (Park), the
ignition will return to ACC/
ACCESSORY and display a
message in the Driver Information
Center (DIC). See Transmission
Messages on page 5-47. When the
vehicle is shifted into P (Park), the
ignition system will switch to OFF. The vehicle may have an electric
steering column lock. The lock is
activated when the vehicle is
switched to OFF and the driver door
is opened. A sound may be heard
as the lock actuates or releases.
The steering column lock may not
release with the wheels turned off
center. If this happens, the vehicle
may not start. Move the steering
wheel from left to right while
attempting to start the vehicle. If this
does not work, the vehicle needs
service.
Do not turn the engine off when the
vehicle is moving. This will cause a
loss of power assist in the brake
and steering systems and disable
the airbags.
If the vehicle must be shut off in an
emergency:
1. Brake using a firm and steady
pressure. Do not pump the
brakes repeatedly. This may
deplete power assist, requiring
increased brake pedal force.
Page 210 of 400
Black plate (18,1)Cadillac CTS Owner Manual (GMNA-Localizing-U.S./Canada/Mexico-
6081492) - 2014 - CRC 2nd Edition - 11/18/13
9-18 Driving and Operating
{Caution
Do not try to shift to P (Park) if the
vehicle is moving. If you do, you
could damage the transmission.
Shift to P (Park) only when the
vehicle is stopped.
{Caution
If you add electrical parts or
accessories, you could change
the way the engine operates. Any
resulting damage would not be
covered by the vehicle warranty.
SeeAdd-On Electrical Equipment
on page 9-70. Starting Procedure
1. If equipped with the Keyless
Access system, the Remote
Keyless Entry (RKE) transmitter
must be in the vehicle. Put your
foot on the brake pedal and
press the ENGINE START/
STOP button. When the engine
begins cranking, let go of the
button.
The idle speed will go down as
the engine gets warm. Do not
race the engine immediately
after starting it. Operate the
engine and transmission gently
to allow the oil to warm up and
lubricate all moving parts.
If the RKE transmitter is not in
the vehicle or something is
interfering with the transmitter,
the Driver Information Center
(DIC) will display a message.
See Key and Lock Messages on
page 5-40.
If the battery in the RKE
transmitter needs replacing, the
DIC will display a message. The vehicle can still be driven. See
“Starting the Vehicle with a Low
Transmitter Battery”
inRemote
Keyless Entry (RKE) System
Operation on page 2-3.
The vehicle has a
Computer-Controlled Cranking
System. This feature assists in
starting the engine and protects
components. If the ENGINE
START/STOP button is pressed,
and then released when the
engine begins cranking, the
engine will continue cranking for
a few seconds or until the
vehicle starts. If the engine does
not start and the button is
pressed for many seconds,
cranking will be stopped after
15 seconds to prevent cranking
motor damage. To prevent gear
damage, this system also
prevents cranking if the engine
is already running. Engine
cranking can be stopped by
pressing the ENGINE START/
STOP button a second time.
Page 218 of 400

Black plate (26,1)Cadillac CTS Owner Manual (GMNA-Localizing-U.S./Canada/Mexico-
6081492) - 2014 - CRC 2nd Edition - 11/18/13
9-26 Driving and Operating
With the shift lever in D (Drive) and
not in Permanent Tap Shift Mode,
the tap shift controls will activate a
temporary tap manual shift mode,
allowing the transmission to be
manually shifted. Automatic shifts
return after no manual shifts have
been done for seven to 10 seconds.
The Temporary Tap Shift Mode can
also be deactivated by holding the
right upshift control briefly.
While using Tap Shift, the vehicle
will have firmer, quicker shifting. You
can use this for sport driving or
when climbing or descending hills,
to stay in gear longer, or to
downshift for more power or engine
braking.
The transmission will only allow you
to shift into gears appropriate for the
vehicle speed and engine
revolutions per minute (rpm). The
transmission will not automatically
shift to the next lower gear if the
engine rpm is too high, nor to the
next higher gear when the maximum
engine rpm is reached.If shifting is prevented for any
reason, a SHIFT DENIED message
will be displayed in the instrument
cluster. See
Transmission
Messages on page 5-47.
When accelerating the vehicle from
a stop in snowy and icy conditions,
it is suggested to shift into second
gear. A higher gear allows the
vehicle to gain more traction on
slippery surfaces.Drive Systems
All-Wheel Drive
Vehicles with this feature always
send engine power to all four
wheels. It is fully automatic, and
adjusts itself as needed for road
conditions.