ABS CADILLAC CTS SEDAN 2015 3.G Owners Manual
[x] Cancel search | Manufacturer: CADILLAC, Model Year: 2015, Model line: CTS SEDAN, Model: CADILLAC CTS SEDAN 2015 3.GPages: 401, PDF Size: 4.46 MB
Page 5 of 401
Black plate (4,1)Cadillac CTS Owner Manual (GMNA-Localizing-U.S./Canada/Mexico-
7707478) - 2015 - crc - 10/1/14
iv Introduction
Danger, Warnings, and
Cautions
Warning messages found on vehicle
labels and in this manual describe
hazards and what to do to avoid or
reduce them.
{Danger
Danger indicates a hazard with a
high level of risk which will result
in serious injury or death.
{Warning
Warning indicates a hazard that
could result in injury or death.
{Caution
Caution indicates a hazard that
could result in property or vehicle
damage.
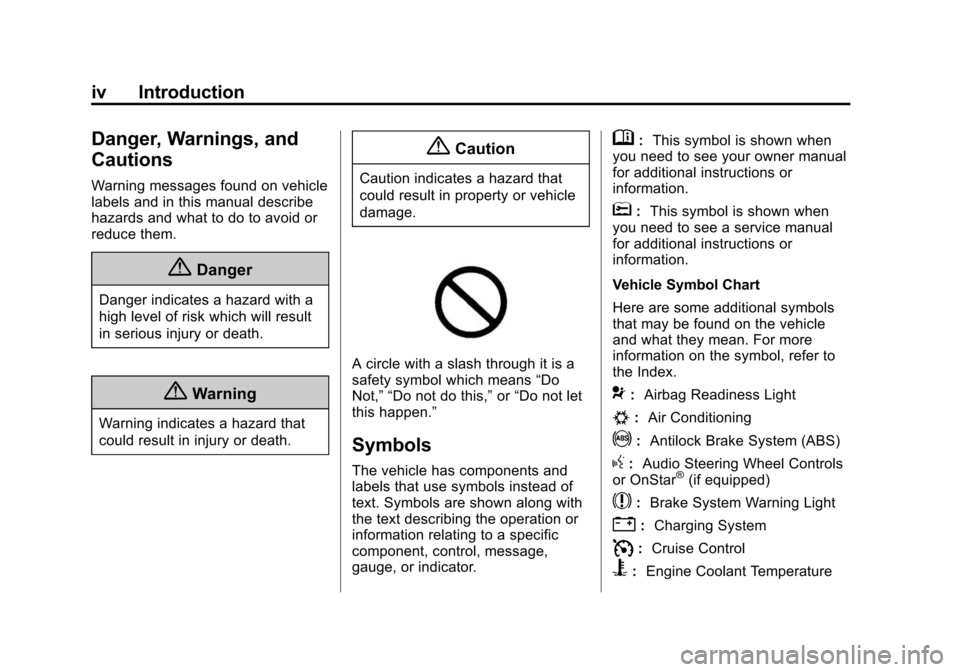
A circle with a slash through it is a
safety symbol which means“Do
Not,” “Do not do this,” or“Do not let
this happen.”
Symbols
The vehicle has components and
labels that use symbols instead of
text. Symbols are shown along with
the text describing the operation or
information relating to a specific
component, control, message,
gauge, or indicator.
M: This symbol is shown when
you need to see your owner manual
for additional instructions or
information.
*: This symbol is shown when
you need to see a service manual
for additional instructions or
information.
Vehicle Symbol Chart
Here are some additional symbols
that may be found on the vehicle
and what they mean. For more
information on the symbol, refer to
the Index.
9: Airbag Readiness Light
#:Air Conditioning
!:Antilock Brake System (ABS)
g:Audio Steering Wheel Controls
or OnStar®(if equipped)
$: Brake System Warning Light
":Charging System
I:Cruise Control
B: Engine Coolant Temperature
Page 40 of 401
Black plate (11,1)Cadillac CTS Owner Manual (GMNA-Localizing-U.S./Canada/Mexico-
7707478) - 2015 - crc - 10/1/14
Keys, Doors, and Windows 2-11
Warning (Continued)
.Outsiders can easily enter
through an unlocked door
when slowing or stopping the
vehicle. Lock the doors to
help prevent this from
happening.
Keyless Access
Use the Keyless Access system to
lock and unlock the door. When the
doors are locked and the Remote
Keyless Entry (RKE) transmitter is within 1 m (3 ft) of the driver door
handle, press the lock/unlock
button. When unlocking from the
driver door, the first press unlocks
that door; press again within
five seconds to unlock all passenger
doors. See
Remote Keyless Entry
(RKE) System Operation on
page 2-2.
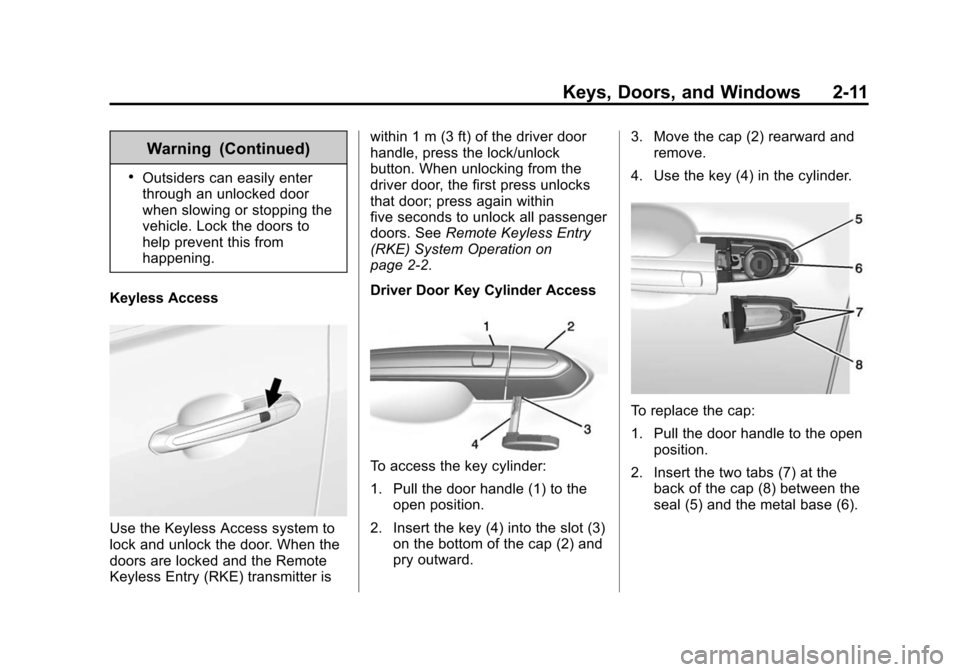
Driver Door Key Cylinder Access
To access the key cylinder:
1. Pull the door handle (1) to the open position.
2. Insert the key (4) into the slot (3) on the bottom of the cap (2) and
pry outward. 3. Move the cap (2) rearward and
remove.
4. Use the key (4) in the cylinder.
To replace the cap:
1. Pull the door handle to the open position.
2. Insert the two tabs (7) at the back of the cap (8) between the
seal (5) and the metal base (6).
Page 114 of 401
Black plate (1,1)Cadillac CTS Owner Manual (GMNA-Localizing-U.S./Canada/Mexico-
7707478) - 2015 - crc - 10/1/14
Instruments and Controls 5-1
Instruments and
Controls
Controls
Steering Wheel Adjustment . . . 5-2
Steering Wheel Controls . . . . . . 5-3
Heated Steering Wheel . . . . . . . 5-3
Horn . . . . . . . . . . . . . . . . . . . . . . . . . . 5-3
Windshield Wiper/Washer . . . . . 5-3
Compass . . . . . . . . . . . . . . . . . . . . . 5-5
Clock . . . . . . . . . . . . . . . . . . . . . . . . . 5-5
Power Outlets . . . . . . . . . . . . . . . . . 5-6
Warning Lights, Gauges, and
Indicators
Warning Lights, Gauges, andIndicators . . . . . . . . . . . . . . . . . . . . 5-9
Instrument Cluster . . . . . . . . . . . 5-10
Speedometer . . . . . . . . . . . . . . . . 5-14
Odometer . . . . . . . . . . . . . . . . . . . . 5-14
Trip Odometer . . . . . . . . . . . . . . . 5-14
Tachometer . . . . . . . . . . . . . . . . . . 5-14
Fuel Gauge . . . . . . . . . . . . . . . . . . 5-14
Engine Coolant Temperature Gauge . . . . . . . . . . . . . . . . . . . . . . 5-16
Safety Belt Reminders . . . . . . . 5-16
Airbag Readiness Light . . . . . . 5-17 Passenger Airbag Status
Indicator . . . . . . . . . . . . . . . . . . . . 5-18
Charging System Light . . . . . . 5-19
Malfunction Indicator Lamp . . . . . . . . . . . . . 5-19
Brake System Warning Light . . . . . . . . . . . . . . . . . . . . . . . 5-22
Parking Brake Light . . . . . . . . . . 5-22
Service Electric Parking Brake Light . . . . . . . . . . . . . . . . . . . . . . . 5-23
Antilock Brake System (ABS) Warning Light . . . . . . . . . . . . . . 5-23
Lane Keep Assist (LKA) Light . . . . . . . . . . . . . . . . . . . . . . . 5-23
Vehicle Ahead Indicator . . . . . . 5-24
Traction Off Light . . . . . . . . . . . . 5-24
StabiliTrak
®OFF Light . . . . . . . 5-24
Traction Control System (TCS)/StabiliTrak
®Light . . . . 5-25
Engine Coolant Temperature Warning Light . . . . . . . . . . . . . . 5-25
Tire Pressure Light . . . . . . . . . . 5-26
Engine Oil Pressure Light . . . . 5-26
Low Fuel Warning Light . . . . . . 5-27
Security Light . . . . . . . . . . . . . . . . 5-27
High-Beam On Light . . . . . . . . . 5-27
Adaptive Forward Lighting (AFL) Light . . . . . . . . . . . . . . . . . 5-28 Lamps On Reminder . . . . . . . . . 5-28
Cruise Control Light . . . . . . . . . 5-28
Door Ajar Light . . . . . . . . . . . . . . 5-29
Information Displays
Driver Information
Center (DIC) . . . . . . . . . . . . . . . 5-29
Head-Up Display (HUD) . . . . . 5-32
Vehicle Messages
Vehicle Messages . . . . . . . . . . . 5-36
Battery Voltage and Charging Messages . . . . . . . . . . . . . . . . . . 5-36
Brake System Messages . . . . 5-36
Compass Messages . . . . . . . . . 5-37
Cruise Control Messages . . . . 5-37
Door Ajar Messages . . . . . . . . . 5-38
Engine Cooling System Messages . . . . . . . . . . . . . . . . . . 5-38
Engine Oil Messages . . . . . . . . 5-39
Engine Power Messages . . . . 5-39
Fuel System Messages . . . . . . 5-39
Key and Lock Messages . . . . . 5-39
Lamp Messages . . . . . . . . . . . . . 5-40
Object Detection System Messages . . . . . . . . . . . . . . . . . . 5-41
Ride Control System Messages . . . . . . . . . . . . . . . . . . 5-43
Airbag System Messages . . . . 5-44
Page 136 of 401
Black plate (23,1)Cadillac CTS Owner Manual (GMNA-Localizing-U.S./Canada/Mexico-
7707478) - 2015 - crc - 10/1/14
Instruments and Controls 5-23
Service Electric Parking
Brake Light
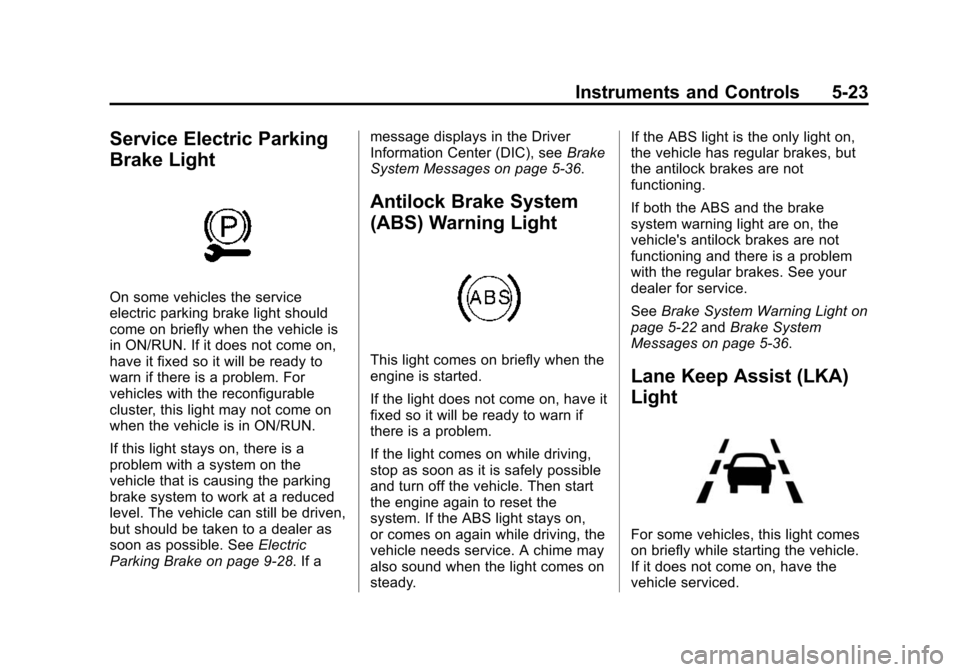
On some vehicles the service
electric parking brake light should
come on briefly when the vehicle is
in ON/RUN. If it does not come on,
have it fixed so it will be ready to
warn if there is a problem. For
vehicles with the reconfigurable
cluster, this light may not come on
when the vehicle is in ON/RUN.
If this light stays on, there is a
problem with a system on the
vehicle that is causing the parking
brake system to work at a reduced
level. The vehicle can still be driven,
but should be taken to a dealer as
soon as possible. SeeElectric
Parking Brake on page 9-28. If a message displays in the Driver
Information Center (DIC), see
Brake
System Messages on page 5-36.
Antilock Brake System
(ABS) Warning Light
This light comes on briefly when the
engine is started.
If the light does not come on, have it
fixed so it will be ready to warn if
there is a problem.
If the light comes on while driving,
stop as soon as it is safely possible
and turn off the vehicle. Then start
the engine again to reset the
system. If the ABS light stays on,
or comes on again while driving, the
vehicle needs service. A chime may
also sound when the light comes on
steady. If the ABS light is the only light on,
the vehicle has regular brakes, but
the antilock brakes are not
functioning.
If both the ABS and the brake
system warning light are on, the
vehicle's antilock brakes are not
functioning and there is a problem
with the regular brakes. See your
dealer for service.
See
Brake System Warning Light on
page 5-22 andBrake System
Messages on page 5-36.
Lane Keep Assist (LKA)
Light
For some vehicles, this light comes
on briefly while starting the vehicle.
If it does not come on, have the
vehicle serviced.
Page 194 of 401
Black plate (1,1)Cadillac CTS Owner Manual (GMNA-Localizing-U.S./Canada/Mexico-
7707478) - 2015 - crc - 10/1/14
Driving and Operating 9-1
Driving and
Operating
Driving Information
Distracted Driving . . . . . . . . . . . . . 9-2
Defensive Driving . . . . . . . . . . . . . 9-3
Drunk Driving . . . . . . . . . . . . . . . . . 9-3
Control of a Vehicle . . . . . . . . . . . 9-3
Braking . . . . . . . . . . . . . . . . . . . . . . . 9-3
Steering . . . . . . . . . . . . . . . . . . . . . . . 9-4
Off-Road Recovery . . . . . . . . . . . . 9-5
Loss of Control . . . . . . . . . . . . . . . . 9-5
Track Events and CompetitiveDriving . . . . . . . . . . . . . . . . . . . . . . . 9-6
Driving on Wet Roads . . . . . . . . . 9-7
Hill and Mountain Roads . . . . . . 9-8
Winter Driving . . . . . . . . . . . . . . . . . 9-8
If the Vehicle Is Stuck . . . . . . . . 9-10
Vehicle Load Limits . . . . . . . . . . 9-11
Starting and Operating
New Vehicle Break-In . . . . . . . . 9-15
Ignition Positions . . . . . . . . . . . . 9-16
Starting the Engine . . . . . . . . . . 9-18
Retained Accessory Power (RAP) . . . . . . . . . . . . . . . 9-19
Engine Coolant Heater . . . . . . . 9-19 Shifting Into Park . . . . . . . . . . . . 9-20
Shifting out of Park . . . . . . . . . . 9-21
Parking over Things
That Burn . . . . . . . . . . . . . . . . . . 9-21
Engine Exhaust
Engine Exhaust . . . . . . . . . . . . . . 9-22
Running the Vehicle WhileParked . . . . . . . . . . . . . . . . . . . . . 9-22
Automatic Transmission
Automatic Transmission . . . . . 9-23
Manual Mode . . . . . . . . . . . . . . . . 9-25
Drive Systems
All-Wheel Drive . . . . . . . . . . . . . . 9-26
Brakes
Antilock BrakeSystem (ABS) . . . . . . . . . . . . . . 9-27
Electric Parking Brake . . . . . . . 9-28
Brake Assist . . . . . . . . . . . . . . . . . 9-29
Ride Control Systems
Traction Control/Electronic Stability Control . . . . . . . . . . . . 9-30
Driver Mode Control . . . . . . . . . 9-31
Competitive Driving Mode (LF3 Only) . . . . . . . . . . . . . . . . . . 9-33
Limited-Slip Differential (LF3 Only) . . . . . . . . . . . . . . . . . . 9-34
Cruise Control
Cruise Control . . . . . . . . . . . . . . . 9-34
Adaptive Cruise Control . . . . . 9-37
Driver Assistance Systems
Driver AssistanceSystems . . . . . . . . . . . . . . . . . . . . 9-45
Assistance Systems for Parking or Backing . . . . . . . . . 9-46
Assistance Systems for Driving . . . . . . . . . . . . . . . . . . . . . 9-51
Forward Collision Alert (FCA) System . . . . . . . . . . . . . . . . . . . . . 9-52
Active Emergency Braking System . . . . . . . . . . . . . . . . . . . . . 9-54
Side Blind Zone Alert (SBZA) . . . . . . . . . . . . . . . 9-56
Page 198 of 401
Black plate (5,1)Cadillac CTS Owner Manual (GMNA-Localizing-U.S./Canada/Mexico-
7707478) - 2015 - crc - 10/1/14
Driving and Operating 9-5
.Holding both sides of the
steering wheel allows you to turn
180 degrees without removing
a hand.
.Antilock Brake System (ABS)
allows steering while braking.
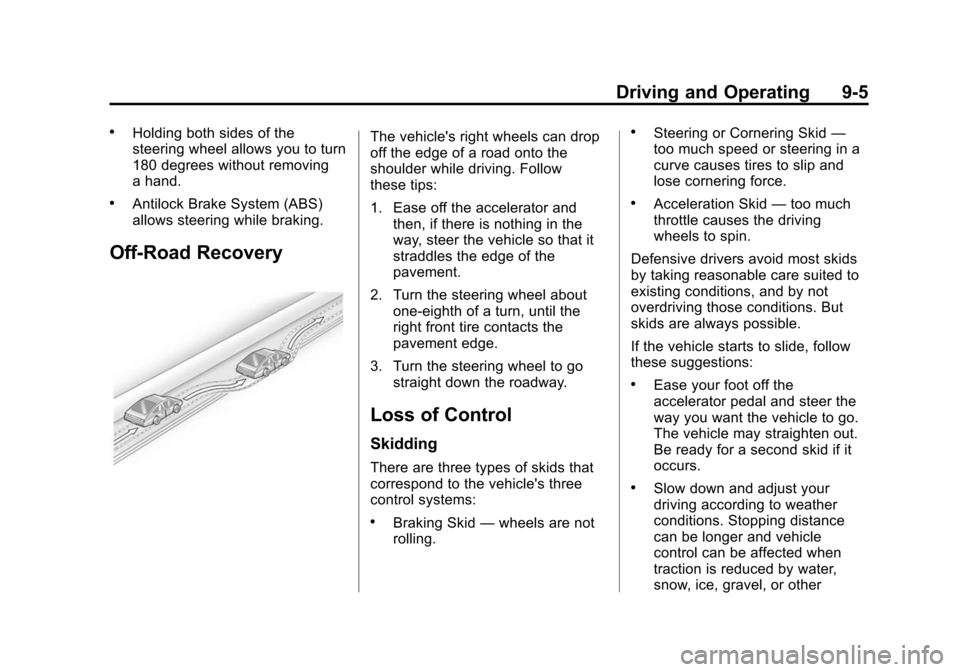
Off-Road Recovery
The vehicle's right wheels can drop
off the edge of a road onto the
shoulder while driving. Follow
these tips:
1. Ease off the accelerator andthen, if there is nothing in the
way, steer the vehicle so that it
straddles the edge of the
pavement.
2. Turn the steering wheel about one-eighth of a turn, until the
right front tire contacts the
pavement edge.
3. Turn the steering wheel to go straight down the roadway.
Loss of Control
Skidding
There are three types of skids that
correspond to the vehicle's three
control systems:
.Braking Skid —wheels are not
rolling.
.Steering or Cornering Skid —
too much speed or steering in a
curve causes tires to slip and
lose cornering force.
.Acceleration Skid —too much
throttle causes the driving
wheels to spin.
Defensive drivers avoid most skids
by taking reasonable care suited to
existing conditions, and by not
overdriving those conditions. But
skids are always possible.
If the vehicle starts to slide, follow
these suggestions:
.Ease your foot off the
accelerator pedal and steer the
way you want the vehicle to go.
The vehicle may straighten out.
Be ready for a second skid if it
occurs.
.Slow down and adjust your
driving according to weather
conditions. Stopping distance
can be longer and vehicle
control can be affected when
traction is reduced by water,
snow, ice, gravel, or other
Page 202 of 401
Black plate (9,1)Cadillac CTS Owner Manual (GMNA-Localizing-U.S./Canada/Mexico-
7707478) - 2015 - crc - 10/1/14
Driving and Operating 9-9
Drive with caution, whatever the
condition. Accelerate gently so
traction is not lost. Accelerating too
quickly causes the wheels to spin
and makes the surface under the
tires slick, so there is even less
traction.
The Antilock Brake System (ABS)
improves vehicle stability during
hard stops on slippery roads, but
apply the brakes sooner than when
on dry pavement.
Allow greater following distance on
any slippery road and watch for
slippery spots. Icy patches can
occur on otherwise clear roads in
shaded areas. The surface of a
curve or an overpass can remain icy
when the surrounding roads are
clear. Avoid sudden steering
maneuvers and braking while
on ice.
SeeAntilock Brake System (ABS)
on page 9-27.
See Driver Mode Control on
page 9-31 Turn off cruise control on slippery
surfaces.
Blizzard Conditions
Being stuck in snow can be a
serious situation. Stay with the
vehicle unless there is help nearby.
If possible, use Roadside Service.
See
Roadside Service on
page 13-5. To get help and keep
everyone in the vehicle safe:
.Turn on the hazard warning
flashers.
.Tie a red cloth to an outside
mirror.
{Warning
Snow can trap engine exhaust
under the vehicle. This may
cause exhaust gases to get
inside. Engine exhaust contains
carbon monoxide (CO) which
(Continued)
Warning (Continued)
cannot be seen or smelled. It can
cause unconsciousness and even
death.
If the vehicle is stuck in the snow:
.Clear away snow from around
the base of your vehicle,
especially any that is blocking
the exhaust pipe.
.Check again from time to
time to be sure snow does
not collect there.
.Open a window about 5 cm
(2 in) on the side of the
vehicle that is away from the
wind to bring in fresh air.
.Fully open the air outlets on
or under the instrument
panel.
.Adjust the climate control
system to a setting that
circulates the air inside the(Continued)
Page 220 of 401
Black plate (27,1)Cadillac CTS Owner Manual (GMNA-Localizing-U.S./Canada/Mexico-
7707478) - 2015 - crc - 10/1/14
Driving and Operating 9-27
Brakes
Antilock Brake
System (ABS)
This vehicle has ABS, an advanced
electronic braking system that helps
prevent a braking skid.
When the vehicle begins to drive
away, ABS checks itself.
A momentary motor or clicking noise
might be heard while this test is
going on, and it might even be
noticed that the brake pedal moves
a little. This is normal.
If there is a problem with ABS, this
warning light stays on. SeeAntilock
Brake System (ABS) Warning Light
on page 5-23. If driving safely on a wet road and it
becomes necessary to slam on the
brakes and continue braking to
avoid a sudden obstacle, a
computer senses the wheels are
slowing down. If one of the wheels
is about to stop rolling, the computer
will separately work the brakes at
each wheel.
ABS can change the brake pressure
to each wheel, as required, faster
than any driver could. This can help
you steer around the obstacle while
braking hard.
As the brakes are applied, the
computer keeps receiving updates
on wheel speed and controls
braking pressure accordingly.
Remember: ABS does not change
the time needed to get a foot up to
the brake pedal or always decrease
stopping distance. If you get too
close to the vehicle in front of you,
there will not be enough time to
apply the brakes if that vehicle
suddenly slows or stops. Always
leave enough room up ahead to
stop, even with ABS.
Using ABS
Do not pump the brakes. Just hold
the brake pedal down firmly and let
ABS work. You may hear the ABS
pump or motor operating and feel
the brake pedal pulsate. This is
normal.
Braking in Emergencies
ABS allows you to steer and brake
at the same time. In many
emergencies, steering can help
more than even the very best
braking.
Page 222 of 401
Black plate (29,1)Cadillac CTS Owner Manual (GMNA-Localizing-U.S./Canada/Mexico-
7707478) - 2015 - crc - 10/1/14
Driving and Operating 9-29
normal, and is done to periodically
check the correct operation of the
EPB system.
If the EPB fails to apply, the rear
wheels should be blocked to
prevent vehicle movement.
EPB Release
To release the EPB:
1. Place the ignition in the ACC/ACCESSORY or ON/RUN
position.
2. Apply and hold the brake pedal.
3. Push down momentarily on the EPB switch.
The EPB is released when the red
parking brake status light is off.
If the amber parking brake warning
light is on, release the EPB by
pushing down on the EPB switch
and holding it down. Continue to
hold the switch until the red parking
brake status light is off. If either light
stays on after release is attempted,
see your dealer.
{Caution
Driving with the parking brake on
can overheat the brake system
and cause premature wear or
damage to brake system parts.
Make sure that the parking brake
is fully released and the brake
warning light is off before driving.
Automatic EPB Release
The EPB will automatically release if
the vehicle is running, placed into
gear, and an attempt is made to
drive away. Avoid rapid acceleration
when the EPB is applied, to
preserve parking brake lining life.
If parking on a hill, or if the vehicle
is pulling a trailer, see Driving
Characteristics and Towing Tips on
page 9-65.
Brake Assist
This vehicle has a brake assist
feature designed to assist the driver
in stopping or decreasing vehicle
speed in emergency driving
conditions. This feature uses the
stability system hydraulic brake
control module to supplement the
power brake system under
conditions where the driver has
quickly and forcefully applied the
brake pedal in an attempt to quickly
stop or slow down the vehicle. The
stability system hydraulic brake
control module increases brake
pressure at each corner of the
vehicle until the ABS activates.
Minor brake pedal pulsation or
pedal movement during this time is
normal and the driver should
continue to apply the brake pedal as
the driving situation dictates. The
brake assist feature will
automatically disengage when the
brake pedal is released or brake
pedal pressure is quickly
decreased.
Page 260 of 401
Black plate (67,1)Cadillac CTS Owner Manual (GMNA-Localizing-U.S./Canada/Mexico-
7707478) - 2015 - crc - 10/1/14
Driving and Operating 9-67
Caution (Continued)
The vehicle could be damaged.
Avoid making very sharp turns
while trailering.
When turning with a trailer, make
wider turns than normal. Do this so
the trailer will not strike soft
shoulders, curbs, road signs, trees,
or other objects. Avoid jerky or
sudden maneuvers. Signal well in
advance.
If the trailer turn signal bulbs burn
out, the arrows on the instrument
cluster will still flash for turns. It is
important to check occasionally to
be sure the trailer bulbs are still
working.
Driving on Grades
Reduce speed and shift to a lower
gear before starting down a long or
steep downgrade. If the
transmission is not shifted down, the
brakes might get hot and no longer
work well. Vehicles can tow in D (Drive). Shift
the transmission to a lower gear if
the transmission shifts too often
under heavy loads and/or hilly
conditions.
When towing at high altitude on
steep uphill grades, consider the
following: Engine coolant will boil at
a lower temperature than at normal
altitudes. If the engine is turned off
immediately after towing at high
altitude on steep uphill grades, the
vehicle may show signs similar to
engine overheating. To avoid this,
let the engine run while parked,
preferably on level ground, with the
automatic transmission in P (Park)
for a few minutes before turning the
engine off. If the overheat warning
comes on, see
Engine Overheating
on page 10-21.
Parking on Hills
{Warning
Parking the vehicle on a hill with
the trailer attached can be
dangerous. If something goes
wrong, the rig could start to move.
People can be injured, and both
the vehicle and the trailer can be
damaged. When possible, always
park the rig on a flat surface.
If parking the rig on a hill:
1. Press the brake pedal, but do not shift into P (Park) yet. Turn
the wheels into the curb if facing
downhill or into traffic if facing
uphill.
2. Have someone place chocks under the trailer wheels.
3. When the wheel chocks are in place, release the regular brakes
until the chocks absorb the load.