buttons CADILLAC CTS SEDAN 2015 3.G Owners Manual
[x] Cancel search | Manufacturer: CADILLAC, Model Year: 2015, Model line: CTS SEDAN, Model: CADILLAC CTS SEDAN 2015 3.GPages: 401, PDF Size: 4.46 MB
Page 15 of 401
Black plate (8,1)Cadillac CTS Owner Manual (GMNA-Localizing-U.S./Canada/Mexico-
7707478) - 2015 - crc - 10/1/14
1-8 In Brief
Reclining Seatbacks
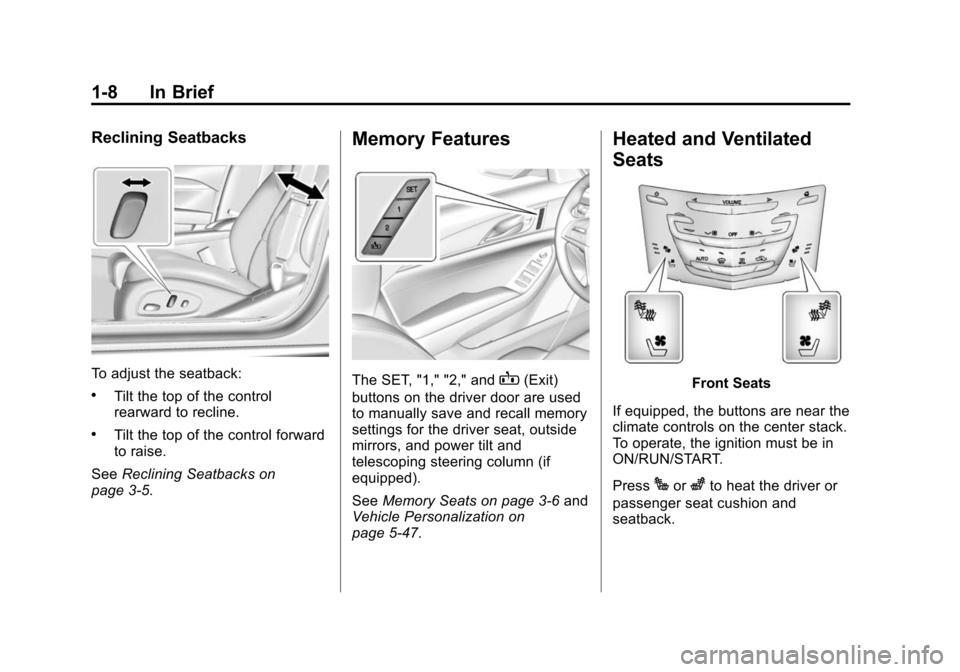
To adjust the seatback:
.Tilt the top of the control
rearward to recline.
.Tilt the top of the control forward
to raise.
See Reclining Seatbacks on
page 3-5.
Memory Features
The SET, "1," "2," andB(Exit)
buttons on the driver door are used
to manually save and recall memory
settings for the driver seat, outside
mirrors, and power tilt and
telescoping steering column (if
equipped).
See Memory Seats on page 3-6 and
Vehicle Personalization on
page 5-47.
Heated and Ventilated
Seats
Front Seats
If equipped, the buttons are near the
climate controls on the center stack.
To operate, the ignition must be in
ON/RUN/START.
Press
Jorzto heat the driver or
passenger seat cushion and
seatback.
Page 16 of 401
Black plate (9,1)Cadillac CTS Owner Manual (GMNA-Localizing-U.S./Canada/Mexico-
7707478) - 2015 - crc - 10/1/14
In Brief 1-9
PressCor{to ventilate the driver
or passenger seat. A ventilated seat
has a fan that pulls or pushes air
through the seat. The air is not
cooled.
Press the button once for the
highest setting. With each press of
the button, the seat will change to
the next lower setting, and then to
the off setting. The indicator lights
next to the buttons indicate three for
the highest setting and one for the
lowest. If the front heated seats are
on high, the level may automatically
be lowered after approximately
30 minutes.
See Heated and Ventilated Front
Seats on page 3-8.
Head Restraint
Adjustment
Do not drive until the head restraints
for all occupants are installed and
adjusted properly. To achieve a comfortable seating
position, change the seatback
recline angle as little as necessary
while keeping the seat and the head
restraint height in the proper
position.
See
Head Restraints on page 3-2
and Power Seat Adjustment on
page 3-3.
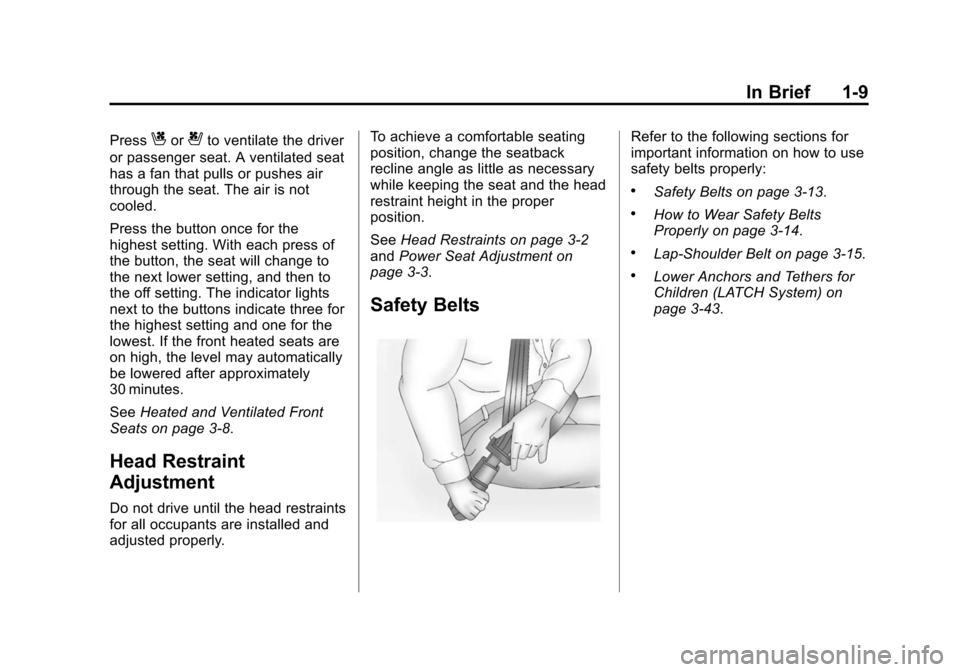
Safety Belts
Refer to the following sections for
important information on how to use
safety belts properly:
.Safety Belts on page 3-13.
.How to Wear Safety Belts
Properly on page 3-14.
.Lap-Shoulder Belt on page 3-15.
.Lower Anchors and Tethers for
Children (LATCH System) on
page 3-43.
Page 21 of 401
Black plate (14,1)Cadillac CTS Owner Manual (GMNA-Localizing-U.S./Canada/Mexico-
7707478) - 2015 - crc - 10/1/14
1-14 In Brief
Climate Controls
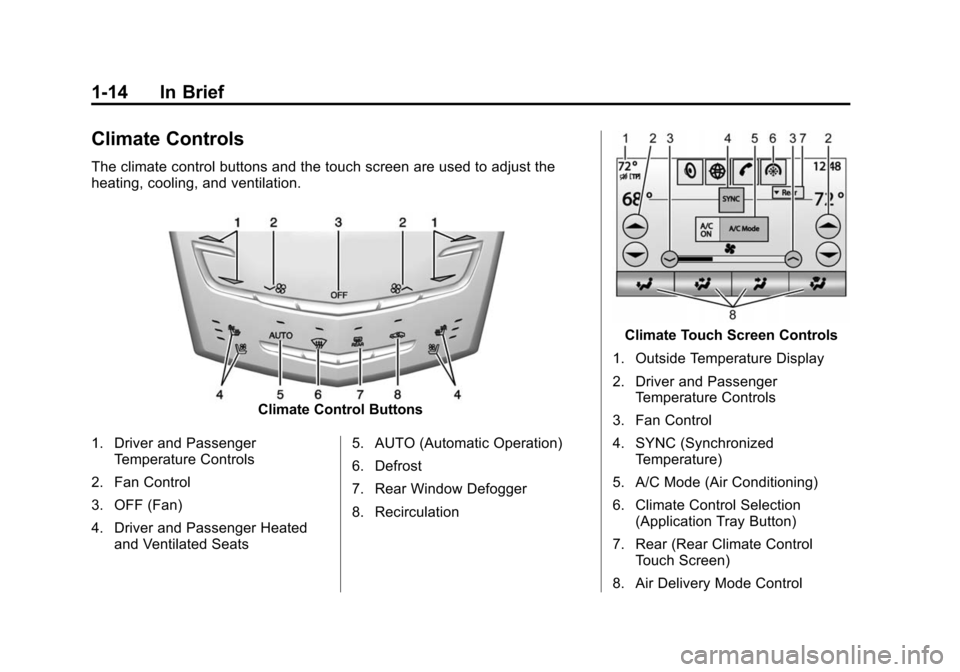
The climate control buttons and the touch screen are used to adjust the
heating, cooling, and ventilation.
Climate Control Buttons
1. Driver and Passenger Temperature Controls
2. Fan Control
3. OFF (Fan)
4. Driver and Passenger Heated and Ventilated Seats 5. AUTO (Automatic Operation)
6. Defrost
7. Rear Window Defogger
8. Recirculation
Climate Touch Screen Controls
1. Outside Temperature Display
2. Driver and Passenger Temperature Controls
3. Fan Control
4. SYNC (Synchronized Temperature)
5. A/C Mode (Air Conditioning)
6. Climate Control Selection (Application Tray Button)
7. Rear (Rear Climate Control Touch Screen)
8. Air Delivery Mode Control
Page 28 of 401
Black plate (21,1)Cadillac CTS Owner Manual (GMNA-Localizing-U.S./Canada/Mexico-
7707478) - 2015 - crc - 10/1/14
In Brief 1-21
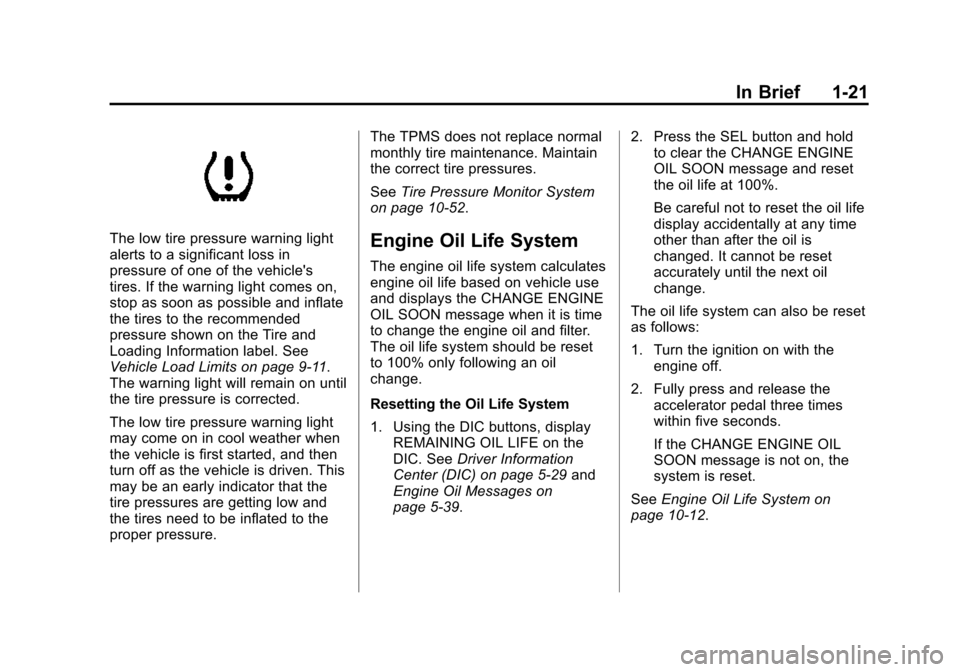
The low tire pressure warning light
alerts to a significant loss in
pressure of one of the vehicle's
tires. If the warning light comes on,
stop as soon as possible and inflate
the tires to the recommended
pressure shown on the Tire and
Loading Information label. See
Vehicle Load Limits on page 9-11.
The warning light will remain on until
the tire pressure is corrected.
The low tire pressure warning light
may come on in cool weather when
the vehicle is first started, and then
turn off as the vehicle is driven. This
may be an early indicator that the
tire pressures are getting low and
the tires need to be inflated to the
proper pressure.The TPMS does not replace normal
monthly tire maintenance. Maintain
the correct tire pressures.
See
Tire Pressure Monitor System
on page 10-52.Engine Oil Life System
The engine oil life system calculates
engine oil life based on vehicle use
and displays the CHANGE ENGINE
OIL SOON message when it is time
to change the engine oil and filter.
The oil life system should be reset
to 100% only following an oil
change.
Resetting the Oil Life System
1. Using the DIC buttons, display REMAINING OIL LIFE on the
DIC. See Driver Information
Center (DIC) on page 5-29 and
Engine Oil Messages on
page 5-39. 2. Press the SEL button and hold
to clear the CHANGE ENGINE
OIL SOON message and reset
the oil life at 100%.
Be careful not to reset the oil life
display accidentally at any time
other than after the oil is
changed. It cannot be reset
accurately until the next oil
change.
The oil life system can also be reset
as follows:
1. Turn the ignition on with the engine off.
2. Fully press and release the accelerator pedal three times
within five seconds.
If the CHANGE ENGINE OIL
SOON message is not on, the
system is reset.
See Engine Oil Life System on
page 10-12.
Page 61 of 401
Black plate (6,1)Cadillac CTS Owner Manual (GMNA-Localizing-U.S./Canada/Mexico-
7707478) - 2015 - crc - 10/1/14
3-6 Seats and Restraints
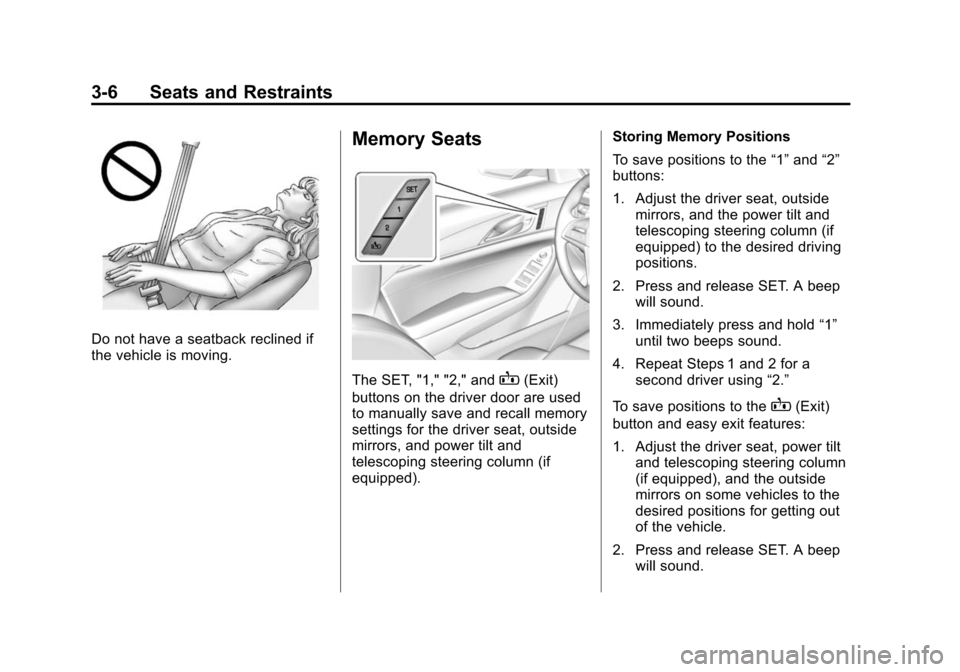
Do not have a seatback reclined if
the vehicle is moving.
Memory Seats
The SET, "1," "2," andB(Exit)
buttons on the driver door are used
to manually save and recall memory
settings for the driver seat, outside
mirrors, and power tilt and
telescoping steering column (if
equipped). Storing Memory Positions
To save positions to the
“1”and “2”
buttons:
1. Adjust the driver seat, outside mirrors, and the power tilt and
telescoping steering column (if
equipped) to the desired driving
positions.
2. Press and release SET. A beep will sound.
3. Immediately press and hold “1”
until two beeps sound.
4. Repeat Steps 1 and 2 for a second driver using “2.”
To save positions to the
B(Exit)
button and easy exit features:
1. Adjust the driver seat, power tilt and telescoping steering column
(if equipped), and the outside
mirrors on some vehicles to the
desired positions for getting out
of the vehicle.
2. Press and release SET. A beep will sound.
Page 64 of 401

Black plate (9,1)Cadillac CTS Owner Manual (GMNA-Localizing-U.S./Canada/Mexico-
7707478) - 2015 - crc - 10/1/14
Seats and Restraints 3-9
If equipped, the buttons are near the
climate controls on the center stack.
To operate, the ignition must be in
ON/RUN/START.
Press
Jorzto heat the driver or
passenger seat cushion and
seatback.
Press
Cor{to ventilate the driver
or passenger seat. A ventilated seat
has a fan that pulls or pushes air
through the seat. The air is not
cooled.
When this feature is off, the heated
and ventilated seat symbols on the
buttons are white. When a heated
seat is turned on, the symbol turns
red. When a ventilated seat is
turned on, the symbol turns blue.
Press the button once for the
highest setting. With each press of
the button, the seat will change to
the next lower setting, and then to
the off setting. The indicator lights
next to the buttons indicate three for
the highest setting and one for the
lowest. If the heated seats are on high, the level may automatically be
lowered after approximately
30 minutes.
The passenger seat may take
longer to heat up.
Remote Start Auto Heated and
Ventilated Seats
During a remote start, the heated or
ventilated seats, if equipped, can be
turned on automatically. When it is
cold outside, the heated seats turn
on, and when it is hot outside the
ventilated seats turn on. The heated
or ventilated seats are canceled
when the ignition is turned on. Press
the heated or ventilated seat button
to use the heated or ventilated seats
after the vehicle is started.
The heated or ventilated seat
indicator lights do not turn on during
a remote start.
The temperature performance of an
unoccupied seat may be reduced.
This is normal.
The heated or ventilated seats will
not turn on during a remote start
unless they are enabled in the
vehicle personalization menu. See
Remote Vehicle Start on page 2-9
and
Vehicle Personalization on
page 5-47.
Page 67 of 401
Black plate (12,1)Cadillac CTS Owner Manual (GMNA-Localizing-U.S./Canada/Mexico-
7707478) - 2015 - crc - 10/1/14
3-12 Seats and Restraints
Heated Rear Seats
{Warning
If you cannot feel temperature
change or pain to the skin, the
seat heater may cause burns.
See the Warning underHeated
and Ventilated Front Seats on
page 3-8.
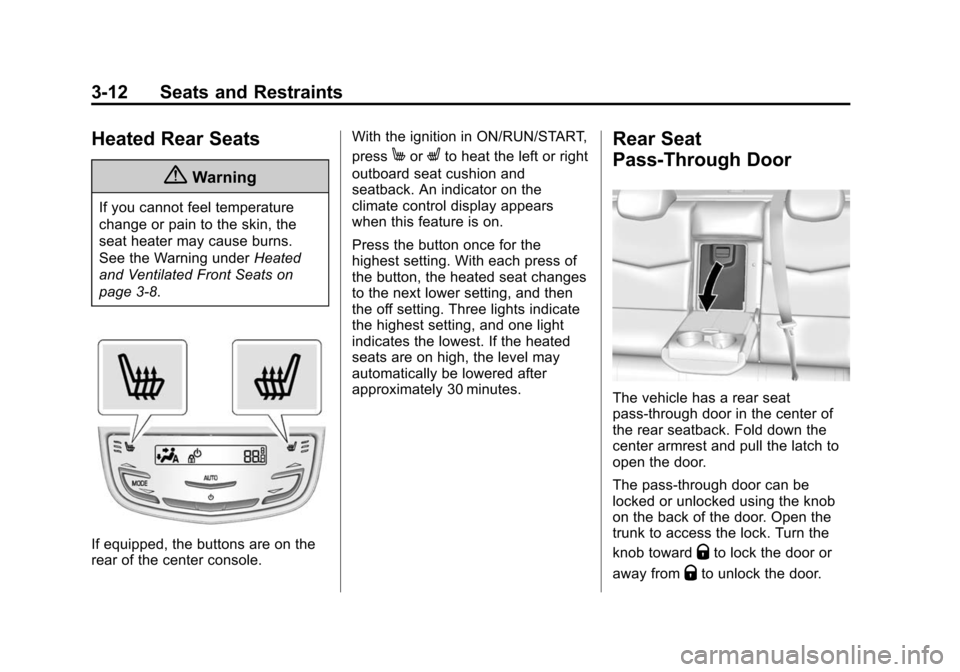
If equipped, the buttons are on the
rear of the center console. With the ignition in ON/RUN/START,
press
MorLto heat the left or right
outboard seat cushion and
seatback. An indicator on the
climate control display appears
when this feature is on.
Press the button once for the
highest setting. With each press of
the button, the heated seat changes
to the next lower setting, and then
the off setting. Three lights indicate
the highest setting, and one light
indicates the lowest. If the heated
seats are on high, the level may
automatically be lowered after
approximately 30 minutes.Rear Seat
Pass-Through Door
The vehicle has a rear seat
pass-through door in the center of
the rear seatback. Fold down the
center armrest and pull the latch to
open the door.
The pass-through door can be
locked or unlocked using the knob
on the back of the door. Open the
trunk to access the lock. Turn the
knob toward
Qto lock the door or
away from
Qto unlock the door.
Page 167 of 401
Black plate (54,1)Cadillac CTS Owner Manual (GMNA-Localizing-U.S./Canada/Mexico-
7707478) - 2015 - crc - 10/1/14
5-54 Instruments and Controls
Pair New Device
Select to pair a new device. See
“Pairing”in“Infotainment Controls”
under “Bluetooth” in the infotainment
manual.
Device Management
Select to connect to a different
phone source, disconnect a phone,
or delete a phone.
Ringtones
Press to change the ring tone for
the specific phone. The phone does
not need to be connected to change
the ring.
Voice Mail Numbers
This feature displays the voice mail
number for all connected phones.
To change the voice mail number,
select EDIT or press the EDIT
button. Type a new number, then
select SAVE or press the SAVE
button.Voice
Select and the following may
display:
.Confidence Threshold
.Prompt Length
.Audio Feedback Speed
Confidence Threshold
This feature allows the adjustment
of the sensitivity of the speech
recognition system.
Select Confirm More or
Confirm Less.
Prompt Length
This feature adjusts the voice
prompt length.
Select Short or Long.
Audio Feedback Speed
This feature adjusts the audio
feedback speed.
Select Slow, Medium, or Fast.
Display
Select and the following may
display:
.Mode
.Proximity Sensing
.Calibrate Touchscreen
.Turn Display Off
Mode
Select to change the display screen
for day or night driving.
Select Auto, Day, or Night.
Proximity Sensing
When on, certain screen buttons
and features will become visible
when a hand approaches the
screen.
Select Off, On, or On - Map Only.
Calibrate Touchscreen
Select to calibrate the touchscreen,
then follow the prompts.
Page 168 of 401
Black plate (55,1)Cadillac CTS Owner Manual (GMNA-Localizing-U.S./Canada/Mexico-
7707478) - 2015 - crc - 10/1/14
Instruments and Controls 5-55
Turn Display Off
Select to turn the display off. Press
anywhere on the display area or any
faceplate button to turn the
display on.
Rear Camera
Select and the following may
display:
.Guidance Lines
.Rear Cross Traffic Alert
.Rear Park Assist Symbols
Guidance Lines
Select to turn Off or On. See
Assistance Systems for Parking or
Backing on page 9-46.
Rear Cross Traffic Alert
Select to turn Off or On. See
Assistance Systems for Parking or
Backing on page 9-46.
Rear Park Assist Symbols
Select to turn Off or On. See
Assistance Systems for Parking or
Backing on page 9-46.
Return to Factory Settings
Select and the following may
display:
.Restore Vehicle Settings
.Clear All Private Data
.Restore Radio Settings
Restore Vehicle Settings
This allows selection of restoring
vehicle settings.
Select Restore or Cancel.
Clear All Private Data
This allows selection to clear all
private information from the vehicle.
Select Delete or Cancel.
Restore Radio Settings
This allows selection to restore
radio settings.
Select Restore or Cancel.
Software Information
Select to view the infotainment
system current software information.
Universal Remote
System
See Radio Frequency Statement on
page 13-11.
Universal Remote System
Programming
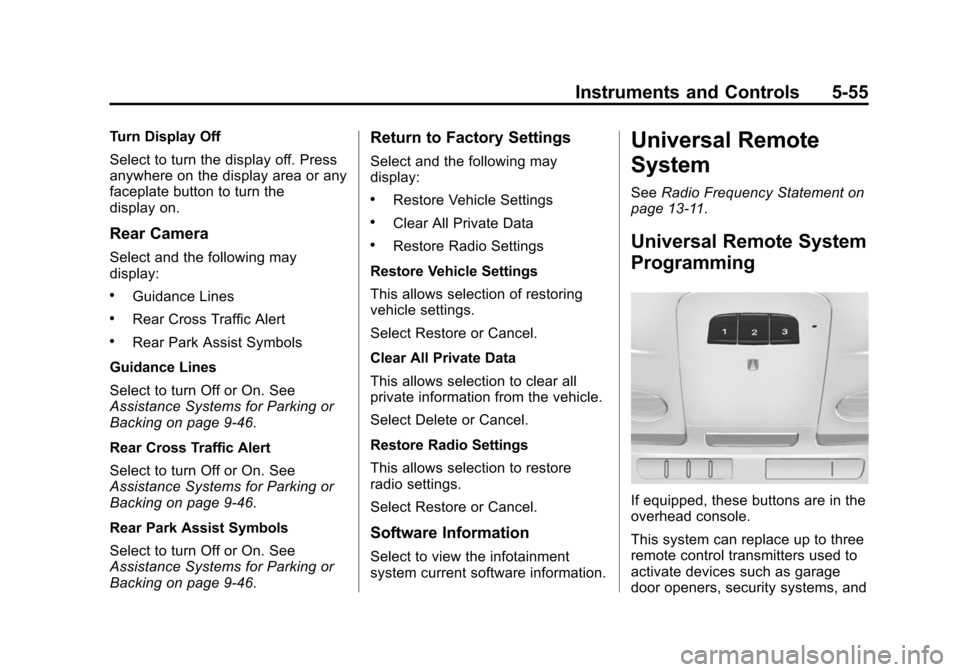
If equipped, these buttons are in the
overhead console.
This system can replace up to three
remote control transmitters used to
activate devices such as garage
door openers, security systems, and
Page 169 of 401
Black plate (56,1)Cadillac CTS Owner Manual (GMNA-Localizing-U.S./Canada/Mexico-
7707478) - 2015 - crc - 10/1/14
5-56 Instruments and Controls
home automation devices. These
instructions refer to a garage door
opener, but can be used for other
devices.
Do not use the Universal Remote
system with any garage door opener
that does not have the stop and
reverse feature. This includes any
garage door opener model
manufactured before April 1, 1982.
Read these instructions completely
before programming the Universal
Remote system. It may help to have
another person assist with the
programming process.
Keep the original hand-held
transmitter for use in other vehicles
as well as for future programming.
Erase the programming when
vehicle ownership is terminated.
See“Erasing Universal Remote
System Buttons” later in this
section. To program a garage door opener,
park outside directly in line with and
facing the garage door opener
receiver. Clear all people and
objects near the garage door.
Make sure the hand-held transmitter
has a new battery for quick and
accurate transmission of the
radio-frequency signal.
Programming the Universal
Remote System
For questions or help programming
the Universal Remote system, call
1-800-355-3515 or see
www.homelink.com.
Programming involves
time-sensitive actions, and may time
out causing the procedure to be
repeated.
To program up to three devices:
1. Hold the end of the hand-held
transmitter about 3 to 8 cm (1 to
3 in) away from the Universal
Remote system buttons with the
indicator light in view. The hand-held transmitter was
supplied by the manufacturer of
the garage door opener receiver.
2. At the same time, press and hold both the hand-held
transmitter button and one of the
three Universal Remote system
buttons to be used to operate
the garage door. Do not release
either button until the indicator
light changes from a slow to a
rapid flash. Then release both
buttons.
Some garage door openers may
require substitution of Step 2
with the procedure under in
“Radio Signals for Canada and
Some Gate Operators” later in
this section.
3. Press and hold the newly programmed Universal Remote
system button for five seconds
while watching the indicator light
and garage door activation.
.If the indicator light stays on
continuously or the garage
door moves when the