remote control CADILLAC DTS 2008 1.G Owners Manual
[x] Cancel search | Manufacturer: CADILLAC, Model Year: 2008, Model line: DTS, Model: CADILLAC DTS 2008 1.GPages: 454, PDF Size: 2.48 MB
Page 1 of 454
Seats and Restraint Systems........................... 1-1
Front Seats
............................................... 1-2
Rear Seats
............................................... 1-9
Safety Belts
.............................................1-10
Child Restraints
.......................................1-31
Airbag System
.........................................1-53
Restraint System Check
............................1-70
Features and Controls..................................... 2-1
Keys
........................................................ 2-3
Doors and Locks
......................................2-10
Windows
.................................................2-14
Theft-Deterrent Systems
............................2-18
Starting and Operating Your Vehicle
...........2-22
Mirrors
....................................................2-36
Object Detection Systems
..........................2-40
OnStar
®System
......................................2-49
Universal Home Remote System
................2-52
Storage Areas
.........................................2-59
Sunroof
..................................................2-61
Instrument Panel............................................. 3-1
Instrument Panel Overview
.......................... 3-4
Climate Controls
......................................3-42
Warning Lights, Gages, and Indicators
........3-53
Driver Information Center (DIC)
..................3-70
Audio System(s)
.......................................3-96Driving Your Vehicle....................................... 4-1
Your Driving, the Road, and the Vehicle
....... 4-2
Towing
...................................................4-26
Service and Appearance Care.......................... 5-1
Service
..................................................... 5-3
Fuel
......................................................... 5-5
Checking Things Under the Hood
...............5-12
Headlamp Aiming
.....................................5-47
Bulb Replacement
....................................5-50
Windshield Wiper Blade Replacement
.........5-50
Tires
......................................................5-52
Appearance Care
.....................................5-90
Vehicle Identi�cation
.................................5-99
Electrical System
....................................5-100
Capacities and Speci�cations
...................5-109
Maintenance Schedule..................................... 6-1
Maintenance Schedule
................................ 6-2
Customer Assistance Information.................... 7-1
Customer Assistance and Information
........... 7-2
Reporting Safety Defects
...........................7-16
Vehicle Data Recording and Privacy
...........7-18
Index................................................................ 1
2008 Cadillac DTS Owner ManualM
Page 8 of 454
Press a button to turn on the desired feature. A light on
that button will display to show which feature is on.
There are three temperature settings for each feature.
A column of three lights next to the buttons will
display which setting the feature is in: high, medium or
low. Three lights indicate the highest setting, two
lights for medium and one light for the lowest setting.
When you press a button, the feature will turn on at the
highest setting. Each time you press the button, the
feature will go down one temperature setting.
To turn the feature off, keep pressing the button until
the display lights turn off.
If your vehicle has remote vehicle start and is started
using the remote keyless entry transmitter, the front
heated seats will be turned on to the high setting if it is
cold outside. See “Remote Vehicle Start” under
Remote Keyless Entry (RKE) System Operation on
page 2-5. When the key is inserted into the ignition and
the ignition is turned on, this feature will turn off.
To turn it back on, press the desired button.Memory Seat, Mirrors and Steering
Wheel
Your vehicle may have the memory package.
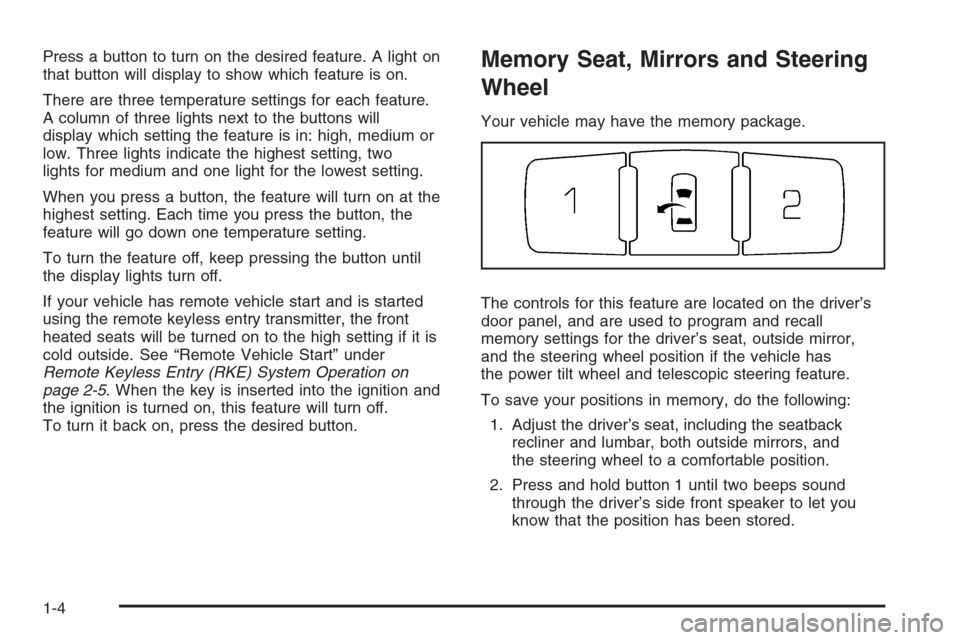
The controls for this feature are located on the driver’s
door panel, and are used to program and recall
memory settings for the driver’s seat, outside mirror,
and the steering wheel position if the vehicle has
the power tilt wheel and telescopic steering feature.
To save your positions in memory, do the following:
1. Adjust the driver’s seat, including the seatback
recliner and lumbar, both outside mirrors, and
the steering wheel to a comfortable position.
2. Press and hold button 1 until two beeps sound
through the driver’s side front speaker to let you
know that the position has been stored.
1-4
Page 9 of 454
A second seating, mirror, and steering wheel position
can be programmed by repeating the above steps
and pressing button 2 for a second driver.
To recall your memory positions, the vehicle must be in
PARK (P). Press and release either button 1 or
button 2 corresponding to the desired driving position.
The seat, outside mirrors, and steering wheel will move
to the position previously stored for the identi�ed
driver. You will hear a single beep.
If you use the remote keyless entry transmitter to enter
your vehicle and the remote recall memory feature
is on, automatic seat and mirror movement will occur.
See “MEMORY SEAT RECALL” underDIC Vehicle
Customization on page 3-87for more information.
To stop recall movement of the memory feature at any
time, press one of the power seat controls, memory
buttons, power tilt wheel control, or power mirror
buttons.
If something has blocked the driver’s seat and/or the
steering column while recalling a memory position, the
driver’s seat and/or the steering column recall may
stop. If this happens remove the obstruction, then press
the appropriate control for the area that is not recalling
for two seconds. Try recalling the memory position again
by pressing the appropriate memory button. If the
memory position is still not recalling, see your dealer for
service.Easy Exit Recall
The control for this feature is located on the driver’s
door panel between buttons 1 and 2.
With the vehicle in PARK (P), the exit position can be
recalled by pressing the exit button. You will hear
a single beep. The driver’s seat will move back, and if
the vehicle has the power tilt wheel and telescopic
steering feature, the power telescopic steering column
will move up and forward.
If the easy exit seat feature is on in the DIC, automatic
seat and power telescopic steering column movement
will occur when the key is removed from the ignition.
See “EASY EXIT RECALL” underDIC Vehicle
Customization on page 3-87for more information.
Further programming for automatic seat and steering
wheel movement can be done using the Driver
Information Center (DIC). You can select or not select
the following:
The easy exit recall feature
The memory seat recall feature
For programming information, seeDIC Vehicle
Customization on page 3-87.
1-5
Page 77 of 454
Keys...............................................................2-3
Remote Keyless Entry (RKE) System................2-4
Remote Keyless Entry (RKE) System
Operation...................................................2-5
Remote Vehicle Start......................................2-8
Doors and Locks............................................2-10
Door Locks..................................................2-10
Central Door Unlocking System......................2-10
Power Door Locks........................................2-10
Programmable Automatic Door Locks..............2-11
Rear Door Security Locks..............................2-11
Lockout Protection........................................2-12
Trunk..........................................................2-12
Windows........................................................2-14
Power Windows............................................2-15
Sun Visors...................................................2-17
Theft-Deterrent Systems..................................2-18
Valet Lockout Switch.....................................2-18
Content Theft-Deterrent.................................2-19
PASS-Key
®III+ Electronic Immobilizer.............2-20
PASS-Key®III+ Electronic Immobilizer
Operation.................................................2-21Starting and Operating Your Vehicle................2-22
New Vehicle Break-In....................................2-22
Ignition Positions..........................................2-23
Retained Accessory Power (RAP)...................2-24
Starting the Engine.......................................2-24
Engine Coolant Heater..................................2-26
Automatic Transmission Operation...................2-27
Performance Shifting.....................................2-29
Parking Brake..............................................2-30
Shifting Into Park..........................................2-31
Shifting Out of Park......................................2-33
Parking Over Things That Burn.......................2-34
Engine Exhaust............................................2-34
Running the Vehicle While Parked..................2-35
Mirrors...........................................................2-36
Automatic Dimming Rearview Mirror................2-36
Compass.....................................................2-36
Outside Power Foldaway Mirrors.....................2-38
Outside Automatic Dimming Mirror..................2-39
Park Tilt Mirrors............................................2-39
Outside Convex Mirror...................................2-39
Outside Heated Mirrors..................................2-39
Section 2 Features and Controls
2-1
Page 78 of 454

Object Detection Systems...............................2-40
Ultrasonic Front and Rear Parking
Assist (UFRPA).........................................2-40
Side Blind Zone Alert (SBZA).........................2-43
Lane Departure Warning (LDW)......................2-46
OnStar
®System.............................................2-49
Universal Home Remote System......................2-52
Universal Home Remote System Operation
(With Three Round LED)............................2-52Storage Areas................................................2-59
Glove Box...................................................2-59
Cupholders..................................................2-59
Coinholder(s)................................................2-59
Front Storage Area.......................................2-59
Center Console Storage.................................2-59
Center Flex Storage Unit...............................2-60
Floor Mats...................................................2-60
Rear Seat Armrest........................................2-60
Convenience Net..........................................2-60
Sunroof.........................................................2-61
Section 2 Features and Controls
2-2
Page 84 of 454
Remote Vehicle Start
The remote vehicle starting feature allows you to start
the engine from outside of the vehicle. It also starts up the
vehicle’s automatic climate control system. When the
remote start system is active, the climate control system
will heat and cool the inside of the vehicle according to
the previous settings of the system before turning the
vehicle off. The rear window defogger will be turned on by
the climate control system when it is cold outside. If the
vehicle has heated seats, they will also turn on when it is
cold outside. SeeHeated and Cooled Seats on page 1-3
for additional information. Cooled seats are not activated
during a remote start. Normal operation of the climate
control system will return after the key is turned to
ON/RUN. SeeDual Climate Control System on
page 3-42.
Laws in some communities may restrict the use of
remote starters. For example, some laws may require a
person using remote start to have the vehicle in view
when doing so. Check local regulations for any
requirements on remote starting of vehicles.
Do not use the remote start feature if your vehicle is low
on fuel. Your vehicle may run out of fuel.
If your vehicle has the remote start feature, the RKE
transmitter functions will have an increased range
of operation. However, the range may be less while the
vehicle is running.There are other conditions which can affect the
performance of the transmitter, seeRemote Keyless
Entry (RKE) System Operation on page 2-5for
additional information.
/(Remote Start):This button will be on the RKE
transmitter if you have remote start.
To start the vehicle using the remote start feature:
1. Aim the transmitter at the vehicle.
2. Press and release the transmitter’s lock button, then
immediately press and hold the transmitter’s remote
start button until the turn signal lights �ash or if the
vehicle’s lights are not visible, press and hold the
remote start button for at least four seconds. The
vehicle’s doors will lock. Pressing the remote start
button again after the vehicle has started will turn off
the ignition.
When the vehicle starts, the parking lamps will turn
on and remain on while the vehicle is running.
3. If it is the �rst remote start since the vehicle has been
driven, repeat these steps, while the engine is still
running, to extend the engine running time by
10 minutes. Remote start can be extended one time.
After entering the vehicle during a remote start, insert
and turn the key to ON/RUN to drive the vehicle.
2-8
Page 85 of 454
If the vehicle is left running it will automatically shut off
after 10 minutes unless a time extension has been done.
To manually shut off a remote start:
Aim the RKE transmitter at the vehicle and press
the remote start button until the parking lamps
turn off.
Turn on the hazard warning �ashers.
Turn the ignition switch on and then off.
The remote vehicle start feature provides two separate
starts, each with 10 minutes of engine running, or it
provides one start with 10 minutes of engine running that
may be extended 10 more minutes. If you press and
release the transmitter lock button and then press and
hold the remote start button on the RKE transmitter again
before the �rst 10 minutes of engine running time has
expired, 10 minutes are added to the remaining minutes.
For example, if the lock button and then the remote start
buttons are pressed again after �ve minutes of the engine
run time, 10 minutes are added and you now have
15 minutes of engine running. The added ten minutes are
considered a second remote vehicle start.
Once two remote starts or a single start with a time
extension have been used, the vehicle must be started
with the ignition key before you can use the remote
start feature again.The remote vehicle start feature will not operate if the
key is in the ignition, the hood is not closed, or if there is
an emission control system malfunction.
The engine will turn off during a remote vehicle start if
the coolant temperature gets too high, or the oil pressure
is too low.
Your vehicle was shipped from the factory with the
remote vehicle start system enabled. The system may
be disabled through the Driver Information Center (DIC).
See “REMOTE START” underDIC Vehicle
Customization on page 3-87for additional information.
SeeEngine Exhaust on page 2-34for important safety
information when using remote start in a closed garage.
Remote Start Ready
If your vehicle does not have the remote vehicle start
feature, it may have the remote start ready feature.
This feature allows your dealer/retailer to add the
manufacturer’s remote vehicle start feature. See your
dealer/retailer if you would like to add the manufacturer’s
remote vehicle start feature to your vehicle.
2-9
Page 88 of 454
The rear doors on your vehicle cannot be opened from
the inside when this feature is in use.
When you want to open a rear door when the security
lock is on, do the following:
1. Unlock the door using the remote keyless entry
transmitter, the front door power lock switch, or
by lifting the rear door manual lock knob.
2. Open the door from the outside.
To cancel the rear door security lock, do the following:
1. Unlock the door and open it from the outside.
2. Turn the knob to the horizontal position to
disengage the lock.
3. Do the same for the other rear door.
Lockout Protection
If the key is in the ignition and the power door lock
switch is used to lock the doors, all doors will lock
and then the driver’s door will unlock. It is always
recommended that you remove the ignition key when
locking your vehicle.
The lockout protection feature can be overridden by
holding the power door lock switch for three seconds or
longer.
Trunk
{CAUTION:
It can be dangerous to drive with the trunk lid
open because carbon monoxide (CO) gas can
come into your vehicle. You cannot see or
smell CO. It can cause unconsciousness and
even death. If you must drive with the trunk lid
open or if electrical wiring or other cable
connections must pass through the seal
between the body and the trunk lid:
Make sure all other windows are shut.
Turn the fan on your heating or cooling
system to its highest speed and select the
control setting that will force outside air
into your vehicle. See Climate Control
System.
If you have air outlets on or under the
instrument panel, open them all the way.
SeeEngine Exhaust on page 2-34.
2-12
Page 89 of 454
Remote Trunk Release
G
(Remote Trunk Release):The remote trunk
release button is located to the left of the steering wheel
next to the instrument panel brightness control. Press the
button to open the trunk. To use this feature, your vehicle
must be in PARK (P) or NEUTRAL (N) and the valet
lockout switch must be off.
You can also press the button with the trunk symbol on
the remote keyless entry transmitter to open the trunk.
To disable this feature, seeValet Lockout Switch on
page 2-18.
If the vehicle has lost power, the trunk can be accessed
using the Rear Seat Pass-Through. See Rear Seat
Pass-Through below.
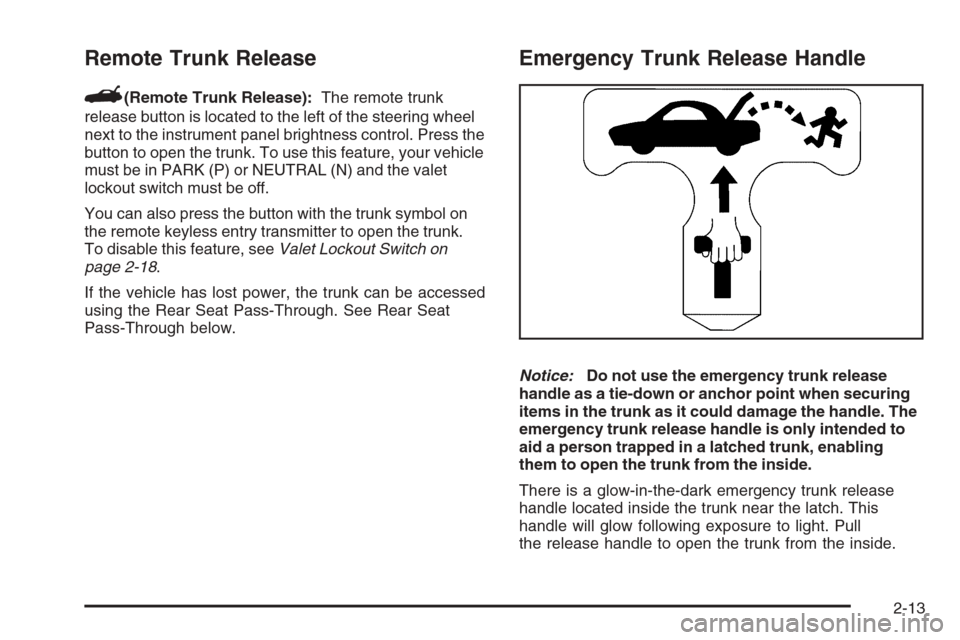
Emergency Trunk Release Handle
Notice:Do not use the emergency trunk release
handle as a tie-down or anchor point when securing
items in the trunk as it could damage the handle. The
emergency trunk release handle is only intended to
aid a person trapped in a latched trunk, enabling
them to open the trunk from the inside.
There is a glow-in-the-dark emergency trunk release
handle located inside the trunk near the latch. This
handle will glow following exposure to light. Pull
the release handle to open the trunk from the inside.
2-13
Page 126 of 454

Available Services with Safe & Sound Plan
Automatic Noti�cation of Airbag Deployment
Advanced Automatic Crash Noti�cation (AACN)
(If equipped)
Link to Emergency Services
Roadside Assistance
Stolen Vehicle Location Assistance
AccidentAssist
Remote Door Unlock/Vehicle Alert
OnStar Vehicle Diagnostics
GM Goodwrench On Demand Diagnostics
OnStar Hands-Free Calling with 30 complimentary
minutes
OnStar Virtual Advisor (U.S. Only)
Available Services included with
Directions & Connections Plan
All Safe and Sound Plan Services
Driving Directions - Advisor delivered or OnStar
Turn-by-Turn Navigation (If equipped)
RideAssist
Information and Convenience Services
OnStar Hands-Free Calling
OnStar Hands-Free Calling allows eligible OnStar
subscribers to make and receive calls using voice
commands. Hands-Free Calling is fully integrated into
the vehicle, and can be used with OnStar Pre-Paid
Minute Packages. Hands-Free Calling may also
be linked to a Verizon Wireless service plan in the U.S.
or a Bell Mobility service plan in Canada, depending
on eligibility. To �nd out more, refer to the OnStar
Owner’s Guide in the vehicle’s glove box, visit
www.onstar.com or www.onstar.ca, or speak with an
OnStar advisor by pressing the OnStar button or calling
1-888-4-ONSTAR (1-888-466-7827).
OnStar Virtual Advisor
OnStar Virtual Advisor is a feature of OnStar Hands-Free
Calling that uses your minutes to access location-based
weather, local traffic reports, and stock quotes. By
pressing the phone button and giving a few simple voice
commands, you can browse through the various topics.
See the OnStar Owner’s Guide for more information
(Only available in the continental U.S.).
OnStar Steering Wheel Controls
Your vehicle may have a Talk/Mute button that can be
used to interact with OnStar Hands-Free Calling.
SeeAudio Steering Wheel Controls on page 3-118for
more information.
2-50