tow CADILLAC DTS 2009 1.G Owners Manual
[x] Cancel search | Manufacturer: CADILLAC, Model Year: 2009, Model line: DTS, Model: CADILLAC DTS 2009 1.GPages: 462, PDF Size: 2.46 MB
Page 1 of 462

Seats and Restraint System............................. 1-1
Head Restraints
......................................... 1-2
Front Seats
............................................... 1-3
Rear Seats
..............................................1-10
Safety Belts
.............................................1-12
Child Restraints
.......................................1-33
Airbag System
.........................................1-55
Restraint System Check
............................1-70
Features and Controls..................................... 2-1
Keys
........................................................ 2-3
Doors and Locks
......................................2-10
Windows
.................................................2-15
Theft-Deterrent Systems
............................2-20
Starting and Operating Your Vehicle
...........2-24
Mirrors
....................................................2-38
Object Detection Systems
..........................2-42
OnStar
®System
......................................2-51
Universal Home Remote System
................2-55
Storage Areas
.........................................2-62
Sunroof
..................................................2-64
Instrument Panel............................................. 3-1
Instrument Panel Overview
.......................... 3-4
Climate Controls
......................................3-40
Warning Lights, Gages, and Indicators
........3-50Driver Information Center (DIC)
..................3-67
Audio System(s)
.......................................3-95
Driving Your Vehicle....................................... 4-1
Your Driving, the Road, and the Vehicle
....... 4-2
Towing
...................................................4-26
Service and Appearance Care.......................... 5-1
Service
..................................................... 5-3
Fuel
......................................................... 5-5
Checking Things Under the Hood
...............5-10
Headlamp Aiming
.....................................5-43
Bulb Replacement
....................................5-46
Windshield Wiper Blade Replacement
.........5-46
Tires
......................................................5-48
Appearance Care
.....................................5-86
Vehicle Identi�cation
.................................5-94
Electrical System
......................................5-94
Capacities and Speci�cations
...................5-103
Maintenance Schedule..................................... 6-1
Maintenance Schedule
................................ 6-2
Customer Assistance Information.................... 7-1
Customer Assistance and Information
........... 7-2
Reporting Safety Defects
...........................7-15
Vehicle Data Recording and Privacy
...........7-17
Index................................................................ 1
2009 Cadillac DTS Owner ManualM
Page 12 of 462

Easy Exit Recall
The control for this feature is located on the driver door
panel between buttons 1 and 2.
With the vehicle in P (Park), the exit position can be
recalled by pressing the exit button. You will hear
a single beep. The driver seat will move back, and if the
vehicle has the power tilt wheel and telescopic steering
feature, the power telescopic steering column will
move up and forward.
If the easy exit seat feature is on in the DIC, automatic
seat and power telescopic steering column movement
will occur when the key is removed from the ignition.
See “EASY EXIT RECALL” underDIC Vehicle
Customization on page 3-86for more information.
Further programming for automatic seat and steering
wheel movement can be done using the Driver
Information Center (DIC). You can select or not
select the following:
The easy exit recall feature
The memory seat recall feature
For programming information, seeDIC Vehicle
Customization on page 3-86.
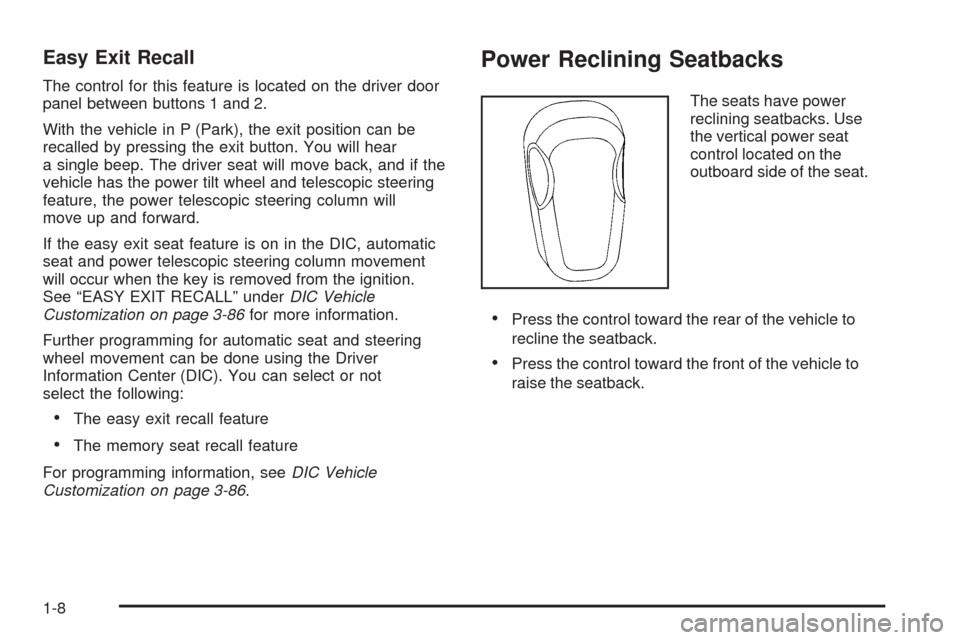
Power Reclining Seatbacks
The seats have power
reclining seatbacks. Use
the vertical power seat
control located on the
outboard side of the seat.
Press the control toward the rear of the vehicle to
recline the seatback.
Press the control toward the front of the vehicle to
raise the seatback.
1-8
Page 31 of 462

4. If equipped with a shoulder belt height adjuster,
move it to the height that is right for you. See
“Shoulder Belt Height Adjustment” later in this
section for instructions on use and important safety
information.
5. To make the lap part tight, pull up on the
shoulder belt.
It may be necessary to pull stitching on the safety
belt through the latch plate to fully tighten the
lap belt on smaller occupants.To unlatch the belt, push the button on the buckle.
The belt should return to its stowed position.
Slide the latch plate up the safety belt webbing when
the safety belt is not in use. The latch plate should
rest on the stitching on the safety belt, near the guide
loop on the side wall.
Before a door is closed, be sure the safety belt is out
of the way. If a door is slammed against a safety belt,
damage can occur to both the safety belt and the vehicle.
1-27
Page 51 of 462

{CAUTION:
Do not attach more than one child restraint to a
single anchor. Attaching more than one child
restraint to a single anchor could cause the anchor
or attachment to come loose or even break during
a crash. A child or others could be injured. To
reduce the risk of serious or fatal injuries during a
crash, attach only one child restraint per anchor.
{CAUTION:
Children can be seriously injured or strangled if a
shoulder belt is wrapped around their neck and
the safety belt continues to tighten. Buckle any
unused safety belts behind the child restraint so
children cannot reach them. Pull the shoulder belt
all the way out of the retractor to set the lock, if
your vehicle has one, after the child restraint has
been installed.Notice:Do not let the LATCH attachments rub
against the vehicle’s safety belts. This may damage
these parts. If necessary, move buckled safety
belts to avoid rubbing the LATCH attachments.
Do not fold the empty rear seat with a safety belt
buckled. This could damage the safety belt or
the seat. Unbuckle and return the safety belt to its
stowed position, before folding the seat.
1. Attach and tighten the lower attachments to the
lower anchors. If the child restraint does not have
lower attachments or the desired seating position
does not have lower anchors, secure the child
restraint with the top tether and the safety belts.
Refer to your child restraint manufacturer
instructions and the instructions in this manual.
1.1. Find the lower anchors for the desired
seating position.
1.2. Put the child restraint on the seat.
1.3. Attach and tighten the lower attachments on
the child restraint to the lower anchors.
1-47
Page 55 of 462

5. To tighten the belt, push down on the child restraint,
pull the shoulder portion of the belt to tighten the
lap portion of the belt and feed the shoulder
belt back into the retractor. When installing a
forward-facing child restraint, it may be helpful to
use your knee to push down on the child restraint
as you tighten the belt.6. If the child restraint has a top tether, follow the child
restraint manufacturer’s instructions regarding the
use of the top tether. SeeLower Anchors and
Tethers for Children (LATCH) on page 1-43for
more information.
7. Push and pull the child restraint in different
directions to be sure it is secure.
To remove the child restraint, unbuckle the vehicle safety
belt and let it return to the stowed position. If the top
tether is attached to a top tether anchor, disconnect it.
Securing a Child Restraint in the
Center Front Seat Position
{CAUTION:
A child in a child restraint in the center front seat
can be badly injured or killed by the frontal airbags
if they in�ate. Never secure a child restraint in the
center front seat. It is always better to secure a
child restraint in a rear seat.
Do not use child restraints in the center front seat
position.
1-51
Page 59 of 462

If a child restraint has been installed and the on
indicator is lit, see “If the On Indicator is Lit for a Child
Restraint ” underPassenger Sensing System on
page 1-64for more information.
To remove the child restraint, unbuckle the vehicle
safety belt and let it return to the stowed position.
Airbag System
The vehicle has the following airbags:
A frontal airbag for the driver.
A frontal airbag for the right front passenger.
A seat-mounted side impact airbag for the driver.
A seat-mounted side impact airbag for the right front
passenger.
The vehicle may also have the following airbags:
A roof-rail airbag for the driver and the passenger
seated directly behind the driver.
A roof-rail airbag for the right front passenger and
the passenger seated directly behind the right
front passenger.All of the airbags in your vehicle will have the word
AIRBAG embossed in the trim or on an attached label
near the deployment opening.
For frontal airbags, the word AIRBAG will appear on the
middle part of the steering wheel for the driver and
on the instrument panel for the right front passenger.
With seat-mounted side impact airbags, the word
AIRBAG will appear on the side of the seatback closest
to the door.
With roof-rail airbags, the word AIRBAG will appear
along the headliner or trim.
Airbags are designed to supplement the protection
provided by safety belts. Even though today’s airbags
are also designed to help reduce the risk of injury
from the force of an in�ating bag, all airbags must in�ate
very quickly to do their job.
1-55
Page 66 of 462

How Does an Airbag Restrain?
In moderate to severe frontal or near frontal collisions,
even belted occupants can contact the steering wheel or
the instrument panel. In moderate to severe side
collisions, even belted occupants can contact the inside
of the vehicle.
Airbags supplement the protection provided by safety
belts. Frontal airbags distribute the force of the impact
more evenly over the occupant’s upper body, stopping
the occupant more gradually. Seat-mounted side impact
and roof-rail airbags distribute the force of the impact
more evenly over the occupant’s upper body.
But airbags would not help in many types of collisions,
primarily because the occupant’s motion is not
toward those airbags. SeeWhen Should an Airbag
Inflate? on page 1-60for more information.
Airbags should never be regarded as anything more
than a supplement to safety belts.
What Will You See After an Airbag
In�ates?
After the frontal airbags and seat-mounted side impact
airbags in�ate, they quickly de�ate, so quickly that
some people may not even realize an airbag in�ated.
Roof-rail airbags may still be at least partially in�ated
for some time after they deploy. Some components
of the airbag module may be hot for several minutes.
For location of the airbag modules, seeWhat Makes an
Airbag Inflate? on page 1-61.
The parts of the airbag that come into contact with you
may be warm, but not too hot to touch. There may
be some smoke and dust coming from the vents in the
de�ated airbags. Airbag in�ation does not prevent
the driver from seeing out of the windshield or being
able to steer the vehicle, nor does it prevent people from
leaving the vehicle.
1-62
Page 72 of 462

Additional Factors Affecting System
Operation
Safety belts help keep the passenger in position on the
seat during vehicle maneuvers and braking, which helps
the passenger sensing system maintain the passenger
airbag status. See “Safety Belts” and “Child Restraints” in
the Index for additional information about the importance
of proper restraint use.
A thick layer of additional material, such as a blanket or
cushion, or aftermarket equipment such as seat covers,
seat heaters, and seat massagers can affect how well the
passenger sensing system operates. We recommend
that you not use seat covers or other aftermarket
equipment except when approved by GM for your speci�c
vehicle. SeeAdding Equipment to Your Airbag-Equipped
Vehicle on page 1-69for more information about
modi�cations that can affect how the system operates.
{CAUTION:
Stowing of articles under the passenger seat or
between the passenger seat cushion and seatback
may interfere with the proper operation of the
passenger sensing system.
Servicing Your Airbag-Equipped
Vehicle
Airbags affect how the vehicle should be serviced.
There are parts of the airbag system in several places
around the vehicle. Your dealer/retailer and the
service manual have information about servicing the
vehicle and the airbag system. To purchase a service
manual, seeService Publications Ordering Information
on page 7-16.
{CAUTION:
For up to 10 seconds after the ignition is turned off
and the battery is disconnected, an airbag can still
in�ate during improper service. You can be injured
if you are close to an airbag when it in�ates. Avoid
yellow connectors. They are probably part of the
airbag system. Be sure to follow proper service
procedures, and make sure the person performing
work for you is quali�ed to do so.
1-68
Page 100 of 462

See your dealer/retailer or a locksmith who can service
PASS-Key®III+ to get a new key blank that is cut
exactly as the ignition key that operates the system.
To program the new key:
1. Verify that the new key has a
1stamped on it.
2. Insert the original, already programmed, key in the
ignition and start the engine. If the engine will not
start, see your dealer/retailer for service.
3. After the engine has started, turn the key to
LOCK/OFF, and remove the key.
4. Insert the new key to be programmed and turn it to
the ON/RUN position within �ve seconds of turning
the original key to LOCK/OFF.
The security light will turn off once the key has
been programmed.
5. Repeat Steps 1 through 4 if additional keys are to
be programmed.
If you lose or damage your PASS-Key
®III+ key, see
your dealer/retailer or a locksmith who can service
PASS-Key
®III+ to have a new key made.
Do not leave the key or device that disarms or
deactivates the theft deterrent system in the vehicle.
Starting and Operating
Your Vehicle
New Vehicle Break-In
Notice:The vehicle does not need an elaborate
break-in. But it will perform better in the long run if
you follow these guidelines:
Do not drive at any one constant speed, fast or
slow, for the �rst 500 miles (805 km). Do not
make full-throttle starts. Avoid downshifting to
brake or slow the vehicle.
Avoid making hard stops for the �rst 200 miles
(322 km) or so. During this time the new brake
linings are not yet broken in. Hard stops
with new linings can mean premature wear and
earlier replacement. Follow this breaking-in
guideline every time you get new brake linings.
Do not tow a trailer during break-in. SeeTowing
a Trailer on page 4-28for the trailer towing
capabilities of your vehicle and more
information.
Following break-in, engine speed and load can be
gradually increased.
2-24
Page 105 of 462

Automatic Transmission Operation
The automatic transmission may have a shift lever
located either on the steering column or on the console
between the seats.
There are several different positions for the shift lever.
P (Park):This position locks the front wheels. It is
the best position to use when you start the engine
because the vehicle cannot move easily.{CAUTION:
It is dangerous to get out of the vehicle if the shift
lever is not fully in P (Park) with the parking brake
�rmly set. The vehicle can roll.
Do not leave the vehicle when the engine is
running unless you have to. If you have left the
engine running, the vehicle can move suddenly.
You or others could be injured. To be sure the
vehicle will not move, even when you are on fairly
level ground, always set the parking brake and
move the shift lever to P (Park). SeeShifting Into
Park on page 2-33. If you are pulling a trailer,
seeTowing a Trailer on page 4-28.
Make sure the shift lever is fully in P (Park) before
starting the engine. The vehicle has an automatic
transmission shift lock control system. You have to fully
apply the regular brakes before you can shift from
P (Park) while the ignition key is in ON/RUN. If you
cannot shift out of P (Park), ease pressure on the shift
lever. Push the shift lever all the way into P (Park)
as you maintain brake application. Then move the shift
lever into another gear. SeeShifting Out of Park on
page 2-34.
2-29