seats CADILLAC DTS 2011 1.G Owner's Manual
[x] Cancel search | Manufacturer: CADILLAC, Model Year: 2011, Model line: DTS, Model: CADILLAC DTS 2011 1.GPages: 470, PDF Size: 4.72 MB
Page 130 of 470
Black plate (26,1)Cadillac DTS Owner Manual - 2011
To Use the Engine Coolant Heater
1. Turn off the engine.
2. Open the hood and unwrap the electrical cord.The electrical cord is located on the driver side of
the engine, behind the transmission dipstick/fluid
fill location and next to the engine.
3. Plug it into a normal, grounded 110-volt AC outlet.
{WARNING:
Plugging the cord into an ungrounded outlet could
cause an electrical shock. Also, the wrong kind of
extension cord could overheat and cause a fire.
You could be seriously injured. Plug the cord into
a properly grounded three-prong 110-volt AC
outlet. If the cord will not reach, use a heavy-duty
three-prong extension cord rated for at least
15 amps.
4. Before starting the engine, be sure to unplug and store the cord as it was before to keep it away from
moving engine parts and prevent damage. The length of time the heater should remain plugged in
depends on several factors. Ask a dealer in the area
where you will be parking the vehicle for the best advice
on this.
Automatic Transmission Operation
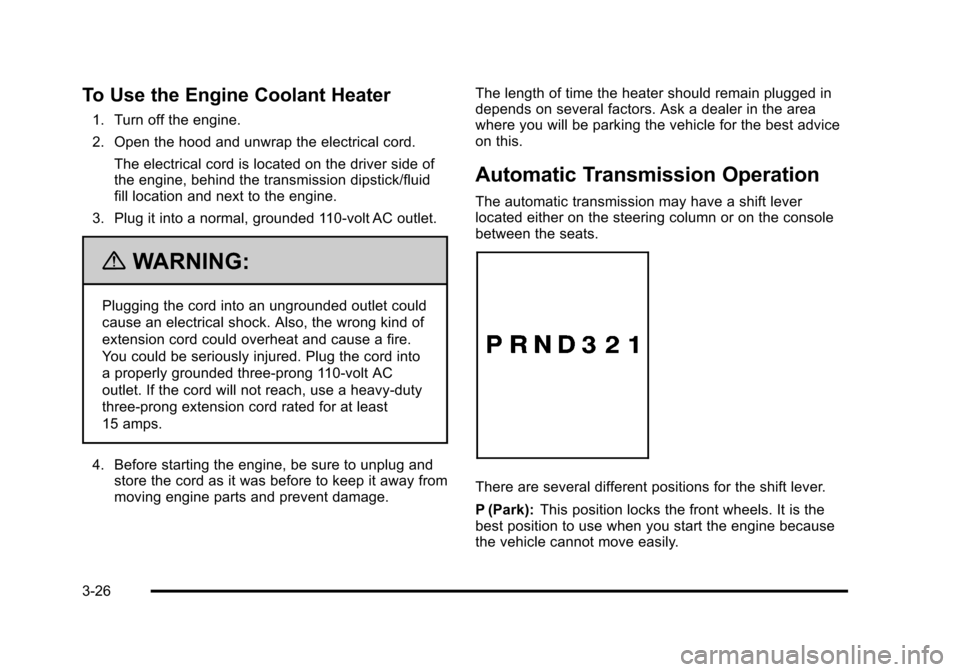
The automatic transmission may have a shift lever
located either on the steering column or on the console
between the seats.
There are several different positions for the shift lever.
P (Park):
This position locks the front wheels. It is the
best position to use when you start the engine because
the vehicle cannot move easily.
3-26
Page 193 of 470
Black plate (31,1)Cadillac DTS Owner Manual - 2011
Parade Dimming
This feature prohibits dimming of the digital displays
and backlighting during daylight hours when the key is
in the ignition and the headlamps are on. This feature is
fully automatic. When the light sensor reads darkness
outside and the parking lamps are active, the digital
displays can be adjusted by turning the instrument
panel brightness knob counterclockwise to dim and
clockwise to brighten lighting.
Reading Lamps
The reading lamps are located on the overhead console
on the headliner and in the rear door opening. These
lamps come on automatically when any door is opened
and it is dark outside.
For manual operation, press the button to turn them on.
Press it again to turn them off.
If the reading lamps are left on, they automatically shut
off 10 minutes after the ignition has been turned off.
Footwell Lamps
For vehicles with footwell lamps, they are located under
the instrument panel and at the rear of the front seats.
These lamps provide soft light to the front and rear floor
areas. They dim with the instrument panel cluster lights.Footwell lighting brightness can be adjusted with the
instrument panel brightness control located below the
exterior lamps control. See
Instrument Panel Brightness
on page 4‑30. The footwell lights will turn off before the
instrument panel lights are at their lowest level of
brightness.
Battery Load Management
This feature monitors the vehicle's electrical load and
determines when the battery is in a heavy discharge
condition. During times of high electrical loading, the
engine may idle at a higher revolutions per minute (rpm)
setting than normal to make sure the battery charges.
High electrical loads may occur when several of the
following are on: headlamps, high beams, fog lamps,
rear window defogger, the climate control fan at high
speeds, heated seats and engine cooling fans.
If the battery continues to discharge, even with the
engine idling at a higher rpm setting, some electrical
loads will automatically be reduced. When this occurs,
the rear window defogger may take slightly longer to
clear the glass, the heated seats may not get as warm
as they usually do and the climate control fan may
cut back to a lower speed. For more battery saving
information, see “Battery Saver Active Message” under
DIC Warnings and Messages on page 4‑65.
4-31
Page 194 of 470
Black plate (32,1)Cadillac DTS Owner Manual - 2011
Electric Power Management
The vehicle has Electric Power Management (EPM) that
estimates the battery's temperature and state of charge.
It then adjusts the voltage for best performance and
extended life of the battery.
When the battery's state of charge is low, the voltage
is raised slightly to quickly bring the charge back up.
When the state of charge is high, the voltage is lowered
slightly to prevent overcharging. If the vehicle has a
voltmeter gauge or a voltage display on the Driver
Information Center (DIC), you may see the voltage
move up or down. This is normal. If there is a problem,
an alert will be displayed.
The battery can be discharged at idle if the electrical
loads are very high. This is true for all vehicles. This is
because the generator (alternator) may not be spinning
fast enough at idle to produce all the power that is
needed for very high electrical loads.
A high electrical load occurs when several of the
following are on, such as: headlamps, high beams, fog
lamps, rear window defogger, climate control fan at high
speed, heated seats, engine cooling fans, trailer loads,
and loads plugged into accessory power outlets.EPM works to prevent excessive discharge of the
battery. It does this by balancing the generator's output
and the vehicle's electrical needs. It can increase
engine idle speed to generate more power, whenever
needed. It can temporarily reduce the power demands
of some accessories.
Normally, these actions occur in steps or levels, without
being noticeable. In rare cases at the highest levels
of corrective action, this action may be noticeable to
the driver. If so, a Driver Information Center (DIC)
message might be displayed, such as BATTERY
SAVER ACTIVE, BATTERY VOLTAGE LOW, or
LOW BATTERY. If this message is displayed, it is
recommended that the driver reduce the electrical loads
as much as possible. See
DIC Warnings and Messages
on page 4‑65.
Inadvertent Power Battery Saver
This feature protects the vehicle battery against
drainage from the interior lamps, trunk lamp, glove box
lamp, or the garage door opener. When the ignition is
turned off, the power to these features automatically
turns off after 10 minutes. Power is restored for an
additional 10 minutes if any door or trunk is opened,
or the courtesy lamp switch is turned on.
4-32
Page 202 of 470

Black plate (40,1)Cadillac DTS Owner Manual - 2011
In order to prevent false temperature readings at
startup, the displayed temperature will not change until
the following occurs:
.Vehicle speed is above 16 km/h (10 mph) for
5 minutes.
.Vehicle speed is above 51 km/h (32 mph) for 2 and
a half minutes.
The climate control system uses the information from
these sensors to maintain your comfort setting by
adjusting the outlet temperature, fan speed, and the
air delivery mode. The system may also supply cooler
air to the side of the vehicle facing the sun. The
recirculation mode will also be used as needed to
maintain cool outlet temperatures.
Outlet Adjustment
For the front outlets, use the thumbwheel located below
each outlet to change the direction of the airflow. Use
the thumbwheel located next to the outlets to shut the
airflow or to open the outlets and re-direct the air.
For the rear outlets, slide the lever left or right and up or
down to change the direction of the airflow.
Operation Tips
.Clear away any ice, snow or leaves from the air
inlets at the base of the windshield that may block
the flow of air into your vehicle.
.Use of non-GM approved hood deflectors may
adversely affect the performance of the system.
.Keep the path under the front seats clear of
objects to help circulate the air inside of your
vehicle more effectively.
Rear Climate Control System
For vehicles with a rear climate control system, the rear
seat passengers can adjust the direction of the airflow,
fan speed and temperature for the rear seating area.
This system also works with the main climate control
system in the vehicle.
4-40
Page 226 of 470

Black plate (64,1)Cadillac DTS Owner Manual - 2011
If a low tire pressure condition is detected by the
system while driving, a message advising you to add
air to a specific tire will appear in the display. See
Inflation - Tire Pressure
on page 6‑57andDIC
Warnings and Messageson page 4‑65for more
information.
If the tire pressure display shows dashes instead of a
value, there may be a problem with your vehicle. If this
consistently occurs, see your dealer for service.
SPEED LIMIT: XXX MPH (SPEED LIMIT:
XXX Km/h) or ADVISORY: XXX MPH
(ADVISORY: XXX Km/h)
This display will show the speed limit or the advised
speed as determined by the information on the map
disc in the navigation system. If there is no map disc in
the navigation system, this display will not be available.
The speed limit and speed advisory displays on the DIC
are for reference only. There may be segments of road
where speed data has not been captured or times
where incorrect speed data, or no speed data, will be
displayed by the DIC due to the navigation system not
correctly matching the vehicle’s position to the actual
road. Be aware of this and obey posted speed limits
wherever you drive.
SPEED ALERT
This display will allow you to customize the speed alert
warning. You can choose to have no warning display,
or to have it display at the limit, at 5 km/h (mph) over
the limit, or at 10 km/h (mph) over the limit. The DIC
will toggle between OFF, AT LIMIT, +5 , +10 (Km/h or
MPH). Press the reset button to make your selection.
RELEARN REMOTE KEY
This display allows you to match Remote Keyless Entry
(RKE) transmitters to your vehicle. This procedure will
erase all previously learned transmitters. Therefore,
they must be relearned as additional transmitters.
To match an RKE transmitter to your vehicle:
1. Press the vehicle information button until PRESS
VTO RELEARN REMOTE KEY displays.
2. Press the set/reset button until REMOTE KEY LEARNING ACTIVE is displayed.
3. Press and hold the lock and unlock buttons on the first transmitter at the same time for about
15 seconds.
On vehicles with memory recall seats, the
first transmitter learned will match driver 1 and
the second will match driver 2.
A chime will sound indicating that the transmitter is
matched.
4-64
Page 301 of 470
Black plate (23,1)Cadillac DTS Owner Manual - 2011
{WARNING:
Do not load the vehicle any heavier than
the Gross Vehicle Weight Rating (GVWR),
or either the maximum front or rear Gross
Axle Weight Rating (GAWR). If you do,
parts on the vehicle can break, and it
can change the way the vehicle handles.
These could cause you to lose control and
crash. Also, overloading can shorten the life
of the vehicle.
Notice:Overloading the vehicle may cause
damage. Repairs would not be covered by the
vehicle warranty. Do not overload the vehicle.
If you put things inside your vehicle, like
suitcases, tools, packages, or anything else, they
will go as fast as the vehicle goes. If you have to
stop or turn quickly, or if there is a crash, they will
keep going.
{WARNING:
Things you put inside your vehicle can strike
and injure people in a sudden stop or turn,
or in a crash.
.Put things in the trunk of your vehicle. In
a trunk, put them as far forward as you
can. Try to spread the weight evenly.
.Never stack heavier things, like
suitcases, inside the vehicle so that some
of them are above the tops of the seats.
.Do not leave an unsecured child restraint
in your vehicle.
.When you carry something inside the
vehicle, secure it whenever you can.
5-23
Page 364 of 470

Black plate (54,1)Cadillac DTS Owner Manual - 2011
(D) Construction Code:A letter code is used to
indicate the type of ply construction in the tire.
The letter R means radial ply construction; the
letter D means diagonal or bias ply construction;
and the letter B means belted‐bias ply
construction.
(E) Rim Diameter
:Diameter of the wheel in
inches.
(F) Load Range
:Load Range.
(G) Service Description
:The service description
indicates the load index and speed rating of a
tire. If two numbers are given as in the example,
120/116, then this represents the load index for
single versus dual wheel usage (single/dual).
The speed rating is the maximum speed a tire is
certified to carry a load.
Tire Terminology and Definitions
Air Pressure:The amount of air inside the tire
pressing outward on each square inch of the tire.
Air pressure is expressed in pounds per square
inch (psi) or kilopascal (kPa). Accessory Weight
:This means the combined
weight of optional accessories. Some examples of
optional accessories are, automatic transmission,
power steering, power brakes, power windows,
power seats, and air conditioning.
Aspect Ratio
:The relationship of a tire's height to
its width.
Belt
:A rubber coated layer of cords that is
located between the plies and the tread. Cords
may be made from steel or other reinforcing
materials.
Bead
:The tire bead contains steel wires wrapped
by steel cords that hold the tire onto the rim.
Bias Ply Tire
:A pneumatic tire in which the plies
are laid at alternate angles less than 90 degrees
to the centerline of the tread.
Cold Tire Pressure
:The amount of air pressure
in a tire, measured in pounds per square inch (psi)
or kilopascals (kPa) before a tire has built up heat
from driving. See Inflation - Tire Pressure
on
page 6‑57
.
Curb Weight
:The weight of a motor vehicle with
standard and optional equipment including the
maximum capacity of fuel, oil, and coolant, but
without passengers and cargo.
6-54
Page 417 of 470

Black plate (107,1)Cadillac DTS Owner Manual - 2011
Rear Underseat Fuse Block
The rear fuse block is located under the rear seat on
the driver side. The rear seat cushion must be removed
to access the rear fuse block.
Removing the Rear Seat Cushion
Notice:If you touch the exposed wires with the
metal on the seat cushion, you could cause a short
that could damage the battery and or wires. Avoid
contact between the rear seat and the fuse center
whenever you remove or reinstall the rear seat. Do
not remove covers from any of the covered parts,
and do not store anything under the seats.
To remove the rear seat cushion, do the following:
1. Pull up on the front of the cushion to release the front hooks.
2. Pull the cushion up and out toward the front of the vehicle.
To access the fuse block, pull out and lift up on the
cover latch, located at the end of the fuse block, near
the battery cable.
6-107
Page 420 of 470

Black plate (110,1)Cadillac DTS Owner Manual - 2011
Fuses Usage
8 Steering Wheel Illumination
9 Front Heated/Cooled Seat Module
10 Run 2 - Heated/Cooled Seats 11 Rear Heated Seat Module
12 RPA Module
13 PASS-Key
®III System
14 Unlock/Lock Module
15 Magnetic Ride Control
16 Not Used
17 Sunroof
18 Body Control Module (BCM) Dim
19 Body Control Module (BCM)
20 Run 1-Heated Steering Wheel
21 Ignition Switch
22 Driver Door Module
23 Rear Lumbar
24 Electronic Leveling Control Module
25 Body Control Module (Left Turn
Signal)
26 Cigarette Lighter, Auxiliary Power
Outlet
27 Navigation (Optional)
Fuses Usage
28 Retained Accessory Power 1 (RAP)
29 Passenger Door Module
30 Sensing and Diagnostic Module
31 Accessory Power Outlets
32 Body Control Module (BCM)
(Inadvertent)
33 Retained Accessory Power 2 (RAP)
34 Canister Vent Solenoid
35 Body Control Module (Courtesy)
36 Body Control Module (Right Turn
Signal)
37 Trunk Release
38 Amplifier, Radio
39 Body Control Module (CHMSL)
40 Body Control Module
41 Stoplamp (optional)
42 OnStar
®Module
43 Body Modules
44 Radio
45 Door Unlatch (optional)
46 Rear Defogger (J-Case)
6-110
Page 461 of 470

Black plate (7,1)Cadillac DTS Owner Manual - 2011
H
Hazard Warning Flashers . . . . . . . . . . . . . . . . . . . . . . . . . . . .4-3
Head Restraints . . . . . . . . . . . . . . . . . . . . . . . . . . . . . . . . . . . . .2-2
Headlamp Wiring . . . . . . . . . . . . . . . . . . . . . . . . . . . . . . . . . 6-103
HeadlampsAiming . . . . . . . . . . . . . . . . . . . . . . . . . . . . . . . . . . . . . . . . . . . . 6-43
Bulb Replacement . . . . . . . . . . . . . . . . . . . . . . . . . . . . . . . . 6-46
Daytime Running Lamps (DRL) . . . . . . . . . . . . . . . . . . . 4-28
Exterior Lamps . . . . . . . . . . . . . . . . . . . . . . . . . . . . . . . . . . . 4-25
Flash-to-Pass . . . . . . . . . . . . . . . . . . . . . . . . . . . . . . . . . . . . . 4-10
High Intensity Discharge (HID) Lighting . . . . . . . . . . . 6-46
High/Low Beam Changer . . . . . . . . . . . . . . . . . . . . . . . . . . 4-6
On Reminder . . . . . . . . . . . . . . . . . . . . . . . . . . . . . . . . . . . . . 4-28
Wiper Activated . . . . . . . . . . . . . . . . . . . . . . . . . . . . . . . . . . . 4-28
Heated Steering Wheel . . . . . . . . . . . . . . . . . . . . . . . . . . . . . . . . . . . . 4-4
Heated Seats . . . . . . . . . . . . . . . . . . . . . . . . . . . . . . . . . . . . . . . .2-5
Heater Engine Coolant . . . . . . . . . . . . . . . . . . . . . . . . . . . . . . . . . . . 3-25
High-Speed Operation, Tires . . . . . . . . . . . . . . . . . . . . . . 6-59
Highbeam On Light . . . . . . . . . . . . . . . . . . . . . . . . . . . . . . . . 4-58
Highway Hypnosis . . . . . . . . . . . . . . . . . . . . . . . . . . . . . . . . . 5-14
Hill and Mountain Roads . . . . . . . . . . . . . . . . . . . . . . . . . . . 5-14 Hood
Checking Things Under . . . . . . . . . . . . . . . . . . . . . . . . . . . 6-12
Release . . . . . . . . . . . . . . . . . . . . . . . . . . . . . . . . . . . . . . . . . . 6-13
Horn . . . . . . . . . . . . . . . . . . . . . . . . . . . . . . . . . . . . . . . . . . . . . . . . .4-3
How to Wear Safety Belts Properly . . . . . . . . . . . . . . . . 2-15
I
Ignition Positions . . . . . . . . . . . . . . . . . . . . . . . . . . . . . . . . . . 3-22
Inadvertent Power Battery Saver . . . . . . . . . . . . . . . . . . 4-32
Infants and Young Children, Restraints . . . . . . . . . . . . 2-34
Inflation - Tire Pressure . . . . . . . . . . . . . . . . . . . . . . . . . . . . 6-57
Instrument Panel Brightness . . . . . . . . . . . . . . . . . . . . . . . . . . . . . . . . . . . . . . . . 4-30
Instrument Panel Cluster . . . . . . . . . . . . . . . . . . . . . . . . . . 4-45
Integrated Trailer Brake Control System (ITBC) . . . . 5-26
Introduction . . . . . . . . . . . . . . . . . . . . . . . . . . . . . . . . . . . . . . . . . .7-2
J
Jump Starting . . . . . . . . . . . . . . . . . . . . . . . . . . . . . . . . . . . . . . 6-38
i - 7