display CADILLAC ELR 2014 Owner's Manual
[x] Cancel search | Manufacturer: CADILLAC, Model Year: 2014, Model line: ELR, Model: CADILLAC ELR 2014Pages: 408, PDF Size: 4.47 MB
Page 1 of 408
Black plate (1,1)Cadillac ELR Owner Manual (GMNA-Localizing-U.S./Canada-6081525) -
2014 - Second Edition - 1/22/14
2014 Cadillac ELR Owner ManualM
In Brief. . . . . . . . . . . . . . . . . . . . . . . . 1-1
Instrument Panel . . . . . . . . . . . . . . 1-2
Initial Drive Information . . . . . . . . 1-4
Vehicle Features . . . . . . . . . . . . . 1-15
Battery and Efficiency . . . . . . . . 1-19
Performance and
Maintenance . . . . . . . . . . . . . . . . 1-24
Keys, Doors, and Windows . . . . . . . . . . . . . . . . . . . . 2-1
Keys and Locks . . . . . . . . . . . . . . . 2-1
Doors . . . . . . . . . . . . . . . . . . . . . . . . 2-13
Vehicle Security . . . . . . . . . . . . . . 2-15
Exterior Mirrors . . . . . . . . . . . . . . . 2-17
Interior Mirrors . . . . . . . . . . . . . . . . 2-18
Windows . . . . . . . . . . . . . . . . . . . . . 2-19
Seats and Restraints . . . . . . . . . 3-1
Head Restraints . . . . . . . . . . . . . . . 3-2
Front Seats . . . . . . . . . . . . . . . . . . . . 3-3
Rear Seats . . . . . . . . . . . . . . . . . . . 3-10
Safety Belts . . . . . . . . . . . . . . . . . . 3-11
Airbag System . . . . . . . . . . . . . . . . 3-19
Child Restraints . . . . . . . . . . . . . . 3-32 Storage
. . . . . . . . . . . . . . . . . . . . . . . 4-1
Storage Compartments . . . . . . . . 4-1
Instruments and Controls . . . . 5-1
Controls . . . . . . . . . . . . . . . . . . . . . . . 5-2
Warning Lights, Gauges, and Indicators . . . . . . . . . . . . . . . . . . . . 5-7
Information Displays . . . . . . . . . . 5-27
Vehicle Messages . . . . . . . . . . . . 5-40
Vehicle Personalization . . . . . . . 5-51
Universal Remote System . . . . 5-59
Lighting . . . . . . . . . . . . . . . . . . . . . . . 6-1
Exterior Lighting . . . . . . . . . . . . . . . 6-1
Interior Lighting . . . . . . . . . . . . . . . . 6-6
Lighting Features . . . . . . . . . . . . . . 6-7
Infotainment System . . . . . . . . . 7-1
Introduction . . . . . . . . . . . . . . . . . . . . 7-1
Climate Controls . . . . . . . . . . . . . 8-1
Climate Control Systems . . . . . . 8-1
Air Vents . . . . . . . . . . . . . . . . . . . . . . . 8-7
Maintenance . . . . . . . . . . . . . . . . . . . 8-8 Driving and Operating
. . . . . . . . 9-1
Driving Information . . . . . . . . . . . . . 9-2
Starting and Operating . . . . . . . 9-16
Electric Vehicle Operating
Modes . . . . . . . . . . . . . . . . . . . . . . 9-21
Engine Exhaust . . . . . . . . . . . . . . 9-27
Electric Drive Unit . . . . . . . . . . . . 9-28
Brakes . . . . . . . . . . . . . . . . . . . . . . . 9-29
Ride Control Systems . . . . . . . . 9-33
Cruise Control . . . . . . . . . . . . . . . . 9-36
Driver Assistance Systems . . . 9-47
Charging . . . . . . . . . . . . . . . . . . . . . 9-58
Fuel . . . . . . . . . . . . . . . . . . . . . . . . . . 9-66
Trailer Towing . . . . . . . . . . . . . . . . 9-71
Conversions and Add-Ons . . . 9-71
Vehicle Care . . . . . . . . . . . . . . . . . 10-1
General Information . . . . . . . . . . 10-2
Vehicle Checks . . . . . . . . . . . . . . . 10-5
Headlamp Aiming . . . . . . . . . . . 10-26
Bulb Replacement . . . . . . . . . . 10-27
Electrical System . . . . . . . . . . . . 10-28
Wheels and Tires . . . . . . . . . . . 10-42
Page 9 of 408
Black plate (3,1)Cadillac ELR Owner Manual (GMNA-Localizing-U.S./Canada-6081525) -
2014 - Second Edition - 1/22/14
In Brief 1-3
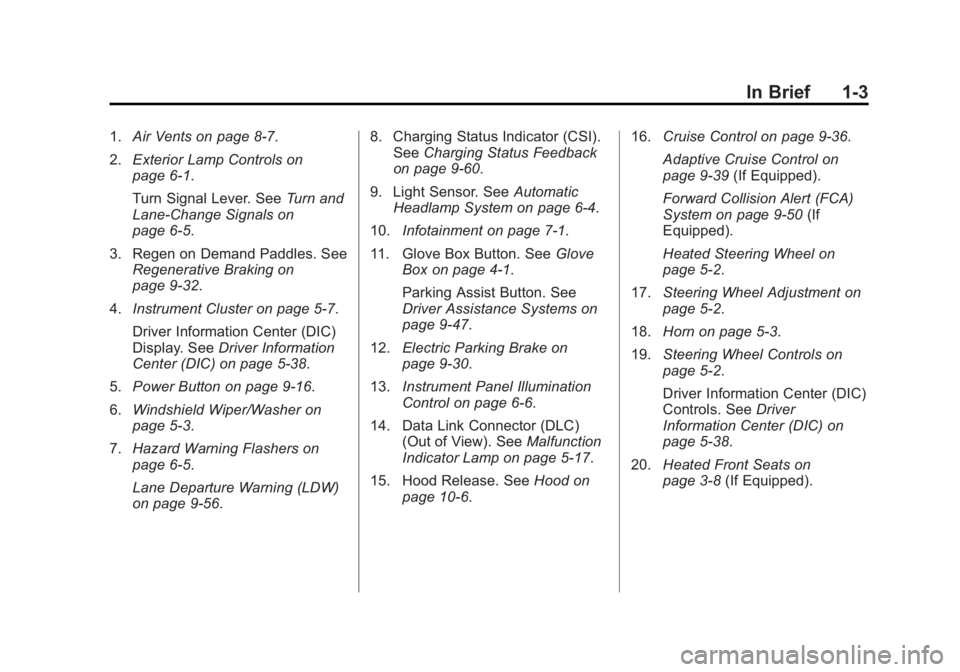
1.Air Vents on page 8-7.
2. Exterior Lamp Controls on
page 6-1.
Turn Signal Lever. See Turn and
Lane-Change Signals on
page 6-5.
3. Regen on Demand Paddles. See Regenerative Braking on
page 9-32.
4. Instrument Cluster on page 5-7.
Driver Information Center (DIC)
Display. See Driver Information
Center (DIC) on page 5-38.
5. Power Button on page 9-16.
6. Windshield Wiper/Washer on
page 5-3.
7. Hazard Warning Flashers on
page 6-5.
Lane Departure Warning (LDW)
on page 9-56. 8. Charging Status Indicator (CSI).
See Charging Status Feedback
on page 9-60.
9. Light Sensor. See Automatic
Headlamp System on page 6-4.
10. Infotainment on page 7-1.
11. Glove Box Button. See Glove
Box on page 4-1.
Parking Assist Button. See
Driver Assistance Systems on
page 9-47.
12. Electric Parking Brake on
page 9-30.
13. Instrument Panel Illumination
Control on page 6-6.
14. Data Link Connector (DLC) (Out of View). See Malfunction
Indicator Lamp on page 5-17.
15. Hood Release. See Hood on
page 10-6. 16.
Cruise Control on page 9-36.
Adaptive Cruise Control on
page 9-39 (If Equipped).
Forward Collision Alert (FCA)
System on page 9-50 (If
Equipped).
Heated Steering Wheel on
page 5-2.
17. Steering Wheel Adjustment on
page 5-2.
18. Horn on page 5-3.
19. Steering Wheel Controls on
page 5-2.
Driver Information Center (DIC)
Controls. See Driver
Information Center (DIC) on
page 5-38.
20. Heated Front Seats on
page 3-8 (If Equipped).
Page 21 of 408

Black plate (15,1)Cadillac ELR Owner Manual (GMNA-Localizing-U.S./Canada-6081525) -
2014 - Second Edition - 1/22/14
In Brief 1-15
Climate Touch Screen Controls
1. Outside Air Temperature Display
2. Driver and Passenger Temperature Controls
3. Fan Control
4. Climate Modes: MIN, ECO, MAX
5. SYNC (Synchronized Temperature)
6. Climate Control Selection (Application Tray Button)
7. Climate Power Gauge
8. Driver and Passenger Auto Heated Seats 9. Air Delivery Mode Controls
See
Dual Automatic Climate Control
System on page 8-1.
Vehicle Features
Steering Wheel Controls
The infotainment system can be
operated by using the steering
wheel controls. See "Steering
Wheel Controls" in the infotainment
manual.
Cruise Control
Page 22 of 408

Black plate (16,1)Cadillac ELR Owner Manual (GMNA-Localizing-U.S./Canada-6081525) -
2014 - Second Edition - 1/22/14
1-16 In Brief
J:Press to turn the system on
and off. A white cruise control
indicator appears in the instrument
cluster when cruise is turned on.
+RES: Press the control up briefly
to make the vehicle resume to a
previously set speed or press and
hold to accelerate. If cruise control
is already active, use to increase
vehicle speed. To increase speed by
1 km/h or 1 mph, press +RES up to
the first detent. To increase speed to
the next 5 km/h or 5 mph mark on
the speedometer, press +RES up to
the second detent.
SET−: Press the control down
briefly to set the speed and activate
cruise control. If cruise control is
already active, use to decrease
vehicle speed. To decrease speed
by 1 km/h or 1 mph, press SET−
down to the first detent. To decrease
speed to the next 5 km/h or 5 mph
mark on the speedometer, press
SET− down to the second detent.*:Press to disengage cruise
control without erasing the set
speed from memory.
See Cruise Control on page 9-36 or
Adaptive Cruise Control on
page 9-39 (if equipped).
Infotainment System
See the infotainment manual for
information on the radio, audio
players, phone, navigation system,
and voice or speech recognition.
It also includes information on
settings.
Driver Information
Center (DIC)
The DIC display is in the instrument
cluster. It shows the status of many
vehicle systems.
yorz:Move SEL up or down to
go to the previous or next selection.
SorT: Press to move between
the interactive display zones in the
cluster. Press
Sto go back to the
previous menu.
SEL: Press to open a menu or
select a menu item. Press and hold
to reset values on certain screens.
See Driver Information Center (DIC)
on page 5-38.
Page 23 of 408
Black plate (17,1)Cadillac ELR Owner Manual (GMNA-Localizing-U.S./Canada-6081525) -
2014 - Second Edition - 1/22/14
In Brief 1-17
Forward Collision Alert
(FCA) System
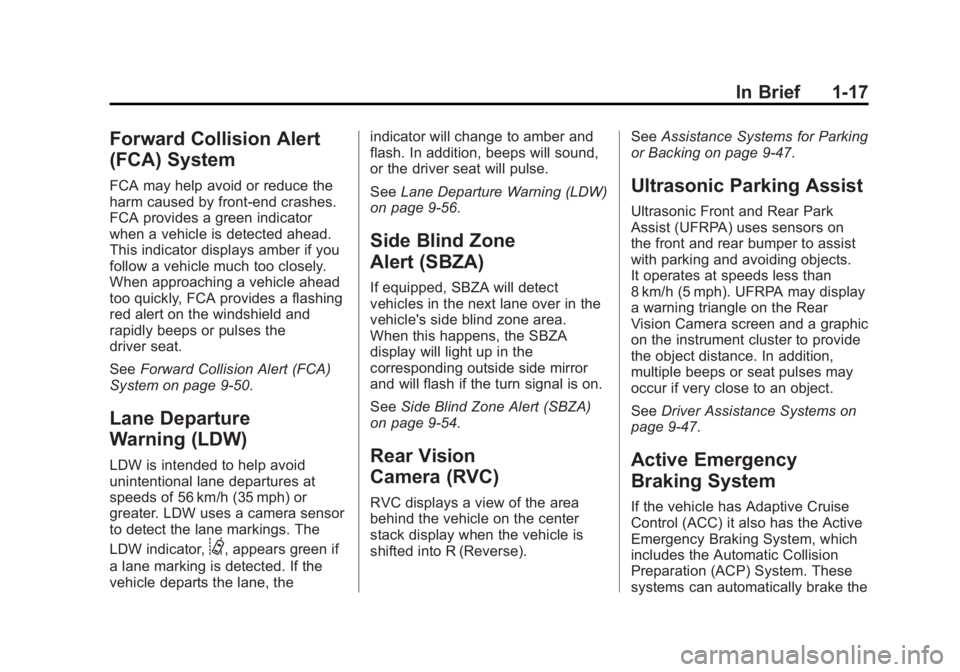
FCA may help avoid or reduce the
harm caused by front-end crashes.
FCA provides a green indicator
when a vehicle is detected ahead.
This indicator displays amber if you
follow a vehicle much too closely.
When approaching a vehicle ahead
too quickly, FCA provides a flashing
red alert on the windshield and
rapidly beeps or pulses the
driver seat.
SeeForward Collision Alert (FCA)
System on page 9-50.
Lane Departure
Warning (LDW)
LDW is intended to help avoid
unintentional lane departures at
speeds of 56 km/h (35 mph) or
greater. LDW uses a camera sensor
to detect the lane markings. The
LDW indicator,
@, appears green if
a lane marking is detected. If the
vehicle departs the lane, the indicator will change to amber and
flash. In addition, beeps will sound,
or the driver seat will pulse.
See
Lane Departure Warning (LDW)
on page 9-56.
Side Blind Zone
Alert (SBZA)
If equipped, SBZA will detect
vehicles in the next lane over in the
vehicle's side blind zone area.
When this happens, the SBZA
display will light up in the
corresponding outside side mirror
and will flash if the turn signal is on.
See Side Blind Zone Alert (SBZA)
on page 9-54.
Rear Vision
Camera (RVC)
RVC displays a view of the area
behind the vehicle on the center
stack display when the vehicle is
shifted into R (Reverse). See
Assistance Systems for Parking
or Backing on page 9-47.
Ultrasonic Parking Assist
Ultrasonic Front and Rear Park
Assist (UFRPA) uses sensors on
the front and rear bumper to assist
with parking and avoiding objects.
It operates at speeds less than
8 km/h (5 mph). UFRPA may display
a warning triangle on the Rear
Vision Camera screen and a graphic
on the instrument cluster to provide
the object distance. In addition,
multiple beeps or seat pulses may
occur if very close to an object.
See Driver Assistance Systems on
page 9-47.
Active Emergency
Braking System
If the vehicle has Adaptive Cruise
Control (ACC) it also has the Active
Emergency Braking System, which
includes the Automatic Collision
Preparation (ACP) System. These
systems can automatically brake the
Page 25 of 408

Black plate (19,1)Cadillac ELR Owner Manual (GMNA-Localizing-U.S./Canada-6081525) -
2014 - Second Edition - 1/22/14
In Brief 1-19
Battery and Efficiency
High Voltage Safety
Information
{Warning
Exposure to high voltage can
cause shock, burns, and even
death. The high voltage
components in the vehicle can
only be serviced by technicians
with special training.
High voltage components are
identified by labels. Do not
remove, open, take apart,
or modify these components.
High voltage cable or wiring has
orange covering. Do not probe,
tamper with, cut, or modify high
voltage cable or wiring.
This vehicle has a high voltage
battery and a standard 12-volt
battery. If the vehicle is in a crash, the
sensing system may shut down the
high voltage system. When this
occurs, the high voltage battery is
disconnected and the vehicle will
not start. The SERVICE VEHICLE
SOON message in the Driver
Information Center (DIC) will be
displayed. Before the vehicle can be
operated again, it must be serviced
at your dealer.
{Warning
Damage to the high voltage
battery or high voltage system
can create a risk of electric shock,
overheating, or fire.
If the vehicle is damaged from a
crash, flood, fire, or other event it
may be necessary to have the
vehicle inspected. Contact
Customer Assistance as soon as
possible to determine whether an
inspection is needed. See
Customer Assistance Offices on
page 13-3.See
Battery on page 10-23 for
important safety information. If an
airbag has inflated, see What Will
You See after an Airbag Inflates? on
page 3-24.
Only a trained service technician
with the proper knowledge and tools
should inspect, test, or replace the
high voltage battery. See your
dealer if the high voltage battery
needs service.
See Battery on page 10-23.Charging
This section explains the process
for charging the high voltage battery.
Do not allow the vehicle to remain in
temperature extremes for long
periods without being driven or
plugged in. It is recommended that
the vehicle be plugged in when
temperatures are below 0°C (32°F)
and above 32°C (90°F) to maximize
high voltage battery life.
When using a 120-volt AC electrical
outlet, it will take approximately
12.5 hours to charge the vehicle
Page 29 of 408

Black plate (23,1)Cadillac ELR Owner Manual (GMNA-Localizing-U.S./Canada-6081525) -
2014 - Second Edition - 1/22/14
In Brief 1-23
Fueling
The fuel system on this vehicle
requires a refueling process to
control evaporative emissions. To
refuel the vehicle:
1. Press the fuel door button on thedriver door for one second.
A WAIT TO REFUEL message
displays on the Driver
Information Center.
2. When the READY TO REFUELmessage displays, the fuel door
on the passenger side will
unlock. Push the rearward edge
of the fuel door in and release to
open the door.
3. Turn the fuel cap counterclockwise to remove.
While refueling, hang the fuel
cap tether from the hook on the
inside of the fuel door. Complete
refueling within 30 minutes of
pressing the fuel door button on
the driver door. If refueling more
than 30 minutes, press the fuel
door button again. 4. After refueling, reinstall the fuel
cap by turning it clockwise until it
clicks. Close the fuel door.
See Filling the Tank on page 9-68.
Regenerative Braking
Regenerative braking takes some of
the energy from the moving vehicle
and turns it back into electrical
energy. This energy is then stored in
the high voltage battery system,
contributing to increased energy
efficiency.
Regen on Demand™
This feature will slow the vehicle by
recapturing energy using the
steering wheel paddles.
SeeRegenerative Braking on
page 9-32.
Page 30 of 408
Black plate (24,1)Cadillac ELR Owner Manual (GMNA-Localizing-U.S./Canada-6081525) -
2014 - Second Edition - 1/22/14
1-24 In Brief
Service
{Warning
Never try to do your own service
on high voltage components. You
can be injured and the vehicle
can be damaged if you try to do
your own service work. Service
and repair of these high voltage
components should only be
performed by a trained service
technician with the proper
knowledge and tools. SeeDoing
Your Own Service Work on
page 10-5.
Performance and
Maintenance
Traction Control/
Electronic Stability
Control
The Traction Control System (TCS)
limits wheel spin. The system turns
on automatically every time the
vehicle is started.
StabiliTrak assists with directional
control of the vehicle in difficult
driving conditions. The system turns
on automatically every time the
vehicle is started.
.To turn off TCS, press and
release the TCS/StabiliTrak
button
Yon the center console.
iilluminates in the instrument
cluster. The appropriate DIC
message is displayed. See Ride
Control System Messages on
page 5-48.
.Press the TCS/StabiliTrak buttonYagain to turn traction control
back on.
.To turn off both TCS and
StabiliTrak, press and hold the
TCS/StabiliTrak button
Yon the
center console until
gandi
illuminate in the instrument
cluster. The appropriate DIC
message displays. See Ride
Control System Messages on
page 5-48.
.Press the TCS/StabiliTrak buttonYagain to turn on both
systems.
See Traction Control/Electronic
Stability Control on page 9-33.
Page 31 of 408
Black plate (25,1)Cadillac ELR Owner Manual (GMNA-Localizing-U.S./Canada-6081525) -
2014 - Second Edition - 1/22/14
In Brief 1-25
Tire Pressure Monitor
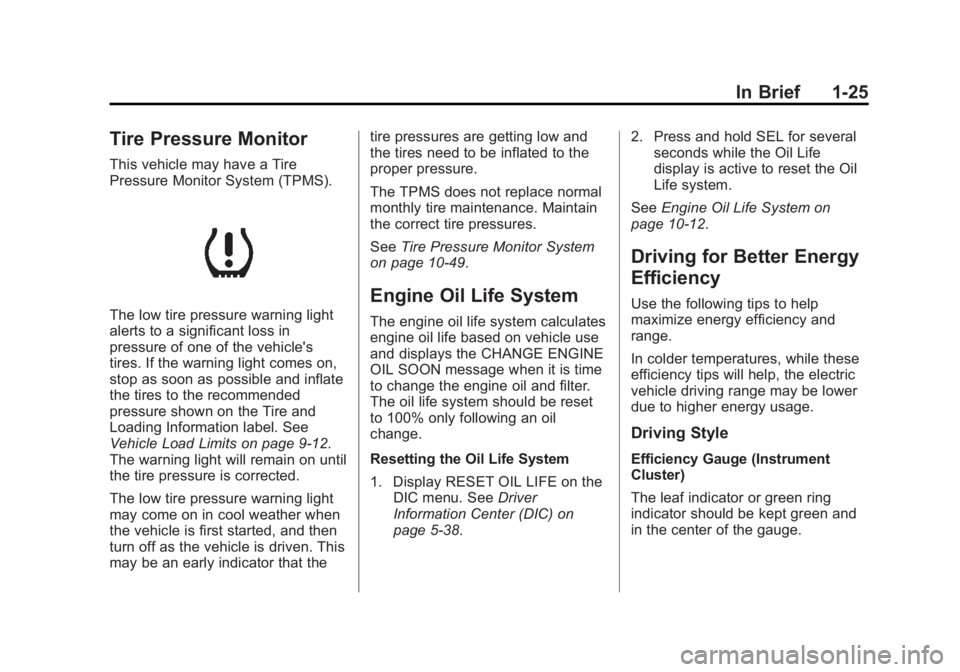
This vehicle may have a Tire
Pressure Monitor System (TPMS).
The low tire pressure warning light
alerts to a significant loss in
pressure of one of the vehicle's
tires. If the warning light comes on,
stop as soon as possible and inflate
the tires to the recommended
pressure shown on the Tire and
Loading Information label. See
Vehicle Load Limits on page 9-12.
The warning light will remain on until
the tire pressure is corrected.
The low tire pressure warning light
may come on in cool weather when
the vehicle is first started, and then
turn off as the vehicle is driven. This
may be an early indicator that thetire pressures are getting low and
the tires need to be inflated to the
proper pressure.
The TPMS does not replace normal
monthly tire maintenance. Maintain
the correct tire pressures.
See
Tire Pressure Monitor System
on page 10-49.
Engine Oil Life System
The engine oil life system calculates
engine oil life based on vehicle use
and displays the CHANGE ENGINE
OIL SOON message when it is time
to change the engine oil and filter.
The oil life system should be reset
to 100% only following an oil
change.
Resetting the Oil Life System
1. Display RESET OIL LIFE on the DIC menu. See Driver
Information Center (DIC) on
page 5-38. 2. Press and hold SEL for several
seconds while the Oil Life
display is active to reset the Oil
Life system.
See Engine Oil Life System on
page 10-12.
Driving for Better Energy
Efficiency
Use the following tips to help
maximize energy efficiency and
range.
In colder temperatures, while these
efficiency tips will help, the electric
vehicle driving range may be lower
due to higher energy usage.
Driving Style
Efficiency Gauge (Instrument
Cluster)
The leaf indicator or green ring
indicator should be kept green and
in the center of the gauge.
Page 39 of 408

Black plate (5,1)Cadillac ELR Owner Manual (GMNA-Localizing-U.S./Canada-6081525) -
2014 - Second Edition - 1/22/14
Keys, Doors, and Windows 2-5
4. Insert the vehicle key into thekey cylinder above the license
plate.
5. Open the trunk.
6. Turn the key counterclockwise five times within 10 seconds.
7. The DIC displays READY FOR REMOTE KEY 3 or 4, up to 8.8. Remove the rubber liner toaccess the pocket. Place the
new transmitter on the indent in
the center console storage bin.
9. Press the POWER
Obutton.
10. The DIC displays READY FOR REMOTE KEY 4 or 5, up to 8.
11. Press
QorKon each newly
programmed transmitter to
complete the process. 12. To program additional
transmitters, repeat
Steps 8–11.
Return the key base back into
the RKE transmitter.
13. Press and hold the POWER
O
button for at least 12 seconds
to exit programming.
Programming without a
Recognized Transmitter
If there are no currently recognized
transmitters available, follow this
procedure to program up to eight
transmitters. This feature is not
available in Canada. This procedure
will take approximately 30 minutes
to complete. The vehicle must be off
and all transmitters to be
programmed must be present.