CADILLAC ESCALADE 2002 2.G User Guide
Manufacturer: CADILLAC, Model Year: 2002, Model line: ESCALADE, Model: CADILLAC ESCALADE 2002 2.GPages: 417, PDF Size: 3.13 MB
Page 11 of 417

ix
Page 12 of 417

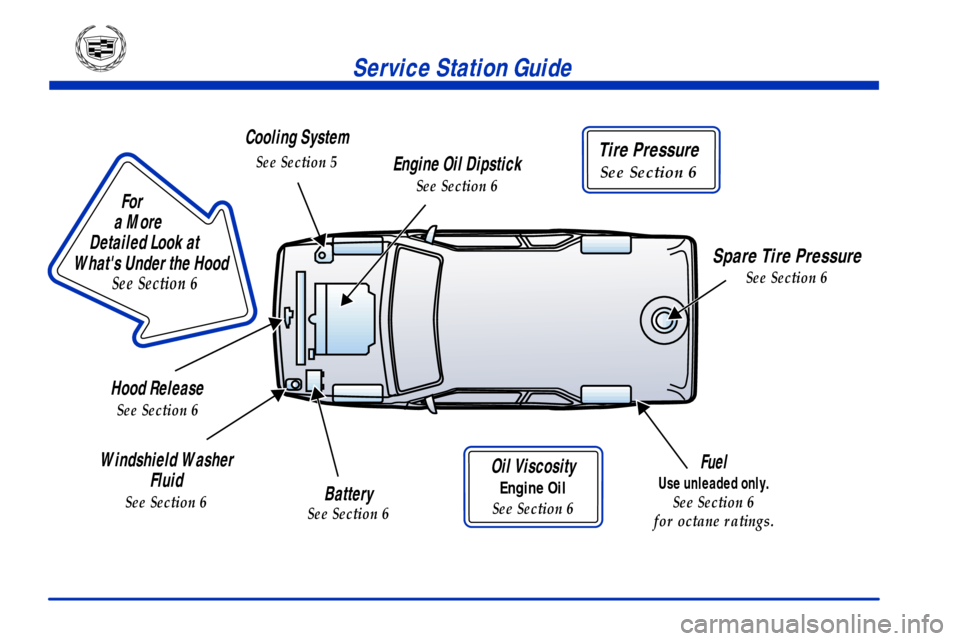
For
a More
Detailed Look at
What's Under the Hood
See Section 6
Tire Pressure
See Section 6
Oil Viscosity
Engine Oil
See Section 6
Service Station Guide
Cooling System
See Section 5
Spare Tire Pressure
See Section 6
Fuel
Use unleaded only.
See Section 6
for octane ratings.
Engine Oil Dipstick
See Section 6
Hood Release
See Section 6
Windshield Washer
Fluid
See Section 6Battery
See Section 6
Page 13 of 417

1-
1-1
Section 1 Seats and Restraint Systems
Here you'll find information about the seats in your vehicle and how to use your safety belts properly. You can also
learn about some things you should not do with air bags and safety belts.
1
-2 Seats and Seat Controls
1
-16 Safety Belts: They're for Everyone
1
-21 Here Are Questions Many People Ask About
Safety Belts
-- and the Answers
1
-22 How to Wear Safety Belts Properly
1
-22 Driver Position
1
-28 Safety Belt Use During Pregnancy
1
-29 Right Front Passenger Position
1
-29 Supplemental Restraint System (SRS)
1
-38 Rear Seat Passengers1
-40 Rear Safety Belt Comfort Guides for Children
and Small Adults
1
-43 Center Passenger Position
1
-44 Children
1
-48 Restraint Systems for Children
1
-64 Older Children
1
-67 Safety Belt Extender
1
-67 Checking Your Restraint Systems
1
-67 Replacing Restraint System Parts
After a Crash
Page 14 of 417

1-2
Seats and Seat Controls
This section tells you about the seats -- how to adjust
them, and fold them up and down. It also tells you about
reclining front seatbacks and head restraints.
Power Seats
Horizontal Control: Raise or lower the front of the seat
cushion by raising or lowering the forward edge of the
control. Move the seat forward or rearward by moving
the whole control toward the front or rear of the vehicle.
Raise or lower the rear of the seat cushion by raising or
lowering the rear edge of the control.
Moving the whole control up or down raises or lowers
the entire seat cushion.
Reclining Front Seatbacks
Your vehicle's front seatbacks have a recline feature.
Vertical Control: You can use the vertical control to
adjust the angle of the seatback. Move the reclining
front seatback forward or rearward by moving the
control toward the front or toward the rear of the
vehicle. Move the seatback forward by moving the
control toward the front of the vehicle. See ªReclining
Seatbacksº in the Index for further information.
Page 15 of 417

1-3
But don't have a seatback reclined if your vehicle
is moving.
CAUTION:
Sitting in a reclined position when your vehicle is
in motion can be dangerous. Even if you buckle
up, your safety belts can't do their job when
you're reclined like this.
The shoulder belt can't do its job. In a crash, you
could go into it, receiving neck or other injuries.
The lap belt can't do its job either. In a crash the
belt could go up over your abdomen. The belt
forces would be there, not at your pelvic bones.
This could cause serious internal injuries.
For proper protection when the vehicle is in
motion, have the seatback upright. Then sit
well back in the seat and wear your safety
belt properly.
Page 16 of 417

1-4 Power Lumbar Control
Your vehicle's power
lumber controls are
located near the power
seat controls. You can
increase or decrease lumbar
support in an area of the
lower seatback with the
lumber controls.
To increase support, press and hold the front of the
control. To decrease support, press and hold the rear
of the control. Let go of the control when the lower
seatback reaches the desired level of support.
You can also reshape the side wing area of the lower
seatback for more lateral support.
To increase support, press and hold the top of the
control. To decrease support, press and hold the
bottom of the control. Let go of the control when the
lower seatback reaches the desired level of support.
Memory Seat and Memory Mirrors
The memory function controls are located on the driver's
door trim panel.
For this function to work, it must be enabled/configured
in the secondary information center. See ªSecondary
Information Centerº in the Index for more information.
These controls are used to program and recall the memory
settings for the driver's seat and both the driver's and
the passenger's outside mirrors. The seat and mirror
positions can be personalized for both driver 1 and driver 2.
Page 17 of 417

1-5
In addition, you can also store the seat exit position for
driver 1 and driver 2. See ªMemory Seat Exitº later in this
section for more information.
The memory function does not store the lumbar or the
side wing positions.
To store your memory seat and mirror positions,
do the following:
1. Adjust the driver's seat and both outside mirrors to
your desired position.
2. Press and hold the 1 or 2 (driver 1 or 2) button of
the memory control for three seconds. When you
hear a chime ring two times, the memory positions
are stored.
To do the same thing for a second driver, follow the
preceding steps, but press the other number of the
memory control. The memory recall feature only works
when the transmission is in PARK (P).
To recall memory seat and mirror positions, make sure
your vehicle is in PARK (P), then press the 1 or 2 button
of the memory control to recall the seat setting. You will
hear a chime ring one time to let you know the setting
has been selected.
The memory seat and mirror positions can also be
programmed to work with the keyless entry system.
See ªSecondary Information Centerº in the Index for
more information.Memory Seat Exit
For this function to work, it must be enabled in the
secondary information center. See ªSecondary
Information Centerº in the Index for more information.
By moving the seats to a stored exit position, the
memory seat exit feature can make it easier to leave the
vehicle. To store the seat exit position for driver 1 or
driver 2, do the following:
1. Select the desired driver number by pressing
the 1 or 2 button.
2. Move the seat to the desired position.
3. Press and hold the Exit button of the memory
control for three seconds. When you hear a chime
ring two times, the exit position is stored for the
identified driver (driver 1 or 2).
To use the exit feature, press the Exit button on the
memory seat controls. If you have the exit feature
enabled in the secondary information center, then
removing the key from the ignition will cause the seat to
move to the preset exit position without having to press
the Exit button. See ªSecondary Information Centerº in
the Index for more information.
Page 18 of 417

1-6
Keyless Entry Transmitter Seat and Mirror
Memory Recall
For this function to work, it must be enabled in the
secondary information system. See ªSecondary
Information Centerº in the Index for more information.
You can program both of your keyless entry transmitters
to work the settings you have chosen for driver 1 or
driver 2. Once a transmitter is programmed, pressing
the UNLOCK button will recall the memory functions
chosen for that transmitter. To match a transmitter
do the following:
1. Press and hold the desired number button (1 or 2)
on the memory controls until the seat and mirror
positions are set. You will hear a chime ring twice.
Continue holding the number button.
2. While still holding the memory number button,
press UNLOCK on the keyless entry transmitter
(within five seconds) that you want to match with the
specific memory number button (1 or 2) you pressed
in Step 1.
That transmitter will now be matched with the memory
number button 1 or 2 and the memory settings that are
set for that number.Heated Front Seats
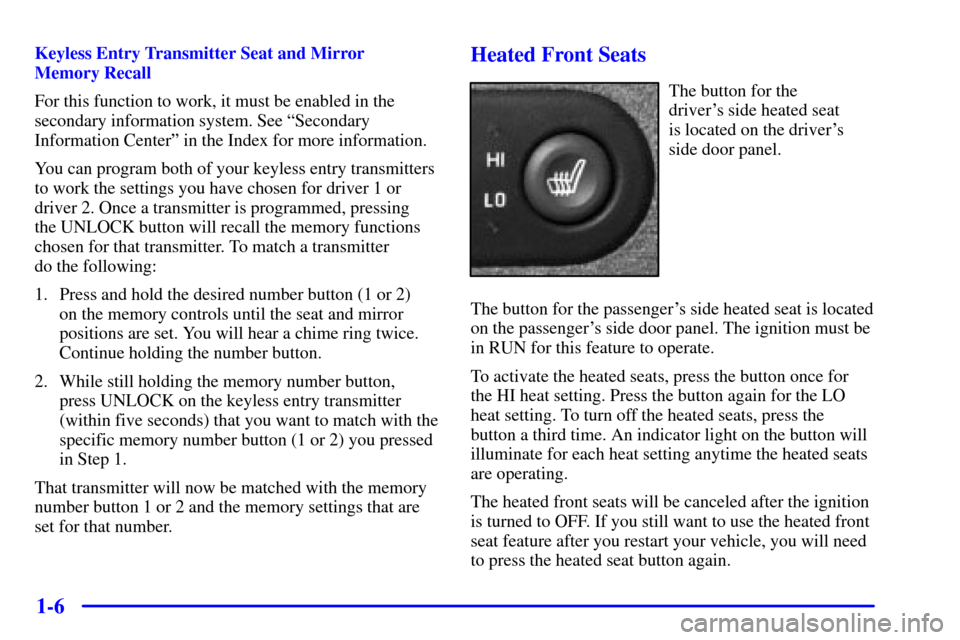
The button for the
driver's side heated seat
is located on the driver's
side door panel.
The button for the passenger's side heated seat is located
on the passenger's side door panel. The ignition must be
in RUN for this feature to operate.
To activate the heated seats, press the button once for
the HI heat setting. Press the button again for the LO
heat setting. To turn off the heated seats, press the
button a third time. An indicator light on the button will
illuminate for each heat setting anytime the heated seats
are operating.
The heated front seats will be canceled after the ignition
is turned to OFF. If you still want to use the heated front
seat feature after you restart your vehicle, you will need
to press the heated seat button again.
Page 19 of 417

1-7 Head Restraints
Slide the head restraint up or down so that the top of the
restraint is closest to the top of your head. This position
reduces the chance of a neck injury in a crash.The head restraints tilt forward and rearward also.
The rear seat head restraints in your vehicle are
adjustable. Slide an adjustable head restraint up or
down so that the top of the restraint is closest to the
top of your head. This position reduces the chance of
a neck injury in a crash.
To adjust the tilt for either of the front head restraints,
pull it toward you until you hear a ªclickº. There are
four positions available: initial position, first click,
second click and third click. Each position will click
into place. After the third position (three clicks) is
reached, pulling the restraint farther will release it back
to the normal, upright position.
Page 20 of 417

1-8 Rear Seats
Reclining Rear (Second Row) Seats
The seatbacks can be reclined in the second row seats.
To recline the seatback,
do the following:
1. Pull the lever located
at the base of the seat
cushion forward.
2. Release the lever to lock the seatback where you
want it. Pull the lever again without pushing on
the seatback and the seatback will go to an
upright position.Folding Rear (Second Row) Seats
The rear seat is a 60/40 split seat which may be folded
down to give you more cargo space. The rear seatbacks
are equipped with rearward folding head restraints.
When the seatback is being folded down, the head
restraint will automatically fold rearward to allow a flat
load floor for cargo or entry to the third row seating.
To fold the rear seat, do the following:
1. Insert the two safety belt buckles into the pocket
in the seatback before folding the rear seat on the
driver's side.
That way, the buckles will be out of the way when
the seat is folded and will be available for passengers
to use when the seat is returned to the passenger
position. Also, make sure that nothing is under or
in front of the seat
2. Make sure the seatback is in an upright position
(unreclined) before folding it.