warning light CADILLAC ESCALADE 2010 3.G User Guide
[x] Cancel search | Manufacturer: CADILLAC, Model Year: 2010, Model line: ESCALADE, Model: CADILLAC ESCALADE 2010 3.GPages: 616, PDF Size: 39.41 MB
Page 132 of 616

If your vehicle has the remote start feature, theRKE transmitter functions will have an increased rangeof operation. However, the range may be less while thevehicle is running.
There are other conditions which can affect theperformance of the transmitter, seeRemote KeylessEntry (RKE) Systemo n p a g e 3!4for additionalinformation.
/(Remote Start) :This button will be on theRKE transmitter if you have remote start.
To start the vehicle using the remote start feature:
1. Aim the transmitter at the vehicle.
2. Press and release the transmitter's lock button.The vehicle's doors will lock. Immediately pressand hold the transmitter's remote start button untilthe turn signal lights flash. If you cannot see thevehicle's lights, press and hold the remote startbutton for two to four seconds. Pressing the remotestart button again after the vehicle has started willturn the engine off.
When the vehicle starts, the parking lamps will turnon and remain on while the vehicle is running.
If the vehicle is left running it will automatically shutoff after 10 minutes unless a time extension hasbeen done.
3. If it is the first remote start since the vehicle hasbeen driven, repeat these steps, while the engineis still running, to extend the engine running timeby 10 minutes. Remote start can be extendedone time.
After entering the vehicle during a remote start, insertand turn the key to ON/RUN to drive the vehicle.
To manually shut off a remote start, do any of thefollowing:
.Aim the RKE transmitter at the vehicle and pressthe remote start button until the parking lampsturn off.
.Turn on the hazard warning flashers.
.Turn the ignition switch on and then off.
The vehicle can be remote started two separate timesbetween driving sequences. The engine will run for10 minutes after each remote start.
Or, you can extend the engine run time by another10 minutes within the first 10 minute remote start timeframe, and before the engine stops.
3-8
Page 140 of 616

Pressing the buttons, or touchpad switch a second timewhile the liftgate is moving reverses the direction.
l:The liftgate can also be closed by pressing thepower liftgate button next to the liftgate latch.
Press the button a second time during liftgate operationto reverse that operation.
The power liftgate may be temporarily disabled underextreme temperatures, or under low battery conditions.If this occurs, the liftgate can still be operated manually.
If you shift the transmission out of P (Park) while thepower function is in progress, the liftgate power functionwill continue to completion. If you shift the transmissionout of P (Park) and accelerate before the power liftgatelatches closed, the liftgate may reverse to the openposition. Cargo could fall out of the vehicle. Alwaysmake sure the power liftgate is closed and latchedbefore you drive away.
If you power open the liftgate and the liftgate supportstruts have lost pressure, the lights will flash and achime will sound. The liftgate will stay open temporarily,then slowly close. See your dealer/retailer for servicebefore using the liftgate.
Obstacle Detection Features
If the liftgate encounters an obstacle during a poweropen or close cycle, a warning chime will sound and theliftgate will automatically reverse direction to the fullclosed or open position. After removing the obstruction,the power liftgate operation can be used again. If theliftgate encounters multiple obstacles on the samepower cycle, the power function will deactivate, and youmust manually open or close the liftgate. The REARACCESS OPEN warning message in the DriverInformation Center (DIC) will indicate that the liftgate isopen. After removing the obstructions, manually openthe liftgate to the full open position or close the liftgateto the fully closed and latched position. The liftgate willnow resume normal power operation.
Your vehicle has pinch sensors located on the sideedges of the liftgate. If an object is caught between theliftgate and the body and presses against this sensor,the liftgate will reverse direction and open fully. Theliftgate will remain open until it is activated again orclosed manually. Do not force the liftgate open or closedduring a power cycle.
3-16
Page 152 of 616
C (ON/RUN) :This position can be used to operate theelectrical accessories and to display some instrumentpanel cluster warning and indicator lights. The switchstays in this position when the engine is running.The transmission is also unlocked in this position onautomatic transmission vehicles.
If you leave the key in the ACC/ACCESSORY orON/RUN position with the engine off, the batterycould be drained. You may not be able to start thevehicle if the battery is allowed to drain for an extendedperiod of time.
D (START) :This is the position that starts the engine.When the engine starts, release the key. The ignitionswitch returns to ON/RUN for driving.
A warning tone will sound when the driver door isopened, the ignition is in ACC/ACCESSORY orLOCK/OFF and the key is in the ignition.
Retained Accessory Power (RAP)
The following vehicle accessories can be used for up to10 minutes after the engine is turned off:
.Audio System
.Power Windows
.OnStar®System (if equipped)
.Sunroof (if equipped)
These features work when the key is in ON/RUN orACC/ACCESSORY. Once the key is turned fromON/RUN to LOCK/OFF, the windows and sunroofcontinue to work up to 10 minutes until any door isopened. The radio continues to work for up to10 minutes or until the driver door is opened.
3-28
Page 162 of 616
Parking Brake
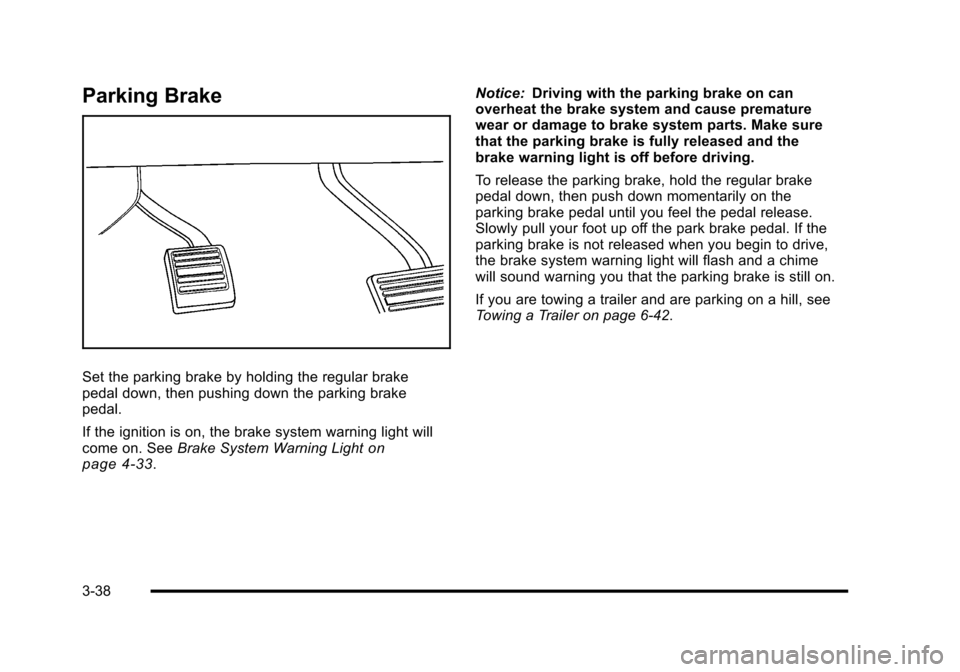
Set the parking brake by holding the regular brakepedal down, then pushing down the parking brakepedal.
If the ignition is on, the brake system warning light willcome on. SeeBrake System Warning Lightonpage 4!33.
Notice:Driving with the parking brake on canoverheat the brake system and cause prematurewear or damage to brake system parts. Make surethat the parking brake is fully released and thebrake warning light is off before driving.
To release the parking brake, hold the regular brakepedal down, then push down momentarily on theparking brake pedal until you feel the pedal release.Slowly pull your foot up off the park brake pedal. If theparking brake is not released when you begin to drive,the brake system warning light will flash and a chimewill sound warning you that the parking brake is still on.
If you are towing a trailer and are parking on a hill, seeTowing a Trailer on page 6!42.
3-38
Page 171 of 616

The system can bedisabled by pressing therear park aid disablebutton located next tothe radio.
The indicator light will come on and PARK ASSIST OFFdisplays on the Driver Information Center (DIC) toindicate that URPA is off, seeDIC Warnings andMessages on page 4!48.
When the System Does Not Seem to
Work Properly
If the URPA system will not activate due to a temporarycondition, the messages PARK ASSIST OFF or PARKASSIST BLOCKED SEE OWNERS MANUAL will bedisplayed on the DIC.
SERVICE PARK ASSIST :If this message occurs, takethe vehicle to your dealer/retailer to repair the system.
PARK ASSIST OFF :This message occurs if the driverdisables the system.
PARKING ASSIST BLOCKED SEE OWNERSMANUAL :This message can occur under thefollowing conditions:
.The ultrasonic sensors are not clean. Keep thevehicle's rear bumper free of mud, dirt, snow, iceand slush. For cleaning instructions, seeWashingYour Vehicle on page 7!102.
.The park assist sensors are covered by frost orice. Frost or ice can form around and behind thesensors and may not always be seen; this canoccur after washing the vehicle in cold weather.The message may not clear until the frost or icehas melted.
.A trailer was attached to the vehicle, or a bicycle oran object was hanging out of the liftgate during thelast drive cycle. Once the attached object isremoved, URPA will return to normal operation.
.A tow bar is attached to the vehicle.
.The vehicle's bumper is damaged. Take the vehicleto your dealer/retailer to repair the system.
.Other conditions may affect system performance,such as vibrations from a jackhammer or thecompression of air brakes on a very large truck.
If the system is still disabled, after driving forward atleast 40 km/h (25 mph), take the vehicle to yourdealer/retailer.
3-47
Page 172 of 616
Side Blind Zone Alert (SBZA)
The vehicle may have a Side Blind Zone Alert (SBZA)system. Read this entire section before using thesystem.
{WARNING:
SBZA is only a lane changing aid and does not
replace driver vision. SBZA does not detect:
.Vehicles outside the side blind zones which
may be rapidly approaching.
.Pedestrians, bicyclists, or animals.
Failure to use proper care when changing lanes
may result in damage to the vehicle, injury,
or death. Always check the outside and rearview
mirrors, glance over your shoulder, and use the
turn signal before changing lanes.
When the system detects a vehicle in the side blindzone, amber SBZA displays light up in the side mirrors.This indicates that it may be unsafe to change lanes.Before making a lane change, always check the SBZAdisplay, check the outside and rearview mirrors, lookover your shoulder for vehicles and hazards, and usethe turn signal.
3-48
Page 173 of 616
SBZA Detection Zones
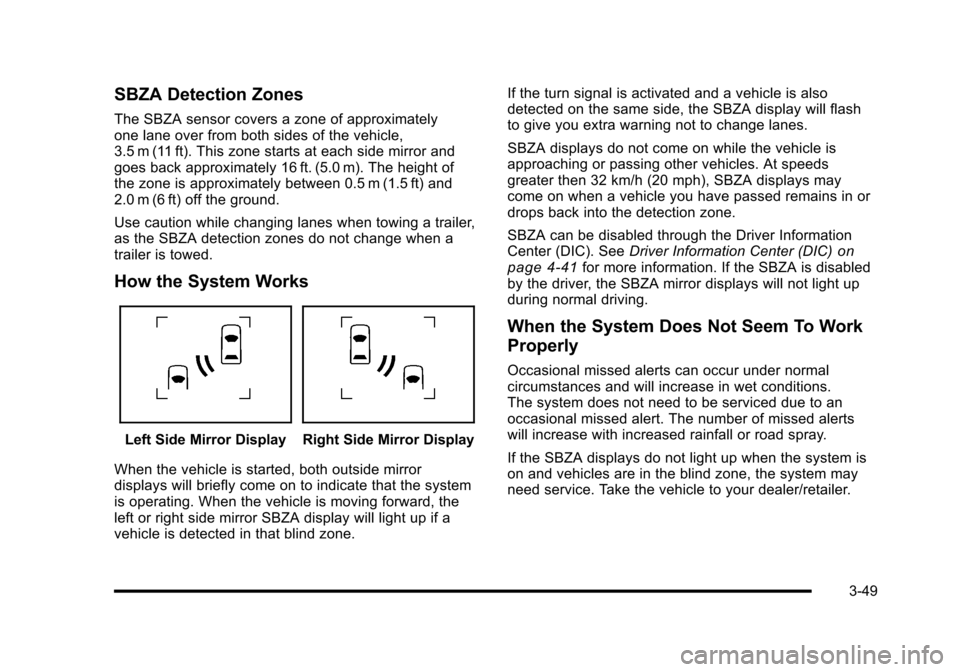
The SBZA sensor covers a zone of approximatelyone lane over from both sides of the vehicle,3.5 m (11 ft). This zone starts at each side mirror andgoes back approximately 16 ft. (5.0 m). The height ofthe zone is approximately between 0.5 m (1.5 ft) and2.0 m (6 ft) off the ground.
Use caution while changing lanes when towing a trailer,as the SBZA detection zones do not change when atrailer is towed.
How the System Works
Left Side Mirror DisplayRight Side Mirror Display
When the vehicle is started, both outside mirrordisplays will briefly come on to indicate that the systemis operating. When the vehicle is moving forward, theleft or right side mirror SBZA display will light up if avehicle is detected in that blind zone.
If the turn signal is activated and a vehicle is alsodetected on the same side, the SBZA display will flashto give you extra warning not to change lanes.
SBZA displays do not come on while the vehicle isapproaching or passing other vehicles. At speedsgreater then 32 km/h (20 mph), SBZA displays maycome on when a vehicle you have passed remains in ordrops back into the detection zone.
SBZA can be disabled through the Driver InformationCenter (DIC). SeeDriver Information Center (DIC)onpage 4!41for more information. If the SBZA is disabledby the driver, the SBZA mirror displays will not light upduring normal driving.
When the System Does Not Seem To Work
Properly
Occasional missed alerts can occur under normalcircumstances and will increase in wet conditions.The system does not need to be serviced due to anoccasional missed alert. The number of missed alertswill increase with increased rainfall or road spray.
If the SBZA displays do not light up when the system ison and vehicles are in the blind zone, the system mayneed service. Take the vehicle to your dealer/retailer.
3-49
Page 193 of 616
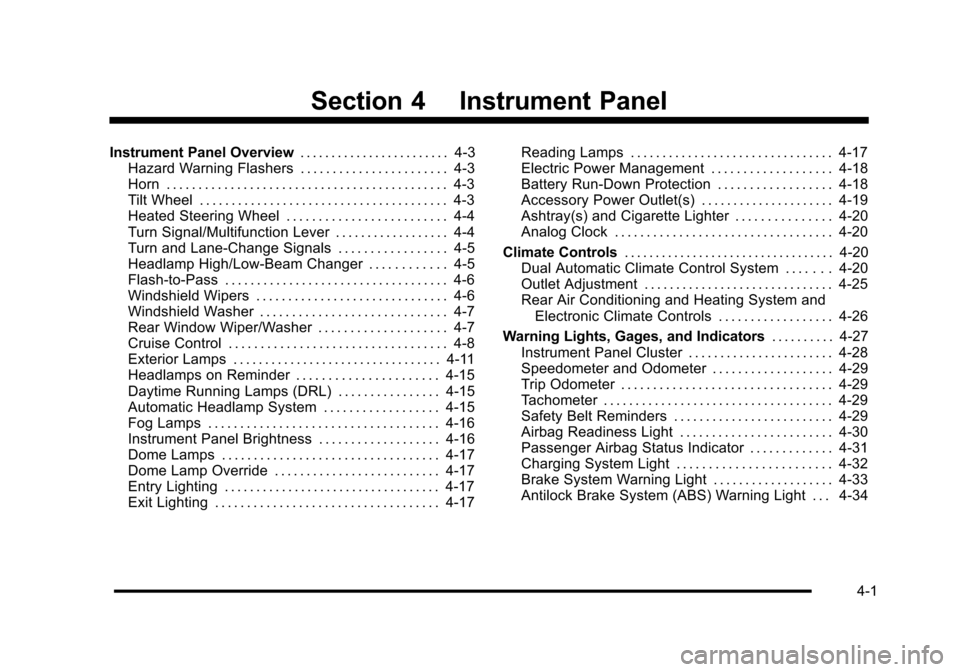
Section 4 Instrument Panel
Instrument Panel Overview. . . . . . . . . . . . . . . . . . . . . . . . 4-3Hazard Warning Flashers . . . . . . . . . . . . . . . . . . . . . . . 4-3Horn . . . . . . . . . . . . . . . . . . . . . . . . . . . . . . . . . . . . . . . . . . . . 4-3Tilt Wheel . . . . . . . . . . . . . . . . . . . . . . . . . . . . . . . . . . . . . . . 4-3Heated Steering Wheel . . . . . . . . . . . . . . . . . . . . . . . . . 4-4Turn Signal/Multifunction Lever . . . . . . . . . . . . . . . . . . 4-4Turn and Lane-Change Signals . . . . . . . . . . . . . . . . . 4-5Headlamp High/Low-Beam Changer . . . . . . . . . . . . 4-5Flash-to-Pass . . . . . . . . . . . . . . . . . . . . . . . . . . . . . . . . . . . 4-6Windshield Wipers . . . . . . . . . . . . . . . . . . . . . . . . . . . . . . 4-6Windshield Washer . . . . . . . . . . . . . . . . . . . . . . . . . . . . . 4-7Rear Window Wiper/Washer . . . . . . . . . . . . . . . . . . . . 4-7Cruise Control . . . . . . . . . . . . . . . . . . . . . . . . . . . . . . . . . . 4-8Exterior Lamps . . . . . . . . . . . . . . . . . . . . . . . . . . . . . . . . . 4-11Headlamps on Reminder . . . . . . . . . . . . . . . . . . . . . . 4-15Daytime Running Lamps (DRL) . . . . . . . . . . . . . . . . 4-15Automatic Headlamp System . . . . . . . . . . . . . . . . . . 4-15Fog Lamps . . . . . . . . . . . . . . . . . . . . . . . . . . . . . . . . . . . . 4-16Instrument Panel Brightness . . . . . . . . . . . . . . . . . . . 4-16Dome Lamps . . . . . . . . . . . . . . . . . . . . . . . . . . . . . . . . . . 4-17Dome Lamp Override . . . . . . . . . . . . . . . . . . . . . . . . . . 4-17Entry Lighting . . . . . . . . . . . . . . . . . . . . . . . . . . . . . . . . . . 4-17Exit Lighting . . . . . . . . . . . . . . . . . . . . . . . . . . . . . . . . . . . 4-17
Reading Lamps . . . . . . . . . . . . . . . . . . . . . . . . . . . . . . . . 4-17Electric Power Management . . . . . . . . . . . . . . . . . . . 4-18Battery Run-Down Protection . . . . . . . . . . . . . . . . . . 4-18Accessory Power Outlet(s) . . . . . . . . . . . . . . . . . . . . . 4-19Ashtray(s) and Cigarette Lighter . . . . . . . . . . . . . . . 4-20Analog Clock . . . . . . . . . . . . . . . . . . . . . . . . . . . . . . . . . . 4-20
Climate Controls. . . . . . . . . . . . . . . . . . . . . . . . . . . . . . . . . . 4-20Dual Automatic Climate Control System . . . . . . . 4-20Outlet Adjustment . . . . . . . . . . . . . . . . . . . . . . . . . . . . . . 4-25Rear Air Conditioning and Heating System andElectronic Climate Controls . . . . . . . . . . . . . . . . . . 4-26
Warning Lights, Gages, and Indicators. . . . . . . . . . 4-27Instrument Panel Cluster . . . . . . . . . . . . . . . . . . . . . . . 4-28Speedometer and Odometer . . . . . . . . . . . . . . . . . . . 4-29Trip Odometer . . . . . . . . . . . . . . . . . . . . . . . . . . . . . . . . . 4-29Tachometer . . . . . . . . . . . . . . . . . . . . . . . . . . . . . . . . . . . . 4-29Safety Belt Reminders . . . . . . . . . . . . . . . . . . . . . . . . . 4-29Airbag Readiness Light . . . . . . . . . . . . . . . . . . . . . . . . 4-30Passenger Airbag Status Indicator . . . . . . . . . . . . . 4-31Charging System Light . . . . . . . . . . . . . . . . . . . . . . . . 4-32Brake System Warning Light . . . . . . . . . . . . . . . . . . . 4-33Antilock Brake System (ABS) Warning Light . . . 4-34
4-1
Page 194 of 616
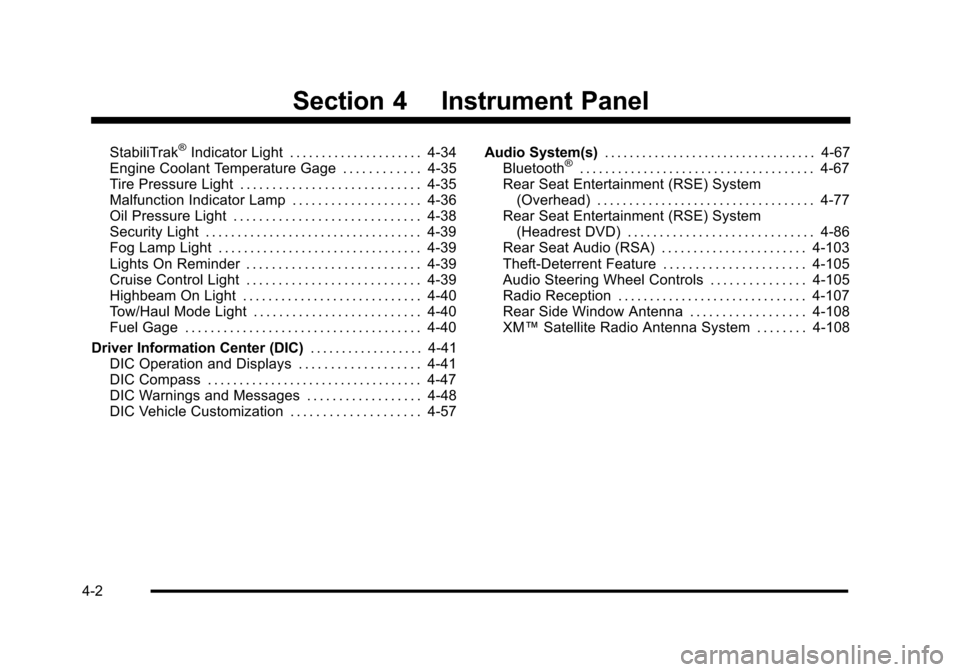
Section 4 Instrument Panel
StabiliTrak®Indicator Light . . . . . . . . . . . . . . . . . . . . . 4-34Engine Coolant Temperature Gage . . . . . . . . . . . . 4-35Tire Pressure Light . . . . . . . . . . . . . . . . . . . . . . . . . . . . 4-35Malfunction Indicator Lamp . . . . . . . . . . . . . . . . . . . . 4-36Oil Pressure Light . . . . . . . . . . . . . . . . . . . . . . . . . . . . . 4-38Security Light . . . . . . . . . . . . . . . . . . . . . . . . . . . . . . . . . . 4-39Fog Lamp Light . . . . . . . . . . . . . . . . . . . . . . . . . . . . . . . . 4-39Lights On Reminder . . . . . . . . . . . . . . . . . . . . . . . . . . . 4-39Cruise Control Light . . . . . . . . . . . . . . . . . . . . . . . . . . . 4-39Highbeam On Light . . . . . . . . . . . . . . . . . . . . . . . . . . . . 4-40Tow/Haul Mode Light . . . . . . . . . . . . . . . . . . . . . . . . . . 4-40Fuel Gage . . . . . . . . . . . . . . . . . . . . . . . . . . . . . . . . . . . . . 4-40
Driver Information Center (DIC). . . . . . . . . . . . . . . . . . 4-41DIC Operation and Displays . . . . . . . . . . . . . . . . . . . 4-41DIC Compass . . . . . . . . . . . . . . . . . . . . . . . . . . . . . . . . . . 4-47DIC Warnings and Messages . . . . . . . . . . . . . . . . . . 4-48DIC Vehicle Customization . . . . . . . . . . . . . . . . . . . . 4-57
Audio System(s). . . . . . . . . . . . . . . . . . . . . . . . . . . . . . . . . . 4-67Bluetooth®. . . . . . . . . . . . . . . . . . . . . . . . . . . . . . . . . . . . . 4-67Rear Seat Entertainment (RSE) System(Overhead) . . . . . . . . . . . . . . . . . . . . . . . . . . . . . . . . . . 4-77Rear Seat Entertainment (RSE) System(Headrest DVD) . . . . . . . . . . . . . . . . . . . . . . . . . . . . . 4-86Rear Seat Audio (RSA) . . . . . . . . . . . . . . . . . . . . . . . 4-103Theft-Deterrent Feature . . . . . . . . . . . . . . . . . . . . . . 4-105Audio Steering Wheel Controls . . . . . . . . . . . . . . . 4-105Radio Reception . . . . . . . . . . . . . . . . . . . . . . . . . . . . . . 4-107Rear Side Window Antenna . . . . . . . . . . . . . . . . . . 4-108XM™Satellite Radio Antenna System . . . . . . . . 4-108
4-2
Page 201 of 616
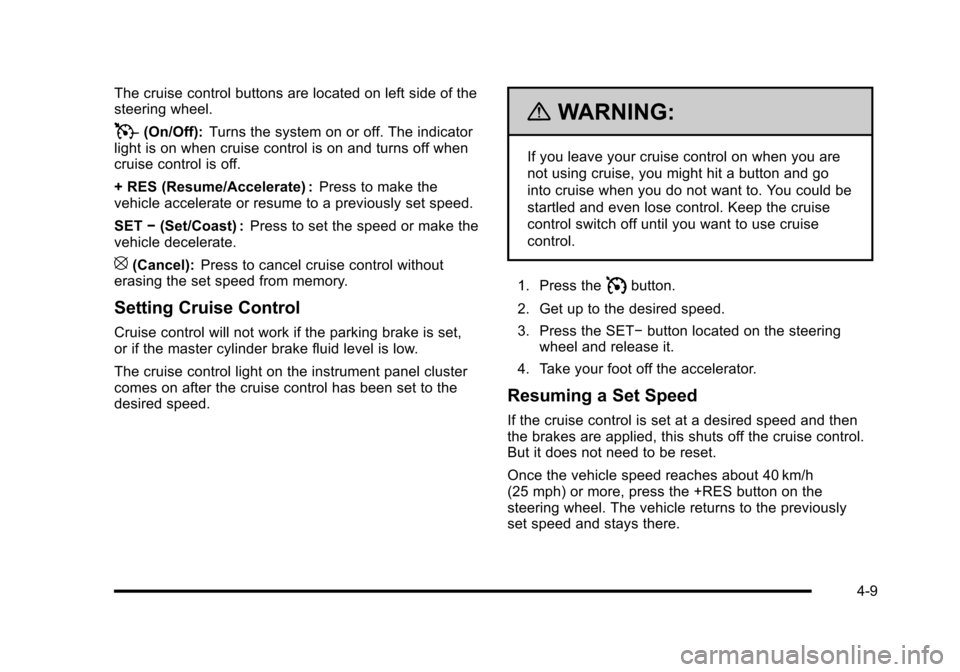
The cruise control buttons are located on left side of thesteering wheel.
T(On/Off):Turns the system on or off. The indicatorlight is on when cruise control is on and turns off whencruise control is off.
+ RES (Resume/Accelerate) :Press to make thevehicle accelerate or resume to a previously set speed.
SET!(Set/Coast) :Press to set the speed or make thevehicle decelerate.
[(Cancel):Press to cancel cruise control withouterasing the set speed from memory.
Setting Cruise Control
Cruise control will not work if the parking brake is set,or if the master cylinder brake fluid level is low.
The cruise control light on the instrument panel clustercomes on after the cruise control has been set to thedesired speed.
{WARNING:
If you leave your cruise control on when you are
not using cruise, you might hit a button and go
into cruise when you do not want to. You could be
startled and even lose control. Keep the cruise
control switch off until you want to use cruise
control.
1. Press theIbutton.
2. Get up to the desired speed.
3. Press the SET!button located on the steeringwheel and release it.
4. Take your foot off the accelerator.
Resuming a Set Speed
If the cruise control is set at a desired speed and thenthe brakes are applied, this shuts off the cruise control.But it does not need to be reset.
Once the vehicle speed reaches about 40 km/h(25 mph) or more, press the +RES button on thesteering wheel. The vehicle returns to the previouslyset speed and stays there.
4-9