transmission CADILLAC ESCALADE 2015 4.G Owner's Guide
[x] Cancel search | Manufacturer: CADILLAC, Model Year: 2015, Model line: ESCALADE, Model: CADILLAC ESCALADE 2015 4.GPages: 435, PDF Size: 4.59 MB
Page 237 of 435
Black plate (32,1)Cadillac Escalade Owner Manual (GMNA-Localizing-U.S./Canada/Mexico-
7063683) - 2015 - crc - 2/24/14
9-32 Driving and Operating
The selector button is on the end of
the shift lever. Turn the Tow/Haul
Mode on and off by pressing the
button. When the Tow/Haul Mode is
enabled, a light on the instrument
cluster will come on.
SeeTow/Haul Mode Light on
page 5-21 andHill and Mountain
Roads on page 9-10.
Also see “Tow/Haul Mode” under
Towing Equipment on page 9-77.
Tow/Haul Mode Grade Braking
Tow/Haul Mode Grade Braking is
only enabled while the Tow/Haul
Mode is selected and the vehicle is
not in the Range Selection Mode.
See “Tow/Haul Mode” listed
previously and Manual Mode on
page 9-30. Tow/Haul Mode Grade
Braking assists in maintaining
desired vehicle speeds when driving
on downhill grades by using the
engine and transmission to slow the
vehicle. To disable or enable Tow/Haul
Grade Braking within the current
ignition cycle, press and hold the
Tow/Haul button for five seconds.
When the button is released, the
requested mode change is made.
A DIC message is displayed. See
Transmission Messages on
page 5-43.
See
Towing Equipment on
page 9-77.
For other forms of grade braking,
see Automatic Transmission on
page 9-27 andCruise Control on
page 9-41.
Drive Systems
Four-Wheel Drive
If equipped, four-wheel drive
engages the front axle for extra
traction.
{Caution
Driving on clean, dry pavement in
four-wheel drive for an extended
period of time may cause
premature wear on the system.
The damage would not be
covered by the vehicle warranty.
Driving on clean, dry pavement in
four-wheel drive may:
.Cause a vibration to be felt in
the steering system.
.Cause tires to wear faster.
.Make the transfer case harder to
shift, and cause it to run noisier.
Page 248 of 435
Black plate (43,1)Cadillac Escalade Owner Manual (GMNA-Localizing-U.S./Canada/Mexico-
7063683) - 2015 - crc - 2/24/14
Driving and Operating 9-43
Reducing Speed While Cruise
Control is at a Set Speed
If the cruise control system is
already activated:
.Press and hold SET−down until
the desired lower speed is
reached, then release it.
.To decrease the vehicle speed in
small increments, press SET−
down briefly. For each press, the
vehicle goes about 1.6 km/h
(1 mph) slower.
The speedometer reading can be
displayed in either English or metric
units. See Instrument Cluster on
page 5-10. The increment value
used depends on the units
displayed.
Passing Another Vehicle While
Using Cruise Control
Use the accelerator pedal to
increase the vehicle speed. When
you take your foot off the pedal, the
vehicle will slow down to the
previous set cruise speed. While pressing the accelerator pedal
or shortly following the release to
override cruise, briefly applying the
SET−
control will result in cruise set
to the current vehicle speed.
Using Cruise Control on Hills
How well the cruise control will work
on hills depends upon the vehicle
speed, load, and the steepness of
the hills. When going up steep hills,
you might have to step on the
accelerator pedal to maintain the
vehicle speed.
While going downhill vehicles with a
six-speed automatic transmission
have Cruise Grade Braking to help
maintain driver selected speed.
Cruise Grade Braking is enabled
when the vehicle is started and
cruise control is active. It is not
enabled in Range Selection Mode.
It assists in maintaining driver
selected speed when driving on
downhill grades by using the engine
and transmission to slow the
vehicle. To disable and enable Cruise Grade
Braking for the current ignition key
cycle, press and hold the Tow/Haul
button for five seconds. A Driver
Information Center (DIC) message
displays. See
Transmission
Messages on page 5-43.
For other forms of Grade Braking,
see Automatic Transmission on
page 9-27, and Tow/Haul Mode on
page 9-31.
Ending Cruise Control
There are four ways to end cruise
control:
.Step lightly on the brake pedal.
.Press*.
.Shift the transmission to
N (Neutral).
.To turn off cruise control,
press
J.
Page 275 of 435
Black plate (70,1)Cadillac Escalade Owner Manual (GMNA-Localizing-U.S./Canada/Mexico-
7063683) - 2015 - crc - 2/24/14
9-70 Driving and Operating
Trailer Towing
General Towing
Information
Only use towing equipment that has
been designed for the vehicle.
Contact your dealer or trailering
dealer for assistance with preparing
the vehicle for towing a trailer. Read
the entire section before towing a
trailer.
For towing a disabled vehicle, see
Towing the Vehicle on page 10-76.
For towing the vehicle behind
another vehicle such as a motor
home, seeRecreational Vehicle
Towing on page 10-76.
Driving Characteristics
and Towing Tips
Driving with a Trailer
When towing a trailer:
.Become familiar with the state
and local laws that apply to
trailer towing.
.Do not tow a trailer during the
first 800 km (500 mi) to prevent
damage to the engine, axle,
or other parts.
.Then during the first 800 km
(500 mi) of trailer towing, do not
drive over 80 km/h (50 mph) and
do not make starts at full throttle.
.Vehicles can tow in D (Drive).
Shift the transmission to a lower
gear if the transmission shifts
too often under heavy loads and/
or hilly conditions.
.Do not use Adaptive Cruise
Control when towing.
.Turn off Park Assist when
towing.
.The Automatic Collision
Preparation System should be
set to Off when towing. See
Active Emergency Braking
System on page 9-59.
{Warning
When towing a trailer, exhaust
gases may collect at the rear of
the vehicle and enter if the
liftgate, trunk/hatch, or rear-most
window is open.
When towing a trailer:
.Do not drive with the liftgate,
trunk/hatch, or rear-most
window open.
.Fully open the air outlets on
or under the instrument
panel.
.Also adjust the climate
control system to a setting
that brings in only outside air.
See “Climate Control
Systems” in the Index.
For more information about
Carbon Monoxide, see Engine
Exhaust on page 9-26.
Page 276 of 435
Black plate (71,1)Cadillac Escalade Owner Manual (GMNA-Localizing-U.S./Canada/Mexico-
7063683) - 2015 - crc - 2/24/14
Driving and Operating 9-71
Towing a trailer requires a certain
amount of experience. The
combination you are driving is
longer and not as responsive as the
vehicle itself. Get acquainted with
the handling and braking of the rig
before setting out for the open road.
Before starting, check all trailer hitch
parts and attachments, safety
chains, electrical connectors, lamps,
tires, and mirrors. If the trailer has
electric brakes, start the
combination moving and then apply
the trailer brake controller by hand
to be sure the brakes work.
During the trip, check occasionally
to be sure that the load is secure
and the lamps and any trailer
brakes still work.
Following Distance
Stay at least twice as far behind the
vehicle ahead as you would when
driving the vehicle without a trailer.
This can help to avoid heavy
braking and sudden turns.
Passing
More passing distance is needed
when towing a trailer. The
combination will not accelerate as
quickly and is longer so it is
necessary to go much farther
beyond the passed vehicle before
returning to the lane.
Backing Up
Hold the bottom of the steering
wheel with one hand. To move the
trailer to the left, move that hand to
the left. To move the trailer to the
right, move your hand to the right.
Always back up slowly and,
if possible, have someone
guide you.
Making Turns
{Caution
Making very sharp turns while
trailering could cause the trailer to
come in contact with the vehicle.(Continued)
Caution (Continued)
The vehicle could be damaged.
Avoid making very sharp turns
while trailering.
When turning with a trailer, make
wider turns than normal. Do this so
the trailer will not strike soft
shoulders, curbs, road signs, trees,
or other objects. Avoid jerky or
sudden maneuvers. Signal well in
advance.
If the trailer turn signal bulbs burn
out, the arrows on the instrument
cluster will still flash for turns. It is
important to check occasionally to
be sure the trailer bulbs are still
working.
Driving on Grades
Reduce speed and shift to a lower
gear before starting down a long or
steep downgrade. If the
transmission is not shifted down, the
brakes might get hot and no longer
work well.
Page 277 of 435
Black plate (72,1)Cadillac Escalade Owner Manual (GMNA-Localizing-U.S./Canada/Mexico-
7063683) - 2015 - crc - 2/24/14
9-72 Driving and Operating
Vehicles can tow in D (Drive). Shift
the transmission to a lower gear if
the transmission shifts too often
under heavy loads and/or hilly
conditions.
When towing, use the Tow/Haul
Mode to prevent damage to the
engine or transmission. SeeTow/
Haul Mode on page 9-31.
When towing at high altitude on
steep uphill grades, consider the
following: Engine coolant will boil at
a lower temperature than at normal
altitudes. If the engine is turned off
immediately after towing at high
altitude on steep uphill grades, the
vehicle may show signs similar to
engine overheating. To avoid this,
let the engine run while parked,
preferably on level ground, with the
transmission in P (Park) for a few
minutes before turning the engine
off. If the overheat warning comes
on, see Engine Overheating on
page 10-18.Parking on Hills
{Warning
Parking the vehicle on a hill with
the trailer attached can be
dangerous. If something goes
wrong, the rig could start to move.
People can be injured, and both
the vehicle and the trailer can be
damaged. When possible, always
park the rig on a flat surface.
If parking the rig on a hill:
1. Press the brake pedal, but do not shift into P (Park) yet. Turn
the wheels into the curb if facing
downhill or into traffic if facing
uphill.
2. Have someone place chocks under the trailer wheels. 3. When the wheel chocks are in
place, release the regular brakes
until the chocks absorb the load.
4. Reapply the brake pedal. Then apply the parking brake and shift
into P (Park).
5. Release the brake pedal.
Leaving After Parking on a Hill
1. Apply and hold the brake pedal.
2. Start the engine.
3. Shift into a gear.
4. Release the parking brake.
5. Let up on the brake pedal.
6. Drive slowly until the trailer is clear of the chocks.
7. Stop and have someone pick up and store the chocks.
Page 278 of 435
Black plate (73,1)Cadillac Escalade Owner Manual (GMNA-Localizing-U.S./Canada/Mexico-
7063683) - 2015 - crc - 2/24/14
Driving and Operating 9-73
Maintenance when Trailer
Towing
The vehicle needs service more
often when pulling a trailer. See
Maintenance Schedule on
page 11-4. Things that are
especially important in trailer
operation are automatic
transmission fluid, engine oil, axle
lubricant, belts, cooling system, and
brake system. It is a good idea to
inspect these before and during
the trip.
Check periodically to see that all
hitch nuts and bolts are tight.
Trailer Towing
Do not tow a trailer during break-in.
SeeNew Vehicle Break-In on
page 9-19.
{Warning
The driver can lose control when
pulling a trailer if the correct
equipment is not used or the
vehicle is not driven properly. For
example, if the trailer is too
heavy, the brakes may not work
well —or even at all. The driver
and passengers could be
seriously injured. The vehicle may
also be damaged; the resulting
repairs would not be covered by
the vehicle warranty. Pull a trailer
only if all the steps in this section
have been followed. Ask your
dealer for advice and information
about towing a trailer with the
vehicle.
{Caution
Pulling a trailer improperly can
damage the vehicle and result in
costly repairs not covered by the
vehicle warranty. To pull a trailer
correctly, follow the advice in this
section and see your dealer for
important information about
towing a trailer with the vehicle.
To identify the trailering capacity of
the vehicle, read the information in
“Weight of the Trailer” later in this
section.
Trailering is different than just
driving the vehicle by itself.
Trailering means changes in
handling, acceleration, braking,
durability and fuel economy.
Successful, safe trailering takes
correct equipment, and it has to be
used properly.
Page 284 of 435
Black plate (79,1)Cadillac Escalade Owner Manual (GMNA-Localizing-U.S./Canada/Mexico-
7063683) - 2015 - crc - 2/24/14
Driving and Operating 9-79
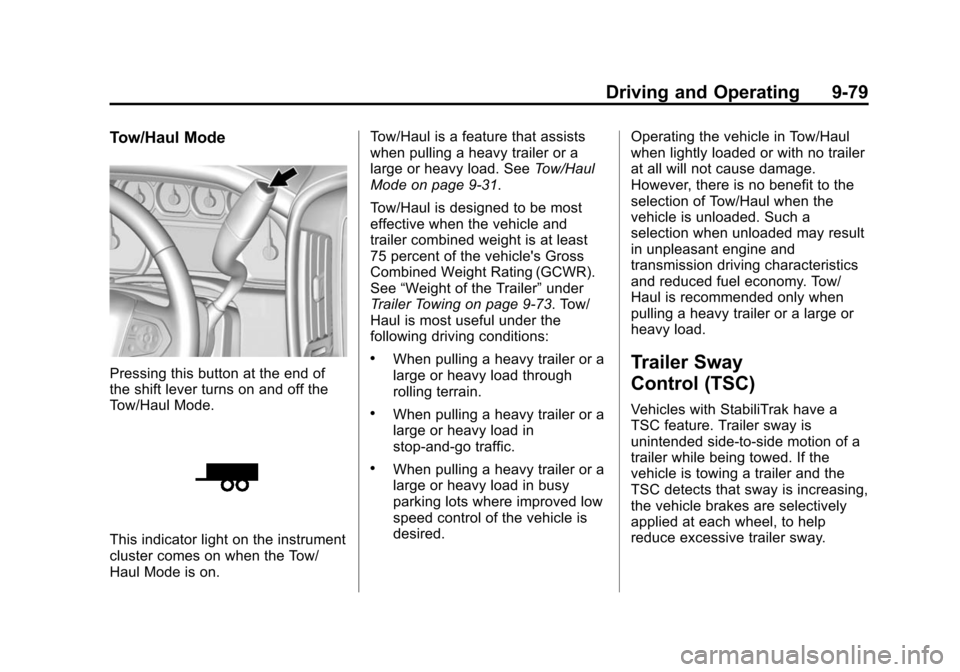
Tow/Haul Mode
Pressing this button at the end of
the shift lever turns on and off the
Tow/Haul Mode.
This indicator light on the instrument
cluster comes on when the Tow/
Haul Mode is on.Tow/Haul is a feature that assists
when pulling a heavy trailer or a
large or heavy load. See
Tow/Haul
Mode on page 9-31.
Tow/Haul is designed to be most
effective when the vehicle and
trailer combined weight is at least
75 percent of the vehicle's Gross
Combined Weight Rating (GCWR).
See “Weight of the Trailer” under
Trailer Towing on page 9-73. Tow/
Haul is most useful under the
following driving conditions:
.When pulling a heavy trailer or a
large or heavy load through
rolling terrain.
.When pulling a heavy trailer or a
large or heavy load in
stop-and-go traffic.
.When pulling a heavy trailer or a
large or heavy load in busy
parking lots where improved low
speed control of the vehicle is
desired. Operating the vehicle in Tow/Haul
when lightly loaded or with no trailer
at all will not cause damage.
However, there is no benefit to the
selection of Tow/Haul when the
vehicle is unloaded. Such a
selection when unloaded may result
in unpleasant engine and
transmission driving characteristics
and reduced fuel economy. Tow/
Haul is recommended only when
pulling a heavy trailer or a large or
heavy load.
Trailer Sway
Control (TSC)
Vehicles with StabiliTrak have a
TSC feature. Trailer sway is
unintended side-to-side motion of a
trailer while being towed. If the
vehicle is towing a trailer and the
TSC detects that sway is increasing,
the vehicle brakes are selectively
applied at each wheel, to help
reduce excessive trailer sway.
Page 286 of 435
Black plate (1,1)Cadillac Escalade Owner Manual (GMNA-Localizing-U.S./Canada/Mexico-
7063683) - 2015 - crc - 2/24/14
Vehicle Care 10-1
Vehicle Care
General Information
General Information . . . . . . . . . . 10-2
California Proposition65 Warning . . . . . . . . . . . . . . . . . 10-2
California Perchlorate Materials Requirements . . . . 10-2
Accessories and Modifications . . . . . . . . . . . . . . . 10-2
Vehicle Checks
Doing Your OwnService Work . . . . . . . . . . . . . . . 10-3
Hood . . . . . . . . . . . . . . . . . . . . . . . . 10-4
Engine Compartment Overview . . . . . . . . . . . . . . . . . . . 10-5
Engine Oil . . . . . . . . . . . . . . . . . . . 10-6
Engine Oil Life System . . . . . . 10-8
Automatic Transmission Fluid . . . . . . . . . . . . . . . . . . . . . . 10-10
Engine Air Cleaner/Filter . . . . 10-13
Cooling System . . . . . . . . . . . . 10-14
Engine Coolant . . . . . . . . . . . . . 10-15
Engine Overheating . . . . . . . . 10-18
Engine Fan . . . . . . . . . . . . . . . . . 10-19
Washer Fluid . . . . . . . . . . . . . . . 10-20
Brakes . . . . . . . . . . . . . . . . . . . . . 10-20 Brake Fluid . . . . . . . . . . . . . . . . . 10-21
Battery . . . . . . . . . . . . . . . . . . . . . 10-23
Four-Wheel Drive . . . . . . . . . . . 10-24
Front Axle . . . . . . . . . . . . . . . . . . 10-24
Rear Axle . . . . . . . . . . . . . . . . . . 10-25
Starter Switch Check . . . . . . . 10-26
Automatic Transmission Shift
Lock Control Function
Check . . . . . . . . . . . . . . . . . . . . . 10-26
Park Brake and P (Park) Mechanism Check . . . . . . . . 10-26
Wiper Blade Replacement . . . . . . . . . . . . . . 10-27
Glass Replacement . . . . . . . . 10-28
Windshield Replacement . . . 10-28
Headlamp Aiming
Headlamp Aiming . . . . . . . . . . 10-28
Bulb Replacement
Bulb Replacement . . . . . . . . . . 10-29
LED Lighting . . . . . . . . . . . . . . . 10-29
License Plate Lamp . . . . . . . . 10-29
Replacement Bulbs . . . . . . . . . 10-30
Electrical System
Electrical System Overload . . . . . . . . . . . . . . . . . . 10-30
Fuses . . . . . . . . . . . . . . . . . . . . . . 10-31 Engine Compartment Fuse
Block . . . . . . . . . . . . . . . . . . . . . 10-31
Instrument Panel Fuse Block (Left) . . . . . . . . . . . . . . . 10-35
Instrument Panel Fuse Block
(Right) . . . . . . . . . . . . . . . . . . . . 10-37
Rear Compartment Fuse Block . . . . . . . . . . . . . . . . . . . . . 10-40
Wheels and Tires
Tires . . . . . . . . . . . . . . . . . . . . . . . . 10-41
All-Season Tires . . . . . . . . . . . . 10-42
Winter Tires . . . . . . . . . . . . . . . . 10-42
Low-Profile Tires . . . . . . . . . . . 10-43
All-Terrain Tires . . . . . . . . . . . . 10-43
Tire Sidewall Labeling . . . . . . 10-43
Tire Designations . . . . . . . . . . . 10-45
Tire Terminology andDefinitions . . . . . . . . . . . . . . . . 10-46
Tire Pressure . . . . . . . . . . . . . . . 10-48
Tire Pressure for High-Speed Operation . . . . . . . . . . . . . . . . . 10-50
Tire Pressure Monitor System . . . . . . . . . . . . . . . . . . . 10-50
Tire Pressure Monitor Operation . . . . . . . . . . . . . . . . . 10-51
Tire Inspection . . . . . . . . . . . . . . 10-54
Tire Rotation . . . . . . . . . . . . . . . 10-55
Page 291 of 435
Black plate (6,1)Cadillac Escalade Owner Manual (GMNA-Localizing-U.S./Canada/Mexico-
7063683) - 2015 - crc - 2/24/14
10-6 Vehicle Care
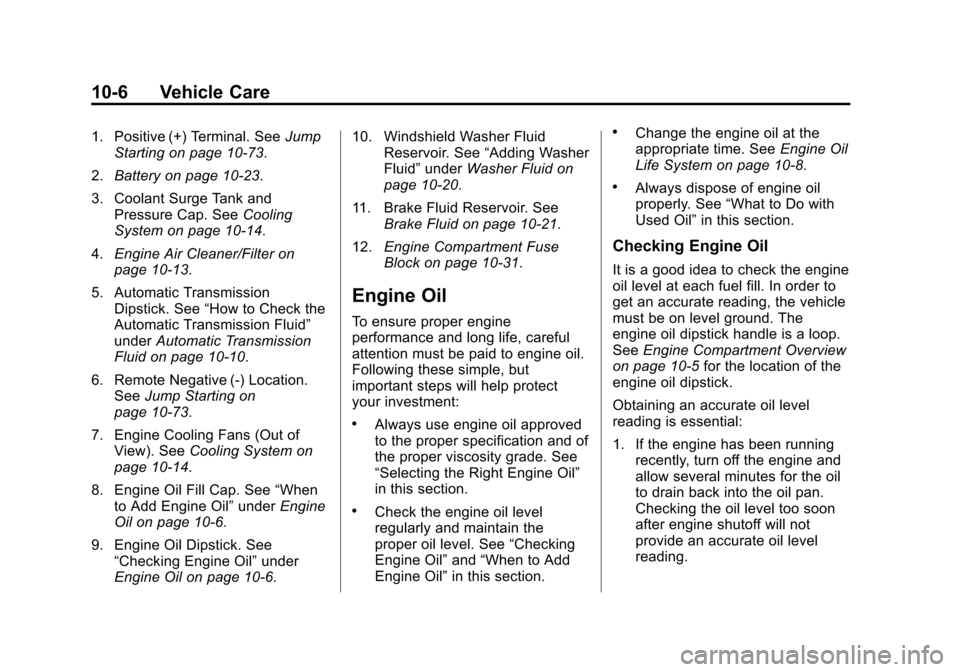
1. Positive (+) Terminal. SeeJump
Starting on page 10-73.
2. Battery on page 10-23.
3. Coolant Surge Tank and Pressure Cap. See Cooling
System on page 10-14.
4. Engine Air Cleaner/Filter on
page 10-13.
5. Automatic Transmission Dipstick. See “How to Check the
Automatic Transmission Fluid”
under Automatic Transmission
Fluid on page 10-10.
6. Remote Negative (-) Location. See Jump Starting on
page 10-73.
7. Engine Cooling Fans (Out of View). See Cooling System on
page 10-14.
8. Engine Oil Fill Cap. See “When
to Add Engine Oil” underEngine
Oil on page 10-6.
9. Engine Oil Dipstick. See “Checking Engine Oil” under
Engine Oil on page 10-6. 10. Windshield Washer Fluid
Reservoir. See “Adding Washer
Fluid” under Washer Fluid on
page 10-20.
11. Brake Fluid Reservoir. See Brake Fluid on page 10-21.
12. Engine Compartment Fuse
Block on page 10-31.
Engine Oil
To ensure proper engine
performance and long life, careful
attention must be paid to engine oil.
Following these simple, but
important steps will help protect
your investment:
.Always use engine oil approved
to the proper specification and of
the proper viscosity grade. See
“Selecting the Right Engine Oil”
in this section.
.Check the engine oil level
regularly and maintain the
proper oil level. See “Checking
Engine Oil” and“When to Add
Engine Oil” in this section.
.Change the engine oil at the
appropriate time. See Engine Oil
Life System on page 10-8.
.Always dispose of engine oil
properly. See “What to Do with
Used Oil” in this section.
Checking Engine Oil
It is a good idea to check the engine
oil level at each fuel fill. In order to
get an accurate reading, the vehicle
must be on level ground. The
engine oil dipstick handle is a loop.
SeeEngine Compartment Overview
on page 10-5 for the location of the
engine oil dipstick.
Obtaining an accurate oil level
reading is essential:
1. If the engine has been running recently, turn off the engine and
allow several minutes for the oil
to drain back into the oil pan.
Checking the oil level too soon
after engine shutoff will not
provide an accurate oil level
reading.
Page 295 of 435
Black plate (10,1)Cadillac Escalade Owner Manual (GMNA-Localizing-U.S./Canada/Mexico-
7063683) - 2015 - crc - 2/24/14
10-10 Vehicle Care
Automatic Transmission
Fluid
When to Check and Change
Automatic Transmission Fluid
It is usually not necessary to check
the transmission fluid level. The only
reason for fluid loss is a
transmission leak or overheated
transmission. If a small leak is
suspected, then use the following
checking procedures to check the
fluid level. However, if there is a
large leak, then it may be necessary
to have the vehicle towed to a
dealer service department and have
it repaired before driving the vehicle
further.
{Caution
Use of the incorrect automatic
transmission fluid may damage
the vehicle, and the damage may
not be covered by the vehicle
warranty. Always use the(Continued)
Caution (Continued)
automatic transmission fluid listed
inRecommended Fluids and
Lubricants on page 11-11.
Change the fluid and filter at the
scheduled maintenance intervals
listed in Maintenance Schedule on
page 11-4. Be sure to use the
transmission fluid listed in
Recommended Fluids and
Lubricants on page 11-11.
How to Check Automatic
Transmission Fluid
{Caution
Too much or too little fluid can
damage the transmission. Too
much can mean that some of the
fluid could come out and fall on
hot engine parts or exhaust
system parts, starting a fire. Too
little fluid could cause the
(Continued)
Caution (Continued)
transmission to overheat. Be sure
to get an accurate reading if
checking the transmission fluid.
Before checking the fluid level,
prepare the vehicle:
1. Start the engine and park the vehicle on a level surface. Keep
the engine running.
2. Apply the parking brake and place the shift lever in P (Park).
3. With your foot on the brake pedal, move the shift lever
through each gear range,
pausing for about three seconds
in each range. Then, move the
shift lever back to P (Park).
4. Allow the engine to idle (500– 800 rpm) for at least one minute.
Slowly release the brake pedal.