light CADILLAC ESCALADE 2020 Convenience & Personalization Guide
[x] Cancel search | Manufacturer: CADILLAC, Model Year: 2020, Model line: ESCALADE, Model: CADILLAC ESCALADE 2020Pages: 20, PDF Size: 2.77 MB
Page 4 of 20
4
KEYLESS (PUSHBUTTON) START
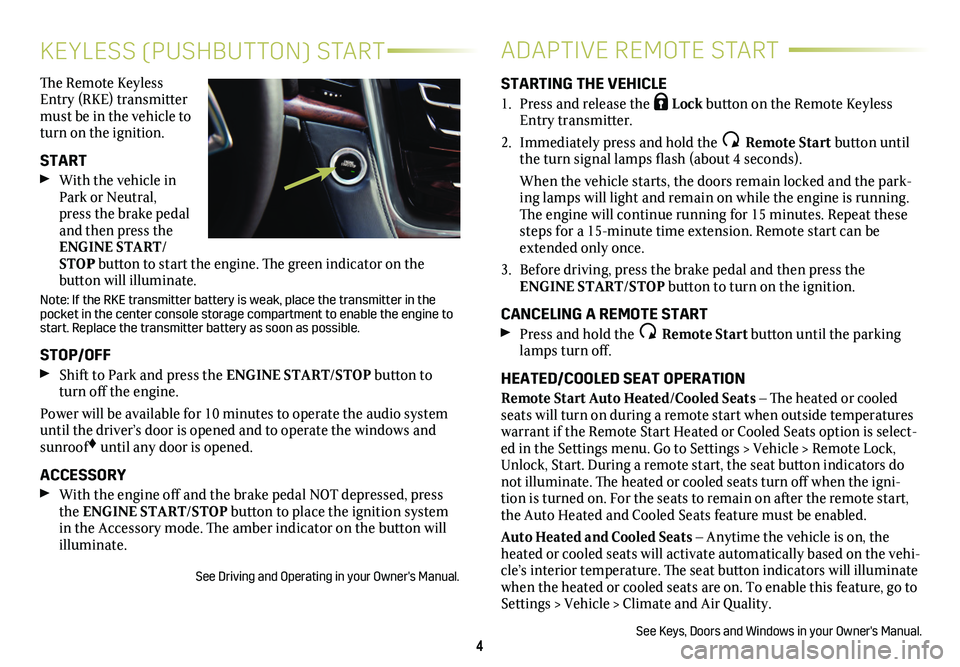
The Remote Keyless Entry (RKE) transmitter must be in the vehicle to turn on the ignition.
START
With the vehicle in Park or Neutral, press the brake pedal and then press the ENGINE START/STOP button to start the engine. The green indicator on the
button will illuminate.
Note: If the RKE transmitter battery is weak, place the transmitter in \
the pocket in the center console storage compartment to enable the engine to start. Replace the transmitter battery as soon as possible.
STOP/OFF
Shift to Park and press the ENGINE START/STOP button to turn off the engine.
Power will be available for 10 minutes to operate the audio system until the driver’s door is opened and to operate the windows and sunroof♦ until any door is opened.
ACCESSORY
With the engine off and the brake pedal NOT depressed, press the ENGINE START/STOP button to place the ignition system in the Accessory mode. The amber indicator on the button will illuminate.
See Driving and Operating in your Owner's Manual.
ADAPTIVE REMOTE START
STARTING THE VEHICLE
1. Press and release the Lock button on the Remote Keyless Entry transmitter.
2. Immediately press and hold the Remote Start button until the turn signal lamps flash (about 4 seconds).
When the vehicle starts, the doors remain locked and the park-ing lamps will light and remain on while the engine is running. The engine will continue running for 15 minutes. Repeat these steps for a 15-minute time extension. Remote start can be extended only once.
3. Before driving, press the brake pedal and then press the ENGINE START/STOP button to turn on the ignition.
CANCELING A REMOTE START
Press and hold the Remote Start button until the parking lamps turn off.
HEATED/COOLED SEAT OPERATION
Remote Start Auto Heated/Cooled Seats – The heated or cooled seats will turn on during a remote start when outside temperatures warrant if the Remote Start Heated or Cooled Seats option is select-ed in the Settings menu. Go to Settings > Vehicle > Remote Lock, Unlock, Start. During a remote start, the seat button indicators do not illuminate. The heated or cooled seats turn off when the igni-tion is turned on. For the seats to remain on after the remote start, the Auto Heated and Cooled Seats feature must be enabled.
Auto Heated and Cooled Seats – Anytime the vehicle is on, the heated or cooled seats will activate automatically based on the vehi-cle’s interior temperature. The seat button indicators will illuminate when the heated or cooled seats are on. To enable this feature, go to Settings > Vehicle > Climate and Air Quality.
See Keys, Doors and Windows in your Owner's Manual.
Page 5 of 20
Press and hold the Cancel button to switch between regular Cruise Control and ACC. When ACC is active, a green indicator illuminates and the following gap is displayed.
When the vehicle is turned on, the Cruise Control is set to the last mode used.
Following Gap (Adaptive Cruise Control–Advanced♦)
Press repeatedly to set a following gap (the time between your
vehicle and a detected vehicle ahead) of Far, Medium, or Near.
When a slower vehicle is detected ahead, the Vehicle Ahead Indicator is displayed and the vehicle brakes to maintain the select-ed following gap. The ACC system may slow your vehicle to a stop behind the detected vehicle. When the ACC system is holding the vehicle at a stop, be prepared to manually apply the brakes.
If driver action is required to apply sufficient braking behind a detected vehicle, a red alert flashes on the windshield and the Safety Alert Seat pulses or beeps sound (if selected). See Safety Alert Seat on page 14.
Note: Changing the gap settings automatically changes the alert timing sensitivity for the Forward Collision Alert system.
See Driving and Operating in your Owner's Manual.
VOICE RECOGNITION
Push to Talk
Press to interact with the OnStar, Bluetooth or Infotainment
system. Wait for the beep before speaking.
End Call/Mute
Press to end/decline a call or mute/unmute the audio system.
See your Infotainment System Manual.
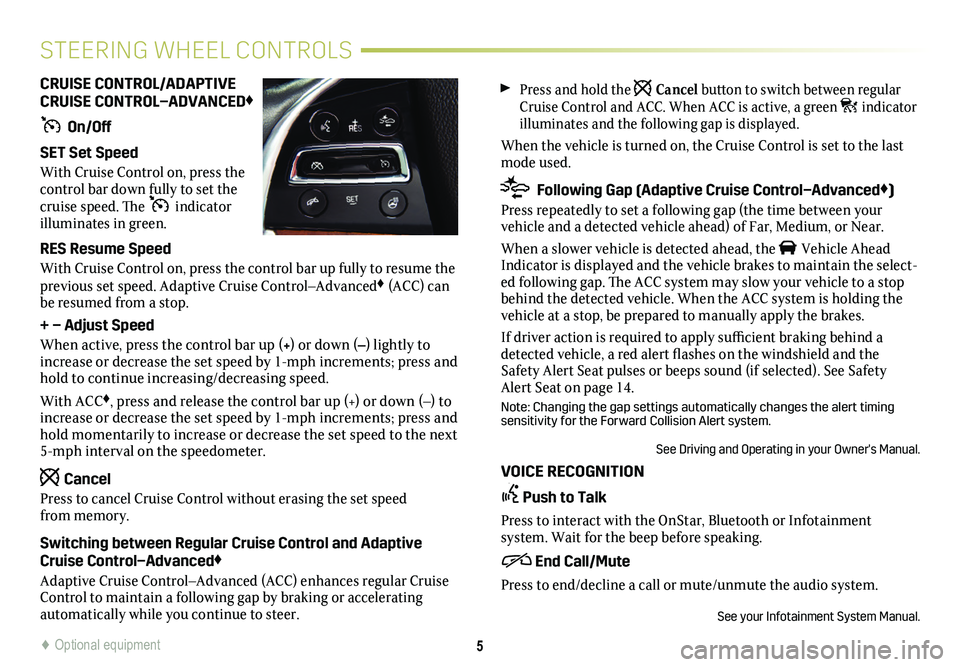
CRUISE CONTROL/ADAPTIVE CRUISE CONTROL–ADVANCED♦
On/Off
SET Set Speed
With Cruise Control on, press the control bar down fully to set the cruise speed. The indicator illuminates in green.
RES Resume Speed
With Cruise Control on, press the control bar up fully to resume the previous set speed. Adaptive Cruise Control–Advanced♦ (ACC) can be resumed from a stop.
+ – Adjust Speed
When active, press the control bar up (+) or down (–) lightly to increase or decrease the set speed by 1-mph increments; press and hold to continue increasing/decreasing speed.
With ACC♦, press and release the control bar up (+) or down (–) to increase or decrease the set speed by 1-mph increments; press and hold momentarily to increase or decrease the set speed to the next 5-mph interval on the speedometer.
Cancel
Press to cancel Cruise Control without erasing the set speed from memory.
Switching between Regular Cruise Control and Adaptive Cruise Control–Advanced♦
Adaptive Cruise Control–Advanced (ACC) enhances regular Cruise Control to maintain a following gap by braking or accelerating
automatically while you continue to steer.
5
STEERING WHEEL CONTROLS
♦ Optional equipment
Page 6 of 20
6
INSTRUMENT CLUSTERSTEERING WHEEL CONTROLS
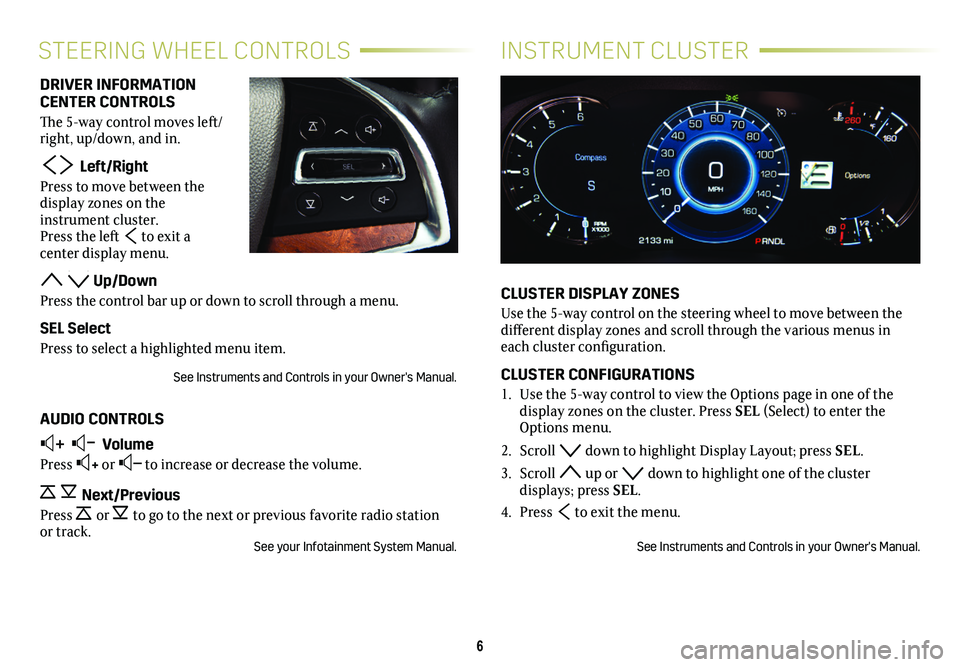
CLUSTER DISPLAY ZONES
Use the 5-way control on the steering wheel to move between the different display zones and scroll through the various menus in each cluster configuration.
CLUSTER CONFIGURATIONS
1. Use the 5-way control to view the Options page in one of the
display zones on the cluster. Press SEL (Select) to enter the Options menu.
2. Scroll down to highlight Display Layout; press SEL.
3. Scroll up or down to highlight one of the cluster displays; press SEL.
4. Press to exit the menu.
See Instruments and Controls in your Owner's Manual.
DRIVER INFORMATION CENTER CONTROLS
The 5-way control moves left/right, up/down, and in.
Left/Right
Press to move between the display zones on the instrument cluster. Press the left to exit a
center display menu.
Up/Down
Press the control bar up or down to scroll through a menu.
SEL Select
Press to select a highlighted menu item.
See Instruments and Controls in your Owner's Manual.
AUDIO CONTROLS
+ – Volume
Press + or – to increase or decrease the volume.
Next/Previous
Press or to go to the next or previous favorite radio station or track.See your Infotainment System Manual.
Page 7 of 20
7
DRIVER INFORMATION CENTER
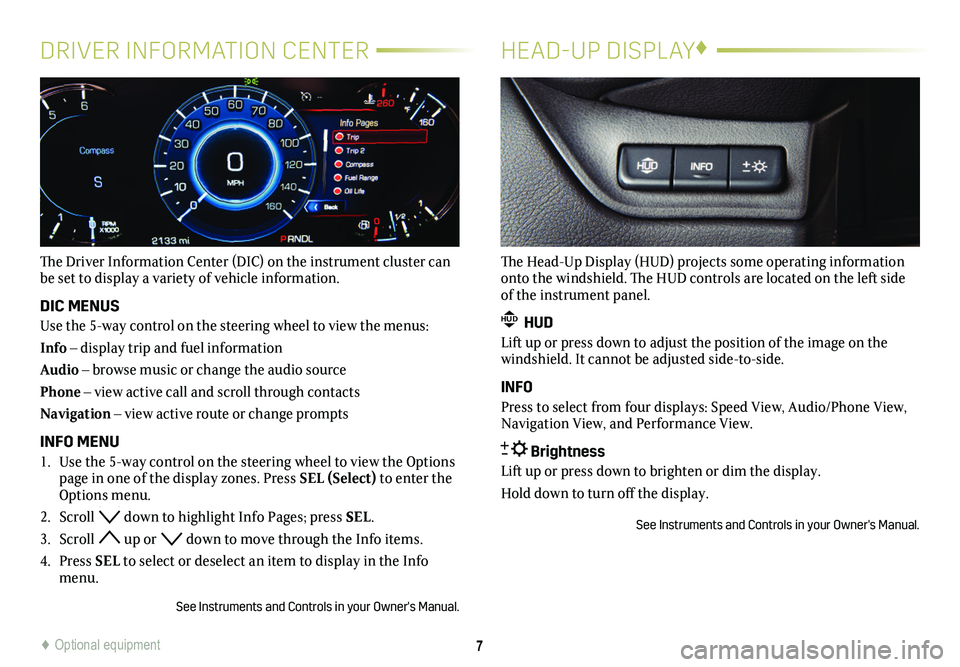
The Driver Information Center (DIC) on the instrument cluster can be set to display a variety of vehicle information.
DIC MENUS
Use the 5-way control on the steering wheel to view the menus:
Info – display trip and fuel information
Audio – browse music or change the audio source
Phone – view active call and scroll through contacts
Navigation – view active route or change prompts
INFO MENU
1. Use the 5-way control on the steering wheel to view the Options page in one of the display zones. Press SEL (Select) to enter the Options menu.
2. Scroll down to highlight Info Pages; press SEL.
3. Scroll up or down to move through the Info items.
4. Press SEL to select or deselect an item to display in the Info menu.
See Instruments and Controls in your Owner's Manual.
HEAD-UP DISPLAY♦
The Head-Up Display (HUD) projects some operating information onto the windshield. The HUD controls are located on the left side of the instrument panel.
HUD HUD
Lift up or press down to adjust the position of the image on the windshield. It cannot be adjusted side-to-side.
INFO
Press to select from four displays: Speed View, Audio/Phone View, Navigation View, and Performance View.
Brightness
Lift up or press down to brighten or dim the display.
Hold down to turn off the display.
See Instruments and Controls in your Owner's Manual.
♦ Optional equipment
Page 10 of 20
10
INFOTAINMENT SYSTEM FEATURES
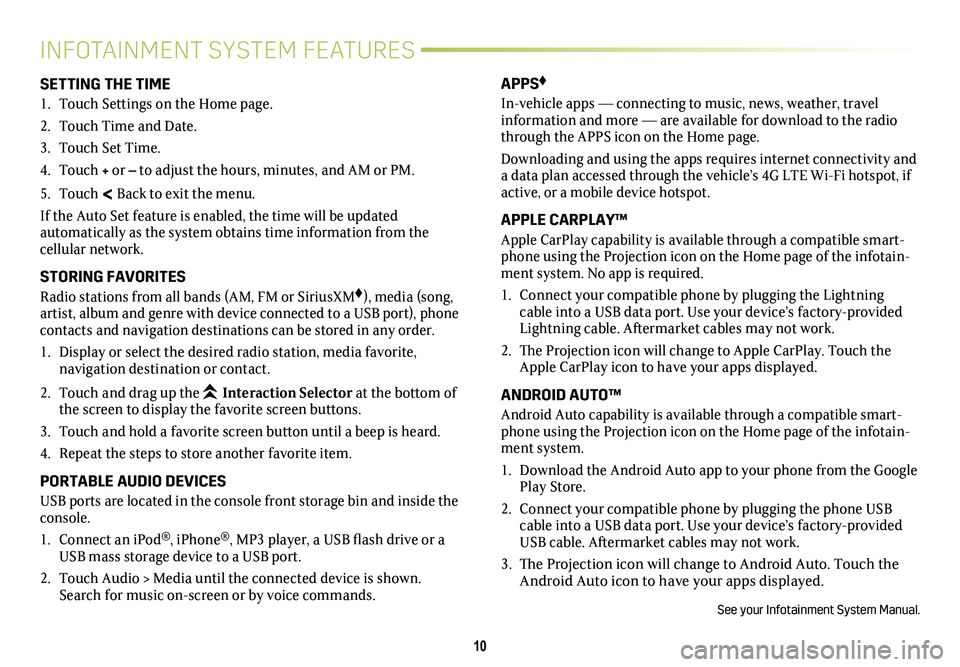
SETTING THE TIME
1. Touch Settings on the Home page.
2. Touch Time and Date.
3. Touch Set Time.
4. Touch + or – to adjust the hours, minutes, and AM or PM.
5. Touch < Back to exit the menu.
If the Auto Set feature is enabled, the time will be updated
automatically as the system obtains time information from the cellular network.
STORING FAVORITES
Radio stations from all bands (AM, FM or SiriusXM♦), media (song, artist, album and genre with device connected to a USB port), phone contacts and navigation destinations can be stored in any order.
1. Display or select the desired radio station, media favorite,
navigation destination or contact.
2. Touch and drag up the Interaction Selector at the bottom of the screen to display the favorite screen buttons.
3. Touch and hold a favorite screen button until a beep is heard.
4. Repeat the steps to store another favorite item.
PORTABLE AUDIO DEVICES
USB ports are located in the console front storage bin and inside the console.
1. Connect an iPod®, iPhone®, MP3 player, a USB flash drive or a USB mass storage device to a USB port.
2. Touch Audio > Media until the connected device is shown. Search for music on-screen or by voice commands.
APPS♦
In-vehicle apps — connecting to music, news, weather, travel information and more — are available for download to the radio through the APPS icon on the Home page.
Downloading and using the apps requires internet connectivity and a data plan accessed through the vehicle’s 4G LTE Wi-Fi hotspot, if active, or a mobile device hotspot.
APPLE CARPLAY™
Apple CarPlay capability is available through a compatible smart-phone using the Projection icon on the Home page of the infotain-ment system. No app is required.
1. Connect your compatible phone by plugging the Lightning cable into a USB data port. Use your device’s factory-provided Lightning cable. Aftermarket cables may not work.
2. The Projection icon will change to Apple CarPlay. Touch the Apple CarPlay icon to have your apps displayed.
ANDROID AUTO™
Android Auto capability is available through a compatible smart-phone using the Projection icon on the Home page of the infotain-ment system.
1. Download the Android Auto app to your phone from the Google Play Store.
2. Connect your compatible phone by plugging the phone USB cable into a USB data port. Use your device’s factory-provided USB cable. Aftermarket cables may not work.
3. The Projection icon will change to Android Auto. Touch the Android Auto icon to have your apps displayed.
See your Infotainment System Manual.
Page 13 of 20
13
LIGHTING
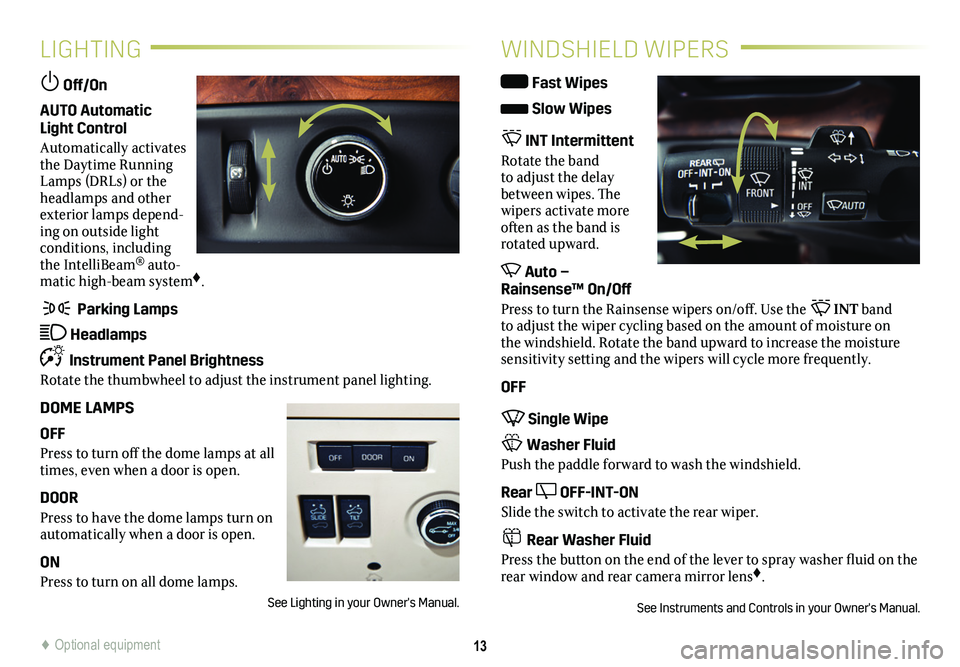
Off/On
AUTO Automatic Light Control
Automatically activates the Daytime Running Lamps (DRLs) or the headlamps and other exterior lamps depend-ing on outside light conditions, including the IntelliBeam® auto-matic high-beam system♦.
Parking Lamps
Headlamps
Instrument Panel Brightness
Rotate the thumbwheel to adjust the instrument panel lighting.
DOME LAMPS
OFF
Press to turn off the dome lamps at all times, even when a door is open.
DOOR
Press to have the dome lamps turn on automatically when a door is open.
ON
Press to turn on all dome lamps.
See Lighting in your Owner's Manual.
WINDSHIELD WIPERS
Fast Wipes
Slow Wipes
INT Intermittent
Rotate the band to adjust the delay between wipes. The wipers activate more often as the band is rotated upward.
Auto – Rainsense™ On/Off
Press to turn the Rainsense wipers on/off. Use the INT band to adjust the wiper cycling based on the amount of moisture on the windshield. Rotate the band upward to increase the moisture sensitivity setting and the wipers will cycle more frequently.
OFF
Single Wipe
Washer Fluid
Push the paddle forward to wash the windshield.
Rear OFF-INT-ON
Slide the switch to activate the rear wiper.
Rear Washer Fluid
Press the button on the end of the lever to spray washer fluid on the rear window and rear camera mirror lens♦.
See Instruments and Controls in your Owner's Manual.
♦ Optional equipment
Page 15 of 20
15
SURROUND VISION
FRONT AND REAR PARK ASSIST
The Surround Vision system displays a rear or front camera view along with a view of the area surrounding the vehicle on the infotain-ment screen when the vehicle is in Reverse or Drive below 8 mph.
REAR CROSS-TRAFFIC ALERT♦
When the vehicle is in Reverse, the Rear Cross-Traffic Alert system warns of cross-traffic approaching in either direction by displaying a red alert on the infotainment screen and the left or right side of the Safety Alert Seat pulses or beeps sound (if selected).
To turn the Surround Vision System guidance lines or Rear Park Assist symbols on or off, go to Settings > Rear Camera.
See Driving and Operating in your Owner's Manual.
During low-speed parking maneuvers, the system provides “dis-tance to closest object” information on the Driver Information Center and the Safety Alert Seat pulses or a beep sounds (if select-ed). When an object is very close, the Safety Alert Seat pulses or a continuous beep sounds (if selected).
To turn the system on or off, press the Park Assist button on the right side of the infotainment screen.
See Driving and Operating in your Owner's Manual.
AUTOMATIC PARKING ASSIST
Automatic Parking Assist steers the vehicle to help you park in parallel or perpendicular spaces while you follow commands and control the gear selection, acceleration and braking. The system is available when vehicle speed is below 18 mph.
1. Press the Automatic Parking Assist button on the right side of the infotainment screen. A beep sounds and a parking assist display is shown on the infotainment screen. The system will begin searching for a large enough parking space.
2. To switch between parallel and perpendicular parking, touch the Parking Type screen button during the search process.
3. The system searches for parking spaces to the right of the
vehicle. To search for a parking space to the left, touch the Select Side screen button.
4. Once a space is found, shift the vehicle into Reverse or Drive as directed, follow the commands on the infotainment screen and apply the accelerator or brake as needed. The steering wheel will briefly vibrate as a reminder to remove your hands. Parking Complete will be displayed and a beep will sound when the parking maneuver is complete.
See Driving and Operating in your Owner's Manual.
♦ Optional equipment
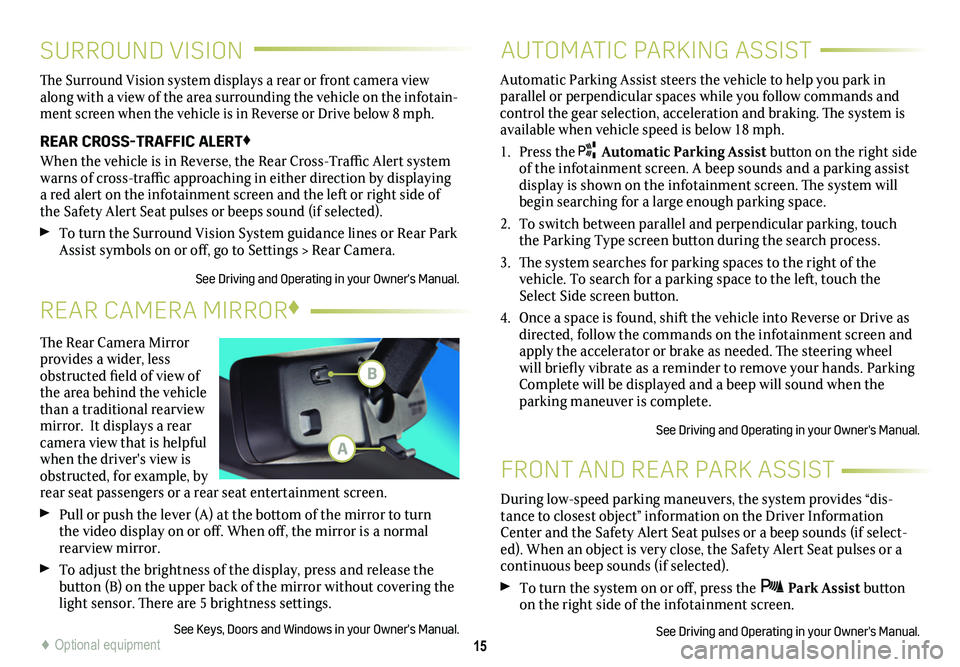
The Rear Camera Mirror provides a wider, less obstructed field of view of the area behind the vehicle than a traditional rearview mirror. It displays a rear camera view that is helpful when the driver's view is obstructed, for example, by rear seat passengers or a rear seat entertainment screen.
Pull or push the lever (A) at the
bottom of the
mirror to turn the video
display on or off. When off, the mirror is a normal rearview mirror.
To adjust the brightness of the display, press and release the button (B) on the upper back of the mirror without covering the light sensor. There are 5 brightness
settings.
See Keys, Doors and Windows in your Owner's Manual.
REAR CAMERA MIRROR♦
B
A
Page 16 of 20
16
STABILITRAK®/TRACTION CONTROL
SYSTEMS
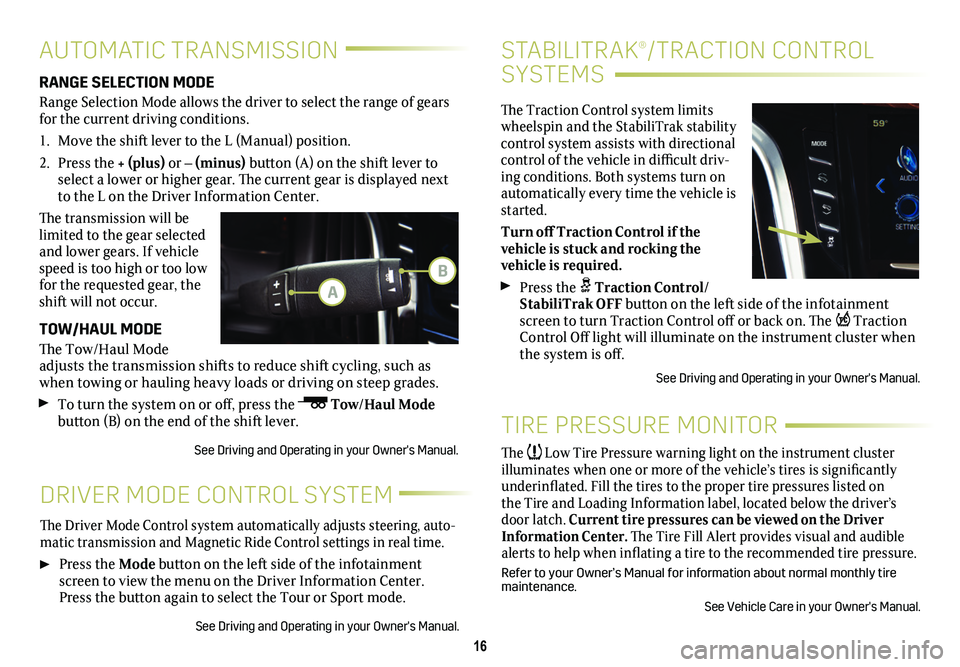
The Traction Control system limits wheelspin and the StabiliTrak stability control system assists with directional control of the vehicle in difficult driv-ing conditions. Both systems turn on automatically every time the vehicle is started.
Turn off Traction Control if the
vehicle is stuck and rocking the
vehicle is required.
Press the Traction Control/StabiliTrak OFF button on the left side of the infotainment screen to turn Traction Control off or back on. The Traction Control Off light will illuminate on the instrument
cluster when the system is off.
See Driving and Operating in your Owner's Manual.
DRIVER MODE CONTROL SYSTEM
The Driver Mode Control system automatically adjusts steering, auto-matic transmission and Magnetic Ride Control settings in real time.
Press the Mode button on the left side of the infotainment screen to view the menu on the Driver Information Center. Press the
button again to select the Tour or Sport mode.
See Driving and Operating in your Owner's Manual.
AUTOMATIC TRANSMISSION
RANGE SELECTION MODE
Range Selection Mode allows the driver to select the range of gears for the current driving conditions.
1. Move the shift lever to the L (Manual) position.
2. Press the + (plus) or – (minus) button (A) on the shift lever to select a lower or higher gear. The current gear is displayed next to the L on the Driver Information Center.
The transmission will be limited to the gear selected and lower gears. If vehicle speed is too high or too low for the requested gear, the shift will not occur.
TOW/HAUL MODE
The Tow/Haul Mode adjusts the transmission shifts to reduce shift cycling, such as when towing or hauling heavy loads or driving on steep grades.
To turn the system on or off, press the Tow/Haul Mode button (B) on the end of the shift lever.
See Driving and Operating in your Owner's Manual.
TIRE PRESSURE MONITOR
The Low Tire Pressure warning light on the instrument cluster illuminates when one or more of the vehicle’s tires is significantly underinflated. Fill the tires to the proper tire pressures listed on the Tire and Loading Information label, located below the driver’s door latch. Current tire pressures can be viewed on the Driver Information Center. The Tire Fill Alert provides visual and audible alerts to help when inflating a tire to the recommended tire
pressure.
Refer to your Owner’s Manual for information about normal monthly tire maintenance.
See Vehicle Care in your Owner's Manual.
A
B