Settings CADILLAC ESCALADE 2020 Owner's Manual
[x] Cancel search | Manufacturer: CADILLAC, Model Year: 2020, Model line: ESCALADE, Model: CADILLAC ESCALADE 2020Pages: 392, PDF Size: 6.39 MB
Page 29 of 392
Cadillac Escalade Owner Manual (GMNA-Localizing-U.S./Canada/Mexico-
13566588) - 2020 - CRC - 4/24/19
28 KEYS, DOORS, AND WINDOWS
Power Assist Steps
{Warning
To avoid personal injury or property
damage, before entering or exiting
the vehicle, be sure the power assist
step is fully extended. Do not step
on the power assist step while it is
moving. Never place hands or other
body parts between the extended
power assist step and the vehicle.
Disable the assist steps before jacking
or placing any object under the
vehicle.
Too much ice buildup may prevent
deployment of the power assist steps.
Check the step position before exiting
the vehicle. If this happens, disable
the power assist steps, clear the ice,
then enable the assist steps and
confirm normal function prior to use.
Keep hands, children, pets, objects,
and clothing clear of the power assist
steps when in motion. The steps will
reverse direction if they encounter an
obstruction when opening or closing. Remove the obstruction, then open
and close the door on the same side
to complete the motion of the assist
steps. If the obstruction is not cleared,
the assist steps remain extended while
driving.
To change the settings:
1. Touch
F.
2. Touch Power Assist Steps icon.
The options are:
OFF : Disables the power assist steps,
so they will not deploy.
ON : Power assist steps will deploy
when a door is opened. When a door
is closed the assist steps will
automatically retract after
three seconds.
Extended : Keeps the steps deployed
when the vehicle is in P (Park) or
N (Neutral). This setting may be used
when cleaning the steps.
Vehicle Security
This vehicle has theft-deterrent
features; however, they do not make
the vehicle impossible to steal.
Vehicle Alarm System
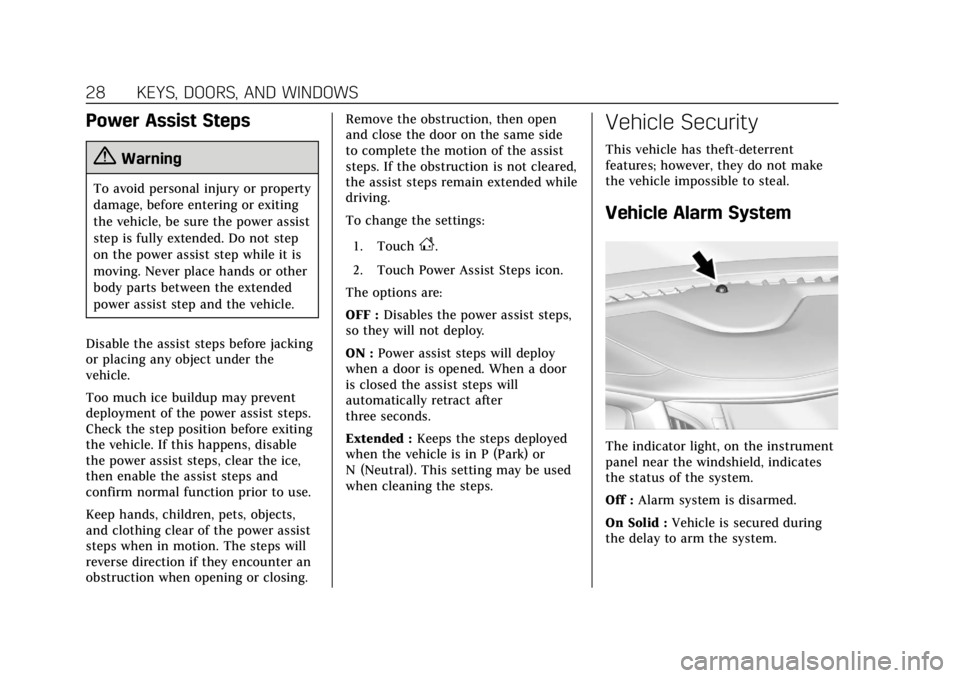
The indicator light, on the instrument
panel near the windshield, indicates
the status of the system.
Off : Alarm system is disarmed.
On Solid : Vehicle is secured during
the delay to arm the system.
Page 35 of 392
Cadillac Escalade Owner Manual (GMNA-Localizing-U.S./Canada/Mexico-
13566588) - 2020 - CRC - 4/24/19
34 KEYS, DOORS, AND WINDOWS
Interior Mirrors
Interior Rearview Mirrors
Adjust the rearview mirror for a clear
view of the area behind your vehicle.
If equipped with OnStar, there may be
three buttons at the bottom of the
mirror. SeeOnStar Overview 0370.
To avoid accidental OnStar calls, clean
the mirror with the ignition off. Do
not spray glass cleaner directly on the
mirror. Use a soft towel dampened
with water.
Automatic Dimming
Rearview Mirror
The rearview mirror automatically
dims to reduce the glare of the
headlamps from behind. This feature
comes on when the vehicle is started.
Rear Camera Mirror
If equipped, this automatic dimming
mirror provides a wide angle camera
view of the area behind the vehicle.
Pull the tab rearward to turn on the
display. Push the tab forward to turn
it off. When off, the mirror is
automatic dimming. Adjust the mirror
for a clear view of the area behind the
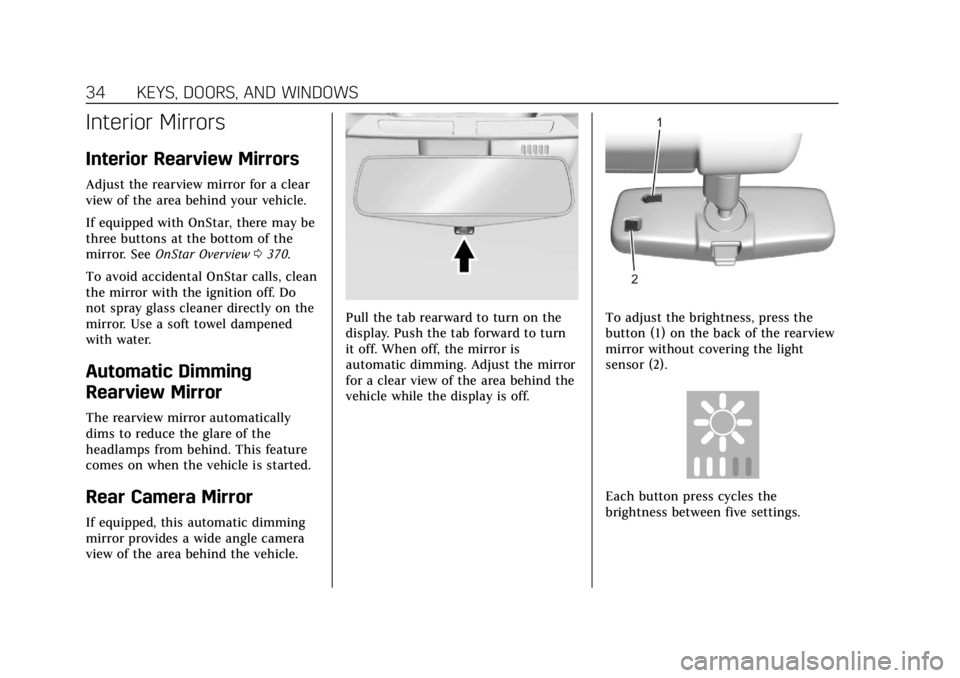
vehicle while the display is off.To adjust the brightness, press the
button (1) on the back of the rearview
mirror without covering the light
sensor (2).
Each button press cycles the
brightness between five settings.
Page 47 of 392
Cadillac Escalade Owner Manual (GMNA-Localizing-U.S./Canada/Mexico-
13566588) - 2020 - CRC - 4/24/19
46 SEATS AND RESTRAINTS
If equipped, memory seats allow two
drivers to save and recall their unique
seat positions for driving the vehicle,
and a shared exit position for getting
out of the vehicle. Other feature
positions may also be saved, such as
power mirrors and power steering
wheel, if equipped. Memory positions
are linked to RKE transmitter 1 or 2
for automatic memory recalls.
Before saving, adjust all available
memory feature positions. Turn the
vehicle on and then press and release
SET; a beep will sound. Then
immediately press and hold 1, 2,
or
B(Exit) until two beeps sound.
To manually recall these positions,
press and hold 1, 2, or
Buntil the
saved position is reached. Follow the
instructions under “Saving Memory
Positions.”
The vehicle identifies the current
driver’s RKE transmitter number
(1–8). See Remote Keyless Entry (RKE)
System Operation 08. Only RKE
transmitters 1 and 2 can be used for
automatic memory recalls. A Driver
Information Center (DIC) welcome
message indicating the transmitter number may display for the first few
ignition cycles following a transmitter
change. For Auto Memory Recall to
work properly, save the positions to
the memory button (1 or 2) matching
the RKE transmitter number displayed
in the DIC welcome message. Carry
the linked RKE transmitter when
entering the vehicle.
Vehicle Personalization Settings
.
To have the Auto Memory Recall
movement begin when the vehicle
is started, select the Settings
menu, then Vehicle, then Comfort
and Convenience, and then Auto
Memory Recall. Select On or Off.
See “Auto Memory Recall” later in
this section.
. To begin Easy Exit Recall
movement when the vehicle is
turned off and the driver door is
opened, or when the vehicle is
turned off with the driver door
already opened, select the Settings
menu, then Vehicle, then Comfort
and Convenience, and then Easy
Exit Options. Select On or Off. See
“Easy Exit Recall” later in this
section. .
See Vehicle Personalization 0136
for additional setting information.
Identifying Driver Number
To identify the driver number: 1. Move your RKE transmitter away from the vehicle.
2. Start the vehicle with another key or RKE transmitter. The DIC
should display the driver number
for the other RKE transmitter.
Turn the vehicle off and remove
the key or RKE transmitter from
the vehicle.
3. Start the vehicle with the initial key or RKE transmitter. The DIC
should display the driver number
of your RKE transmitter.
Saving Memory Positions
Read these instructions completely
before saving memory positions.
To save preferred driving positions
1 and 2: 1. Turn the vehicle on or to ACC/ ACCESSORY.
Page 48 of 392
Cadillac Escalade Owner Manual (GMNA-Localizing-U.S./Canada/Mexico-
13566588) - 2020 - CRC - 4/24/19
SEATS AND RESTRAINTS 47
A DIC welcome message may
indicate driver number 1 or 2.
2. Adjust all available memory features to the desired driving
position.
3. Press and release SET; a beep will sound.
4. Immediately press and hold the 1 or 2 memory button matching
the above DIC welcome message
until two beeps sound.
If too much time passes between
releasing SET and pressing 1, the
memory position will not be
saved and two beeps will not
sound. Repeat Steps 3 and 4.
1 or 2 corresponds to the driver
number. See “Identifying Driver
Number” previously in this
section.
5. Repeat Steps 1–4 for a second driver using 1 or 2.
To save the position for
Band Easy
Exit Recall features, repeat Steps 1–4
using
B. This saves the position for
getting out of the vehicle. Save preferred memory feature
positions to both 1 and 2 if you are
the only driver.
Manually Recalling Memory
Positions
Press and hold 1, 2, or
Bto recall
the previously saved memory
positions if you are driver 1 or 2
identified in the DIC welcome
message. RKE transmitters 3–8 will
not recall memory positions.
To stop Manual Memory recall
movement, release 1, 2, or
Bor press
any of the following controls:
. Power seat
. Memory SET
. Power mirror, with the driver or
passenger side mirror selected
. Power steering wheel, if equipped
Auto Memory Recall
The vehicle identifies the number of
the current driver’s RKE transmitter
(1–8). See Remote Keyless Entry (RKE)
System Operation 08. If the RKE
transmitter is 1 or 2, and Auto Memory Recall is enabled in vehicle
personalization, the positions saved to
the same memory button number 1 or
2 are automatically recalled when the
vehicle is turned on, or turned from
off to ACC/ACCESSORY. RKE
transmitters 3–8 will not provide
automatic memory recalls.
To turn Auto Memory Recall on or off,
see
“Vehicle Personalization Settings”
previously in this section and Vehicle
Personalization 0136.
The shift lever must be in P (Park) to
start Auto Memory Recall. Auto
Memory Recall will complete if the
vehicle is shifted out of P (Park) prior
to reaching the saved memory
position.
To stop Auto Memory Recall
movement, turn the vehicle off or
press any of the following controls:
. Power seat
. Memory SET, 1, 2, or
B
.Power mirror, with the driver or
passenger side mirror selected
. Power steering wheel, if equipped
Page 49 of 392
Cadillac Escalade Owner Manual (GMNA-Localizing-U.S./Canada/Mexico-
13566588) - 2020 - CRC - 4/24/19
48 SEATS AND RESTRAINTS
If the saved memory seat position
does not automatically recall or recalls
to the wrong positions, the driver’s
RKE transmitter number (1 or 2) may
not match the memory button
number that positions were saved to.
Try storing the position to the other
memory button or try the other RKE
transmitter.
Easy Exit Recall
Easy Exit Recall is not linked to an
RKE transmitter. The position saved to
Bis used for all drivers. To turn
Easy Exit Recall on or off, see "Vehicle
Personalization Settings" previously in
this section and Vehicle Personalization
0 136.
If turned on, the position saved to
B
is automatically recalled when one of
the following occurs:
. The vehicle is turned off and the
driver door is opened within a
short time.
. The vehicle is turned off with the
driver door open. To stop Easy Exit Recall movement,
press any of the following memory
controls:
.
Power seat
. Memory SET, 1, 2, or
B
.Power mirror, with the driver or
passenger side mirror selected
. Power steering wheel, if equipped
Obstructions
If something has blocked the driver
seat and/or power steering wheel
while recalling a memory position, the
recall may stop. Remove the
obstruction and try the recall again.
If the memory position still does not
recall, see your dealer.
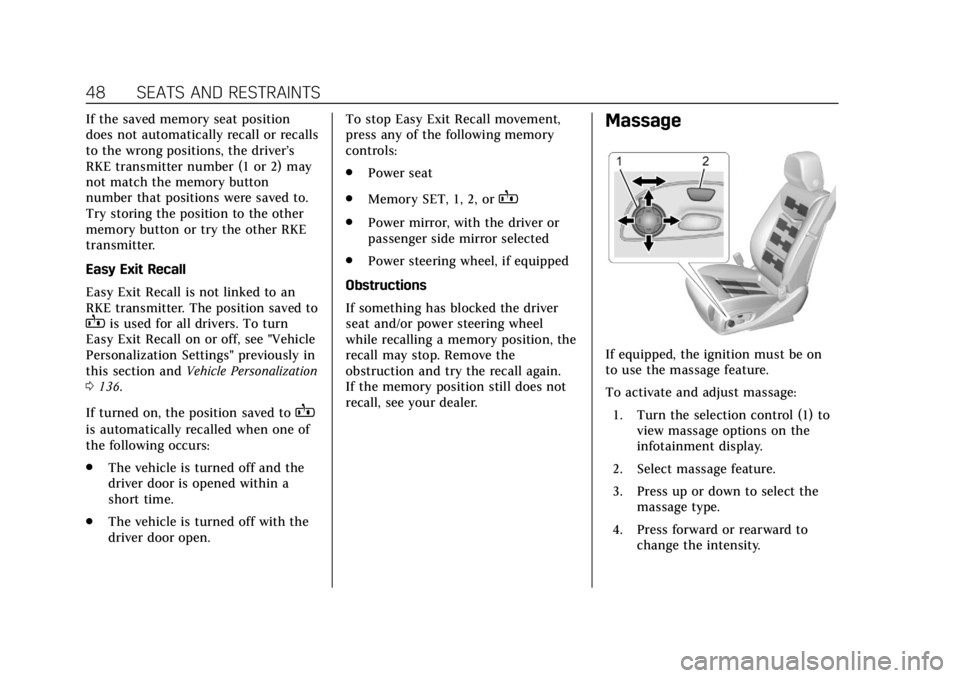
Massage
If equipped, the ignition must be on
to use the massage feature.
To activate and adjust massage: 1. Turn the selection control (1) to view massage options on the
infotainment display.
2. Select massage feature.
3. Press up or down to select the massage type.
4. Press forward or rearward to change the intensity.
Page 50 of 392
Cadillac Escalade Owner Manual (GMNA-Localizing-U.S./Canada/Mexico-
13566588) - 2020 - CRC - 4/24/19
SEATS AND RESTRAINTS 49
5. To activate massage at lastmassage type and intensity
settings or to turn massage off,
press the massage On/Off
control (2).
Heated and Cooled Front
Seats
{Warning
If temperature change or pain to
the skin cannot be felt, the seat
heater may cause burns. To reduce
the risk of burns, use care when
using the seat heater, especially for
long periods of time. Do not place
anything on the seat that insulates
against heat, such as a blanket,
cushion, cover, or similar item. This
may cause the seat heater to
overheat. An overheated seat heater
may cause a burn or may damage
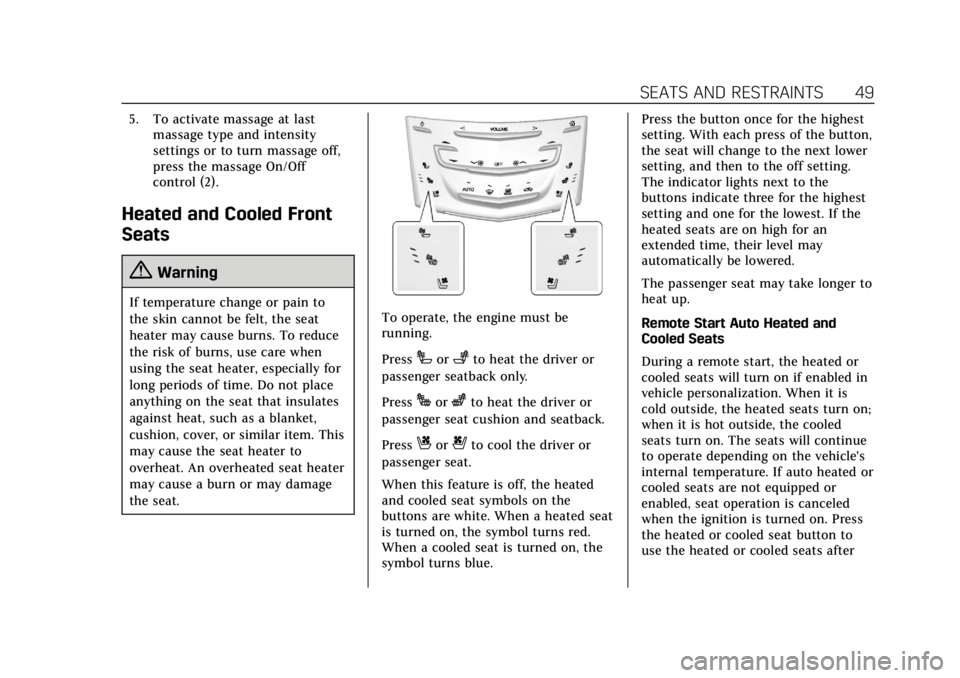
the seat.To operate, the engine must be
running.
Press
Ior+to heat the driver or
passenger seatback only.
Press
Jorzto heat the driver or
passenger seat cushion and seatback.
Press
Cor{to cool the driver or
passenger seat.
When this feature is off, the heated
and cooled seat symbols on the
buttons are white. When a heated seat
is turned on, the symbol turns red.
When a cooled seat is turned on, the
symbol turns blue. Press the button once for the highest
setting. With each press of the button,
the seat will change to the next lower
setting, and then to the off setting.
The indicator lights next to the
buttons indicate three for the highest
setting and one for the lowest. If the
heated seats are on high for an
extended time, their level may
automatically be lowered.
The passenger seat may take longer to
heat up.
Remote Start Auto Heated and
Cooled Seats
During a remote start, the heated or
cooled seats will turn on if enabled in
vehicle personalization. When it is
cold outside, the heated seats turn on;
when it is hot outside, the cooled
seats turn on. The seats will continue
to operate depending on the vehicle's
internal temperature. If auto heated or
cooled seats are not equipped or
enabled, seat operation is canceled
when the ignition is turned on. Press
the heated or cooled seat button to
use the heated or cooled seats after
Page 108 of 392
Cadillac Escalade Owner Manual (GMNA-Localizing-U.S./Canada/Mexico-
13566588) - 2020 - CRC - 4/24/19
INSTRUMENTS AND CONTROLS 107
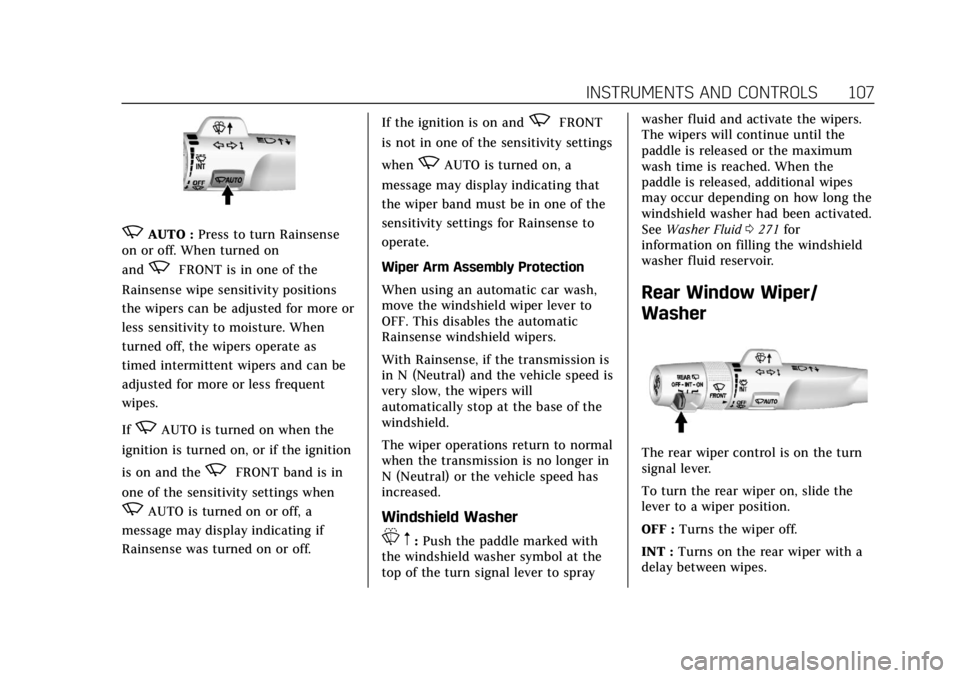
zAUTO :Press to turn Rainsense
on or off. When turned on
and
zFRONT is in one of the
Rainsense wipe sensitivity positions
the wipers can be adjusted for more or
less sensitivity to moisture. When
turned off, the wipers operate as
timed intermittent wipers and can be
adjusted for more or less frequent
wipes.
If
zAUTO is turned on when the
ignition is turned on, or if the ignition
is on and the
zFRONT band is in
one of the sensitivity settings when
zAUTO is turned on or off, a
message may display indicating if
Rainsense was turned on or off. If the ignition is on and
zFRONT
is not in one of the sensitivity settings
when
zAUTO is turned on, a
message may display indicating that
the wiper band must be in one of the
sensitivity settings for Rainsense to
operate.
Wiper Arm Assembly Protection
When using an automatic car wash,
move the windshield wiper lever to
OFF. This disables the automatic
Rainsense windshield wipers.
With Rainsense, if the transmission is
in N (Neutral) and the vehicle speed is
very slow, the wipers will
automatically stop at the base of the
windshield.
The wiper operations return to normal
when the transmission is no longer in
N (Neutral) or the vehicle speed has
increased.
Windshield Washer
L m:Push the paddle marked with
the windshield washer symbol at the
top of the turn signal lever to spray washer fluid and activate the wipers.
The wipers will continue until the
paddle is released or the maximum
wash time is reached. When the
paddle is released, additional wipes
may occur depending on how long the
windshield washer had been activated.
See
Washer Fluid 0271 for
information on filling the windshield
washer fluid reservoir.
Rear Window Wiper/
Washer
The rear wiper control is on the turn
signal lever.
To turn the rear wiper on, slide the
lever to a wiper position.
OFF : Turns the wiper off.
INT : Turns on the rear wiper with a
delay between wipes.
Page 110 of 392
Cadillac Escalade Owner Manual (GMNA-Localizing-U.S./Canada/Mexico-
13566588) - 2020 - CRC - 4/24/19
INSTRUMENTS AND CONTROLS 109
Clock
The infotainment system controls are
used to access the time and date
settings through the menu system.
See“Home Page ”in the infotainment
manual for information about how to
use the menu system.
Setting the Clock
Time
To set the time:
1. From the Home Page, touch SETTINGS, then touch Time
and Date.
2. Touch Set Time, then touch + or −to increase or decrease hours
or minutes, and change AM
or PM.
3. Touch 12-24 Hr for a 12 or 24 hour clock.
4. Touch
[Back to go back to the
previous menu. Date
To set the date:
1. From the Home Page, touch SETTINGS, then touch Time
and Date.
2. Touch Set Date, then touch + or −to increase or decrease month,
day, or year.
3. Touch
[Back to go back to the
previous menu.
Auto Set
When on, the time and date will
automatically update.
To set auto set: 1. From the Home Page, touch SETTINGS, then touch Time
and Date.
2. Touch Set Time or Set Date.
3. Touch Auto Set, then select On-Cell Network or Off-Manual
to manually set the time
and date.
4. Touch
[Back to go back to the
previous menu. If auto set is on, the time displayed on
the clock may not update immediately
when driving into a new time zone.
In some regions, auto set may require
an active OnStar or connected service
plan, if available.
Clock Display
When on, the digital clock will display
on the infotainment screen.
To set the clock display:
1. From the Home Page, touch SETTINGS, then touch Time
and Date.
2. Touch Clock Display, then select Off or On.
3. Touch
[Back to go back to the
previous menu.
Power Outlets
Power Outlets 12-Volt Direct Current
Accessory power outlets can be used
to plug in electrical equipment, such
as a cell phone or MP3 player.
Page 131 of 392
Cadillac Escalade Owner Manual (GMNA-Localizing-U.S./Canada/Mexico-
13566588) - 2020 - CRC - 4/24/19
130 INSTRUMENTS AND CONTROLS
Information Displays
Driver Information
Center (DIC)
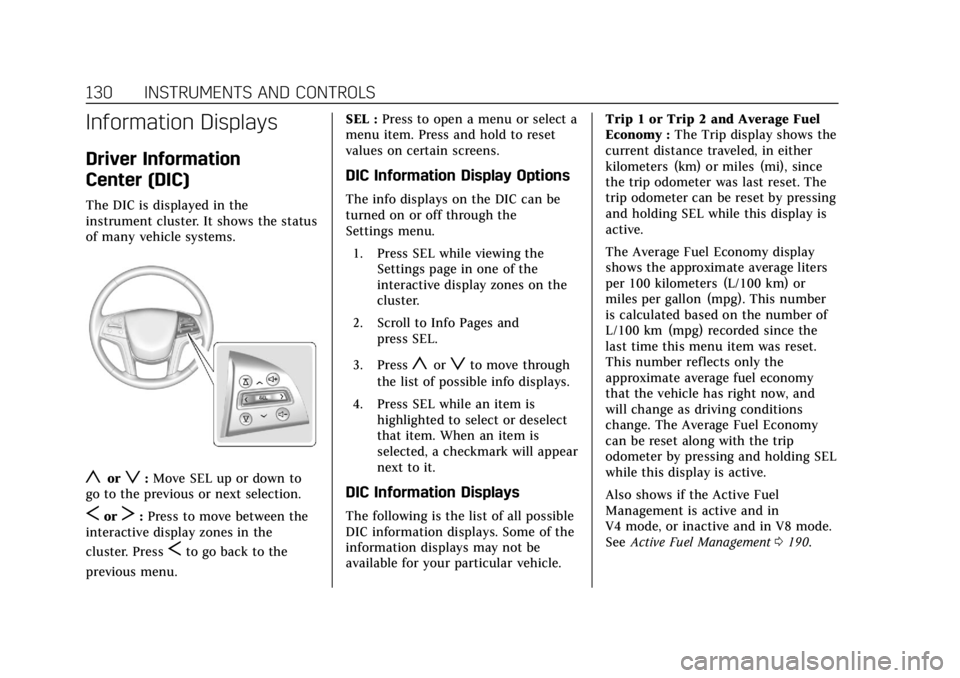
The DIC is displayed in the
instrument cluster. It shows the status
of many vehicle systems.
yorz:Move SEL up or down to
go to the previous or next selection.
SorT: Press to move between the
interactive display zones in the
cluster. Press
Sto go back to the
previous menu. SEL :
Press to open a menu or select a
menu item. Press and hold to reset
values on certain screens.
DIC Information Display Options
The info displays on the DIC can be
turned on or off through the
Settings menu.
1. Press SEL while viewing the Settings page in one of the
interactive display zones on the
cluster.
2. Scroll to Info Pages and press SEL.
3. Press
yorzto move through
the list of possible info displays.
4. Press SEL while an item is highlighted to select or deselect
that item. When an item is
selected, a checkmark will appear
next to it.
DIC Information Displays
The following is the list of all possible
DIC information displays. Some of the
information displays may not be
available for your particular vehicle. Trip 1 or Trip 2 and Average Fuel
Economy :
The Trip display shows the
current distance traveled, in either
kilometers (km) or miles (mi), since
the trip odometer was last reset. The
trip odometer can be reset by pressing
and holding SEL while this display is
active.
The Average Fuel Economy display
shows the approximate average liters
per 100 kilometers (L/100 km) or
miles per gallon (mpg). This number
is calculated based on the number of
L/100 km (mpg) recorded since the
last time this menu item was reset.
This number reflects only the
approximate average fuel economy
that the vehicle has right now, and
will change as driving conditions
change. The Average Fuel Economy
can be reset along with the trip
odometer by pressing and holding SEL
while this display is active.
Also shows if the Active Fuel
Management is active and in
V4 mode, or inactive and in V8 mode.
See Active Fuel Management 0190.
Page 134 of 392
Cadillac Escalade Owner Manual (GMNA-Localizing-U.S./Canada/Mexico-
13566588) - 2020 - CRC - 4/24/19
INSTRUMENTS AND CONTROLS 133
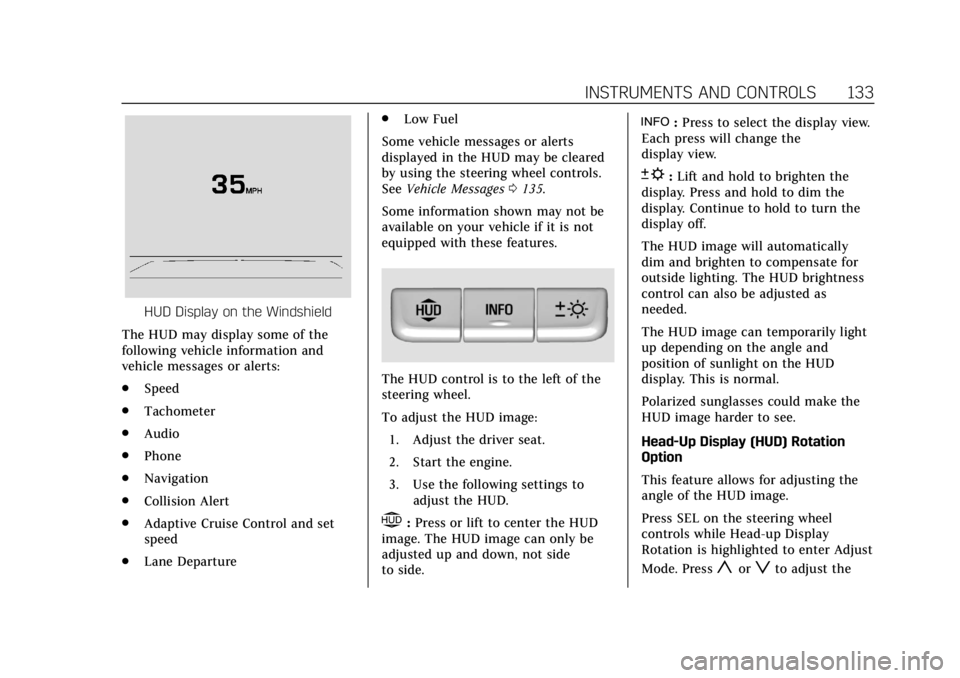
HUD Display on the Windshield
The HUD may display some of the
following vehicle information and
vehicle messages or alerts:
. Speed
. Tachometer
. Audio
. Phone
. Navigation
. Collision Alert
. Adaptive Cruise Control and set
speed
. Lane Departure .
Low Fuel
Some vehicle messages or alerts
displayed in the HUD may be cleared
by using the steering wheel controls.
See Vehicle Messages 0135.
Some information shown may not be
available on your vehicle if it is not
equipped with these features.
The HUD control is to the left of the
steering wheel.
To adjust the HUD image: 1. Adjust the driver seat.
2. Start the engine.
3. Use the following settings to adjust the HUD.
$:Press or lift to center the HUD
image. The HUD image can only be
adjusted up and down, not side
to side.
!: Press to select the display view.
Each press will change the
display view.
D: Lift and hold to brighten the
display. Press and hold to dim the
display. Continue to hold to turn the
display off.
The HUD image will automatically
dim and brighten to compensate for
outside lighting. The HUD brightness
control can also be adjusted as
needed.
The HUD image can temporarily light
up depending on the angle and
position of sunlight on the HUD
display. This is normal.
Polarized sunglasses could make the
HUD image harder to see.
Head-Up Display (HUD) Rotation
Option
This feature allows for adjusting the
angle of the HUD image.
Press SEL on the steering wheel
controls while Head-up Display
Rotation is highlighted to enter Adjust
Mode. Press
yorzto adjust the