steering CADILLAC ESCALADE 2020 User Guide
[x] Cancel search | Manufacturer: CADILLAC, Model Year: 2020, Model line: ESCALADE, Model: CADILLAC ESCALADE 2020Pages: 392, PDF Size: 6.39 MB
Page 72 of 392
Cadillac Escalade Owner Manual (GMNA-Localizing-U.S./Canada/Mexico-
13566588) - 2020 - CRC - 4/24/19
SEATS AND RESTRAINTS 71
Frontal airbags are not intended to
inflate during vehicle rollovers, rear
impacts, or many side impacts.
In addition, the vehicle has advanced
technology frontal airbags. Advanced
technology frontal airbags adjust the
restraint according to crash severity.
The vehicle also has a seat position
sensor that enables the sensing
system to monitor the position of the
driver seat. The seat position sensor
provides information that is used to
adjust the deployment of the driver
frontal airbag.
The front center airbag is designed to
inflate in moderate to severe side
crashes depending upon the location
of the impact, when either side of the
vehicle is struck. In addition, the front
center airbag is designed to inflate
when the sensing system predicts that
the vehicle is about to roll over on its
side. The front center airbag is not
designed to inflate in frontal impacts,
near frontal impacts, or rear impacts.
Seat-mounted side impact airbags are
designed to inflate in moderate to
severe side crashes depending on thelocation of the impact. Seat-mounted
side impact airbags are not designed
to inflate in frontal impacts, near
frontal impacts, rollovers, or rear
impacts. A seat-mounted side impact
airbag is designed to inflate on the
side of the vehicle that is struck.
Roof-rail airbags are designed to
inflate in moderate to severe side
crashes depending on the location of
the impact. In addition, these roof-rail
airbags are designed to inflate during
a rollover or in a severe frontal
impact. Roof-rail airbags are not
designed to inflate in rear impacts.
Both roof-rail airbags will inflate when
either side of the vehicle is struck,
if the sensing system predicts that the
vehicle is about to roll over on its
side, or in a severe frontal impact.
In any particular crash, no one can
say whether an airbag should have
inflated simply because of the vehicle
damage or the repair costs.What Makes an Airbag
Inflate?
In a deployment event, the sensing
system sends an electrical signal
triggering a release of gas from the
inflator. Gas from the inflator fills the
airbag causing the bag to break out of
the cover. The inflator, the airbag, and
related hardware are all part of the
airbag module.
For airbag locations, see
Where Are the
Airbags? 069.
How Does an Airbag
Restrain?
In moderate to severe frontal or near
frontal collisions, even belted
occupants can contact the steering
wheel or the instrument panel. In
moderate to severe side collisions,
even belted occupants can contact the
inside of the vehicle.
Airbags supplement the protection
provided by seat belts by distributing
the force of the impact more evenly
over the occupant's body.
Page 74 of 392
Cadillac Escalade Owner Manual (GMNA-Localizing-U.S./Canada/Mexico-
13566588) - 2020 - CRC - 4/24/19
SEATS AND RESTRAINTS 73
{Warning
A crash severe enough to inflate the
airbags may have also damaged
important functions in the vehicle,
such as the fuel system, brake and
steering systems, etc. Even if the
vehicle appears to be drivable after
a moderate crash, there may be
concealed damage that could make
it difficult to safely operate the
vehicle.
Use caution if you should attempt
to restart the engine after a crash
has occurred.
In many crashes severe enough to
inflate the airbag, windshields are
broken by vehicle deformation.
Additional windshield breakage may
also occur from the front outboard
passenger airbag.
. Airbags are designed to inflate
only once. After an airbag inflates,
you will need some new parts for
the airbag system. If you do not
get them, the airbag system will not be there to help protect you in
another crash. A new system will
include airbag modules and
possibly other parts. The service
manual for the vehicle covers the
need to replace other parts.
. The vehicle has a crash sensing
and diagnostic module which
records information after a crash.
See Vehicle Data Recording and
Privacy 0367 and
Event Data Recorders 0368.
. Let only qualified technicians
work on the airbag systems.
Improper service can mean that
an airbag system will not work
properly. See your dealer for
service.
Passenger Sensing System
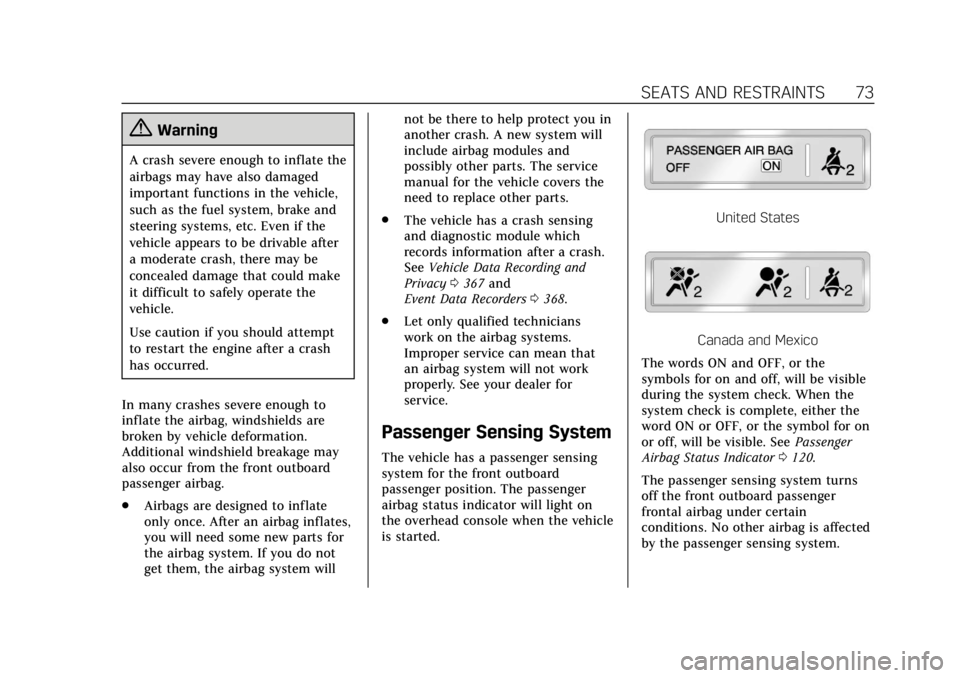
The vehicle has a passenger sensing
system for the front outboard
passenger position. The passenger
airbag status indicator will light on
the overhead console when the vehicle
is started.
United States
Canada and Mexico
The words ON and OFF, or the
symbols for on and off, will be visible
during the system check. When the
system check is complete, either the
word ON or OFF, or the symbol for on
or off, will be visible. See Passenger
Airbag Status Indicator 0120.
The passenger sensing system turns
off the front outboard passenger
frontal airbag under certain
conditions. No other airbag is affected
by the passenger sensing system.
Page 78 of 392
Cadillac Escalade Owner Manual (GMNA-Localizing-U.S./Canada/Mexico-
13566588) - 2020 - CRC - 4/24/19
SEATS AND RESTRAINTS 77
A thick layer of additional material,
such as a blanket or cushion,
or aftermarket equipment such as seat
covers, seat heaters, and seat
massagers can affect how well the
passenger sensing system operates.
We recommend that you not use seat
covers or other aftermarket equipment
except when approved by GM for your
specific vehicle. SeeAdding Equipment
to the Airbag-Equipped Vehicle 077 for
more information about modifications
that can affect how the system
operates.
The ON indicator may be lit if an
object, such as a briefcase, handbag,
grocery bag, laptop, or other electronic
device, is put on an unoccupied seat.
If this is not desired, remove the
object from the seat.
{Warning
Stowing articles under the
passenger seat or between the
passenger seat cushion and
seatback may interfere with the
proper operation of the passenger
sensing system.
Servicing the
Airbag-Equipped Vehicle
Airbags affect how the vehicle should
be serviced. There are parts of the
airbag system in several places around
the vehicle. Your dealer and the
service manual have information
about servicing the vehicle and the
airbag system. To purchase a service
manual, see Publication Ordering
Information 0365.
{Warning
For up to 10 seconds after the
vehicle is turned off and the battery
is disconnected, an airbag can still
inflate during improper service. You
can be injured if you are close to an
airbag when it inflates. Avoid
yellow connectors. They are
probably part of the airbag system.
Be sure to follow proper service
procedures, and make sure the
person performing work for you is
qualified to do so.
Adding Equipment to the
Airbag-Equipped Vehicle
Adding accessories that change the
vehicle's frame, bumper system,
height, front end, or side sheet metal
may keep the airbag system from
working properly.
The operation of the airbag system
can also be affected by changing,
including improperly repairing or
replacing, any parts of the following:
.
Airbag system, including airbag
modules, front or side impact
sensors, sensing and diagnostic
module, airbag wiring, or front
center console
. Front seats, including stitching,
seams or zippers
. Seat belts
. Steering wheel, instrument panel,
overhead console, ceiling trim,
or pillar garnish trim
. Inner door seals, including
speakers
Page 105 of 392
Cadillac Escalade Owner Manual (GMNA-Localizing-U.S./Canada/Mexico-
13566588) - 2020 - CRC - 4/24/19
104 INSTRUMENTS AND CONTROLS
Instruments and
Controls
Controls
Steering Wheel Adjustment . . . . . 105
Steering Wheel Controls . . . . . . . . . 105
Heated Steering Wheel . . . . . . . . . . 105
Horn . . . . . . . . . . . . . . . . . . . . . . . . . . . . . . . 105
Windshield Wiper/Washer . . . . . . . 105
Rear Window Wiper/Washer . . . . 107
Compass . . . . . . . . . . . . . . . . . . . . . . . . . . 108
Clock . . . . . . . . . . . . . . . . . . . . . . . . . . . . . . 109
Power Outlets . . . . . . . . . . . . . . . . . . . . . 109
Wireless Charging . . . . . . . . . . . . . . . . 111
Cigarette Lighter . . . . . . . . . . . . . . . . . . 113
Ashtrays . . . . . . . . . . . . . . . . . . . . . . . . . . 114
Warning Lights, Gauges, and
Indicators
Warning Lights, Gauges, andIndicators . . . . . . . . . . . . . . . . . . . . . . . 114
Instrument Cluster . . . . . . . . . . . . . . . 115
Speedometer . . . . . . . . . . . . . . . . . . . . . . 117
Odometer . . . . . . . . . . . . . . . . . . . . . . . . . 117
Trip Odometer . . . . . . . . . . . . . . . . . . . . 117
Tachometer . . . . . . . . . . . . . . . . . . . . . . . 118
Fuel Gauge . . . . . . . . . . . . . . . . . . . . . . . . 118 Engine Coolant Temperature
Gauge . . . . . . . . . . . . . . . . . . . . . . . . . . . . 118
Seat Belt Reminders . . . . . . . . . . . . . . 119
Airbag Readiness Light . . . . . . . . . . 120
Passenger Airbag Status Indicator . . . . . . . . . . . . . . . . . . . . . . . . . 120
Charging System Light . . . . . . . . . . . 121
Malfunction Indicator Lamp (Check Engine Light) . . . . . . . . . . . 121
Brake System Warning Light . . . . 123
Electric Parking Brake Light . . . . . 124
Service Electric Parking Brake Light . . . . . . . . . . . . . . . . . . . . . . . . . . . . . 124
Antilock Brake System (ABS) Warning Light . . . . . . . . . . . . . . . . . . 124
Sport Mode Light . . . . . . . . . . . . . . . . . 125
Tow/Haul Mode Light . . . . . . . . . . . . 125
Winter Driving Mode Light . . . . . . 125
Lane Keep Assist (LKA) Light . . . 125
Vehicle Ahead Indicator . . . . . . . . . 126
Traction Off Light . . . . . . . . . . . . . . . . 126
StabiliTrak OFF Light . . . . . . . . . . . . 126
Traction Control System (TCS)/ StabiliTrak Light . . . . . . . . . . . . . . . . 126
Engine Coolant Temperature Warning Light . . . . . . . . . . . . . . . . . . 127
Tire Pressure Light . . . . . . . . . . . . . . . 127
Engine Oil Pressure Light . . . . . . . . 128
Low Fuel Warning Light . . . . . . . . . 128
Security Light . . . . . . . . . . . . . . . . . . . . . 128 High-Beam On Light . . . . . . . . . . . . . 128
Lamps On Reminder . . . . . . . . . . . . . 129
Cruise Control Light . . . . . . . . . . . . . . 129
Door Ajar Light . . . . . . . . . . . . . . . . . . . 129
Information Displays
Driver Information
Center (DIC) . . . . . . . . . . . . . . . . . . . . . 130
Head-Up Display (HUD) . . . . . . . . . 132
Vehicle Messages
Vehicle Messages . . . . . . . . . . . . . . . . . 135
Engine Power Messages . . . . . . . . . . 136
Vehicle Speed Messages . . . . . . . . . 136
Vehicle Personalization
Vehicle Personalization . . . . . . . . . . 136
Universal Remote System
Universal Remote System . . . . . . . . 145
Universal Remote System Programming . . . . . . . . . . . . . . . . . . . 145
Universal Remote System Operation . . . . . . . . . . . . . . . . . . . . . . . . 147
Page 106 of 392
Cadillac Escalade Owner Manual (GMNA-Localizing-U.S./Canada/Mexico-
13566588) - 2020 - CRC - 4/24/19
INSTRUMENTS AND CONTROLS 105
Controls
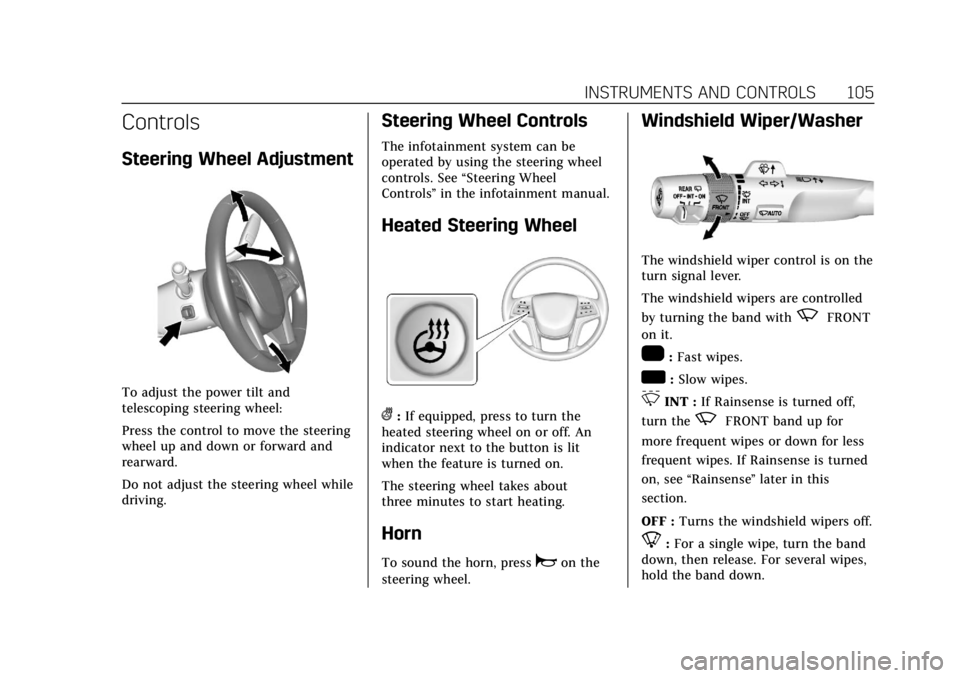
Steering Wheel Adjustment
To adjust the power tilt and
telescoping steering wheel:
Press the control to move the steering
wheel up and down or forward and
rearward.
Do not adjust the steering wheel while
driving.
Steering Wheel Controls
The infotainment system can be
operated by using the steering wheel
controls. See“Steering Wheel
Controls ”in the infotainment manual.
Heated Steering Wheel
(:If equipped, press to turn the
heated steering wheel on or off. An
indicator next to the button is lit
when the feature is turned on.
The steering wheel takes about
three minutes to start heating.
Horn
To sound the horn, pressaon the
steering wheel.
Windshield Wiper/Washer
The windshield wiper control is on the
turn signal lever.
The windshield wipers are controlled
by turning the band with
zFRONT
on it.
1: Fast wipes.
w: Slow wipes.
3INT : If Rainsense is turned off,
turn the
zFRONT band up for
more frequent wipes or down for less
frequent wipes. If Rainsense is turned
on, see “Rainsense ”later in this
section.
OFF : Turns the windshield wipers off.
8:For a single wipe, turn the band
down, then release. For several wipes,
hold the band down.
Page 117 of 392

Cadillac Escalade Owner Manual (GMNA-Localizing-U.S./Canada/Mexico-
13566588) - 2020 - CRC - 4/24/19
116 INSTRUMENTS AND CONTROLS
Reconfigurable Instrument
Cluster
The cluster display layout can be
changed.
Balanced Configuration
The Balanced configuration has three
interactive display zones: one in the
center of each of the gauges.
Enhanced Configuration The Enhanced configuration has three
interactive display zones.
Use the five-way control on the right
side of the steering wheel to move
between the different display zones
and scroll through the different
displays.
To change the cluster configuration:
1. Find the Options page in one of the interactive display zones on
the cluster.
2. Press SEL to enter the Options menu.
3. Scroll down to highlight Display Layout. Then press SEL to
select it.
4. Each layout in the menu is represented by a small preview
image of the display layout.
Scroll up or down and highlight
the selection. Press SEL to select
the desired cluster configuration.
5. Exit the Display Layout menu by pressing
S.
Cluster Application Displays
The cluster can display information
regarding Navigation, Audio, and
Phone.
Navigation
If there is no active route, a compass
will be displayed. If there is an active
route, press SEL to end route guidance
or turn the voice prompts on or off.
Audio
While the Audio application page is
displayed, press SEL to enter the
Audio menu. In the Audio menu,
search for music, select from favorites,
or change the audio source.
Phone
While the Phone application page is
displayed, press SEL to enter the
Phone menu. In the Phone menu,
if there is no active phone call, view
recent calls, select from favorites,
or scroll through contacts. If there is
an active call, mute the phone or
switch to handset operation.
Page 118 of 392
Cadillac Escalade Owner Manual (GMNA-Localizing-U.S./Canada/Mexico-
13566588) - 2020 - CRC - 4/24/19
INSTRUMENTS AND CONTROLS 117
Cluster Options Menu
To enter the cluster Options menu:1. Use the five-way control on the right side of the steering wheel
to find the Options page in one
of the interactive display zones
on the cluster.
2. Press SEL on the center of the five-way control to enter the
Options menu.
Units : Press SEL while Units is
highlighted to enter the Unit menu.
Choose US or metric units by pressing
SEL while the desired item is
highlighted. A checkmark will be
displayed next to the selected item.
Info Pages : Press SEL while Info
Pages is highlighted to select the
items to be displayed in the DIC info
displays. See Driver Information Center
(DIC) 0130.
Fav Button Options : Press SEL while
Fav Button Options is highlighted to
select between FAV Primary and SEEK
Primary. This selection allows for
configuration of the
CandB
steering wheel controls. When FAV Primary is selected, pressing
Cand
Bwill go to the next or previous
favorite and pressing and holding
C
andBwill seek. When SEEK Primary
is selected, pressing
CandBwill
seek and pressing and holding
Cand
Bwill go to the next or previous
favorite.
Display Layout : Press SEL while
Display Layout is highlighted to
change the configuration of the
cluster. See “Reconfigurable
Instrument Cluster” earlier in this
section.
Head-up Display (HUD) Rotation :
This feature allows for adjusting the
angle of the HUD image. The vehicle
must be in P (Park). Press SEL on the
steering wheel controls while Head-up
Display Rotation is highlighted to
enter Adjust Mode. Press
yorzto
adjust the angle of the HUD display.
Press
SorTto highlight OK, then press SEL to save the setting. Cancel
can also be selected to cancel the
setting.
Open Source Software :
Press SEL
while Open Source Software is
highlighted to display open source
software information.
Speedometer
The speedometer shows the vehicle's
speed in either kilometers per hour
(km/h) or miles per hour (mph).
Odometer
The odometer shows how far the
vehicle has been driven, in either
kilometers or miles.
Trip Odometer
The trip odometer shows how far the
vehicle has been driven since the trip
odometer was last reset.
The trip odometer is accessed and
reset through the Driver Information
Center (DIC). See Driver Information
Center (DIC) 0130.
Page 124 of 392
Cadillac Escalade Owner Manual (GMNA-Localizing-U.S./Canada/Mexico-
13566588) - 2020 - CRC - 4/24/19
INSTRUMENTS AND CONTROLS 123
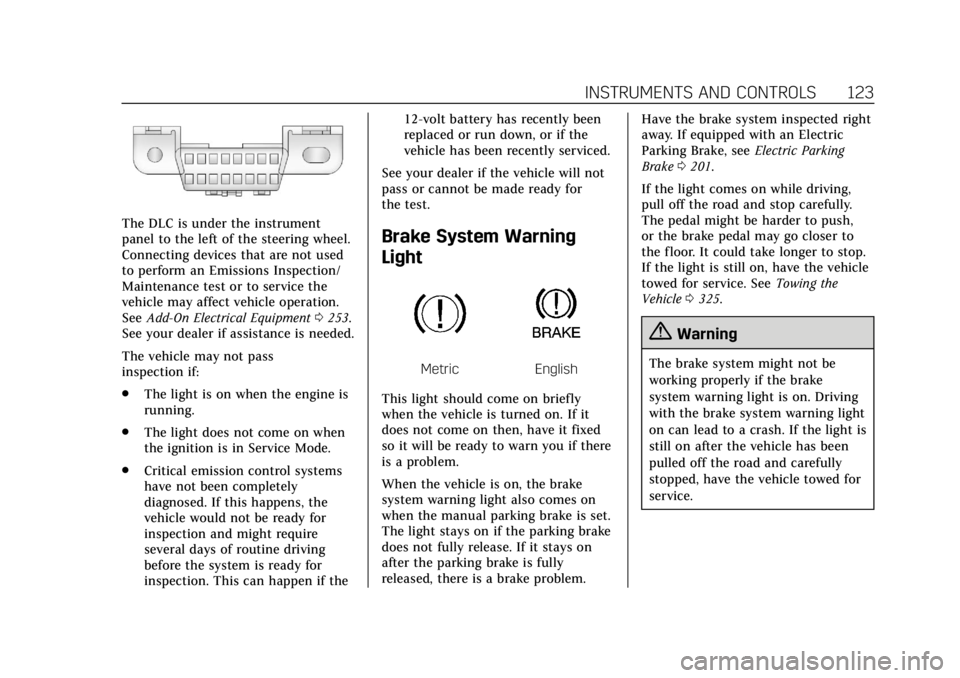
The DLC is under the instrument
panel to the left of the steering wheel.
Connecting devices that are not used
to perform an Emissions Inspection/
Maintenance test or to service the
vehicle may affect vehicle operation.
SeeAdd-On Electrical Equipment 0253.
See your dealer if assistance is needed.
The vehicle may not pass
inspection if:
. The light is on when the engine is
running.
. The light does not come on when
the ignition is in Service Mode.
. Critical emission control systems
have not been completely
diagnosed. If this happens, the
vehicle would not be ready for
inspection and might require
several days of routine driving
before the system is ready for
inspection. This can happen if the 12-volt battery has recently been
replaced or run down, or if the
vehicle has been recently serviced.
See your dealer if the vehicle will not
pass or cannot be made ready for
the test.Brake System Warning
Light
MetricEnglish
This light should come on briefly
when the vehicle is turned on. If it
does not come on then, have it fixed
so it will be ready to warn you if there
is a problem.
When the vehicle is on, the brake
system warning light also comes on
when the manual parking brake is set.
The light stays on if the parking brake
does not fully release. If it stays on
after the parking brake is fully
released, there is a brake problem. Have the brake system inspected right
away. If equipped with an Electric
Parking Brake, see
Electric Parking
Brake 0201.
If the light comes on while driving,
pull off the road and stop carefully.
The pedal might be harder to push,
or the brake pedal may go closer to
the floor. It could take longer to stop.
If the light is still on, have the vehicle
towed for service. See Towing the
Vehicle 0325.
{Warning
The brake system might not be
working properly if the brake
system warning light is on. Driving
with the brake system warning light
on can lead to a crash. If the light is
still on after the vehicle has been
pulled off the road and carefully
stopped, have the vehicle towed for
service.
Page 126 of 392
Cadillac Escalade Owner Manual (GMNA-Localizing-U.S./Canada/Mexico-
13566588) - 2020 - CRC - 4/24/19
INSTRUMENTS AND CONTROLS 125
If both the ABS warning light and the
brake system warning light are on,
ABS is not functioning and there is a
problem with the regular brakes. See
your dealer for service.
SeeBrake System Warning Light 0123.
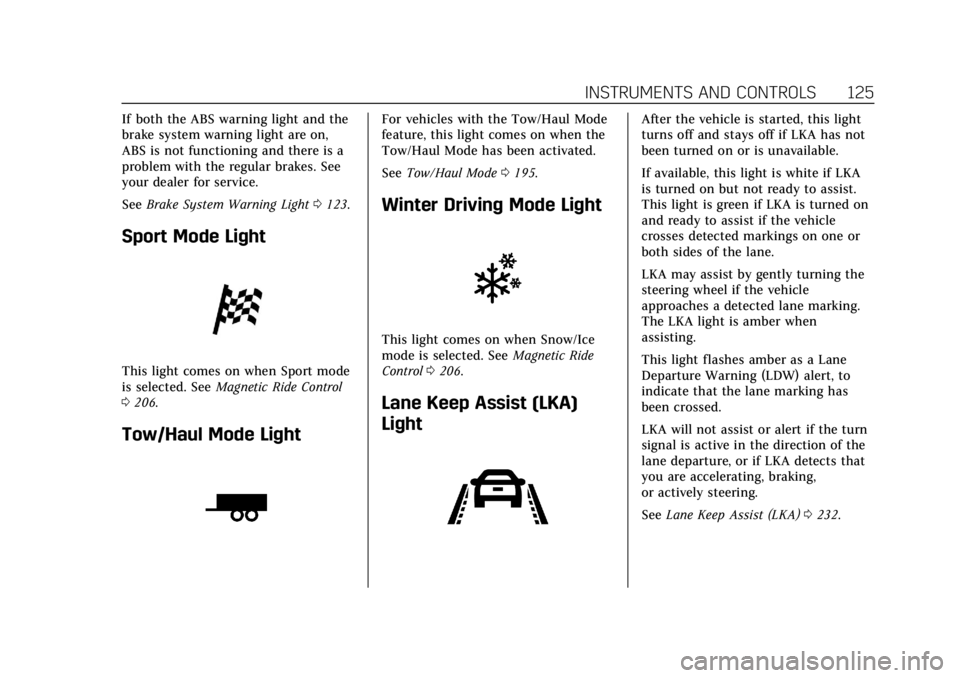
Sport Mode Light
This light comes on when Sport mode
is selected. See Magnetic Ride Control
0 206.
Tow/Haul Mode Light
For vehicles with the Tow/Haul Mode
feature, this light comes on when the
Tow/Haul Mode has been activated.
See Tow/Haul Mode 0195.
Winter Driving Mode Light
This light comes on when Snow/Ice
mode is selected. See Magnetic Ride
Control 0206.
Lane Keep Assist (LKA)
Light
After the vehicle is started, this light
turns off and stays off if LKA has not
been turned on or is unavailable.
If available, this light is white if LKA
is turned on but not ready to assist.
This light is green if LKA is turned on
and ready to assist if the vehicle
crosses detected markings on one or
both sides of the lane.
LKA may assist by gently turning the
steering wheel if the vehicle
approaches a detected lane marking.
The LKA light is amber when
assisting.
This light flashes amber as a Lane
Departure Warning (LDW) alert, to
indicate that the lane marking has
been crossed.
LKA will not assist or alert if the turn
signal is active in the direction of the
lane departure, or if LKA detects that
you are accelerating, braking,
or actively steering.
See Lane Keep Assist (LKA) 0232.
Page 134 of 392
Cadillac Escalade Owner Manual (GMNA-Localizing-U.S./Canada/Mexico-
13566588) - 2020 - CRC - 4/24/19
INSTRUMENTS AND CONTROLS 133
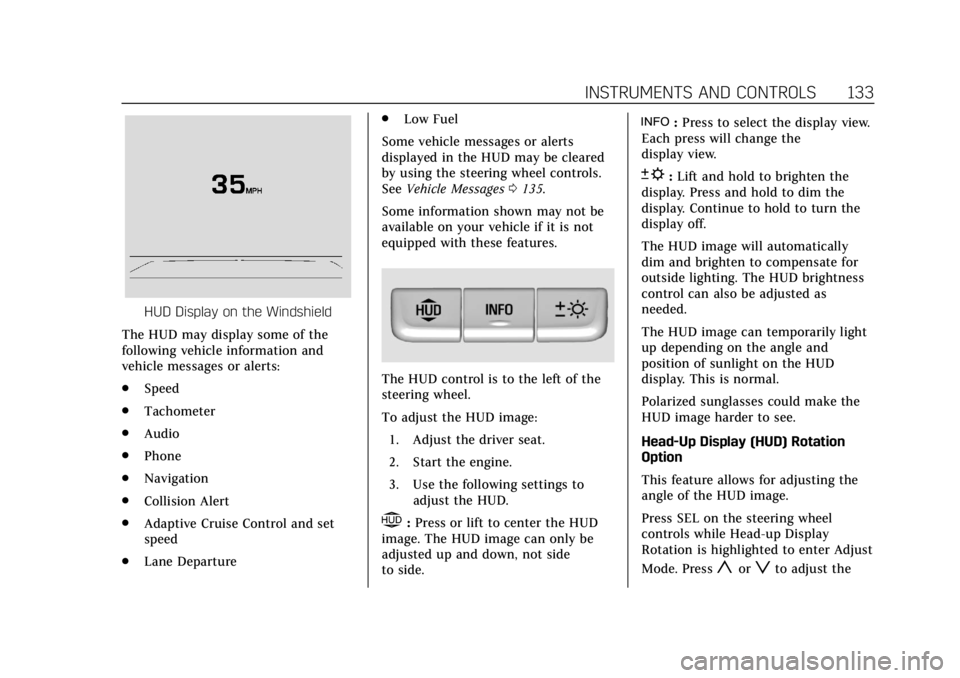
HUD Display on the Windshield
The HUD may display some of the
following vehicle information and
vehicle messages or alerts:
. Speed
. Tachometer
. Audio
. Phone
. Navigation
. Collision Alert
. Adaptive Cruise Control and set
speed
. Lane Departure .
Low Fuel
Some vehicle messages or alerts
displayed in the HUD may be cleared
by using the steering wheel controls.
See Vehicle Messages 0135.
Some information shown may not be
available on your vehicle if it is not
equipped with these features.
The HUD control is to the left of the
steering wheel.
To adjust the HUD image: 1. Adjust the driver seat.
2. Start the engine.
3. Use the following settings to adjust the HUD.
$:Press or lift to center the HUD
image. The HUD image can only be
adjusted up and down, not side
to side.
!: Press to select the display view.
Each press will change the
display view.
D: Lift and hold to brighten the
display. Press and hold to dim the
display. Continue to hold to turn the
display off.
The HUD image will automatically
dim and brighten to compensate for
outside lighting. The HUD brightness
control can also be adjusted as
needed.
The HUD image can temporarily light
up depending on the angle and
position of sunlight on the HUD
display. This is normal.
Polarized sunglasses could make the
HUD image harder to see.
Head-Up Display (HUD) Rotation
Option
This feature allows for adjusting the
angle of the HUD image.
Press SEL on the steering wheel
controls while Head-up Display
Rotation is highlighted to enter Adjust
Mode. Press
yorzto adjust the