tow CADILLAC ESCALADE 2020 User Guide
[x] Cancel search | Manufacturer: CADILLAC, Model Year: 2020, Model line: ESCALADE, Model: CADILLAC ESCALADE 2020Pages: 392, PDF Size: 6.39 MB
Page 78 of 392
Cadillac Escalade Owner Manual (GMNA-Localizing-U.S./Canada/Mexico-
13566588) - 2020 - CRC - 4/24/19
SEATS AND RESTRAINTS 77
A thick layer of additional material,
such as a blanket or cushion,
or aftermarket equipment such as seat
covers, seat heaters, and seat
massagers can affect how well the
passenger sensing system operates.
We recommend that you not use seat
covers or other aftermarket equipment
except when approved by GM for your
specific vehicle. SeeAdding Equipment
to the Airbag-Equipped Vehicle 077 for
more information about modifications
that can affect how the system
operates.
The ON indicator may be lit if an
object, such as a briefcase, handbag,
grocery bag, laptop, or other electronic
device, is put on an unoccupied seat.
If this is not desired, remove the
object from the seat.
{Warning
Stowing articles under the
passenger seat or between the
passenger seat cushion and
seatback may interfere with the
proper operation of the passenger
sensing system.
Servicing the
Airbag-Equipped Vehicle
Airbags affect how the vehicle should
be serviced. There are parts of the
airbag system in several places around
the vehicle. Your dealer and the
service manual have information
about servicing the vehicle and the
airbag system. To purchase a service
manual, see Publication Ordering
Information 0365.
{Warning
For up to 10 seconds after the
vehicle is turned off and the battery
is disconnected, an airbag can still
inflate during improper service. You
can be injured if you are close to an
airbag when it inflates. Avoid
yellow connectors. They are
probably part of the airbag system.
Be sure to follow proper service
procedures, and make sure the
person performing work for you is
qualified to do so.
Adding Equipment to the
Airbag-Equipped Vehicle
Adding accessories that change the
vehicle's frame, bumper system,
height, front end, or side sheet metal
may keep the airbag system from
working properly.
The operation of the airbag system
can also be affected by changing,
including improperly repairing or
replacing, any parts of the following:
.
Airbag system, including airbag
modules, front or side impact
sensors, sensing and diagnostic
module, airbag wiring, or front
center console
. Front seats, including stitching,
seams or zippers
. Seat belts
. Steering wheel, instrument panel,
overhead console, ceiling trim,
or pillar garnish trim
. Inner door seals, including
speakers
Page 92 of 392
Cadillac Escalade Owner Manual (GMNA-Localizing-U.S./Canada/Mexico-
13566588) - 2020 - CRC - 4/24/19
SEATS AND RESTRAINTS 91
{Warning
To reduce the risk of serious or
fatal injuries during a crash, do not
attach more than one child
restraint to a single anchor.
Attaching more than one child
restraint to a single anchor could
cause the anchor or attachment to
come loose or even break during a
crash. A child or others could be
injured.
{Warning
Children can be seriously injured or
strangled if a shoulder belt is
wrapped around their neck. The
shoulder belt can tighten but
cannot be loosened if it is locked.
The shoulder belt locks when it is
pulled all the way out of the
retractor. It unlocks when the
shoulder belt is allowed to go all
the way back into the retractor, but(Continued)
Warning (Continued)
it cannot do this if it is wrapped
around a child’s neck. If the
shoulder belt is locked and
tightened around a child’s neck, the
only way to loosen the belt is to
cut it.
Buckle any unused seat belts
behind the child restraint so
children cannot reach them. Pull
the shoulder belt all the way out of
the retractor to set the lock, and
tighten the belt behind the child
restraint after the child restraint
has been installed.
Caution
Do not let the LATCH attachments
rub against the vehicle’s seat belts.
This may damage these parts.
If necessary, move buckled seat
belts to avoid rubbing the LATCH
attachments.(Continued)
Caution (Continued)
Do not fold the rear seatback when
the seat is occupied. Do not fold the
empty rear seat with a seat belt
buckled. This could damage the
seat belt or the seat. Unbuckle and
return the seat belt to its stowed
position, before folding the seat.
The vehicle is equipped with a front
center airbag in the inboard side of
the driver seat. Even with a front
center airbag, a child restraint can be
installed in any second row seating
position.
If you need to secure more than one
child restraint in the rear seat, see
Where to Put the Restraint 085.
1. Attach and tighten the lower attachments to the lower
anchors. If the child restraint
does not have lower attachments
or the desired seating position
does not have lower anchors,
secure the child restraint with
the seat belt and top tether when
recommended by the child
Page 97 of 392
Cadillac Escalade Owner Manual (GMNA-Localizing-U.S./Canada/Mexico-
13566588) - 2020 - CRC - 4/24/19
96 SEATS AND RESTRAINTS
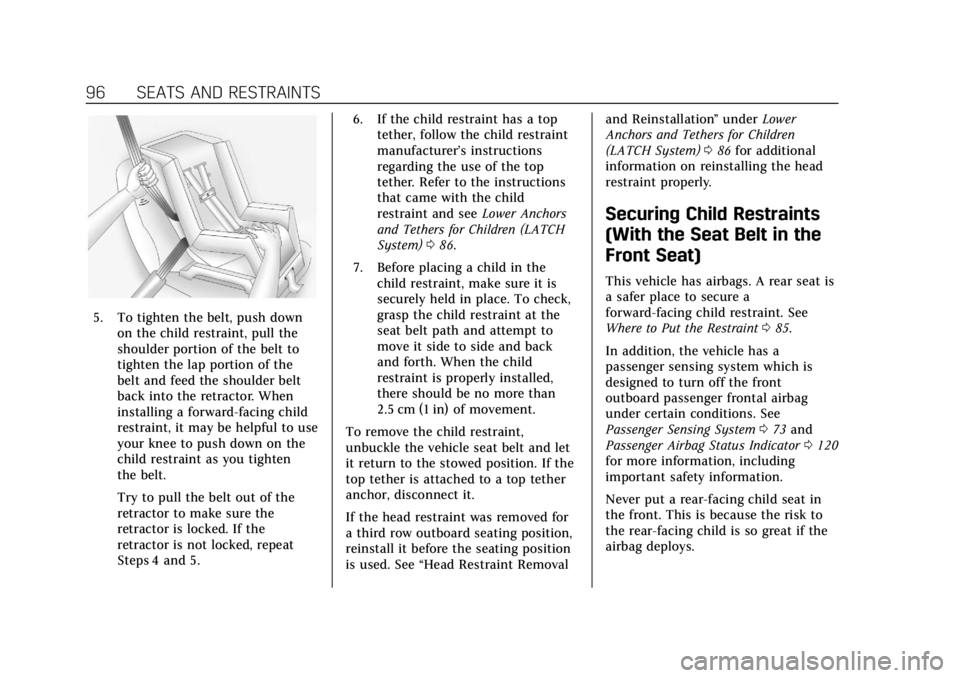
5. To tighten the belt, push downon the child restraint, pull the
shoulder portion of the belt to
tighten the lap portion of the
belt and feed the shoulder belt
back into the retractor. When
installing a forward-facing child
restraint, it may be helpful to use
your knee to push down on the
child restraint as you tighten
the belt.
Try to pull the belt out of the
retractor to make sure the
retractor is locked. If the
retractor is not locked, repeat
Steps 4 and 5. 6. If the child restraint has a top
tether, follow the child restraint
manufacturer’s instructions
regarding the use of the top
tether. Refer to the instructions
that came with the child
restraint and see Lower Anchors
and Tethers for Children (LATCH
System) 086.
7. Before placing a child in the child restraint, make sure it is
securely held in place. To check,
grasp the child restraint at the
seat belt path and attempt to
move it side to side and back
and forth. When the child
restraint is properly installed,
there should be no more than
2.5 cm (1 in) of movement.
To remove the child restraint,
unbuckle the vehicle seat belt and let
it return to the stowed position. If the
top tether is attached to a top tether
anchor, disconnect it.
If the head restraint was removed for
a third row outboard seating position,
reinstall it before the seating position
is used. See “Head Restraint Removal and Reinstallation
”under Lower
Anchors and Tethers for Children
(LATCH System) 086 for additional
information on reinstalling the head
restraint properly.
Securing Child Restraints
(With the Seat Belt in the
Front Seat)
This vehicle has airbags. A rear seat is
a safer place to secure a
forward-facing child restraint. See
Where to Put the Restraint 085.
In addition, the vehicle has a
passenger sensing system which is
designed to turn off the front
outboard passenger frontal airbag
under certain conditions. See
Passenger Sensing System 073 and
Passenger Airbag Status Indicator 0120
for more information, including
important safety information.
Never put a rear-facing child seat in
the front. This is because the risk to
the rear-facing child is so great if the
airbag deploys.
Page 100 of 392
Cadillac Escalade Owner Manual (GMNA-Localizing-U.S./Canada/Mexico-
13566588) - 2020 - CRC - 4/24/19
SEATS AND RESTRAINTS 99
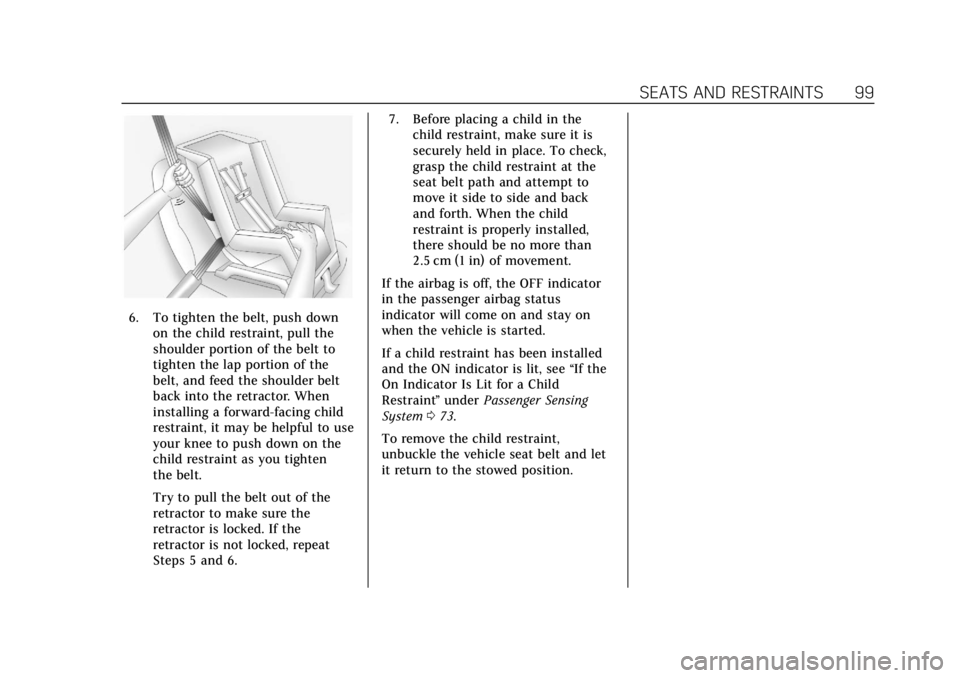
6. To tighten the belt, push downon the child restraint, pull the
shoulder portion of the belt to
tighten the lap portion of the
belt, and feed the shoulder belt
back into the retractor. When
installing a forward-facing child
restraint, it may be helpful to use
your knee to push down on the
child restraint as you tighten
the belt.
Try to pull the belt out of the
retractor to make sure the
retractor is locked. If the
retractor is not locked, repeat
Steps 5 and 6. 7. Before placing a child in the
child restraint, make sure it is
securely held in place. To check,
grasp the child restraint at the
seat belt path and attempt to
move it side to side and back
and forth. When the child
restraint is properly installed,
there should be no more than
2.5 cm (1 in) of movement.
If the airbag is off, the OFF indicator
in the passenger airbag status
indicator will come on and stay on
when the vehicle is started.
If a child restraint has been installed
and the ON indicator is lit, see “If the
On Indicator Is Lit for a Child
Restraint ”under Passenger Sensing
System 073.
To remove the child restraint,
unbuckle the vehicle seat belt and let
it return to the stowed position.
Page 105 of 392
Cadillac Escalade Owner Manual (GMNA-Localizing-U.S./Canada/Mexico-
13566588) - 2020 - CRC - 4/24/19
104 INSTRUMENTS AND CONTROLS
Instruments and
Controls
Controls
Steering Wheel Adjustment . . . . . 105
Steering Wheel Controls . . . . . . . . . 105
Heated Steering Wheel . . . . . . . . . . 105
Horn . . . . . . . . . . . . . . . . . . . . . . . . . . . . . . . 105
Windshield Wiper/Washer . . . . . . . 105
Rear Window Wiper/Washer . . . . 107
Compass . . . . . . . . . . . . . . . . . . . . . . . . . . 108
Clock . . . . . . . . . . . . . . . . . . . . . . . . . . . . . . 109
Power Outlets . . . . . . . . . . . . . . . . . . . . . 109
Wireless Charging . . . . . . . . . . . . . . . . 111
Cigarette Lighter . . . . . . . . . . . . . . . . . . 113
Ashtrays . . . . . . . . . . . . . . . . . . . . . . . . . . 114
Warning Lights, Gauges, and
Indicators
Warning Lights, Gauges, andIndicators . . . . . . . . . . . . . . . . . . . . . . . 114
Instrument Cluster . . . . . . . . . . . . . . . 115
Speedometer . . . . . . . . . . . . . . . . . . . . . . 117
Odometer . . . . . . . . . . . . . . . . . . . . . . . . . 117
Trip Odometer . . . . . . . . . . . . . . . . . . . . 117
Tachometer . . . . . . . . . . . . . . . . . . . . . . . 118
Fuel Gauge . . . . . . . . . . . . . . . . . . . . . . . . 118 Engine Coolant Temperature
Gauge . . . . . . . . . . . . . . . . . . . . . . . . . . . . 118
Seat Belt Reminders . . . . . . . . . . . . . . 119
Airbag Readiness Light . . . . . . . . . . 120
Passenger Airbag Status Indicator . . . . . . . . . . . . . . . . . . . . . . . . . 120
Charging System Light . . . . . . . . . . . 121
Malfunction Indicator Lamp (Check Engine Light) . . . . . . . . . . . 121
Brake System Warning Light . . . . 123
Electric Parking Brake Light . . . . . 124
Service Electric Parking Brake Light . . . . . . . . . . . . . . . . . . . . . . . . . . . . . 124
Antilock Brake System (ABS) Warning Light . . . . . . . . . . . . . . . . . . 124
Sport Mode Light . . . . . . . . . . . . . . . . . 125
Tow/Haul Mode Light . . . . . . . . . . . . 125
Winter Driving Mode Light . . . . . . 125
Lane Keep Assist (LKA) Light . . . 125
Vehicle Ahead Indicator . . . . . . . . . 126
Traction Off Light . . . . . . . . . . . . . . . . 126
StabiliTrak OFF Light . . . . . . . . . . . . 126
Traction Control System (TCS)/ StabiliTrak Light . . . . . . . . . . . . . . . . 126
Engine Coolant Temperature Warning Light . . . . . . . . . . . . . . . . . . 127
Tire Pressure Light . . . . . . . . . . . . . . . 127
Engine Oil Pressure Light . . . . . . . . 128
Low Fuel Warning Light . . . . . . . . . 128
Security Light . . . . . . . . . . . . . . . . . . . . . 128 High-Beam On Light . . . . . . . . . . . . . 128
Lamps On Reminder . . . . . . . . . . . . . 129
Cruise Control Light . . . . . . . . . . . . . . 129
Door Ajar Light . . . . . . . . . . . . . . . . . . . 129
Information Displays
Driver Information
Center (DIC) . . . . . . . . . . . . . . . . . . . . . 130
Head-Up Display (HUD) . . . . . . . . . 132
Vehicle Messages
Vehicle Messages . . . . . . . . . . . . . . . . . 135
Engine Power Messages . . . . . . . . . . 136
Vehicle Speed Messages . . . . . . . . . 136
Vehicle Personalization
Vehicle Personalization . . . . . . . . . . 136
Universal Remote System
Universal Remote System . . . . . . . . 145
Universal Remote System Programming . . . . . . . . . . . . . . . . . . . 145
Universal Remote System Operation . . . . . . . . . . . . . . . . . . . . . . . . 147
Page 123 of 392
Cadillac Escalade Owner Manual (GMNA-Localizing-U.S./Canada/Mexico-
13566588) - 2020 - CRC - 4/24/19
122 INSTRUMENTS AND CONTROLS
Caution
If the vehicle is driven continually
with this light on, the emission
control system may not work as
well, the fuel economy may be
lower, and the vehicle may not run
smoothly. This could lead to costly
repairs that might not be covered
by the vehicle warranty.
Caution
Modifications to the engine,
transmission, exhaust, intake,
or fuel system, or the use of
replacement tires that do not meet
the original tire specifications, can
cause this light to come on. This
could lead to costly repairs not
covered by the vehicle warranty.
This could also affect the vehicle’s
ability to pass an Emissions
Inspection/Maintenance test. See
Accessories and Modifications0257. If the light is f lashing :
A
malfunction has been detected that
could damage the emission control
system and increase vehicle
emissions. Diagnosis and service may
be required.
To help prevent damage, reduce
vehicle speed and avoid hard
accelerations and uphill grades.
If towing a trailer, reduce the amount
of cargo being hauled as soon as
possible.
If the light continues to flash, find a
safe place to park. Turn the vehicle off
and wait at least 10 seconds before
restarting the engine. If the light is
still flashing, follow the previous
guidelines and see your dealer for
service as soon as possible.
If the light is on steady : A
malfunction has been detected.
Diagnosis and service may be
required.
Check the following:
. If fuel has been added to the
vehicle using the capless fuel
funnel adapter, make sure that it
has been removed. See “Filling theTank with a Portable Gas Can
”
under Filling the Tank 0235. The
diagnostic system can detect if the
adapter has been left installed in
the vehicle, allowing fuel to
evaporate into the atmosphere.
A few driving trips with the
adapter removed may turn off the
light.
. Poor fuel quality can cause
inefficient engine operation and
poor driveability, which may go
away once the engine is warmed
up. If this occurs, change the fuel
brand. It may require at least one
full tank of the proper fuel to turn
the light off. See Recommended
Fuel 0234.
If the light remains on, see your
dealer.
Emissions Inspection and
Maintenance Programs
If the vehicle requires an Emissions
Inspection/Maintenance test, the test
equipment will likely connect to the
vehicle's Data Link Connector (DLC).
Page 124 of 392
Cadillac Escalade Owner Manual (GMNA-Localizing-U.S./Canada/Mexico-
13566588) - 2020 - CRC - 4/24/19
INSTRUMENTS AND CONTROLS 123
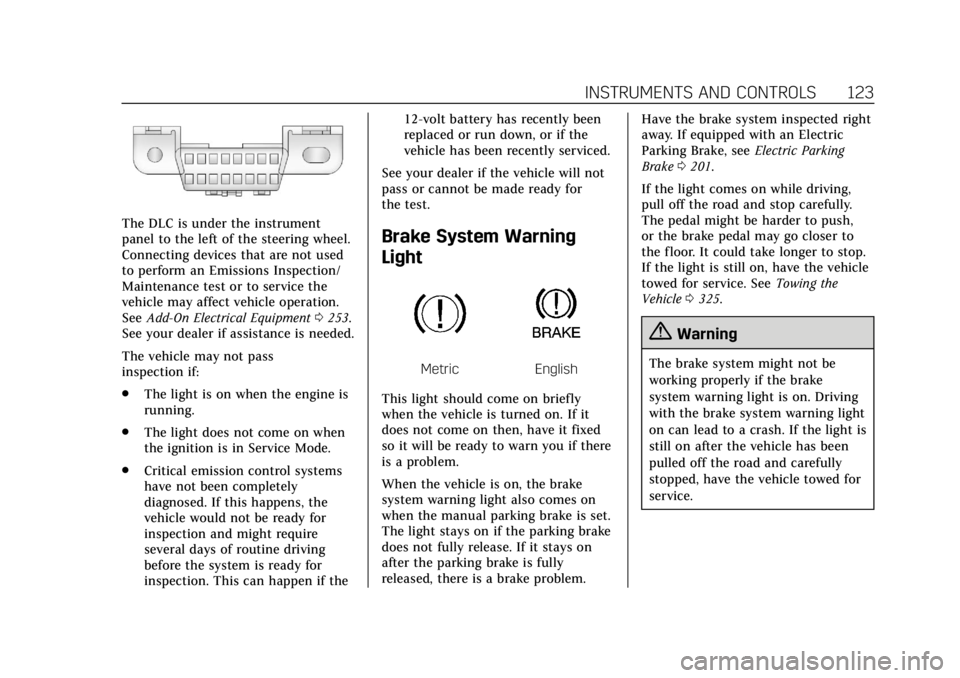
The DLC is under the instrument
panel to the left of the steering wheel.
Connecting devices that are not used
to perform an Emissions Inspection/
Maintenance test or to service the
vehicle may affect vehicle operation.
SeeAdd-On Electrical Equipment 0253.
See your dealer if assistance is needed.
The vehicle may not pass
inspection if:
. The light is on when the engine is
running.
. The light does not come on when
the ignition is in Service Mode.
. Critical emission control systems
have not been completely
diagnosed. If this happens, the
vehicle would not be ready for
inspection and might require
several days of routine driving
before the system is ready for
inspection. This can happen if the 12-volt battery has recently been
replaced or run down, or if the
vehicle has been recently serviced.
See your dealer if the vehicle will not
pass or cannot be made ready for
the test.Brake System Warning
Light
MetricEnglish
This light should come on briefly
when the vehicle is turned on. If it
does not come on then, have it fixed
so it will be ready to warn you if there
is a problem.
When the vehicle is on, the brake
system warning light also comes on
when the manual parking brake is set.
The light stays on if the parking brake
does not fully release. If it stays on
after the parking brake is fully
released, there is a brake problem. Have the brake system inspected right
away. If equipped with an Electric
Parking Brake, see
Electric Parking
Brake 0201.
If the light comes on while driving,
pull off the road and stop carefully.
The pedal might be harder to push,
or the brake pedal may go closer to
the floor. It could take longer to stop.
If the light is still on, have the vehicle
towed for service. See Towing the
Vehicle 0325.
{Warning
The brake system might not be
working properly if the brake
system warning light is on. Driving
with the brake system warning light
on can lead to a crash. If the light is
still on after the vehicle has been
pulled off the road and carefully
stopped, have the vehicle towed for
service.
Page 126 of 392
Cadillac Escalade Owner Manual (GMNA-Localizing-U.S./Canada/Mexico-
13566588) - 2020 - CRC - 4/24/19
INSTRUMENTS AND CONTROLS 125
If both the ABS warning light and the
brake system warning light are on,
ABS is not functioning and there is a
problem with the regular brakes. See
your dealer for service.
SeeBrake System Warning Light 0123.
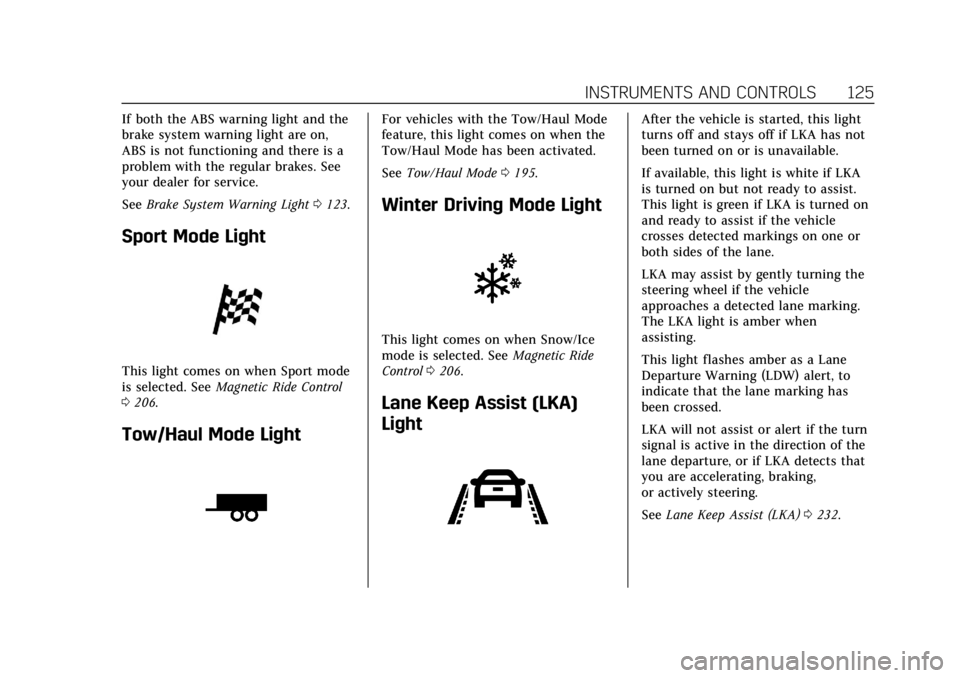
Sport Mode Light
This light comes on when Sport mode
is selected. See Magnetic Ride Control
0 206.
Tow/Haul Mode Light
For vehicles with the Tow/Haul Mode
feature, this light comes on when the
Tow/Haul Mode has been activated.
See Tow/Haul Mode 0195.
Winter Driving Mode Light
This light comes on when Snow/Ice
mode is selected. See Magnetic Ride
Control 0206.
Lane Keep Assist (LKA)
Light
After the vehicle is started, this light
turns off and stays off if LKA has not
been turned on or is unavailable.
If available, this light is white if LKA
is turned on but not ready to assist.
This light is green if LKA is turned on
and ready to assist if the vehicle
crosses detected markings on one or
both sides of the lane.
LKA may assist by gently turning the
steering wheel if the vehicle
approaches a detected lane marking.
The LKA light is amber when
assisting.
This light flashes amber as a Lane
Departure Warning (LDW) alert, to
indicate that the lane marking has
been crossed.
LKA will not assist or alert if the turn
signal is active in the direction of the
lane departure, or if LKA detects that
you are accelerating, braking,
or actively steering.
See Lane Keep Assist (LKA) 0232.
Page 133 of 392
Cadillac Escalade Owner Manual (GMNA-Localizing-U.S./Canada/Mexico-
13566588) - 2020 - CRC - 4/24/19
132 INSTRUMENTS AND CONTROLS
addition to the engine oil life system
monitoring the oil life, additional
maintenance is recommended. See
Maintenance Schedule0339.
The Oil Life display must be reset
after each oil change. It will not reset
itself. Do not reset the Oil Life display
accidentally at any time other than
when the oil has just been changed.
It cannot be reset accurately until the
next oil change. To reset the engine
oil life system, press and hold SEL for
several seconds while the Oil Life
display is active. See Engine Oil Life
System 0263.
Oil Pressure : Shows the engine oil
pressure in kPa (kilopascals)
or psi (pounds per square inch).
Engine Hours : Shows the total
number of hours the engine has run.
Transmission Fluid Temperature :
Shows the temperature of the
automatic transmission fluid in either
degrees Celsius (°C) or degrees
Fahrenheit (°F). Tire Pressure :
Shows the
approximate pressures of all four tires.
Tire pressure is displayed in either
kilopascal (kPa) or in pounds per
square inch (psi). If the pressure is
low, the value for that tire is shown in
amber. See Tire Pressure Monitor
System 0299 and
Tire Pressure Monitor Operation 0300.
Blank Page : Allows for no
information to be displayed in the
cluster info display areas.
Head-Up Display (HUD)
{Warning
If the HUD image is too bright or
too high in your field of view, it
may take you more time to see
things you need to see when it is
dark outside. Be sure to keep the
HUD image dim and placed low in
your field of view.
If equipped with HUD, some
information concerning the operation
of the vehicle is projected onto the windshield. The image is projected
through the HUD lens on top of the
instrument panel. The information
appears as an image focused out
toward the front of the vehicle.
Caution
If you try to use the HUD image as
a parking aid, you may misjudge
the distance and damage your
vehicle. Do not use the HUD image
as a parking aid.
The HUD information can be
displayed in various languages. The
speedometer reading and other
numerical values can be displayed in
either English or metric units.
The language selection is changed
through the radio and the units of
measurement is changed through the
instrument cluster. See Vehicle
Personalization 0136 and “Options”
under Instrument Cluster 0115.
Page 140 of 392
Cadillac Escalade Owner Manual (GMNA-Localizing-U.S./Canada/Mexico-
13566588) - 2020 - CRC - 4/24/19
INSTRUMENTS AND CONTROLS 139
Auto Rear Defog
If equipped, this feature will
automatically turn on the rear window
defogger when the vehicle is first
started in cold weather and turn off
when the vehicle is warmed.
Select Off or On.
Collision/Detection Systems
Select the Collision/Detection Systems
menu and the following may display:
.Alert Type
. Forward Collision System
. Rear Cross Traffic Alert
. Adaptive Cruise Go Notifier
. Park Assist
. Lane Change Alert
Alert Type
This feature will set crash alerts to
beeps or seat vibrations. See Driver
Assistance Systems 0218.
Select Beeps or Safety Alert Seat. Forward Collision System
This setting controls the vehicle
response when detecting a vehicle
ahead of you. The Off setting disables
all FCA and AEB functions. With the
Alert and Brake setting, both FCA and
AEB are available. The Alert setting
disables AEB. See
Automatic
Emergency Braking (AEB) 0228.
Select Off, Alert and Brake, or Alert.
Rear Cross Traffic Alert
This allows the Rear Cross Traffic
Alert feature to be turned on or off.
See Assistance Systems for Parking or
Backing 0219.
Select Off or On.
Adaptive Cruise Go Notifier
This feature will give a reminder that
Adaptive Cruise Control provides
when it has brought the vehicle to a
complete stop behind another
stopping vehicle, and then that vehicle
drives on.
Select Off or On. Park Assist
If equipped, this allows the feature to
be turned on or off. See
Assistance
Systems for Parking or Backing 0219.
Select Off, On, or On with Towbar
Attached.
Lane Change Alert
This allows the feature to be turned
on or off. See Lane Change Alert (LCA)
0 230.
When Lane Change Alert is disabled,
Side Blind Zone Alert is also disabled.
Select Off or On.
Comfort and Convenience
Select and the following may display:
. Auto Power Assist Steps
. Auto Memory Recall
. Easy Exit Options
. Chime Volume
. Hands Free Liftgate Control
. Reverse Tilt Mirror
. Auto Mirror Folding
. Auto Wipe in Reverse Gear