remote start CADILLAC ESCALADE 2023 Owner's Manual
[x] Cancel search | Manufacturer: CADILLAC, Model Year: 2023, Model line: ESCALADE, Model: CADILLAC ESCALADE 2023Pages: 461, PDF Size: 7.99 MB
Page 100 of 461
Cadillac Escalade Owner Manual (GMNA-Localizing-U.S./Canada/Mexico-
16417396) - 2023 - CRC - 5/9/22
98 Instruments and Controls
Controls
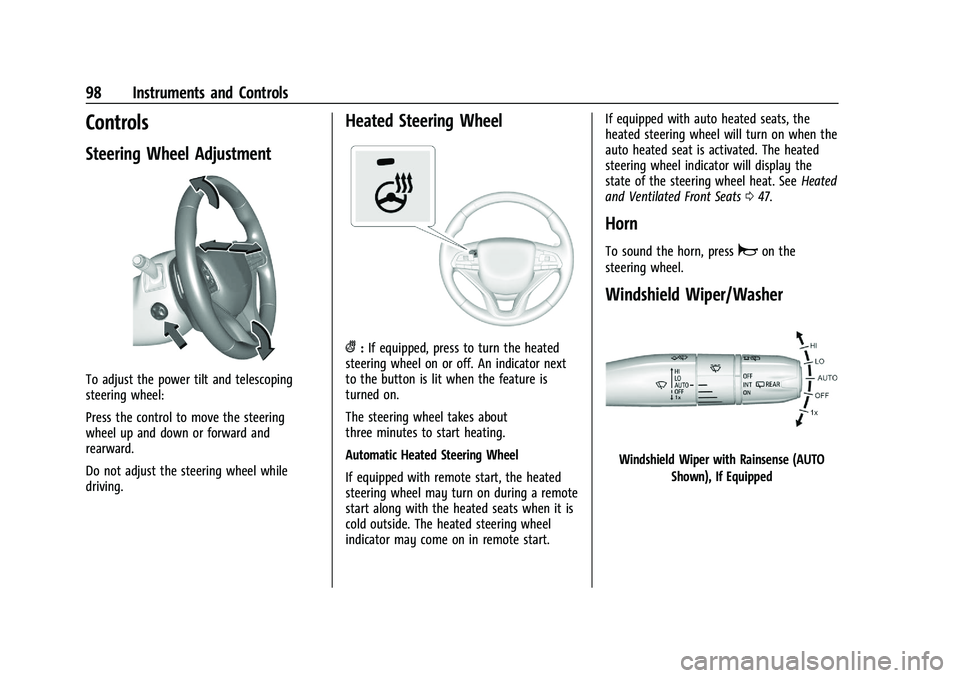
Steering Wheel Adjustment
To adjust the power tilt and telescoping
steering wheel:
Press the control to move the steering
wheel up and down or forward and
rearward.
Do not adjust the steering wheel while
driving.
Heated Steering Wheel
(:If equipped, press to turn the heated
steering wheel on or off. An indicator next
to the button is lit when the feature is
turned on.
The steering wheel takes about
three minutes to start heating.
Automatic Heated Steering Wheel
If equipped with remote start, the heated
steering wheel may turn on during a remote
start along with the heated seats when it is
cold outside. The heated steering wheel
indicator may come on in remote start. If equipped with auto heated seats, the
heated steering wheel will turn on when the
auto heated seat is activated. The heated
steering wheel indicator will display the
state of the steering wheel heat. See
Heated
and Ventilated Front Seats 047.
Horn
To sound the horn, pressaon the
steering wheel.
Windshield Wiper/Washer
Windshield Wiper with Rainsense (AUTO
Shown), If Equipped
Page 133 of 461

Cadillac Escalade Owner Manual (GMNA-Localizing-U.S./Canada/Mexico-
16417396) - 2023 - CRC - 5/9/22
Instruments and Controls 131
Under certain operating conditions,
propulsion will be disabled. Try restarting
after the ignition has been off for
two minutes.
Vehicle Speed Messages
SPEED LIMITED TO XXX KM/H (MPH)
This message shows that the vehicle speed
has been limited to the speed displayed. The
limited speed is a protection for various
propulsion and vehicle systems, such as
lubrication, thermal, brakes, suspension,
Teen Driver if equipped, or tires.
(If equipped with a diesel engine, see the
Duramax Diesel supplement.)–For Diesel
Universal Remote System
See Radio Frequency Statement 0435.
Universal Remote System
Programming
If equipped, these buttons are in the
overhead console.
This system can replace up to three remote
control transmitters used to activate devices
such as garage door openers, security
systems, and home automation devices.
These instructions refer to a garage door
opener, but can be used for other devices.
Do not use the Universal Remote system
with any garage door opener that does not
have the stop and reverse feature. This
includes any garage door opener model
manufactured before April 1, 1982. Keep the original hand-held transmitter for
use in other vehicles as well as for future
programming. Erase the programming when
vehicle ownership is terminated. See
“Erasing Universal Remote System Buttons”
later in this section.
To program a garage door opener, park
outside directly in line with and facing the
garage door opener receiver. Clear all people
and objects near the garage door.
Make sure the hand-held transmitter has a
new battery for quick and accurate
transmission of the radio-frequency signal.
Programming the Universal Remote
System
The Universal Remote system is compatible
with radio-frequency devices operating
between 433-434 MHz.
Programming involves time-sensitive actions
and may time out, requiring the procedure
to be repeated. Read these instructions
completely before programming the
Universal Remote system. It may help to
have another person assist with the
programming process.
Page 144 of 461
Cadillac Escalade Owner Manual (GMNA-Localizing-U.S./Canada/Mexico-
16417396) - 2023 - CRC - 5/9/22
142 Lighting
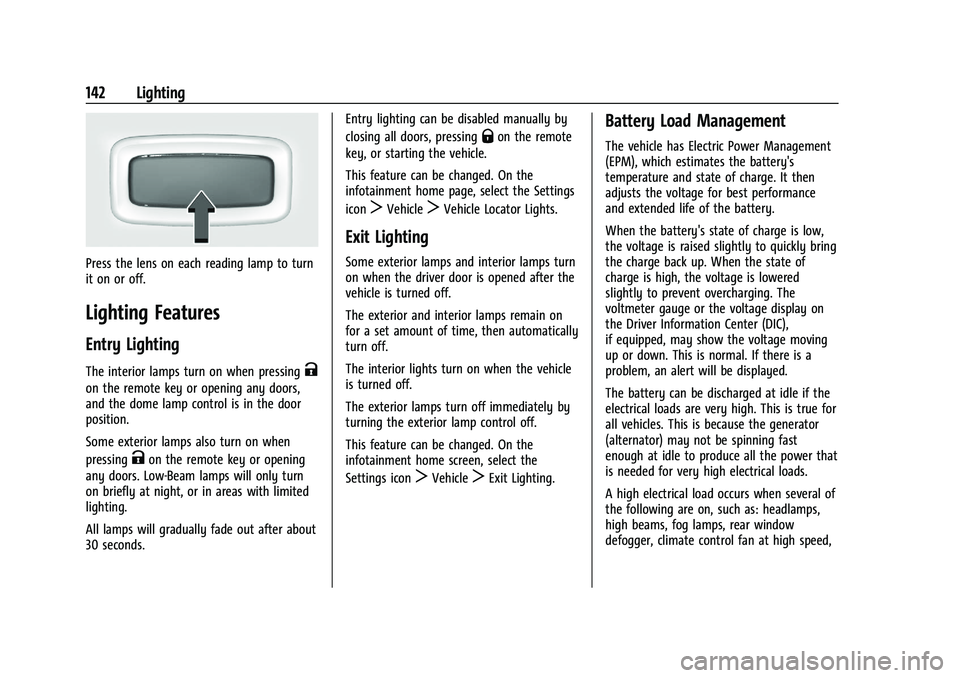
Press the lens on each reading lamp to turn
it on or off.
Lighting Features
Entry Lighting
The interior lamps turn on when pressingK
on the remote key or opening any doors,
and the dome lamp control is in the door
position.
Some exterior lamps also turn on when
pressing
Kon the remote key or opening
any doors. Low-Beam lamps will only turn
on briefly at night, or in areas with limited
lighting.
All lamps will gradually fade out after about
30 seconds. Entry lighting can be disabled manually by
closing all doors, pressing
Qon the remote
key, or starting the vehicle.
This feature can be changed. On the
infotainment home page, select the Settings
icon
TVehicleTVehicle Locator Lights.
Exit Lighting
Some exterior lamps and interior lamps turn
on when the driver door is opened after the
vehicle is turned off.
The exterior and interior lamps remain on
for a set amount of time, then automatically
turn off.
The interior lights turn on when the vehicle
is turned off.
The exterior lamps turn off immediately by
turning the exterior lamp control off.
This feature can be changed. On the
infotainment home screen, select the
Settings icon
TVehicleTExit Lighting.
Battery Load Management
The vehicle has Electric Power Management
(EPM), which estimates the battery's
temperature and state of charge. It then
adjusts the voltage for best performance
and extended life of the battery.
When the battery's state of charge is low,
the voltage is raised slightly to quickly bring
the charge back up. When the state of
charge is high, the voltage is lowered
slightly to prevent overcharging. The
voltmeter gauge or the voltage display on
the Driver Information Center (DIC),
if equipped, may show the voltage moving
up or down. This is normal. If there is a
problem, an alert will be displayed.
The battery can be discharged at idle if the
electrical loads are very high. This is true for
all vehicles. This is because the generator
(alternator) may not be spinning fast
enough at idle to produce all the power that
is needed for very high electrical loads.
A high electrical load occurs when several of
the following are on, such as: headlamps,
high beams, fog lamps, rear window
defogger, climate control fan at high speed,
Page 188 of 461
Cadillac Escalade Owner Manual (GMNA-Localizing-U.S./Canada/Mexico-
16417396) - 2023 - CRC - 5/9/22
186 Infotainment System
About
Shows the infotainment system software
information.
Display Optimization
Touch to adjust the screen for best quality.
Running Applications
Shows a complete list of applications that
are currently running on the infotainment
system.
Return to Factory Settings
Allows resetting the infotainment system
settings in the vehicle.
Vehicle
The menu may contain the following:
Valet Mode
This will lock the infotainment system and
steering wheel controls. It may also limit
access to vehicle storage locations,
if equipped.
To enable valet mode:1. Enter a four-digit code on the keypad.
2. Select Enter to go to the confirmation screen.
3. Re-enter the four-digit code. Touch Lock or Unlock to lock or unlock the
system. Touch Back to go back to the
previous menu.
Teen Driver
See
Teen Driver 0187.
Rear Seat Reminder
Allows for a chime and a message when the
rear door has been opened before or during
operation of the vehicle.
Buckle to Drive
This feature can prevent shifting out of Park
when the driver, and if applicable the front
passenger, seat belt is not buckled. See
Buckle To Drive 056.
Super Cruise Lane Change
See Super Cruise 0258.
Driver Mode Customization
See “Driver Mode Customization” inDriver
Mode Control 0240.
Climate
Adjusts different climate settings.
Collision/Detection Systems
Adjusts different driver assistance system
settings. Comfort and Convenience
Adjusts different comfort and convenience
settings.
Lighting
Adjusts different lighting settings.
Power Door Locks
Adjusts different door lock settings.
Remote Lock, Unlock, and Start
Adjusts different remote lock settings.
Ride Height
Adjusts different ride height settings.
Running Boards
Adjusts different running board settings.
Seating Position
Adjusts different seat settings.
Suspension
Adjusts different suspension settings.
Remote Key Relearn
This sets up a new or forgotten key for use
in the vehicle. Place the key in the
transmitter pocket. Make sure vehicle is
parked and touch Start.
Page 189 of 461
Cadillac Escalade Owner Manual (GMNA-Localizing-U.S./Canada/Mexico-
16417396) - 2023 - CRC - 5/9/22
Infotainment System 187
Search
Enter a setting keyword to find a specific
setting.
Teen Driver
If equipped, this allows multiple keys to be
registered for beginner drivers to encourage
safe driving habits. When the vehicle is
started with a Teen Driver key, it will
automatically activate certain safety
systems, allow setting of some features, and
limit the use of others. The Report Card will
record vehicle data about driving behavior
that can be viewed later. When the vehicle
is started with a registered key, the Driver
Information Center (DIC) displays a message
that Teen Driver is active.
To access:1. Touch Settings on the Home Page, then touch Vehicle, and then Teen Driver.
2. Create a Personal Identification Number (PIN) by choosing a four-digit PIN.
Re-enter the PIN to confirm. To change
the PIN, touch Change PIN.
The PIN is required to:
.Set up/Add or remove keys.
.Change Teen Driver settings.
.Change or clear the Teen Driver PIN.
.Access or delete Report Card data.
Set up/Add keys to activate Teen Driver and
assign restrictions to the key:
Any vehicle key can be registered, up to a
maximum of eight keys. Label the key to
tell it apart from the other keys.
For a pushbutton start system: 1. Start the vehicle.
2. For automatic transmissions, the vehicle must be in P (Park). For manual
transmissions, the vehicle must be
stopped with the parking brake set.
3. From the Settings menu, touch Vehicle and then Teen Driver.
4. Enter the PIN.
5. Place the remote key you wish to register in the transmitter pocket. The
key does not need to be the one that
started the vehicle. See Remote Key
Operation 08for transmitter pocket
location.
6. From the Teen Driver menu, touch Setup Keys or Add/Remove Teen Driver Keys.
.If the remote key has not previously
been registered, the option to add
the key displays. Touch Add and a confirmation message displays. Teen
Driver restrictions will be applied
whenever this remote key is used to
operate the vehicle.
.If the remote key has already been
registered, the option to remove the
key displays. If Remove is touched,
the remote key is no longer
registered. A confirmation message
displays, and Teen Driver restrictions
will not be applied if this remote key
is used to operate the vehicle.
In vehicles with a pushbutton start system,
if a Teen Driver and a non-Teen Driver key
are both present at start up, the vehicle will
recognize the non-Teen Driver key to start
the vehicle. The Teen Driver settings will not
be active.
For a keyed ignition system: 1. Start the vehicle.
2. For automatic transmissions, the vehicle must be in P (Park). For manual
transmissions, the vehicle must be
stopped with the parking brake set.
3. From the Settings menu, touch Vehicle and then Teen Driver.
4. Enter the PIN.
Page 202 of 461

Cadillac Escalade Owner Manual (GMNA-Localizing-U.S./Canada/Mexico-
16417396) - 2023 - CRC - 5/9/22
200 Climate Controls
PressJorzto heat the driver or
passenger seat cushion and seatback.
Press
Cor{to cool the driver or
passenger seat.
There are also auto heated and cooled seats,
for more information see Heated and
Ventilated Front Seats 047.
Remote Start Climate Control Operation :
The climate control system may run when
the vehicle is started remotely. The rear
defog may come on during remote start
based on cold ambient conditions. The rear
defog indicator light does not come on
during a remote start. If equipped with
heated or cooled seats, they may come on
during a remote start. See Remote Vehicle
Start 014 and
Heated and Ventilated Front Seats 047.
Sensor
The solar sensor, on top of the instrument
panel near the windshield, monitors the
solar heat.
The climate control system uses the sensor
information to adjust the temperature, fan
speed, recirculation, and air delivery mode
for best comfort.
If the sensor is covered, the automatic
climate control system may not work
properly. Afterblow Feature
If equipped, under certain conditions, the
fan may stay on or may turn on and off
several times after you turn off and lock the
vehicle. This is normal.
Rear Climate Control System
The rear climate control system is on the
rear of the center console. The settings can
be adjusted with the rear climate controls
and the rear climate display.
Page 221 of 461

Cadillac Escalade Owner Manual (GMNA-Localizing-U.S./Canada/Mexico-
16417396) - 2023 - CRC - 5/11/22
Driving and Operating 219
Caution
Overloading the vehicle may cause
damage. Repairs would not be covered by
the vehicle warranty. Do not overload the
vehicle.
Remember not to exceed the Gross Axle
Weight Rating (GAWR) of the front or
rear axle.
Starting and Operating
New Vehicle Break-In
Caution
The vehicle does not need an elaborate
break-in. But it will perform better in the
long run if you follow these guidelines:
.Do not drive at any one constant
speed, fast or slow, for the first
800 km (500 mi). Do not make
full-throttle starts. Avoid downshifting
to brake or slow the vehicle.
.Avoid making hard stops for the first
300 km (200 mi) or so. During this
time the new brake linings are not yet
(Continued)
Caution (Continued)
broken in. Hard stops with new linings
can mean premature wear and earlier
replacement. Follow this breaking-in
guideline every time you get new
brake linings.
.Do not tow a trailer during break-in.
SeeTrailer Towing 0309 for the
trailer towing capabilities of the
vehicle and more information.
Following break-in, engine speed and load
can be gradually increased.
On new vehicles, the various mechanical and
electrical systems experience a “break-in”
period during the first 6 400 km (4,000 mi)
of routine driving. As the vehicle is driven,
the mechanical systems adjust to provide
optimal fuel economy and transmission shift
performance.
Electrical systems will adapt and calibrate
during the break-in period. A one-time
occurrence of clicks and similar vehicle
noises is normal during this process.
Normal driving charges the vehicle’s battery
to achieve the best operation of the vehicle,
including fuel economy and the Stop/Start
System. See Stop/Start System 0222.
Ignition Positions
Vehicles equipped with Keyless Access have
pushbutton starting.
The Remote Key must be in the vehicle for
the system to operate. If the pushbutton
start is not working, the vehicle may be
near a strong radio antenna signal causing
interference to the Keyless Access system.
See Remote Key Operation 08.
To shift out of P (Park), the ignition must be
on or in Service Mode, and the brake pedal
must be applied.
Page 223 of 461
Cadillac Escalade Owner Manual (GMNA-Localizing-U.S./Canada/Mexico-
16417396) - 2023 - CRC - 5/11/22
Driving and Operating 221
brake pedal not applied, pressing and
holding the button for more than
five seconds will place the vehicle in Service
Mode. The instruments and audio systems
will operate as they do when the ignition is
on, but the vehicle will not be able to be
driven. The engine will not start in Service
Mode. Press the button again to turn the
ignition off.
Starting the Engine
If the vehicle has a diesel engine, see the
Duramax diesel supplement.
Caution
If you add electrical parts or accessories,
you could change the way the engine
operates. Any resulting damage would
not be covered by the vehicle warranty.
SeeAdd-On Electrical Equipment 0334.
Shift the vehicle into P (Park) or N (Neutral).
To restart the engine when the vehicle is
already moving, use N (Neutral) only.
Caution
Do not try to shift to P (Park) if the
vehicle is moving. If you do, you could
damage the transmission. Shift to P (Park)
only when the vehicle is stopped.
Starting Procedure
1. The remote key must be in the vehicle. Press ENGINE START/STOP with the brake
pedal applied. When the engine begins
cranking, let go of the button.
The idle speed will go down as the
engine gets warm. Do not race the
engine immediately after starting it.
Operate the engine and transmission
gently to allow the oil to warm up and
lubricate all moving parts.
When the low fuel warning light is on
and the FUEL LEVEL LOW message is
displayed in the Driver Information
Center (DIC), press the ENGINE START/
STOP position to continue engine
cranking.
Caution
Cranking the engine for long periods of
time, by trying to start the engine
immediately after cranking has ended,
can overheat and damage the cranking
motor, and drain the battery. Wait at
least 15 seconds between each try, to let
the cranking motor cool down.
2. If the engine does not start after five to 10 seconds, especially in very cold
weather (below −18 °C or 0 °F), it could
be flooded with too much gasoline. Try
pushing the accelerator pedal all the way
to the floor and holding it there while
pressing ENGINE START/STOP for up to a
maximum of 15 seconds. Wait at least
15 seconds between each try, to allow
the cranking motor to cool down. When
the engine starts, let go of the button
and accelerator. If the vehicle starts
briefly but then stops again, do the
same thing. This clears the extra gasoline
from the engine. Do not race the engine
immediately after starting it. Operate
the engine and transmission gently until
the oil warms up and lubricates all
moving parts.
Page 320 of 461

Cadillac Escalade Owner Manual (GMNA-Localizing-U.S./Canada/Mexico-
16417396) - 2023 - CRC - 5/11/22
318 Driving and Operating
Use only a round, seven-wire connector with
flat blade terminals meeting SAE J2863
specifications for proper electrical
connectivity.
The seven-wire harness contains the
following trailer circuits:
.Yellow/Grey: Left Stop/Turn Signal
.Green/Violet: Right Stop/Turn Signal
.Grey/Brown: Taillamps
.White: Ground
.White/Green: Back-up Lamps
.Red/Green: Battery Feed
.Dark Blue: Trailer Brake
To help charge a remote (non-vehicle)
battery, change drive mode to Tow Haul.
If the trailer is too light for Tow/Haul Mode,
turn on the headlamps to help charge the
battery.
Electric Brake Control Wiring Provisions
These wiring provisions are included with
the vehicle as part of the trailer wiring
package. These provisions are for an electric
brake controller.
The harness should be installed by your
dealer or a qualified service center. Refer to the aftermarket electric trailer brake
controller owner's manual to determine wire
color coding of the electric trailer brake
controller. The wire colors on the brake
controller may be different from the vehicle.
Trailer Lamps
Always check that all trailer lamps are
working at the beginning of each trip, and
periodically on longer trips.
If equipped, the Trailering App will monitor
the right turn/brake circuit, left turn/brake
circuit, running lamp circuit, and reverse
lamp circuits on the trailer. Driver
Information Center (DIC) messages and
Trailering App alerts display if lighting circuit
issues are detected on the trailer.
When trailers cannot be detected, the
trailer-related DIC messages and/or
Trailering App alerts will not be displayed.
Pressing START LIGHT TEST in the Trailering
App automatically activates trailer lamps.
The Trailering App is not a substitute for
manually inspecting your trailer lamps. See
Trailering App
0324.
Trailer Connection and Lamp Messages
When a trailer is properly connected and
working, no trailer connection or lamp
messages appear on the DIC. However; if
the vehicle detects an issue with a trailer
connection or lamp, you may see the
following DIC message(s):
.TRAILER DISCONNECTED CHECK
CONNECTION appears when a connected
trailer is disconnected. It appears
immediately when the vehicle is on,
or upon the next start-up if the trailer
was disconnected while the vehicle was
off. Check the trailer connection as
appropriate.
.CHECK TRAILER XXX LAMP appears when
there is a detected lamp or wiring fault
on the trailer. Check the trailer wiring and
lamps.
Turn Signals When Towing a Trailer
When properly connected, the trailer turn
signals should will illuminate to indicate the
vehicle is turning, changing lanes,
or stopping. When towing a trailer, the
arrows on the instrument cluster will
illuminate even if the trailer is not properly
connected or the bulbs are burned out.
Page 339 of 461

Cadillac Escalade Owner Manual (GMNA-Localizing-U.S./Canada/Mexico-
16417396) - 2023 - CRC - 5/9/22
Vehicle Care 337
This vehicle has an airbag system. Before
attempting to do your own service work,
seeServicing the Airbag-Equipped Vehicle
0 72.
If equipped with remote vehicle start, open
the hood before performing any service
work to prevent remote starting the vehicle
accidentally. See Remote Vehicle Start 014.
Keep a record with all parts receipts and list
the mileage and the date of any service
work performed. See Maintenance Records
0 422.
Caution
Even small amounts of contamination can
cause damage to vehicle systems. Do not
allow contaminants to contact the fluids,
reservoir caps, or dipsticks.
Hood
{Warning
For vehicles with auto engine stop/start,
turn the vehicle off before opening the
hood. If the vehicle is on, the engine will
start when the hood is opened. You or
others could be injured.
{Warning
Components under the hood can get hot
from running the engine. To help avoid
the risk of burning unprotected skin,
never touch these components until they
have cooled, and always use a glove or
towel to avoid direct skin contact.
Clear any snow from the hood before
opening. To open the hood:
1. Pull the hood release lever with the
isymbol. It is on the lower left side
of the instrument panel.
2. Go to the front of the vehicle and locate the secondary release lever under the
front center of the hood. Push the
secondary hood release lever to the right
to release.
3. After you have partially lifted the hood, the gas strut system will automatically
lift the hood and hold it in the fully
open position.