warning light CADILLAC ESCALADE 2023 Owners Manual
[x] Cancel search | Manufacturer: CADILLAC, Model Year: 2023, Model line: ESCALADE, Model: CADILLAC ESCALADE 2023Pages: 461, PDF Size: 7.99 MB
Page 3 of 461
Cadillac Escalade Owner Manual (GMNA-Localizing-U.S./Canada/Mexico-
16417396) - 2023 - CRC - 5/24/22
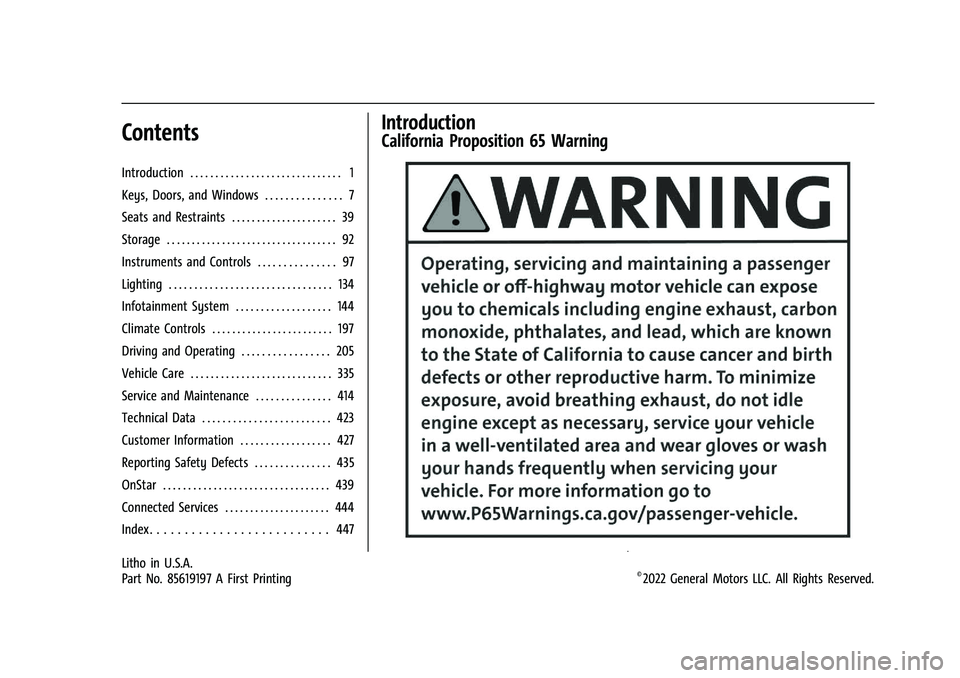
Contents
Introduction . . . . . . . . . . . . . . . . . . . . . . . . . . . . . . 1
Keys, Doors, and Windows . . . . . . . . . . . . . . . 7
Seats and Restraints . . . . . . . . . . . . . . . . . . . . . 39
Storage . . . . . . . . . . . . . . . . . . . . . . . . . . . . . . . . . . 92
Instruments and Controls . . . . . . . . . . . . . . . 97
Lighting . . . . . . . . . . . . . . . . . . . . . . . . . . . . . . . . 134
Infotainment System . . . . . . . . . . . . . . . . . . . 144
Climate Controls . . . . . . . . . . . . . . . . . . . . . . . . 197
Driving and Operating . . . . . . . . . . . . . . . . . 205
Vehicle Care . . . . . . . . . . . . . . . . . . . . . . . . . . . . 335
Service and Maintenance . . . . . . . . . . . . . . . 414
Technical Data . . . . . . . . . . . . . . . . . . . . . . . . . 423
Customer Information . . . . . . . . . . . . . . . . . . 427
Reporting Safety Defects . . . . . . . . . . . . . . . 435
OnStar . . . . . . . . . . . . . . . . . . . . . . . . . . . . . . . . . 439
Connected Services . . . . . . . . . . . . . . . . . . . . . 444
Index . . . . . . . . . . . . . . . . . . . . . . . . . . 447
Introduction
California Proposition 65 Warning
Litho in U.S.A.
Part No. 85619197 A First Printing©2022 General Motors LLC. All Rights Reserved.
Page 5 of 461
Cadillac Escalade Owner Manual (GMNA-Localizing-U.S./Canada/Mexico-
16417396) - 2023 - CRC - 5/24/22
Introduction 3
A circle with a slash through it is a safety
symbol which means“Do not,” “Do not do
this,” or“Do not let this happen.”
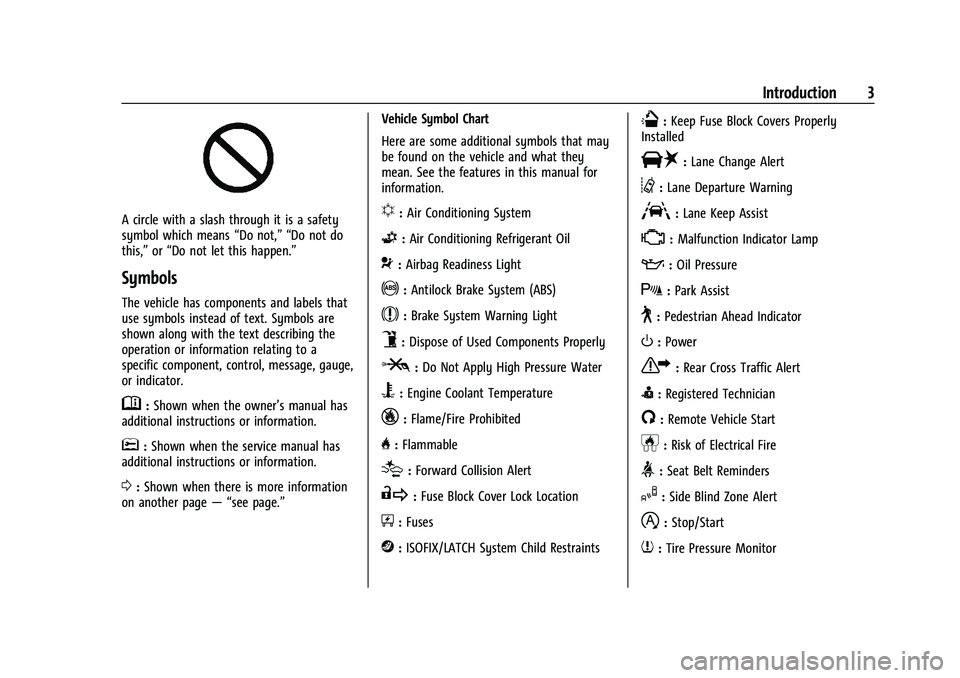
Symbols
The vehicle has components and labels that
use symbols instead of text. Symbols are
shown along with the text describing the
operation or information relating to a
specific component, control, message, gauge,
or indicator.
M:Shown when the owner’s manual has
additional instructions or information.
*: Shown when the service manual has
additional instructions or information.
0: Shown when there is more information
on another page — “see page.” Vehicle Symbol Chart
Here are some additional symbols that may
be found on the vehicle and what they
mean. See the features in this manual for
information.
u:
Air Conditioning System
G:Air Conditioning Refrigerant Oil
9:Airbag Readiness Light
!:Antilock Brake System (ABS)
$:Brake System Warning Light
9:Dispose of Used Components Properly
P:Do Not Apply High Pressure Water
B:Engine Coolant Temperature
_:Flame/Fire Prohibited
H: Flammable
[:Forward Collision Alert
R:Fuse Block Cover Lock Location
+:Fuses
j:ISOFIX/LATCH System Child Restraints
Q:Keep Fuse Block Covers Properly
Installed
|: Lane Change Alert
@:Lane Departure Warning
A:Lane Keep Assist
*: Malfunction Indicator Lamp
::Oil Pressure
X:Park Assist
~:Pedestrian Ahead Indicator
O:Power
7:Rear Cross Traffic Alert
I:Registered Technician
/:Remote Vehicle Start
h:Risk of Electrical Fire
>:Seat Belt Reminders
I:Side Blind Zone Alert
h:Stop/Start
7:Tire Pressure Monitor
Page 8 of 461
Cadillac Escalade Owner Manual (GMNA-Localizing-U.S./Canada/Mexico-
16417396) - 2023 - CRC - 5/24/22
6 Introduction
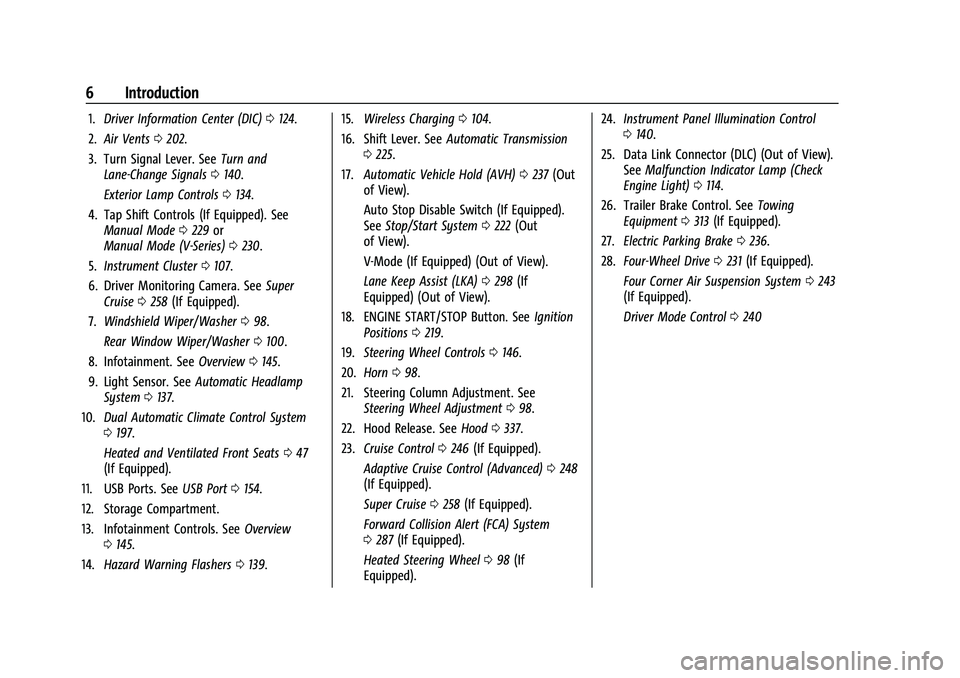
1.Driver Information Center (DIC) 0124.
2. Air Vents 0202.
3. Turn Signal Lever. See Turn and
Lane-Change Signals 0140.
Exterior Lamp Controls 0134.
4. Tap Shift Controls (If Equipped). See Manual Mode 0229 or
Manual Mode (V-Series) 0230.
5. Instrument Cluster 0107.
6. Driver Monitoring Camera. See Super
Cruise 0258 (If Equipped).
7. Windshield Wiper/Washer 098.
Rear Window Wiper/Washer 0100.
8. Infotainment. See Overview0145.
9. Light Sensor. See Automatic Headlamp
System 0137.
10. Dual Automatic Climate Control System
0197.
Heated and Ventilated Front Seats 047
(If Equipped).
11. USB Ports. See USB Port0154.
12. Storage Compartment.
13. Infotainment Controls. See Overview
0 145.
14. Hazard Warning Flashers 0139. 15.
Wireless Charging 0104.
16. Shift Lever. See Automatic Transmission
0 225.
17. Automatic Vehicle Hold (AVH) 0237 (Out
of View).
Auto Stop Disable Switch (If Equipped).
See Stop/Start System 0222 (Out
of View).
V-Mode (If Equipped) (Out of View).
Lane Keep Assist (LKA) 0298 (If
Equipped) (Out of View).
18. ENGINE START/STOP Button. See Ignition
Positions 0219.
19. Steering Wheel Controls 0146.
20. Horn 098.
21. Steering Column Adjustment. See Steering Wheel Adjustment 098.
22. Hood Release. See Hood0337.
23. Cruise Control 0246 (If Equipped).
Adaptive Cruise Control (Advanced) 0248
(If Equipped).
Super Cruise 0258 (If Equipped).
Forward Collision Alert (FCA) System
0 287 (If Equipped).
Heated Steering Wheel 098 (If
Equipped). 24.
Instrument Panel Illumination Control
0140.
25. Data Link Connector (DLC) (Out of View). SeeMalfunction Indicator Lamp (Check
Engine Light) 0114.
26. Trailer Brake Control. See Towing
Equipment 0313 (If Equipped).
27. Electric Parking Brake 0236.
28. Four-Wheel Drive 0231 (If Equipped).
Four Corner Air Suspension System 0243
(If Equipped).
Driver Mode Control 0240
Page 29 of 461

Cadillac Escalade Owner Manual (GMNA-Localizing-U.S./Canada/Mexico-
16417396) - 2023 - CRC - 5/9/22
Keys, Doors, and Windows 27
Power Assist Steps
{Warning
To avoid personal injury or property
damage, before entering or exiting the
vehicle, be sure the power assist step is
fully extended. Do not step on the power
assist step while it is moving. Never place
hands or other body parts between the
extended power assist step and the
vehicle.
If equipped, the power assist steps will
deploy when the door is opened and
automatically retract three seconds after the
door is closed. The power assist steps will
retract immediately if the vehicle starts
moving.
Disable the power assist steps before jacking
or placing any object under the vehicle. Too
much ice buildup may prevent deployment
of the power assist steps. Check the step
position before exiting the vehicle. If this
happens, disable the power assist steps,
clear the ice, then enable the assist steps
and confirm normal function prior to use. Keep hands, children, pets, objects, and
clothing clear of the power assist steps
when in motion. The steps will reverse
direction if they encounter an obstruction
when opening or closing. Remove the
obstruction, then open and close the door
on the same side to complete the motion of
the assist steps. If the obstruction is not
cleared, the assist steps remain extended
while driving.
The power assist steps can be extended or
retracted for cleaning. To view available
settings from the infotainment screen, touch
Settings > Vehicle > Remote Lock, Unlock,
Start.
Enable/Disable
The power assist steps can be enabled or
disabled. To view available settings from the
infotainment screen, touch Settings >
Vehicle > Remote Lock, Unlock, Start.
Vehicle Security
This vehicle has theft-deterrent features;
however, they do not make the vehicle
impossible to steal.
Vehicle Alarm System
The indicator light, on the driver door near
the window, indicates the status of the
system. See
Power Door Locks 018
Arming the Alarm System
1. Turn off the vehicle.
2. Lock the vehicle in one of three ways:
.Use the remote key.
.Use the Keyless Access system.
.With a door open, pressQon the
interior of the door.
3. After 30 seconds the alarm system will arm, and the indicator light will begin to
slowly flash. Pressing
Qon the remote
Page 32 of 461

Cadillac Escalade Owner Manual (GMNA-Localizing-U.S./Canada/Mexico-
16417396) - 2023 - CRC - 5/9/22
30 Keys, Doors, and Windows
The immobilization system is disarmed
when the ignition is turned on or to
accessory mode and a valid remote key is
present in the vehicle.
The security light, in the instrument cluster,
comes on if there is a problem with arming
or disarming the theft-deterrent system.
The system has one or more remote keys
matched to an immobilizer control unit in
the vehicle. Only a correctly matched
remote key will start the vehicle. If the
remote key is ever damaged, you may not
be able to start your vehicle.
When trying to start the vehicle, the
security light may come on briefly.
If the engine does not start and the security
light stays on, there is a problem with the
system. Turn the ignition off and try again.
If the vehicle will not change ignition modes
(accessory mode, on, off), and the remote
key appears to be undamaged, try anotherremote key. Or, you may try placing the
remote key in the backup location. See
Remote Key Operation
08.
If the ignition modes will not change with
the other remote key or in the backup
location, the vehicle needs service. If the
ignition does change modes, the first
remote key may be faulty. See your dealer.
It is possible for the immobilizer system to
learn new or replacement remote keys. Up
to eight remote keys can be programmed
for the vehicle. To program additional
remote keys, see “Programming Remote
Keys to the Vehicle” underRemote Key
Operation 08.
Do not leave the remote key or device that
disarms or deactivates the theft-deterrent
system in the vehicle.
Exterior Mirrors
Convex Mirrors
{Warning
A convex mirror can make things, like
other vehicles, look farther away than
they really are. If you cut too sharply (Continued)
Warning (Continued)
into the right lane, you could hit a
vehicle on the right. Check the inside
mirror or glance over your shoulder
before changing lanes.
The passenger side mirror is convex shaped.
A convex mirror surface is curved so more
can be seen from the driver seat.
Power Mirrors
To adjust each mirror: 1. Press
jor|for the driver or
passenger side mirror. The indicator light
will illuminate.
Page 38 of 461

Cadillac Escalade Owner Manual (GMNA-Localizing-U.S./Canada/Mexico-
16417396) - 2023 - CRC - 5/9/22
36 Keys, Doors, and Windows
.Press2to engage the rear window
lockout feature. The indicator light is on
when engaged.
.Press2again to disengage.
Window Express Movement
All windows can be opened without holding
the window switch. Press the switch down
fully and quickly release to express open the
window.
If equipped, pull the window switch up fully
and quickly release to express close the
window.
Briefly press or pull the window switch in
the same direction to stop that window’s
express movement.
Window Automatic Reversal System
The express-close feature will reverse
window movement if it comes in contact
with an object. Extreme cold or ice could
cause the window to auto-reverse. The
window will operate normally after the
object or condition is removed.
Automatic Reversal System Override
{Warning
If automatic reversal system override is
active, the window will not reverse
automatically. You or others could be
injured and the window could be
damaged. Before using automatic reversal
system override, make sure that all
people and obstructions are clear of the
window path.
When the engine is on, override the
automatic reversal system by pulling and
holding the window switch if conditions
prevent it from closing.
Programming the Power Windows
Programming may be necessary if the
vehicle battery has been disconnected or
discharged. If the window is unable to
express-up, program each express-close
window: 1. Close all doors.
2. Turn the ignition on or to accessory mode.
3. Partially open the window to be programmed. Then close it and continue
to pull the switch briefly after the
window has fully closed.
4. Open the window and continue to press the switch briefly after the window has
fully opened.
Remote Window Operation
If equipped with remote window open
feature, press and hold
"on the remote
key for about three seconds to open all
windows. If equipped with remote window
close feature, press and hold
Qon the
remote key for three seconds to close all
windows. The vehicle must be off and the
remote window operation must be enabled.
To view available settings for this feature,
touch the Settings icon on the infotainment
Page 49 of 461
Cadillac Escalade Owner Manual (GMNA-Localizing-U.S./Canada/Mexico-
16417396) - 2023 - CRC - 5/9/22
Seats and Restraints 47
.During Auto Seat Exit Memory Recall:
Press SET, 1, 2, or
Bmemory buttons
Obstructions
If something has blocked the seat while
recalling a memory position, the recall may
stop. Remove the obstruction and try the
recall again. If the memory position still
does not recall, see your dealer.
Heated and Ventilated Front
Seats
{Warning
If temperature change or pain to the skin
cannot be felt, the seat heater may cause
burns. To reduce the risk of burns, use
care when using the seat heater,
especially for long periods of time. Do
not place anything on the seat that
insulates against heat, such as a blanket,
cushion, cover, or similar item. This may
cause the seat heater to overheat. An
overheated seat heater may cause a burn
or may damage the seat.
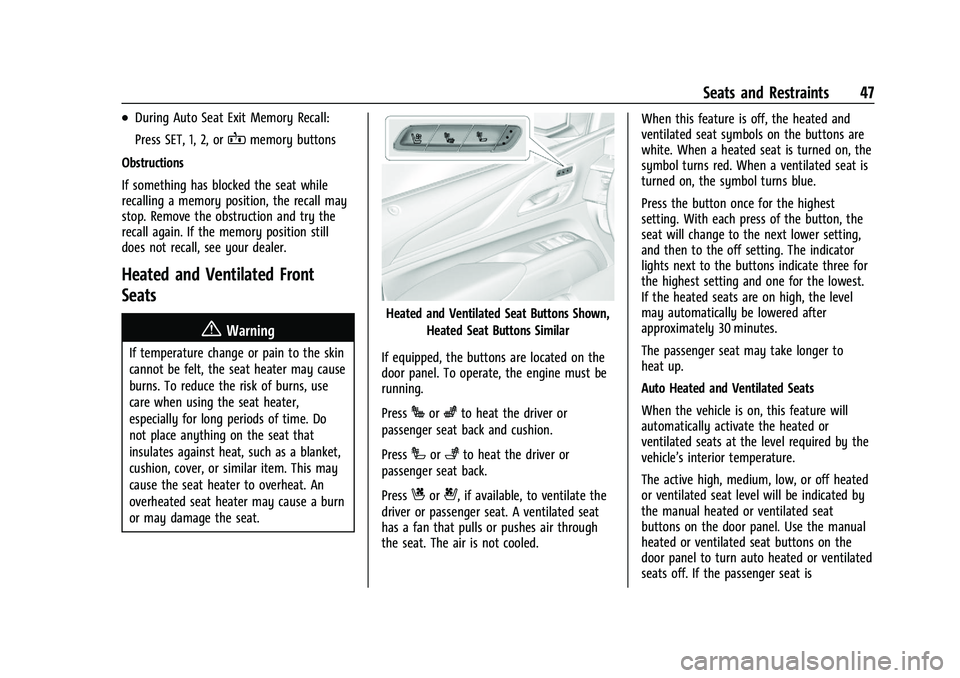
Heated and Ventilated Seat Buttons Shown, Heated Seat Buttons Similar
If equipped, the buttons are located on the
door panel. To operate, the engine must be
running.
Press
Jorzto heat the driver or
passenger seat back and cushion.
Press
Ior+to heat the driver or
passenger seat back.
Press
Cor{, if available, to ventilate the
driver or passenger seat. A ventilated seat
has a fan that pulls or pushes air through
the seat. The air is not cooled. When this feature is off, the heated and
ventilated seat symbols on the buttons are
white. When a heated seat is turned on, the
symbol turns red. When a ventilated seat is
turned on, the symbol turns blue.
Press the button once for the highest
setting. With each press of the button, the
seat will change to the next lower setting,
and then to the off setting. The indicator
lights next to the buttons indicate three for
the highest setting and one for the lowest.
If the heated seats are on high, the level
may automatically be lowered after
approximately 30 minutes.
The passenger seat may take longer to
heat up.
Auto Heated and Ventilated Seats
When the vehicle is on, this feature will
automatically activate the heated or
ventilated seats at the level required by the
vehicle’s interior temperature.
The active high, medium, low, or off heated
or ventilated seat level will be indicated by
the manual heated or ventilated seat
buttons on the door panel. Use the manual
heated or ventilated seat buttons on the
door panel to turn auto heated or ventilated
seats off. If the passenger seat is
Page 57 of 461

Cadillac Escalade Owner Manual (GMNA-Localizing-U.S./Canada/Mexico-
16417396) - 2023 - CRC - 5/9/22
Seats and Restraints 55
{Warning
A seat belt that is improperly routed, not
properly attached, or twisted will not
provide the protection needed in a crash.
The person wearing the belt could be
seriously injured. After raising the rear
seatback, always check to be sure that
the seat belts are properly routed and
attached, and are not twisted.
4. Reconnect the center seat belt mini-latch to the mini-buckle. Do not let it twist.
5. Pull on the seat belt to be sure the mini-latch is secure.
6. Repeat the steps for the other seatback, if desired. Folding the Third Row Seats from the
Overhead Console
To fold the seats from the overhead console,
if equipped:
The vehicle must be in P (Park) for this
feature to work.
1. Press and hold the switch to fold the third row seatback.
The left switch folds the left seatback,
and the right switch folds the right
seatback.
2. Repeat the steps for the other seatback, if desired.
3. Press and hold the switch to return the seatback to the seating position. If equipped, the red light on the switch
will illuminate if the third row seatback
is not in the seating position.
There are additional switches which can be
used to fold the third row seatbacks from
the cargo area. See Third Row Seats053.
Seat Belts
This section describes how to use seat belts
properly, and some things not to do.
{Warning
Do not let anyone ride where a seat belt
cannot be worn properly. In a crash,
if you or your passenger(s) are not
wearing seat belts, injuries can be much
worse than if you are wearing seat belts.
You can be seriously injured or killed by
hitting things inside the vehicle harder or
by being ejected from the vehicle. In
addition, anyone who is not buckled up
can strike other passengers in the vehicle.
It is extremely dangerous to ride in a
cargo area, inside or outside of a vehicle.
In a collision, passengers riding in these
areas are more likely to be seriously
(Continued)
Page 61 of 461
Cadillac Escalade Owner Manual (GMNA-Localizing-U.S./Canada/Mexico-
16417396) - 2023 - CRC - 5/9/22
Seats and Restraints 59
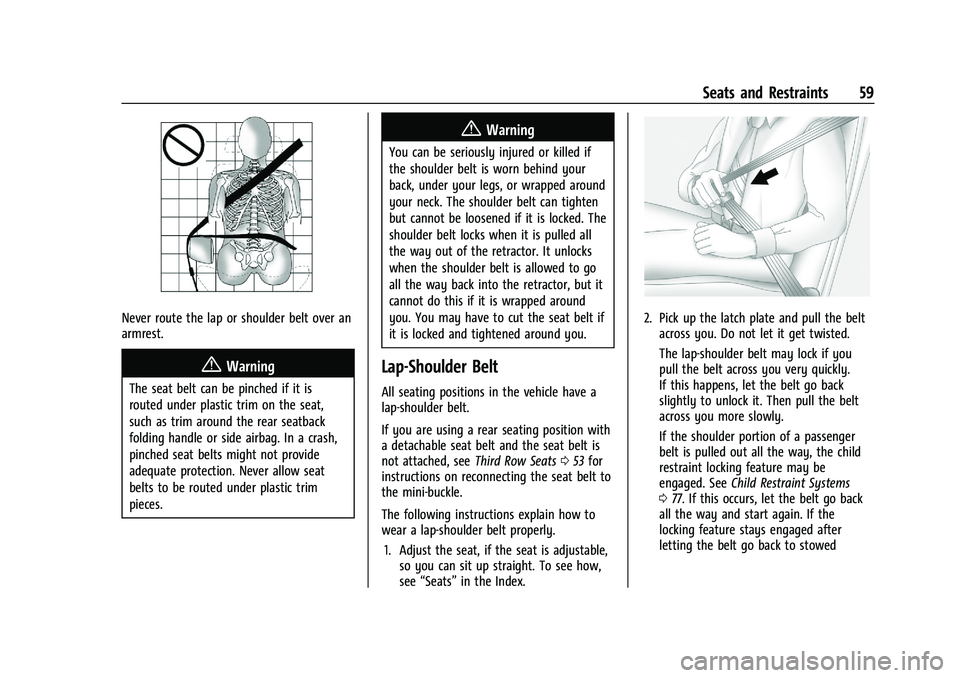
Never route the lap or shoulder belt over an
armrest.
{Warning
The seat belt can be pinched if it is
routed under plastic trim on the seat,
such as trim around the rear seatback
folding handle or side airbag. In a crash,
pinched seat belts might not provide
adequate protection. Never allow seat
belts to be routed under plastic trim
pieces.
{Warning
You can be seriously injured or killed if
the shoulder belt is worn behind your
back, under your legs, or wrapped around
your neck. The shoulder belt can tighten
but cannot be loosened if it is locked. The
shoulder belt locks when it is pulled all
the way out of the retractor. It unlocks
when the shoulder belt is allowed to go
all the way back into the retractor, but it
cannot do this if it is wrapped around
you. You may have to cut the seat belt if
it is locked and tightened around you.
Lap-Shoulder Belt
All seating positions in the vehicle have a
lap-shoulder belt.
If you are using a rear seating position with
a detachable seat belt and the seat belt is
not attached, seeThird Row Seats053 for
instructions on reconnecting the seat belt to
the mini-buckle.
The following instructions explain how to
wear a lap-shoulder belt properly.
1. Adjust the seat, if the seat is adjustable, so you can sit up straight. To see how,
see “Seats” in the Index.
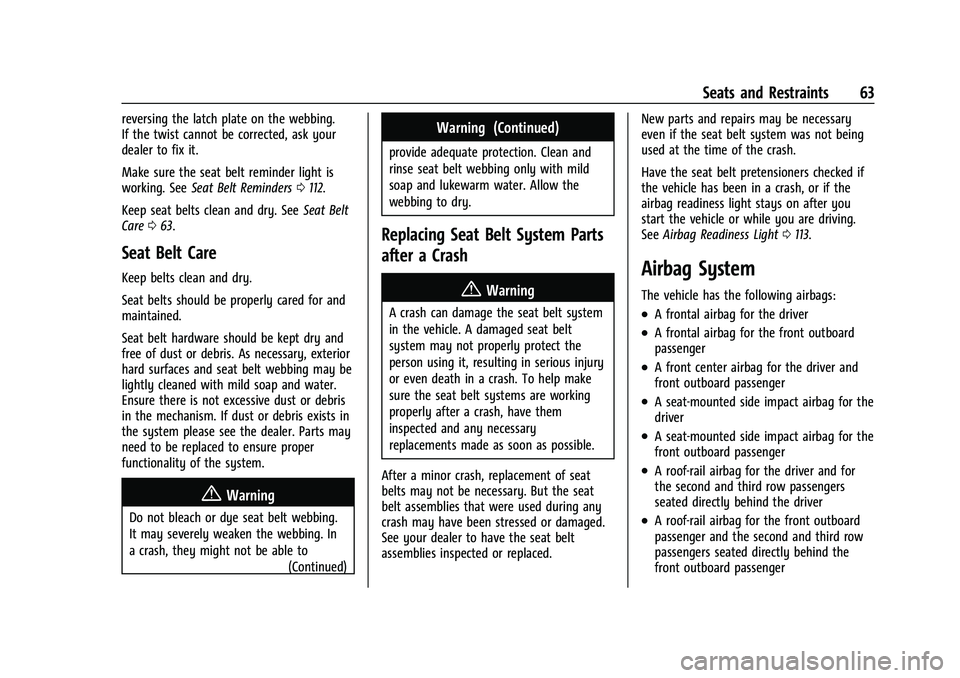
2. Pick up the latch plate and pull the belt
across you. Do not let it get twisted.
The lap-shoulder belt may lock if you
pull the belt across you very quickly.
If this happens, let the belt go back
slightly to unlock it. Then pull the belt
across you more slowly.
If the shoulder portion of a passenger
belt is pulled out all the way, the child
restraint locking feature may be
engaged. See Child Restraint Systems
0 77. If this occurs, let the belt go back
all the way and start again. If the
locking feature stays engaged after
letting the belt go back to stowed
Page 65 of 461
Cadillac Escalade Owner Manual (GMNA-Localizing-U.S./Canada/Mexico-
16417396) - 2023 - CRC - 5/9/22
Seats and Restraints 63
reversing the latch plate on the webbing.
If the twist cannot be corrected, ask your
dealer to fix it.
Make sure the seat belt reminder light is
working. SeeSeat Belt Reminders 0112.
Keep seat belts clean and dry. See Seat Belt
Care 063.
Seat Belt Care
Keep belts clean and dry.
Seat belts should be properly cared for and
maintained.
Seat belt hardware should be kept dry and
free of dust or debris. As necessary, exterior
hard surfaces and seat belt webbing may be
lightly cleaned with mild soap and water.
Ensure there is not excessive dust or debris
in the mechanism. If dust or debris exists in
the system please see the dealer. Parts may
need to be replaced to ensure proper
functionality of the system.
{Warning
Do not bleach or dye seat belt webbing.
It may severely weaken the webbing. In
a crash, they might not be able to
(Continued)
Warning (Continued)
provide adequate protection. Clean and
rinse seat belt webbing only with mild
soap and lukewarm water. Allow the
webbing to dry.
Replacing Seat Belt System Parts
after a Crash
{Warning
A crash can damage the seat belt system
in the vehicle. A damaged seat belt
system may not properly protect the
person using it, resulting in serious injury
or even death in a crash. To help make
sure the seat belt systems are working
properly after a crash, have them
inspected and any necessary
replacements made as soon as possible.
After a minor crash, replacement of seat
belts may not be necessary. But the seat
belt assemblies that were used during any
crash may have been stressed or damaged.
See your dealer to have the seat belt
assemblies inspected or replaced. New parts and repairs may be necessary
even if the seat belt system was not being
used at the time of the crash.
Have the seat belt pretensioners checked if
the vehicle has been in a crash, or if the
airbag readiness light stays on after you
start the vehicle or while you are driving.
See
Airbag Readiness Light 0113.
Airbag System
The vehicle has the following airbags:
.A frontal airbag for the driver
.A frontal airbag for the front outboard
passenger
.A front center airbag for the driver and
front outboard passenger
.A seat-mounted side impact airbag for the
driver
.A seat-mounted side impact airbag for the
front outboard passenger
.A roof-rail airbag for the driver and for
the second and third row passengers
seated directly behind the driver
.A roof-rail airbag for the front outboard
passenger and the second and third row
passengers seated directly behind the
front outboard passenger