remote control CADILLAC ESCALADE ESV 2009 Owner's Guide
[x] Cancel search | Manufacturer: CADILLAC, Model Year: 2009, Model line: ESCALADE ESV, Model: CADILLAC ESCALADE ESV 2009Pages: 602, PDF Size: 5.18 MB
Page 280 of 602

Tips and Troubleshooting Chart Problem Recommended Action
IR Sensor Inoperative
Check that the
batteries are good in
the remote control.
Check that the
remote Control
IR Sensor is not
blocked.
Aim the remote
control toward the
IR Sensor being
controlled.
Select the correct
screen, 3 or 4.
No picture
Check that the
correct video input
mode is selected.
Check that the video
cable is plugged into
the jack securely. Problem Recommended Action
No Sound
Check that the
correct audio input
mode is selected.
Check that the audio
cable is securely
plugged into the jack.
Cleaning the Video Screens The video display screens are made of a specially
coated glass and can be scratched or damaged by
abrasive products, solvents, or ammonia-based window
cleaners. Clean with a soft, lint-free, cotton cloth that
has been slightly dampened with warm water. Dry the
screens by wiping with a clean dry cotton cloth.
3-112
Page 359 of 602
r (Rewind): Touch and hold this button to rewind
quickly through a track selection. You will hear sound at
a reduced volume. Release this button to stop rewinding.
The display will show the elapsed time of the track.
[ (Forward): Touch and hold this button to fast
forward quickly through a track selection. You will hear
sound at a reduced volume. Release this button to stop
fast forwarding. The display will show the elapsed time
of the track.
y©¨z (Seek): To seek tracks, press the up arrow
to go to the next track. Press the down arrow to go to the
start of the current track, if more than eight seconds have
played. If either arrow is pressed more than once, the
player continues moving backward or forward through
the CD. The sound mutes while seeking.
w (Tuning Knob): Turn this knob counterclockwise
one notch to go to the start of the current track, turn it
again to go to the previous track. Turn this knob
clockwise to go to the next track.
When playing an audio CD the rear seat operator can
power on the RSE video screen and use the remote
control to navigate through the tracks on the CD. Using an MP3 CD MP3 Format There are guidelines that must be met, when creating an
MP3 disc. If the guidelines are not met when recording a
CD-R(W), the CD may not play. The guidelines are:
Sampling rate: 16 kHz, 22.05 kHz, 24 kHz, 32 kHz,
and 44.1 kHz.
Bit rates supported: 32, 40, 48, 56, 64, 80, 96, 112,
128, 160, 192, 224, 256, and 320 kbps.
ID3 tag information is displayed by the radio
if it is available. The radio supports ID3 tag
information v1.0, v1.1, or v2.0. The radio will display
a �lename, song name, artist name, album name,
and directory name.
Maximum 32 characters, including spaces, in a �le or
folder name.
Maximum number of folders is 100 with a maximum
hierarchy of eight folders.
Create a folder structure that makes it easy to �nd
songs while driving. Organize songs by albums using
one folder for each album. Each folder or album
should contain 18 songs or less.
4-73
Page 363 of 602

qr (Folder/Artist/Album): Select the left or right
arrow to go to the previous or next folder, artist,
or album on the disc.
Press the middle screen button, with the folder, artist,
or album name, to sort the MP3 by folder, artist, or album.
It may take a few minutes for the system to sort the MP3.
y©¨z (Seek): To seek tracks, press the up arrow
to go to the next track. Press the down arrow to go to the
start of the current track, if more than eight seconds have
played. If either arrow is pressed more than once, the
player will continue moving backward or forward through
the CD. The sound will mute while seeking.
w (Tuning Knob): Turn this knob counterclockwise
one notch to go to the start of the current track, turn
it again to go to the previous track. Turn this knob
clockwise to go to the next track.
When playing an MP3 the rear seat operator can power
on the RSE video screen and use the remote control
to navigate through the MP3. CD Messages If Disc Read Error appears on the display and/or the CD
comes out, it could be for one of the following reasons:
If a disc was inserted with an invalid or unknown
format.
If the map DVD disc was installed into the CD slot.
See “Installing the Map DVD” under Maps on
page 4-15 for more information.
It is very hot. When the temperature returns to
normal, the CD should play.
You are driving on a very rough road. When the
road becomes smoother, the CD should play.
The CD is dirty, scratched, wet, or upside down.
The air is very humid. If so, wait about an hour and
try again.
There may have been a problem while burning
the CD.
The label may be caught in the CD player.
If the CD is not playing correctly, for any other reason,
try a known good CD.
If any error occurs repeatedly or if an error cannot be
corrected, contact your dealer/retailer.
4-77
Page 364 of 602
DVD Player The player can be used for DVD audio and DVD video.
DVD video will not display on the navigation screen
unless the vehicle is in PARK (P). It will operate on the
rear seat entertainment screens while the vehicle is
moving. The Rear Seat Entertainment (RSE) video
screen will start play of the DVD when a DVD video
has been inserted into the navigation system. The DVD
player can be controlled by the buttons on the navigation
system, the Rear Seat Audio (RSA) system, and the
remote control. The DVD player can also be used for
the rear seat passengers with the radio off. The rear
seat passengers can power on the video screen and
use the remote control to navigate the disc. See “Rear
Seat Entertainment System” in the Index of your vehicle’s
owner manual for more information.
The DVD player is only compatible with DVDs of the
appropriate region code that is printed on the jacket of
most DVDs.
The DVD slot is compatible with most audio CDs,
CD-R, CD-RW, DVD-Video, DVD-Audio, DVD-R/RW,
DVD+R/RW media along with MP3 and WMA formats. If an error appears on the display, see “DVD Messages”
later in this section.
M (Load): To load one disc, do the following:
1. Press the load hard key and follow the screen
message displayed.
2. When the system displays “Insert Disc (number)”,
insert the disc partway into the slot, label side up.
The system will pull it into the �rst available slot
and start playing. The system will display the type
of disc inserted.
To load multiple discs, do the following:
1. Press and hold the load hard key and follow the
screen message displayed.
2. When the system displays “Insert Disc (number)”,
insert the disc partway into the slot, label side up.
The system will pull it in.
4-78
Page 365 of 602
3. Once a disc is loaded, the system will display
“Insert Disc (number)” again. Load the next disc.
Repeat this procedure for each disc. The player
takes up to six discs, do not try to load more than six.
The system will not display the disc types when
loading all, until the discs have been read by the
system.
Once all discs have been inserted, the system will
start playing the last loaded disc.
Z (Eject): To eject a disc, do the following:
1. Press the eject hard key.
2. The system will display “Ejecting Disc”.
Press the DISC screen button to display the
Disc Changer screen. Select the disc to eject.
If a selection is not made, the system will eject the
disc from the current slot. If the disc is not removed
from the slot, the system will pull it back in after
10 seconds and start playing it.
To eject all discs at once, press and hold the eject hard
key. The system will display the disc number being
ejected. Playing a DVD There are three ways to play a DVD:
Once a DVD is inserted, the system will
automatically start play of the DVD.
If you are on a map screen, touch the DVD screen
button.
Press the AUDIO hard key, then touch the DVD
screen button.
When a DVD is loaded, the rear seat passengers can
power on the RSE video screen and use the remote
control to navigate through the DVD.
O /
3 (Power/Volume): Press this knob to turn
the system on and off. Turn the knob to increase
or decrease the volume of the audio system.
Press and hold this knob for more than two seconds
to turn off the navigation system, RSE video screen, and
RSA. If the vehicle has not been tuned off, the RSE and
the RSA can be turned back on by pressing this knob and
will continue play of the last active source.
4-79
Page 372 of 602
3. For the second row display select the Rear AUX
screen button next to Rear Display 1 and for the
third row display select the Rear AUX screen
button next to Rear Display 2. Each screen
works independently of the other. The second
row screen can watch a DVD while the third row
screen can use the auxiliary device.
The rear seat passengers can also use the remote
control to change the functions of the RSE. See Rear
Seat Entertainment (RSE) System (Overhead) on
page 3-87 or Rear Seat Entertainment (RSE) System
(Headrest DVD) on page 3-97 for more information.
Voice Recognition The navigation system’s voice recognition allows for
hands-free operation of the navigation system, audio
system, and OnStar ®
features. The DVD map disc must
be installed in the navigation system for voice recognition
to work. See “Installing the DVD Map Disc” under Maps
on page 4-15 for more information. Voice recognition can be used when the ignition is on
or when Retained Accessory Power (RAP) is active.
See “Retained Accessory Power (RAP)” in the Index
of your vehicle’s owner manual for more information.
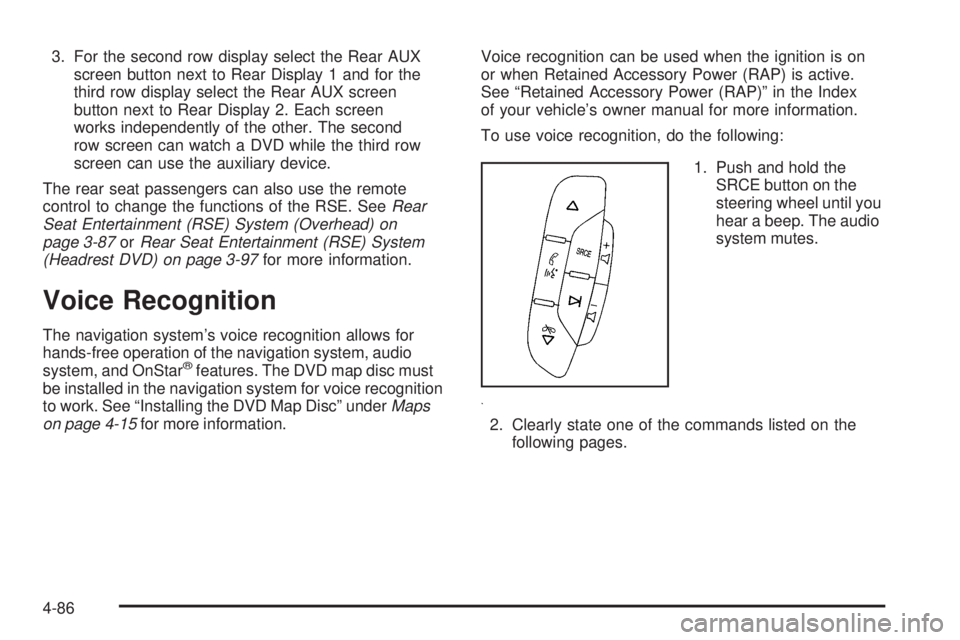
To use voice recognition, do the following:
1. Push and hold the
SRCE button on the
steering wheel until you
hear a beep. The audio
system mutes.
2. Clearly state one of the commands listed on the
following pages.
4-86
Page 598 of 602

Rearview Mirrors (cont.)
Reclining Seatbacks, Power ............................... 1-8
Recommended Fluids and Lubricants ................. 7-13
Recovery Hooks ............................................. 5-32
Recreational Vehicle Towing ............................. 5-40
Reimbursement Program, GM Mobility ................. 8-7
Remote Keyless Entry (RKE) System .................. 2-4
Remote Vehicle Start ........................................ 2-8
Removing the Flat Tire and Installing the
Spare Tire .................................................. 6-84
Removing the Spare Tire and Tools ................... 6-79
Replacement Bulbs ......................................... 6-53
Replacement Parts
Maintenance ............................................... 7-15
Reporting Safety Defects
General Motors ........................................... 8-15
U.S. Government ......................................... 8-14
Restraint System Check
Checking the Restraint Systems .................... 1-95
Replacing Restraint System Parts After a
Crash ..................................................... 1-96
Retained Accessory Power (RAP) ...................... 2-26
Ride Control Systems
Road Sensing Suspension .............................. 5-9
Road Sensing Suspension ................................. 5-9
Roadside Service ............................................. 8-7 Rocking Your Vehicle to Get it Out .................... 5-32
Roof
Sunroof ...................................................... 2-65
Running the Vehicle While Parked ..................... 2-39
S Safety Belts
Care of .................................................... 6-100
Extender .................................................... 1-51
How to Wear Safety Belts Properly ................ 1-35
Lap Belt ..................................................... 1-50
Lap-Shoulder Belt ........................................ 1-43
Reminders .................................................. 3-35
Safety Belts Are for Everyone ....................... 1-30
Use During Pregnancy ................................. 1-50
Safety Defects Reporting
General Motors ........................................... 8-15
U.S. Government ......................................... 8-14
Safety Warnings and Symbols .............................. iv
Scheduled Maintenance ..................................... 7-4
Additional Required Services ........................... 7-6
Scheduling Appointments ................................. 8-10
Seats
60/40 Split Bench Seat ................................. 1-11
Bucket Seats, Rear ...................................... 1-17
Center Seat ................................................ 1-10
12
Page 599 of 602

Seats (cont.)
Head Restraints ............................................ 1-2
Heated and Cooled Seats .............................. 1-6
Heated Seats ............................................... 1-5
Heated Seats - Rear .................................... 1-10
Power Lumbar .............................................. 1-4
Power Reclining Seatbacks ............................. 1-8
Power Seats ................................................. 1-3
Third Row Seat ........................................... 1-25
Secondary Latch System ................................. 6-89
Securing a Child Restraint
Center Front Seat Position ............................ 1-75
Rear Seat Position ...................................... 1-71
Right Front Seat Position .............................. 1-76
Security
Light .......................................................... 3-45
Service ........................................................... 6-3
Accessories and Modi�cations ......................... 6-3
Adding Equipment to the Outside of the
Vehicle ..................................................... 6-5
Doing Your Own Work ................................... 6-4
Engine Soon Lamp ...................................... 3-42
Parts Identi�cation Label ............................. 6-105
Publications Ordering Information ................... 8-15
Scheduling Appointments .............................. 8-10
Servicing Your Airbag-Equipped Vehicle .............. 1-93 Sheet Metal Damage ..................................... 6-103
Shifting
Out of Park ................................................ 2-37
Shifting Into Park ............................................ 2-36
Side Blind Zone Alert ...................................... 2-44
Signals, Turn and Lane-Change .......................... 3-8
Spare Tire ..................................................... 6-96
Installing .................................................... 6-84
Removing ................................................... 6-79
Storing ....................................................... 6-92
Speci�cations and Capacities .......................... 6-113
Speedometer .................................................. 3-35
Split Bench Seat (60/40) .................................. 1-11
StabiliTrak ®
Indicator Light ............................... 3-40
StabiliTrak ®
System .......................................... 5-6
Start Vehicle, Remote ....................................... 2-8
Starting the Engine ......................................... 2-26
Steering ........................................................ 5-10
Steering Wheel
Heated ........................................................ 3-6
Steering Wheel Controls, Audio ....................... 3-115
Steering Wheel, Tilt Wheel ................................. 3-6
Steps
Power Assist ............................................... 2-16
Storage
Garment Hooks ........................................... 2-63
13
Page 601 of 602
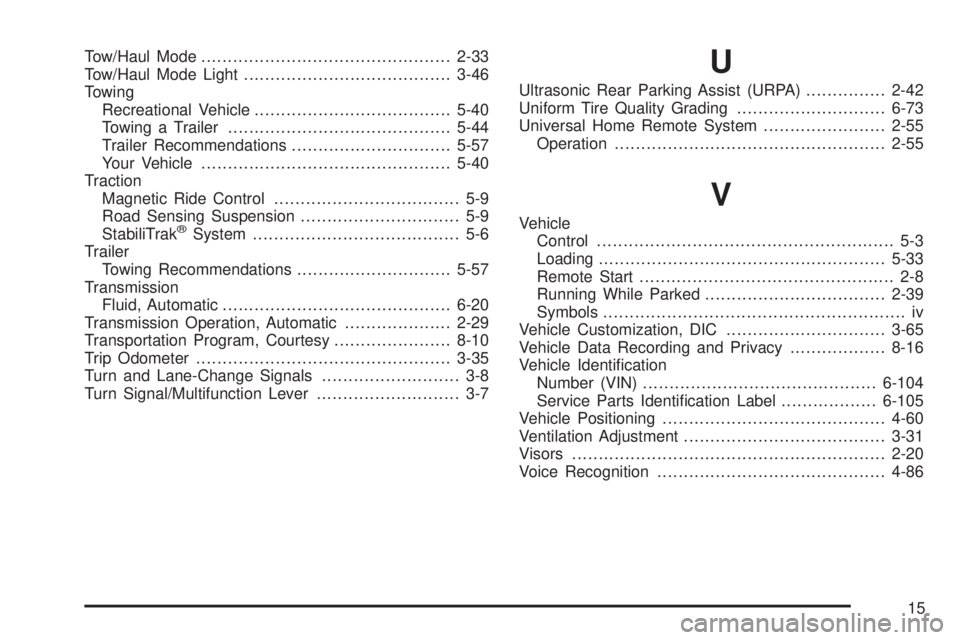
Tow/Haul Mode ............................................... 2-33
Tow/Haul Mode Light ....................................... 3-46
Towing
Recreational Vehicle ..................................... 5-40
Towing a Trailer .......................................... 5-44
Trailer Recommendations .............................. 5-57
Your Vehicle ............................................... 5-40
Traction
Magnetic Ride Control ................................... 5-9
Road Sensing Suspension .............................. 5-9
StabiliTrak ®
System ....................................... 5-6
Trailer
Towing Recommendations ............................. 5-57
Transmission
Fluid, Automatic ........................................... 6-20
Transmission Operation, Automatic .................... 2-29
Transportation Program, Courtesy ...................... 8-10
Trip Odometer ................................................ 3-35
Turn and Lane-Change Signals .......................... 3-8
Turn Signal/Multifunction Lever ........................... 3-7 U Ultrasonic Rear Parking Assist (URPA) ............... 2-42
Uniform Tire Quality Grading ............................ 6-73
Universal Home Remote System ....................... 2-55
Operation ................................................... 2-55
V Vehicle
Control ........................................................ 5-3
Loading ...................................................... 5-33
Remote Start ................................................ 2-8
Running While Parked .................................. 2-39
Symbols ......................................................... iv
Vehicle Customization, DIC .............................. 3-65
Vehicle Data Recording and Privacy .................. 8-16
Vehicle Identi�cation
Number (VIN) ............................................ 6-104
Service Parts Identi�cation Label .................. 6-105
Vehicle Positioning .......................................... 4-60
Ventilation Adjustment ...................................... 3-31
Visors ........................................................... 2-20
Voice Recognition ........................................... 4-86
15