navigation system CADILLAC ESCALADE ESV 2012 User Guide
[x] Cancel search | Manufacturer: CADILLAC, Model Year: 2012, Model line: ESCALADE ESV, Model: CADILLAC ESCALADE ESV 2012Pages: 538, PDF Size: 8.42 MB
Page 188 of 538
Black plate (6,1)Cadillac Escalade/Escalade ESV Owner Manual - 2012 - 2nd CRC - 11/29/11
7-6 Infotainment System Setting the Clock The navigation system time and the
analog clock operate independently.
Changing the time through the
navigation system does not change
the time on the analog clock. See
Clock on page 5 ‑ 7 to change the
analog clock time.
To set the time for the navigation
system:
1. Press CONFIG to enter the
configure menu options, then
press CONFIG again, repeatedly
until the time is selected or touch
the time screen button.
2. Press the Hours and Minutes −
and + to decrease or to increase
the time.
See “ Setting the Clock ” under
Configure Menu on page 7 ‑ 84 for
more information. Entering an Address and Point
of Interest, and Storing Preset
Destinations Entering an Address
Enter a destination by inputting the
city name first:
1. Press
O to turn the system on.
2. A caution may appear. Press OK
to proceed.
3. Press DEST.
4. Press
2 (Address Entry).
5. Select the state/province screen
button, if needed, to change the
current state or province. A list
of all of the available states and
provinces appear. Select the
state or province.
6. Once a state or province has
been selected the City name
category is automatically
selected for entry.
If five or fewer names are
available, a list displays. If more
than five are available, the List screen button displays a
number. This number represents
the number of available cities.
Press this button to view the list
and select a city.
7. Once a city has been selected
the Street name category is
automatically selected for entry.
If five or fewer streets are
available for the selected city,
the system displays the list of
streets. If more than five streets
are available the system
displays the alpha keyboard.
Start entering the street name.
If five or fewer names are
available, a list displays. If more
than five are available, the List
screen button displays a
number. This button represents
the number of available streets.
Select this button to view the list
and select a street.
8. Once a street has been
selected, select the House #
screen button to enter the house
Page 191 of 538
Black plate (9,1)Cadillac Escalade/Escalade ESV Owner Manual - 2012 - 2nd CRC - 11/29/11
Infotainment System 7-9
Radio AM-FM Radio Notice: Before adding any sound
equipment to the vehicle, such
as an audio system, CD player,
CB radio, mobile telephone,
or two-way radio, make sure that
it can be added by checking with
your dealer. Also, check federal
rules covering mobile radio and
telephone units. If sound
equipment can be added, it is
very important to do it properly.
Added sound equipment can
interfere with the operation of the
vehicle's engine, radio, or other
systems, and even damage them.
The vehicle's systems can
interfere with the operation of
sound equipment that has been
added. Notice: The chime signals related
to safety belts, parking brake, and
other functions of the vehicle
operate through the navigation
system. If that equipment is
replaced or additional equipment
is added to the vehicle, the
chimes may not work. Make sure
that replacement or additional
equipment is compatible with the
vehicle before installing it. See
“ Accessories and Modifications ”
in the vehicle's owner manual.
Playing the Radio
O /
n (Power/Volume):
1. Press to turn the audio system
on and off.
2. Turn to increase or to decrease
the volume. 3. Press and hold for more than
two seconds to turn off the
navigation system, the Rear
Seat Entertainment (RSE) video
screen, and Rear Seat Audio
(RSA). If the vehicle has not
been turned off, press this knob
to turn RSE and RSA back on
and to continue playback of the
last active source.
w (Tuning Knob): Turn to go to
the next or previous frequency or
disc track or chapter. See CD/DVD
Player on page 7 ‑ 18 or MP3 on
page 7 ‑ 27 for more information.
AUDIO: Press to display the audio
screen. Press to switch between
AM, FM, or XM, if equipped, Disc,
or AUX (Auxiliary), or press the
screen button. See CD/DVD Player
on page 7 ‑ 18 , MP3 on page 7 ‑ 27 ,
and Auxiliary Devices on page 7 ‑ 30
for more information.
Page 196 of 538
Black plate (14,1)Cadillac Escalade/Escalade ESV Owner Manual - 2012 - 2nd CRC - 11/29/11
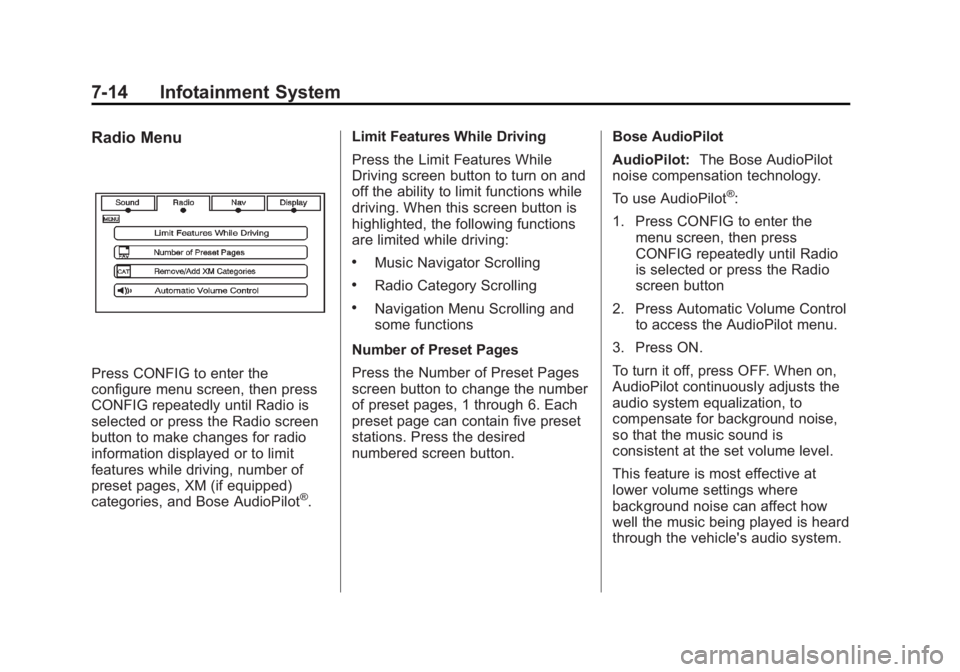
7-14 Infotainment System Radio Menu
Press CONFIG to enter the
configure menu screen, then press
CONFIG repeatedly until Radio is
selected or press the Radio screen
button to make changes for radio
information displayed or to limit
features while driving, number of
preset pages, XM (if equipped)
categories, and Bose AudioPilot ®
. Limit Features While Driving
Press the Limit Features While
Driving screen button to turn on and
off the ability to limit functions while
driving. When this screen button is
highlighted, the following functions
are limited while driving: .
Music Navigator Scrolling .
Radio Category Scrolling .
Navigation Menu Scrolling and
some functions
Number of Preset Pages
Press the Number of Preset Pages
screen button to change the number
of preset pages, 1 through 6. Each
preset page can contain five preset
stations. Press the desired
numbered screen button. Bose AudioPilot
AudioPilot: The Bose AudioPilot
noise compensation technology.
To use AudioPilot ®
:
1. Press CONFIG to enter the
menu screen, then press
CONFIG repeatedly until Radio
is selected or press the Radio
screen button
2. Press Automatic Volume Control
to access the AudioPilot menu.
3. Press ON.
To turn it off, press OFF. When on,
AudioPilot continuously adjusts the
audio system equalization, to
compensate for background noise,
so that the music sound is
consistent at the set volume level.
This feature is most effective at
lower volume settings where
background noise can affect how
well the music being played is heard
through the vehicle's audio system.
Page 200 of 538
Black plate (18,1)Cadillac Escalade/Escalade ESV Owner Manual - 2012 - 2nd CRC - 11/29/11
7-18 Infotainment System If a cellular telephone antenna
needs to be attached to the glass,
make sure that the grid lines for the
AM-FM antenna are not damaged.
There is enough space between the
grid lines to attach a cellular
telephone antenna without
interfering with radio reception.
Notice: Using a razor blade or
sharp object to clear the inside of
the rear side windows may affect
radio reception or damage the
rear side window antenna.
Repairs would not be covered by
the warranty. Do not clear the
inside of the rear side windows
with sharp objects. Notice: Do not apply aftermarket
glass tinting with metallic film.
The metallic film in some tinting
materials will interfere with or
distort the incoming radio
reception. Any damage caused to
the antenna due to metallic tinting
materials will not be covered by
the warranty.
Satellite Radio Antenna The XM Satellite Radio antenna is
located on the roof of the vehicle.
Keep the antenna clear of
obstructions for clear radio
reception.
If the vehicle has a sunroof, the
performance of the XM system
(if equipped) may be affected if
the sunroof is open. Audio Players CD/DVD Player The player can be used for CD,
MP3, and as a DVD video player.
Read this section for more
information about DVD video.
When playing an audio CD the rear
seat operator can power on the
RSE video screen and use the
remote control to navigate through
the tracks on the CD.
CD Player While playing a CD, the navigation
system is available.
When you insert a CD, the CD tab
displays. If a DSP setting is
selected for the CD, it activates
each time you play a CD.
If the ignition or radio is turned off
with a CD in the player, it stays in
the player. When the ignition or
radio is turned on, the CD starts
playing where it stopped, if it was
the last selected audio source.
Page 202 of 538
Black plate (20,1)Cadillac Escalade/Escalade ESV Owner Manual - 2012 - 2nd CRC - 11/29/11
7-20 Infotainment System
y /
© or
¨ /
z (Seek/Scan):
1. To seek tracks, press the up
arrow to go to the next track.
2. Press the down arrow to go to
the start of the current track,
if more than eight seconds have
played.
3. If either arrow is pressed more
than once, the player continues
moving backward or forward
through the CD. The sound
mutes while seeking.
w (Tuning Knob):
1. Turn counterclockwise one notch
to go to the start of the current
track, turn it again to go to the
previous track.
2. Turn clockwise to go to the next
track.
Playing a DVD
DVD video does not display on the
navigation screen unless the vehicle
is in P (Park). It will operate on the
rear seat entertainment screens
while the vehicle is moving. The Rear Seat Entertainment (RSE)
video screen starts play of the DVD
when a DVD video has been
inserted into the CD/DVD slot. The
DVD player can be controlled by the
buttons on the navigation system,
the Rear Seat Audio (RSA) system,
and the remote control. The DVD
player can also be used for the rear
seat passengers with the radio off.
The rear seat passengers can
power on the video screen and use
the remote control to navigate the
disc. See the Rear Seat
Infotainment user guide for more
information.
The DVD player is only compatible
with DVDs of the appropriate region
code that is printed on the jacket of
most DVDs.
The CD/DVD slot is compatible with
most audio CDs, CD-R, CD-RW,
DVD-Video, DVD-R/RW,
DVD+R/RW media along with
MP3 and WMA formats. If an error appears on the display,
see “ CD/DVD Messages ” in this
section.
Once a DVD starts to play, the
menu options and cursor screen
buttons will automatically appear. To
display the menu Options screen
button while a DVD is playing, touch
anywhere on the screen.
There are three ways to play
a DVD: .
Once a DVD is inserted, the
system will automatically start
play of the DVD. .
If you are on a map screen,
press the DVD screen button. .
Press AUDIO, then press the
DVD screen button.
When a DVD is loaded, the rear
seat passengers can power on the
RSE video screen and use the
remote control to navigate through
the DVD.
Page 203 of 538
Black plate (21,1)Cadillac Escalade/Escalade ESV Owner Manual - 2012 - 2nd CRC - 11/29/11
Infotainment System 7-21
O /
3 (Power/Volume):
1. Press to turn the system on
and off.
2. Turn the knob to increase or
decrease the volume of the
audio system.
3. Press and hold for more than
two seconds to turn off the
navigation system, RSE video
screen, and RSA. If the vehicle
has not been tuned off, the RSE
and the RSA can be turned back
on by pressing this knob and will
continue play of the last active
source.
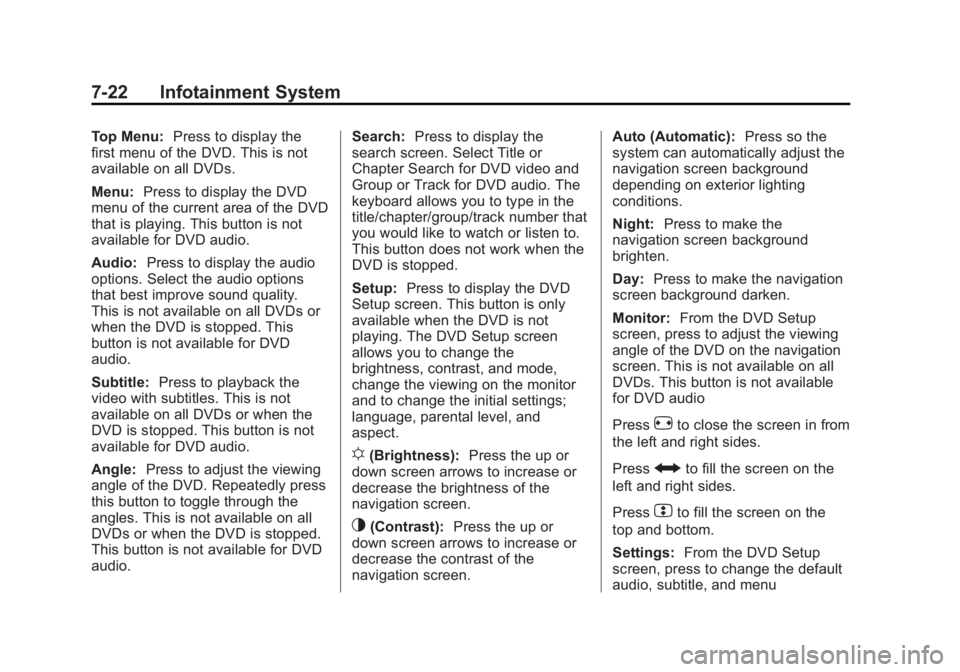
DVD Menu Options Options: Press to view the menu
option screen buttons. Menu options
are available when they are
highlighted. Some menu options are
only available when the DVD is not
playing.
Cursor: Press to access the cursor
menu. The arrows and other cursor
options allow you to navigate the
DVD menu options. The cursor menu options are only available if a
DVD has a menu. Use the cursor
menu to start a DVD video from the
disc main menu.
q ,
Q ,
r ,
R (Arrow Buttons): Press
the arrows to move around the
DVD menu.
Enter: Press to select the
highlighted option.
Return: Press to go back to the
previous DVD menu.
Back: Press to go back to the main
DVD display screen.
Move: Press to move the cursor
buttons back and forth from the
bottom-right corner to the top-left
corner of the screen.
j /
r (Pause/Play):
1. Press to pause the DVD. This
button will then change to the
play button.
2. Press the play button to play
the DVD.
3. Press this button in a DVD disc
main menu to start the movie. c (Stop):
1. Press to stop play of the DVD.
2. Press the play button to continue
playing the DVD from where the
DVD was stopped.
3. Press this button twice to return
to the beginning of the DVD.
Hide Options: Press to remove all
menu options from the display,
except Options and Cursor.
Page 204 of 538
Black plate (22,1)Cadillac Escalade/Escalade ESV Owner Manual - 2012 - 2nd CRC - 11/29/11
7-22 Infotainment System Top Menu: Press to display the
first menu of the DVD. This is not
available on all DVDs.
Menu: Press to display the DVD
menu of the current area of the DVD
that is playing. This button is not
available for DVD audio.
Audio: Press to display the audio
options. Select the audio options
that best improve sound quality.
This is not available on all DVDs or
when the DVD is stopped. This
button is not available for DVD
audio.
Subtitle: Press to playback the
video with subtitles. This is not
available on all DVDs or when the
DVD is stopped. This button is not
available for DVD audio.
Angle: Press to adjust the viewing
angle of the DVD. Repeatedly press
this button to toggle through the
angles. This is not available on all
DVDs or when the DVD is stopped.
This button is not available for DVD
audio. Search: Press to display the
search screen. Select Title or
Chapter Search for DVD video and
Group or Track for DVD audio. The
keyboard allows you to type in the
title/chapter/group/track number that
you would like to watch or listen to.
This button does not work when the
DVD is stopped.
Setup: Press to display the DVD
Setup screen. This button is only
available when the DVD is not
playing. The DVD Setup screen
allows you to change the
brightness, contrast, and mode,
change the viewing on the monitor
and to change the initial settings;
language, parental level, and
aspect.
! (Brightness): Press the up or
down screen arrows to increase or
decrease the brightness of the
navigation screen.
_ (Contrast): Press the up or
down screen arrows to increase or
decrease the contrast of the
navigation screen. Auto (Automatic): Press so the
system can automatically adjust the
navigation screen background
depending on exterior lighting
conditions.
Night: Press to make the
navigation screen background
brighten.
Day: Press to make the navigation
screen background darken.
Monitor: From the DVD Setup
screen, press to adjust the viewing
angle of the DVD on the navigation
screen. This is not available on all
DVDs. This button is not available
for DVD audio
Press
e to close the screen in from
the left and right sides.
Press
J to fill the screen on the
left and right sides.
Press
d to fill the screen on the
top and bottom.
Settings: From the DVD Setup
screen, press to change the default
audio, subtitle, and menu
Page 208 of 538
Black plate (26,1)Cadillac Escalade/Escalade ESV Owner Manual - 2012 - 2nd CRC - 11/29/11
7-26 Infotainment System Using the Navigation Audio
System to Control a USB
Storage Device or iPod ®
The navigation audio system can
control a USB storage device or an
iPod by using the radio touch
screens and steering wheel
controls.
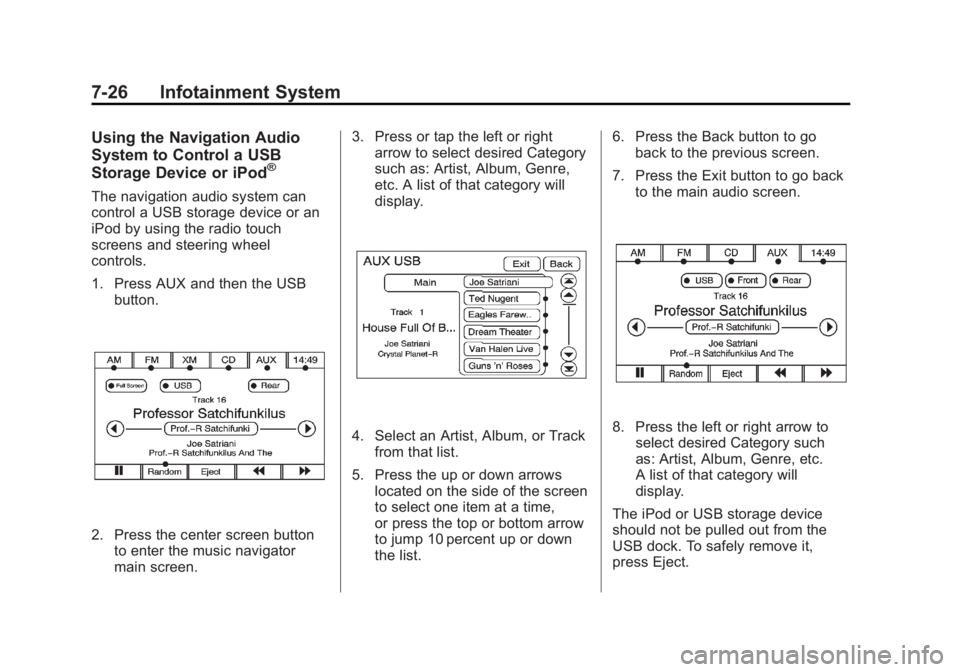
1. Press AUX and then the USB
button.
2. Press the center screen button
to enter the music navigator
main screen. 3. Press or tap the left or right
arrow to select desired Category
such as: Artist, Album, Genre,
etc. A list of that category will
display.
4. Select an Artist, Album, or Track
from that list.
5. Press the up or down arrows
located on the side of the screen
to select one item at a time,
or press the top or bottom arrow
to jump 10 percent up or down
the list. 6. Press the Back button to go
back to the previous screen.
7. Press the Exit button to go back
to the main audio screen.
8. Press the left or right arrow to
select desired Category such
as: Artist, Album, Genre, etc.
A list of that category will
display.
The iPod or USB storage device
should not be pulled out from the
USB dock. To safely remove it,
press Eject.
Page 211 of 538
Black plate (29,1)Cadillac Escalade/Escalade ESV Owner Manual - 2012 - 2nd CRC - 11/29/11
Infotainment System 7-29Playing an MP3
While playing a CD, the navigation
system is available.
When you insert a CD, the CD tab
displays. If a DSP setting is
selected for the CD, it will be
activated each time you play a CD.
If you turn off the ignition or radio
with a CD in the player, it stays in
the player. When you turn on the
ignition or radio, the CD starts
playing where it stopped, if it was
the last selected audio source.
As each new track starts to play,
the track number appears on the
display.
If an error appears on the display,
see “ CD/DVD Messages ” in this
section.
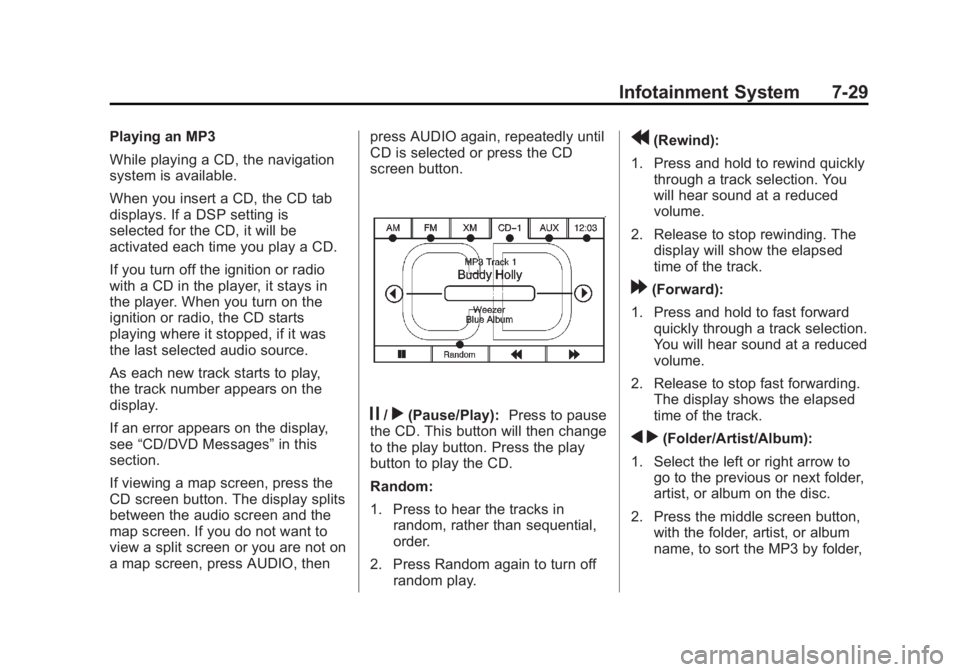
If viewing a map screen, press the
CD screen button. The display splits
between the audio screen and the
map screen. If you do not want to
view a split screen or you are not on
a map screen, press AUDIO, then press AUDIO again, repeatedly until
CD is selected or press the CD
screen button.
j /
r (Pause/Play): Press to pause
the CD. This button will then change
to the play button. Press the play
button to play the CD.
Random:
1. Press to hear the tracks in
random, rather than sequential,
order.
2. Press Random again to turn off
random play. r (Rewind):
1. Press and hold to rewind quickly
through a track selection. You
will hear sound at a reduced
volume.
2. Release to stop rewinding. The
display will show the elapsed
time of the track.
[ (Forward):
1. Press and hold to fast forward
quickly through a track selection.
You will hear sound at a reduced
volume.
2. Release to stop fast forwarding.
The display shows the elapsed
time of the track.
q r (Folder/Artist/Album):
1. Select the left or right arrow to
go to the previous or next folder,
artist, or album on the disc.
2. Press the middle screen button,
with the folder, artist, or album
name, to sort the MP3 by folder,
Page 212 of 538
Black plate (30,1)Cadillac Escalade/Escalade ESV Owner Manual - 2012 - 2nd CRC - 11/29/11
7-30 Infotainment System artist, or album. It may take a
few minutes for the system to
sort the MP3.
y /
© or
¨ /
z (Seek/Scan):
1. To seek tracks, press the up
arrow to go to the next track.
2. Press the down arrow to go to
the start of the current track,
if more than eight seconds have
played.
3. If either arrow is pressed more
than once, the player continues
moving backward or forward
through the CD. The sound
mutes while seeking.
w (Tuning Knob):
1. Turn counterclockwise one notch
to go to the start of the current
track, turn it again to go to the
previous track.
2. Turn clockwise to go to the next
track. When playing an MP3 the rear seat
operator can power on the RSE
video screen and use the remote
control to navigate through the MP3.
Auxiliary Devices Using the Auxiliary Input Jack The navigation system has an
auxiliary input jack located on the
faceplate and in the center console.
This is not an audio output; do not
plug the headphone set into the
front auxiliary input jack. An external
audio device such as an iPod,
laptop computer, MP3 player, CD
player, or cassette tape player, etc.
can be connected to the auxiliary
input jack for use as another audio
source.
Drivers are encouraged to set up
any auxiliary device while the
vehicle is in P (Park). See Defensive
Driving on page 9 ‑ 3 for more
information on driver distraction. To use a portable audio player,
connect a 1/8 in (3.5 mm) cable to
the radio's front auxiliary input jack.
When a device is connected, press
AUDIO, then press AUDIO again
until AUX is selected or press the
AUX screen button to begin playing
audio from the device over the
vehicle speakers.
For optimal sound quality, increase
the portable audio device's volume
to the loudest level.
It is always best to power the
portable audio device through its
own battery while playing.
The vehicle may have a rear
entertainment system (RSE) with a
second and third row screen. The
RSE has audio adapters to allow
you to connect auxiliary devices.
The audio can be heard through the
speakers or through the wireless or
wired headphones. See the Rear
Seat Infotainment user guide for
more information.