clock CADILLAC ESCALADE EXT 2003 2.G User Guide
[x] Cancel search | Manufacturer: CADILLAC, Model Year: 2003, Model line: ESCALADE EXT, Model: CADILLAC ESCALADE EXT 2003 2.GPages: 473, PDF Size: 3.31 MB
Page 319 of 473
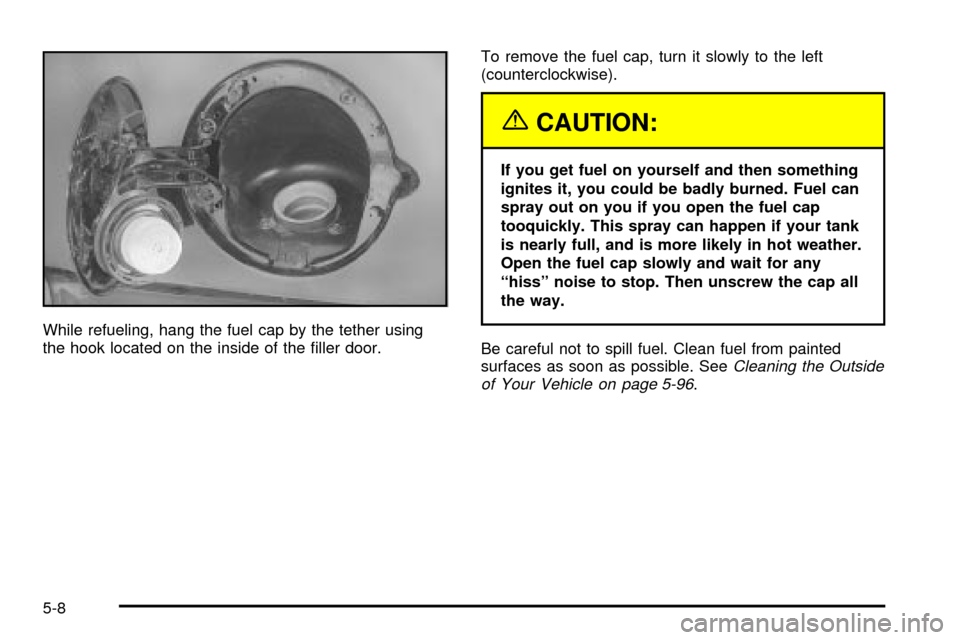
While refueling, hang the fuel cap by the tether using
the hook located on the inside of the ®ller door.To remove the fuel cap, turn it slowly to the left
(counterclockwise).
{CAUTION:
If you get fuel on yourself and then something
ignites it, you could be badly burned. Fuel can
spray out on you if you open the fuel cap
tooquickly. This spray can happen if your tank
is nearly full, and is more likely in hot weather.
Open the fuel cap slowly and wait for any
ªhissº noise to stop. Then unscrew the cap all
the way.
Be careful not to spill fuel. Clean fuel from painted
surfaces as soon as possible. See
Cleaning the Outside
of Your Vehicle on page 5-96.
5-8
Page 320 of 473
When you put the fuel cap back on, turn it to the right
(clockwise) until you hear a clicking sound. Make sure
you fully install the cap. The diagnostic system can
determine if the fuel cap has been left off or improperly
installed. this would allow fuel to evaporate into the
atmosphere. See
Malfunction Indicator Lamp on
page 3-42.
Notice:If you need a new fuel cap, be sure to get
the right type. Your dealer can get one for you.
If you get the wrong type, it may not ®t properly.
This may cause your malfunction indicator lamp to
light and may damage your fuel tank and emissions
system. See ªMalfunction Indicator Lampº in the
Index.
Filling a Portable Fuel Container
{CAUTION:
Never ®ll a portable fuel container while it is in
your vehicle. Static electricity discharge from
the container can ignite the gasoline vapor.
You can be badly burned and your vehicle
damaged if this occurs. To help avoid injury to
you and others:
·Dispense gasoline only into approved
containers.
·Do not ®ll a container while it is inside a
vehicle, in a vehicle's trunk, pickup bed or
on any surface other than the ground.
·Bring the ®ll nozzle in contact with the
inside of the ®ll opening before operating
the nozzle. Contact should be maintained
until the ®lling is complete.
·Don't smoke while pumping gasoline.
5-9
Page 345 of 473
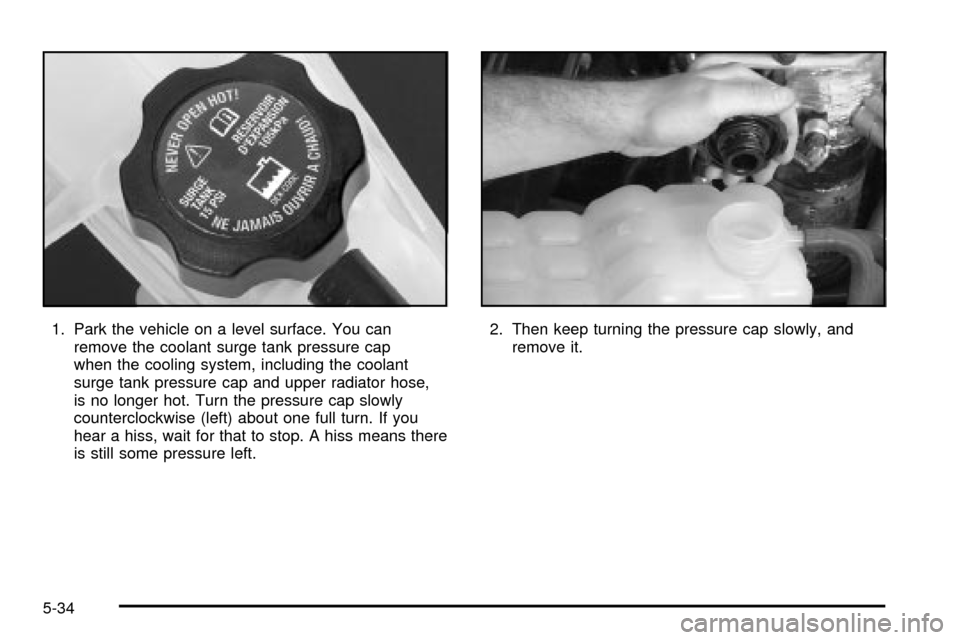
1. Park the vehicle on a level surface. You can
remove the coolant surge tank pressure cap
when the cooling system, including the coolant
surge tank pressure cap and upper radiator hose,
is no longer hot. Turn the pressure cap slowly
counterclockwise (left) about one full turn. If you
hear a hiss, wait for that to stop. A hiss means there
is still some pressure left.2. Then keep turning the pressure cap slowly, and
remove it.
5-34
Page 371 of 473
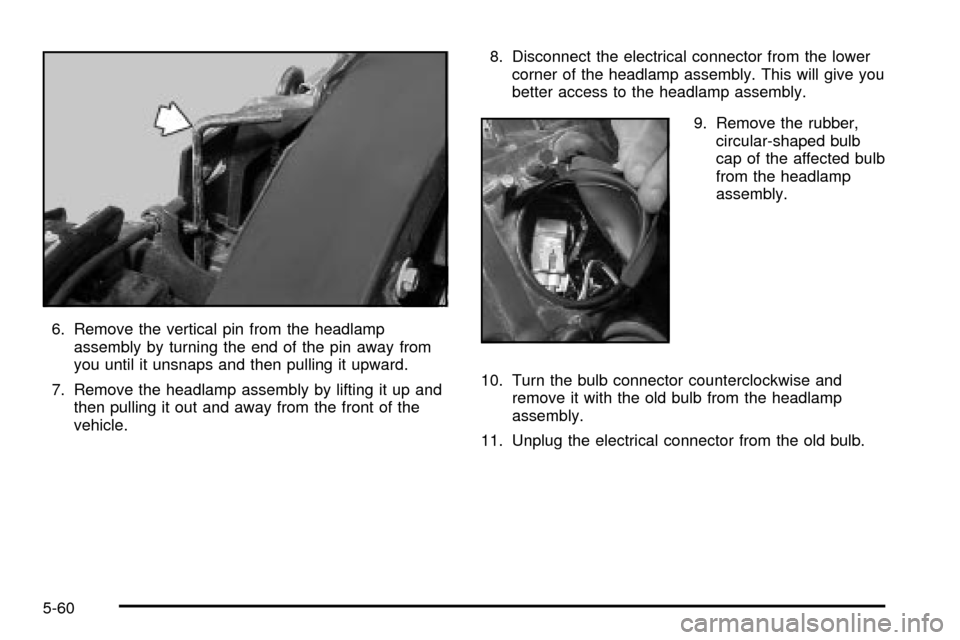
6. Remove the vertical pin from the headlamp
assembly by turning the end of the pin away from
you until it unsnaps and then pulling it upward.
7. Remove the headlamp assembly by lifting it up and
then pulling it out and away from the front of the
vehicle.8. Disconnect the electrical connector from the lower
corner of the headlamp assembly. This will give you
better access to the headlamp assembly.
9. Remove the rubber,
circular-shaped bulb
cap of the affected bulb
from the headlamp
assembly.
10. Turn the bulb connector counterclockwise and
remove it with the old bulb from the headlamp
assembly.
11. Unplug the electrical connector from the old bulb.
5-60
Page 372 of 473
12. Plug in the electrical connector to the new bulb,
using care not to touch the bulb with your hands,
®ngers or anything damp or oily.
13. Place the connector with the new bulb into the
headlamp assembly and turn it clockwise until it
is tight.
14. Reinstall the rubber, circular-shaped bulb cap onto
the headlamp assembly.
15. Reconnect the electrical connector to the lower
corner of the headlamp assembly.
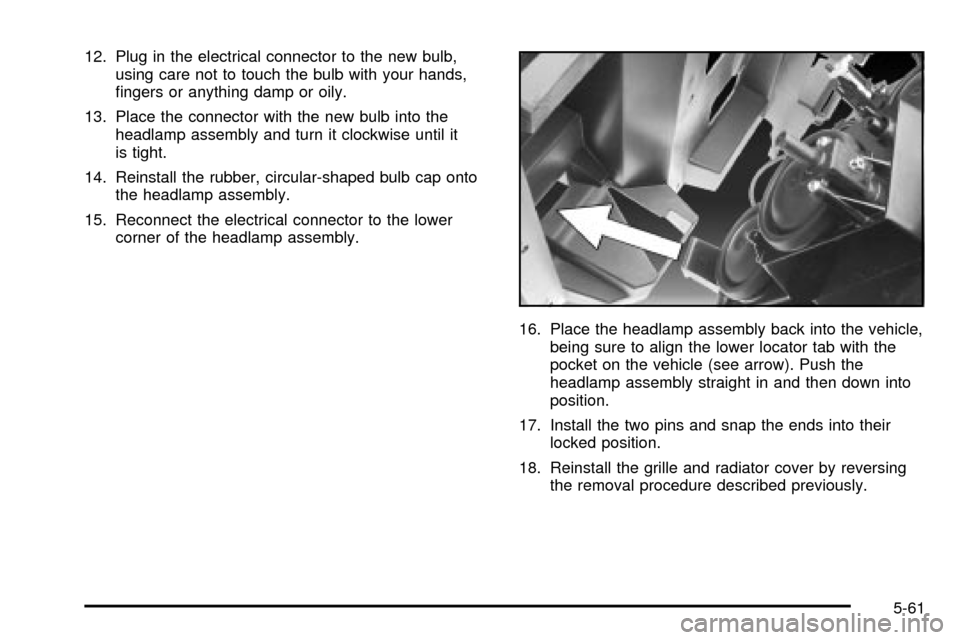
16. Place the headlamp assembly back into the vehicle,
being sure to align the lower locator tab with the
pocket on the vehicle (see arrow). Push the
headlamp assembly straight in and then down into
position.
17. Install the two pins and snap the ends into their
locked position.
18. Reinstall the grille and radiator cover by reversing
the removal procedure described previously.
5-61
Page 373 of 473
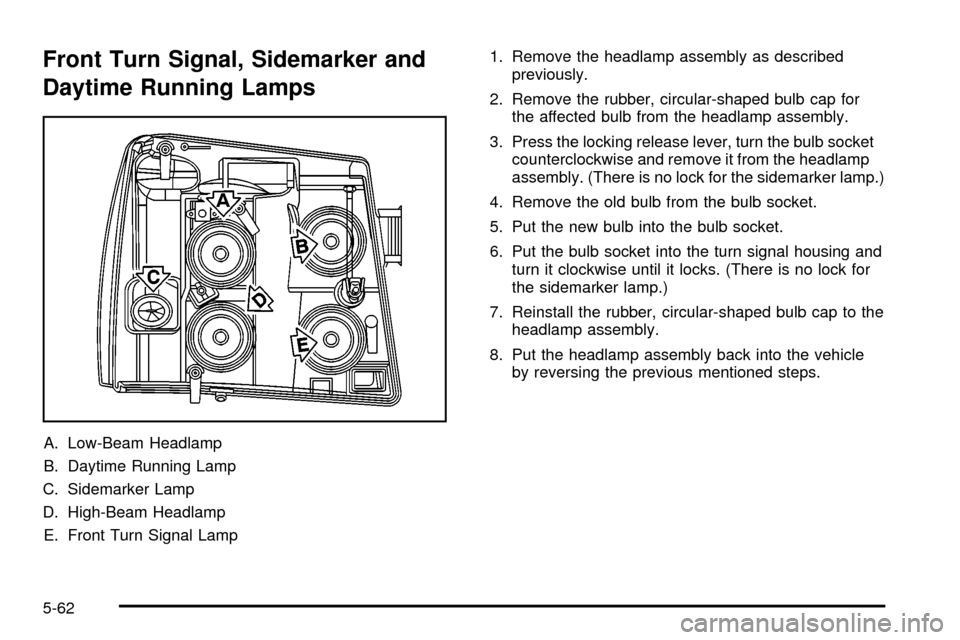
Front Turn Signal, Sidemarker and
Daytime Running Lamps
A. Low-Beam Headlamp
B. Daytime Running Lamp
C. Sidemarker Lamp
D. High-Beam Headlamp
E. Front Turn Signal Lamp1. Remove the headlamp assembly as described
previously.
2. Remove the rubber, circular-shaped bulb cap for
the affected bulb from the headlamp assembly.
3. Press the locking release lever, turn the bulb socket
counterclockwise and remove it from the headlamp
assembly. (There is no lock for the sidemarker lamp.)
4. Remove the old bulb from the bulb socket.
5. Put the new bulb into the bulb socket.
6. Put the bulb socket into the turn signal housing and
turn it clockwise until it locks. (There is no lock for
the sidemarker lamp.)
7. Reinstall the rubber, circular-shaped bulb cap to the
headlamp assembly.
8. Put the headlamp assembly back into the vehicle
by reversing the previous mentioned steps.
5-62
Page 375 of 473
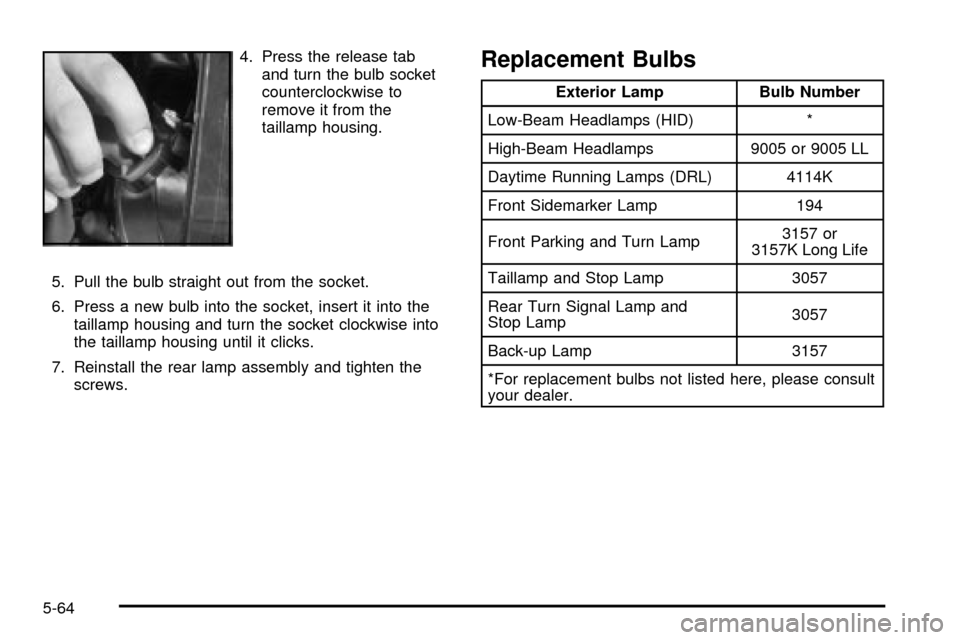
4. Press the release tab
and turn the bulb socket
counterclockwise to
remove it from the
taillamp housing.
5. Pull the bulb straight out from the socket.
6. Press a new bulb into the socket, insert it into the
taillamp housing and turn the socket clockwise into
the taillamp housing until it clicks.
7. Reinstall the rear lamp assembly and tighten the
screws.Replacement Bulbs
Exterior Lamp Bulb Number
Low-Beam Headlamps (HID) *
High-Beam Headlamps 9005 or 9005 LL
Daytime Running Lamps (DRL) 4114K
Front Sidemarker Lamp 194
Front Parking and Turn Lamp3157 or
3157K Long Life
Taillamp and Stop Lamp 3057
Rear Turn Signal Lamp and
Stop Lamp3057
Back-up Lamp 3157
*For replacement bulbs not listed here, please consult
your dealer.
5-64
Page 388 of 473
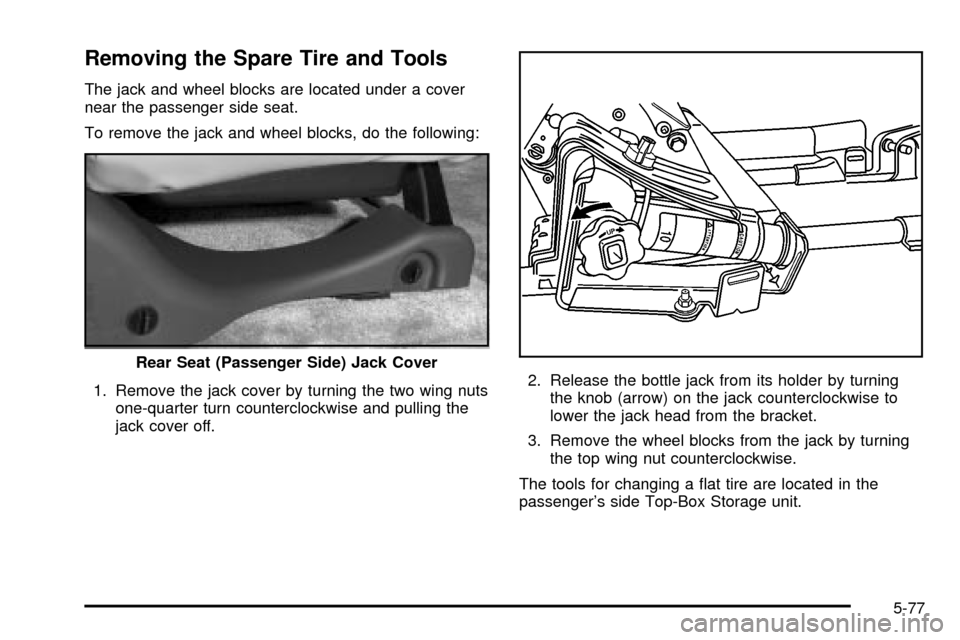
Removing the Spare Tire and Tools
The jack and wheel blocks are located under a cover
near the passenger side seat.
To remove the jack and wheel blocks, do the following:
1. Remove the jack cover by turning the two wing nuts
one-quarter turn counterclockwise and pulling the
jack cover off.2. Release the bottle jack from its holder by turning
the knob (arrow) on the jack counterclockwise to
lower the jack head from the bracket.
3. Remove the wheel blocks from the jack by turning
the top wing nut counterclockwise.
The tools for changing a ¯at tire are located in the
passenger's side Top-Box Storage unit. Rear Seat (Passenger Side) Jack Cover
5-77
Page 390 of 473
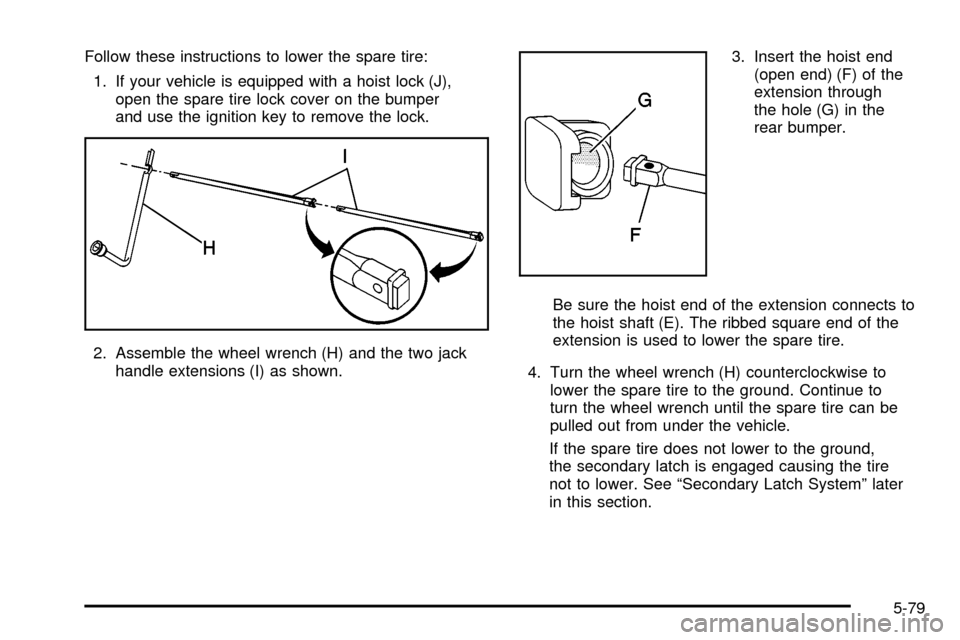
Follow these instructions to lower the spare tire:
1. If your vehicle is equipped with a hoist lock (J),
open the spare tire lock cover on the bumper
and use the ignition key to remove the lock.
2. Assemble the wheel wrench (H) and the two jack
handle extensions (I) as shown.3. Insert the hoist end
(open end) (F) of the
extension through
the hole (G) in the
rear bumper.
Be sure the hoist end of the extension connects to
the hoist shaft (E). The ribbed square end of the
extension is used to lower the spare tire.
4. Turn the wheel wrench (H) counterclockwise to
lower the spare tire to the ground. Continue to
turn the wheel wrench until the spare tire can be
pulled out from under the vehicle.
If the spare tire does not lower to the ground,
the secondary latch is engaged causing the tire
not to lower. See ªSecondary Latch Systemº later
in this section.
5-79
Page 392 of 473

1. Remove the center cap by placing the chisel end of
the wheel wrench in the slot on the wheel and
gently prying the cap out.2. Use the wheel wrench to loosen all the wheel nuts.
Turn the wheel wrench counterclockwise to loosen
the wheel nuts. Don't remove the wheel nuts yet.
5-81