turn CADILLAC ESCALADE EXT 2004 2.G User Guide
[x] Cancel search | Manufacturer: CADILLAC, Model Year: 2004, Model line: ESCALADE EXT, Model: CADILLAC ESCALADE EXT 2004 2.GPages: 478, PDF Size: 3.43 MB
Page 64 of 478
If after reinstalling the child restraint and restarting the
vehicle, the on indicator is still lit, check to make
sure that the vehicle's seatback is not pressing the child
restraint into the seat cushion. If this happens, slightly
recline the vehicle's seatback and adjust the seat
cushion if possible. Also make sure the child restraint is
not trapped under the vehicle head restraint. If this
happens, adjust the head restraint.
If the on indicator is still lit, secure the child in the child
restraint in a rear seat position in the vehicle and
check with your dealer.
The passenger sensing system is designed to enable
(may in¯ate) the right front passenger's frontal air
bag anytime the system senses that a person of adult
size is sitting properly in the right front passenger's seat.
When the passenger sensing system has allowed the
air bag to be enabled, the on indicator will light and stay
lit to remind you that the air bag is active.
For some children who have outgrown child restraints
and for very small adults, the passenger sensing system
may or may not turn off the right front passenger's
frontal air bag, depending upon the person's seating
posture and body build. Everyone in your vehicle
who has outgrown child restraints should wear a safety
belt properly Ð whether or not there is an air bag
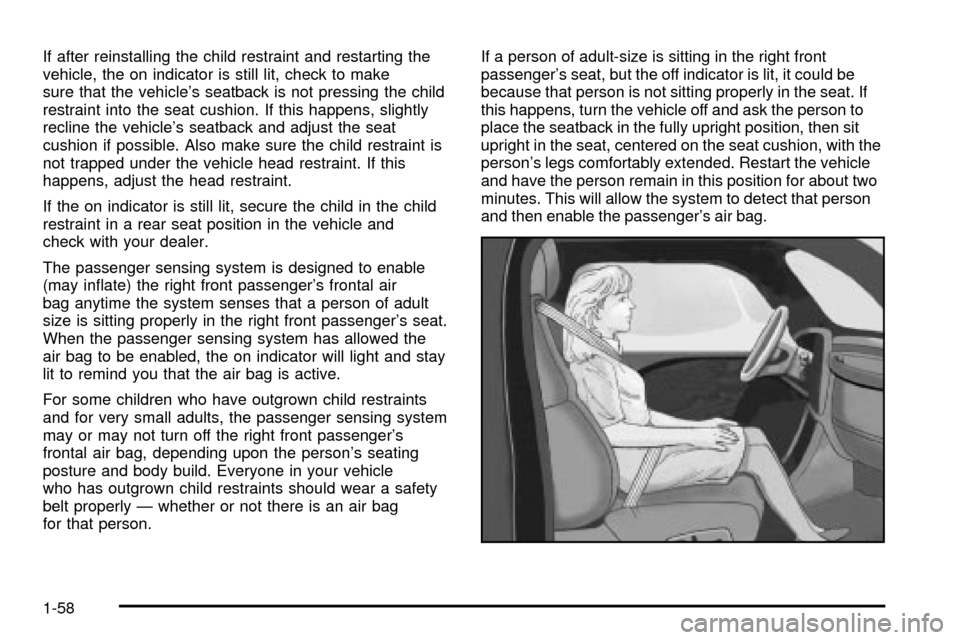
for that person.If a person of adult-size is sitting in the right front
passenger's seat, but the off indicator is lit, it could be
because that person is not sitting properly in the seat. If
this happens, turn the vehicle off and ask the person to
place the seatback in the fully upright position, then sit
upright in the seat, centered on the seat cushion, with the
person's legs comfortably extended. Restart the vehicle
and have the person remain in this position for about two
minutes. This will allow the system to detect that person
and then enable the passenger's air bag.
1-58
Page 66 of 478

Servicing Your Air Bag-Equipped
Vehicle
Air bags affect how your vehicle should be serviced.
There air bag system parts in several places around
your vehicle. You don't want the system to in¯ate while
someone is working on your vehicle. Your dealer
and the service manual have information about servicing
your vehicle and the air bag system. To purchase a
service manual, see
Service Publications Ordering
Information on page 7-11.
{CAUTION:
For up to 10 seconds after the ignition key is
turned off and the battery is disconnected, an
air bag can still in¯ate during improper
service. You can be injured if you are close to
an air bag when it in¯ates. Avoid yellow
connectors. They are probably part of the air
bag system. Be sure to follow proper service
procedures, and make sure the person
performing work for you is quali®ed to do so.
Air bag systems do not need regular maintenance.
Adding Equipment to Your Air
Bag-Equipped Vehicle
Q:Is there anything I might add to the front or
sides of the vehicle that could keep the air
bags from working properly?
A:Yes. If you add things that change your vehicle's
frame, bumper system, front end or side sheet
metal or height, they may keep the air bag system
from working properly. Also, the air bag system
may not work properly if you relocate any of the air
bag sensors. If you have any questions about
this, you should contact Customer Assistance
before you modify your vehicle. The phone
numbers and addresses for Customer Assistance
are in Step Two of the Customer Satisfaction
Procedure in this manual. See
Customer
Satisfaction Procedure on page 7-2
.
1-60
Page 74 of 478

L(Panic):When this button is pressed, the horn will
sound and the headlamps and taillamps will ¯ash for
up to 30 seconds. This can be turned off by pressing the
button again, or by waiting for 30 seconds, or by
starting the vehicle.
Matching Transmitter(s) to Your
Vehicle
Each remote keyless entry transmitter is coded to
prevent another transmitter from unlocking your vehicle.
If a transmitter is lost or stolen, a replacement can
be purchased through your dealer. Remember to bring
any remaining transmitters with you when you go to
your dealer. When the dealer matches the replacement
transmitter to your vehicle, any remaining transmitters
must also be matched. Once your dealer has coded the
new transmitter, the lost transmitter will not unlock
your vehicle. Each vehicle can have a maximum
of four transmitters matched to it.
Battery Replacement
Under normal use, the battery in your remote keyless
entry transmitter should last about two years.
You can tell the battery is weak if the transmitter won't
work at the normal range in any location. If you have
to get close to your vehicle before the transmitter works,
it's probably time to change the battery.
Notice:When replacing the battery, use care not to
touch any of the circuitry. Static from your body
transferred to these surfaces may damage the
transmitter.
To replace the battery in the keyless entry transmitter,
do the following:
2-6
Page 77 of 478

Power Door Locks
The power door lock
switches are located on
the driver's and front
passenger's armrests.
Q(Lock):Remove the ignition key and press the lock
symbol to lock all of the doors.
If the delayed locking feature is on, the doors will not
lock until ®ve seconds after the last door is closed. Press
the lock symbol twice to override this feature and lock
all of the doors immediately. See
Delayed Locking
on page 2-9for more information.
K(Unlock):To unlock the doors, press the unlock
symbol.
Delayed Locking
When locking the doors with the power lock switch or
the keyless entry transmitter and a door or the liftgate
(if equipped) is open, the delayed locking feature
will delay locking the doors until ®ve seconds after the
last door is closed. You will hear three chimes to
signal that the delayed locking feature is in use.
Pressing the power lock switch or the lock button
on the keyless entry transmitter twice will override the
delayed locking feature and immediately lock
all the doors.
You can turn the delayed locking feature off or back on
again by doing the following:
1. Press and hold the power door lock switch in the
lock position.
2. Press unlock twice on the remote keyless entry
transmitter.
This feature will not operate if the key is in the ignition.
You can also program this feature using the DIC.
See ªDelayed Lockingº under
DIC Operation and
Displays on page 3-49.
2-9
Page 78 of 478

Programmable Automatic Door
Locks
Your vehicle is equipped with an automatic lock/unlock
feature which enables you to program your vehicle's
power door locks. You can program this feature through
the Driver Information Center (DIC), or by the following
method.
Programmable Locking Feature
The following is the list of available programming
options:
Mode 1:All doors lock when the transmission is shifted
out of Park. This is the mode that is pre-programmed
in the factory for your vehicle.
Mode 2:All doors lock when the vehicle speed is
greater than 8 mph (13 km/h).
Mode 3:No automatic door locking.
The following instructions tell you how to change the
automatic door lock mode. Choose one of the three
programming options listed above before entering the
program mode. To enter the program mode, do the
following:
1. Begin with the ignition off. Then pull the turn
signal/multifunction lever toward you and hold
it there while you perform the next step.2. Turn the key to RUN then back to LOCK twice.
Then, with the key in LOCK, release the turn
signal/multifunction lever. Once you do this, the
doors will lock and unlock, the horn will chirp twice,
and a 30-second timer will begin. You are now
ready to program the automatic door lock feature.
3. Press the lock side of the power lock switch once.
You will hear one, two, or three chimes. The
number of chimes tells you which lock mode is
currently selected. Continue to press the door lock
switch until the number of chimes that you hear
matches the number of the mode that you want.
If you take longer than 30 seconds, the locks
will automatically lock and unlock and the horn will
chirp twice to indicate that you have left the
program mode. If this occurs, you can repeat the
procedure beginning with Step 1 to re-enter
the programming mode.
You can exit the program mode any time by turning the
ignition to RUN (the doors will automatically lock and
unlock and the horn will chirp twice to indicate that you
are leaving the program mode). If the lock/unlock
switches are not pressed while in the programming
mode, the current automatic settings will not be
modi®ed.
See your dealer for more information.
2-10
Page 79 of 478

Programmable Unlocking Feature
The following is the list of available programming
options:
Mode 1:Driver's door unlocks when the transmission is
shifted into PARK (P).
Mode 2:All doors unlock when the transmission is
shifted into PARK (P). This is the mode that is
pre-programmed in the factory for your vehicle.
Mode 3:All doors unlock when the key is removed
from the ignition.
Mode 4:No automatic door unlock.
The following instructions tell you how to change the
automatic door unlock mode. Choose one of the
four programming options listed above before entering
the program mode. To enter the program mode, do
the following:
1. Begin with the ignition off. Then pull the turn
signal/multifunction lever toward you and hold
it there while you perform the next step.2. Turn the key to RUN and LOCK twice. Then, with
the key in LOCK, release the turn
signal/multifunction lever. Once you do this, the
doors will lock and unlock, the horn will chirp twice,
and a 30-second timer will begin. You are now
ready to program the automatic door unlock feature.
3. Press the unlock side of the power lock switch once.
You will hear one, two, three, or four chimes. The
number of chimes tells you which unlock mode
is currently selected. Continue to press the
door unlock switch until the number of chimes that
you hear matches the number of the mode that
you want. If you take longer than 30 seconds, the
locks will automatically lock and unlock and the horn
will chirp twice to indicate that you have left the
program mode. If this occurs, you can repeat
the procedure beginning with Step 1 to re-enter the
programming mode.
You can exit the program mode any time by turning the
ignition to RUN (the doors will automatically lock and
unlock and the horn will chirp twice to indicate that you
are leaving the program mode). If the lock/unlock
switches are not pressed while in the programming
mode, the current automatic settings will not be
modi®ed.
See your dealer for more information.
2-11
Page 81 of 478

Lockout Protection
This feature protects you from locking your key in the
vehicle when the key is in the ignition and a door
is open.
If the power lock switch is pressed when a door is open
and the key is in the ignition, all of the doors will lock
and then the driver's door will unlock.
Midgate
{CAUTION:
It can be dangerous to drive with the cargo
area covered and the tailgate and the midgate
open because carbon monoxide (CO) gas can
come into your vehicle. You can not see or
smell CO. It can cause unconsciousness and
even death. If you must drive with the cargo
covers on and the tailgate and midgate open
or if electrical wiring or other cable
connections must pass through the seal
between the body and the midgate:
·Make sure all windows are shut.
·Turn the fan on your heating or cooling
system to its highest speed with the
setting on OUTSIDE AIR. That will force
outside air into your vehicle. See
Automatic Climate Control System on
page 3-24.
·If you have air outlets on or under the
instrument panel, open them all the way.
See
Engine Exhaust on page 2-41.
2-13
Page 85 of 478
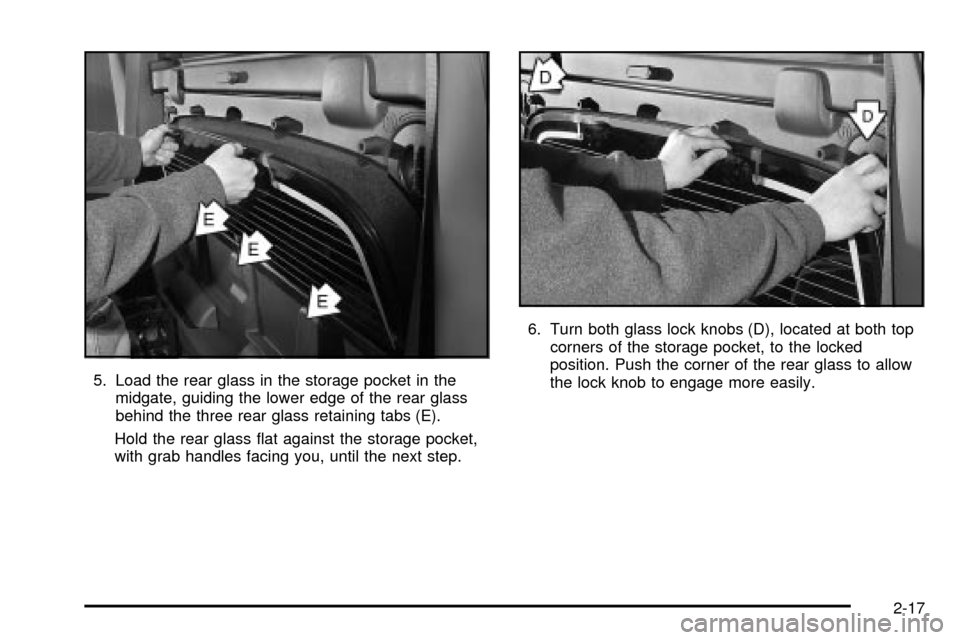
5. Load the rear glass in the storage pocket in the
midgate, guiding the lower edge of the rear glass
behind the three rear glass retaining tabs (E).
Hold the rear glass ¯at against the storage pocket,
with grab handles facing you, until the next step.6. Turn both glass lock knobs (D), located at both top
corners of the storage pocket, to the locked
position. Push the corner of the rear glass to allow
the lock knob to engage more easily.
2-17
Page 86 of 478

Once both glass lock knobs are in the locked
position, the rear glass is securely stored.
7. Push both latch levers (A) up to the locked position.
You should hear a click when each latch lever locks
correctly.
Rear seats can be returned to the normal position
when the rear glass is out and stored properly in the
storage pocket.
Reinstalling the Rear Glass
To reinstall the rear glass, do the following:
1. Squeeze and pull down the latch levers (A), located
near the upper corners of the rear glass, to unlatch.
2. Hold the rear glass in place with one hand and turn
the glass lock knobs, located at both top corners of
the glass storage pocket, to the unlocked position.
3. Pull the rear glass out from the storage pocket using
the grab handles.
2-18
Page 89 of 478

2. Standing outside of the vehicle, hold the midgate
securely so it does not fall forward. Turn the
midgate handle clockwise and pull the midgate
toward you.3. Lower the midgate until it is ¯at. Rear Glass in Normal Position
2-21