turn CADILLAC ESCALADE EXT 2004 2.G Service Manual
[x] Cancel search | Manufacturer: CADILLAC, Model Year: 2004, Model line: ESCALADE EXT, Model: CADILLAC ESCALADE EXT 2004 2.GPages: 478, PDF Size: 3.43 MB
Page 148 of 478
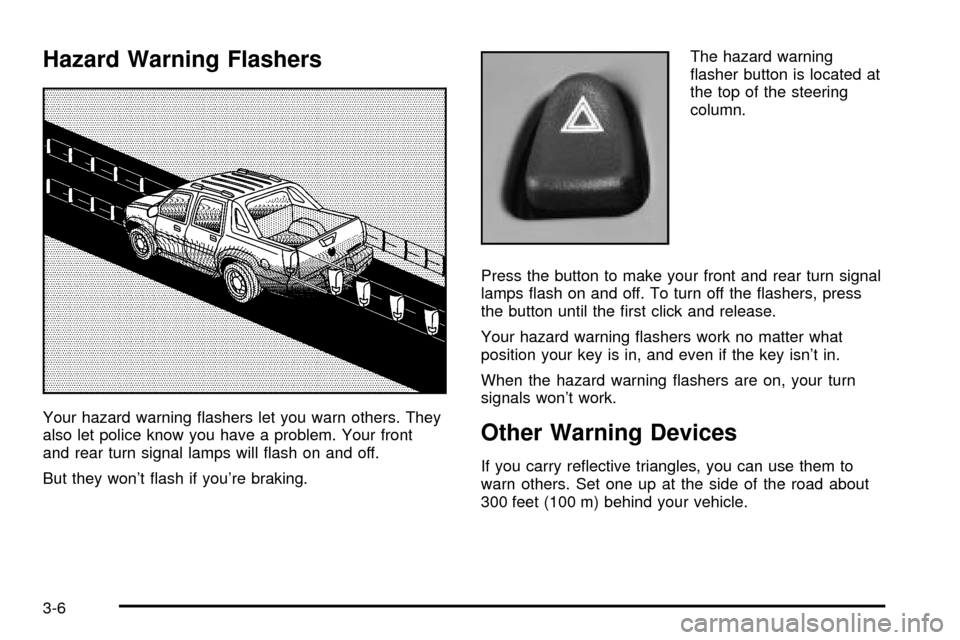
Hazard Warning Flashers
Your hazard warning ¯ashers let you warn others. They
also let police know you have a problem. Your front
and rear turn signal lamps will ¯ash on and off.
But they won't ¯ash if you're braking.The hazard warning
¯asher button is located at
the top of the steering
column.
Press the button to make your front and rear turn signal
lamps ¯ash on and off. To turn off the ¯ashers, press
the button until the ®rst click and release.
Your hazard warning ¯ashers work no matter what
position your key is in, and even if the key isn't in.
When the hazard warning ¯ashers are on, your turn
signals won't work.Other Warning Devices
If you carry re¯ective triangles, you can use them to
warn others. Set one up at the side of the road about
300 feet (100 m) behind your vehicle.
3-6
Page 149 of 478
Horn
To sound the horn, press the center pad on the
steering wheel.
Tilt Wheel
The tilt steering wheel allows you to adjust the steering
wheel before you drive. You can raise it to the highest
level to give your legs more room when you enter
and exit the vehicle.
The tilt lever is located on
the driver's side of the
steering column under the
turn signal lever.
To tilt the wheel, hold the steering wheel and pull the
lever. Move the steering wheel to a comfortable
level, then release the lever to lock the wheel in place.
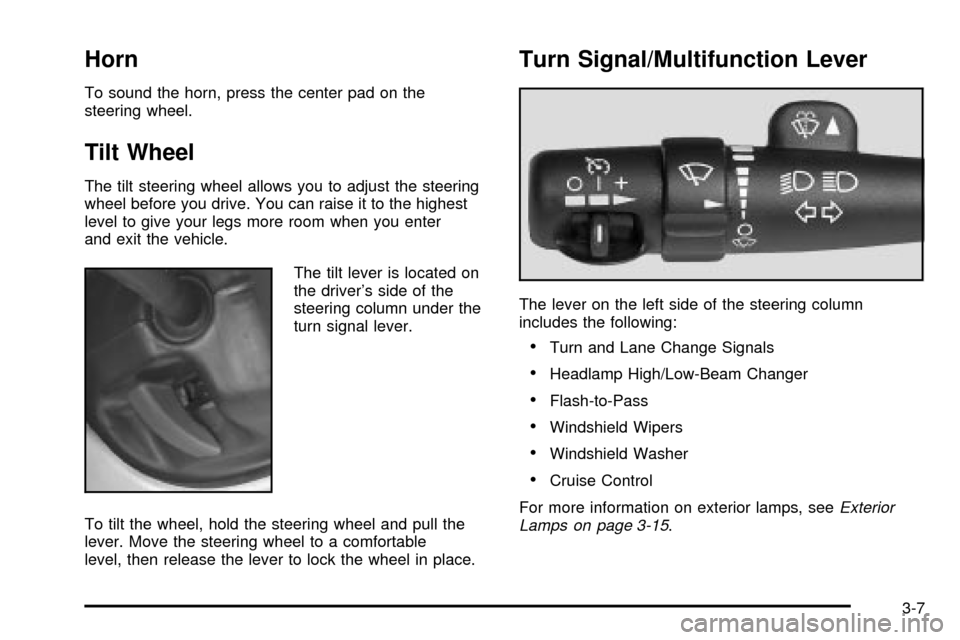
Turn Signal/Multifunction Lever
The lever on the left side of the steering column
includes the following:
·Turn and Lane Change Signals
·Headlamp High/Low-Beam Changer
·Flash-to-Pass
·Windshield Wipers
·Windshield Washer
·Cruise Control
For more information on exterior lamps, see
Exterior
Lamps on page 3-15.
3-7
Page 150 of 478

Turn and Lane Change Signals
The turn signal has two upward (for right) and
two downward (for left) positions. These positions
allow you to signal a turn or a lane change.
To signal a turn, move the lever all the way up
or down. When the turn is ®nished, the lever will
return automatically.
To signal a lane change, raise or lower the lever until
the arrow starts to ¯ash. Hold it there until you complete
your lane change. The lever will return by itself when
you release it.An arrow on the instrument
panel cluster will ¯ash in
the direction of the
turn or lane change.
As you signal a turn or a lane change, if the arrows
¯ash more quickly than normal, a signal bulb may
be burned out and other drivers won't see your turn
signal.
If a bulb is burned out, replace it to help avoid an
accident. If the arrows don't go on at all when you signal
a turn, check for burned-out bulbs and a blown fuse.
See
Fuses and Circuit Breakers on page 5-111.
3-8
Page 151 of 478

Turn Signal On Chime
If your turn signal is left on for more than 3/4 of a mile
(1.2 km), a chime will sound at each ¯ash of the
turn signal and the message TURN SIGNAL ON will
also appear in the DIC. To turn the chime and message
off, move the turn signal lever to the off position.
Headlamp High/Low-Beam Changer
53
(Headlamp High/Low Beam Changer):To
change the headlamps from low to high beam, push the
lever toward the instrument panel. To return to
low-beam headlamps, pull the multifunction lever toward
you. Then release it.
When the high beams are
on, this indicator light on
the instrument panel
cluster will also be on.
Flash-to-Pass
This feature lets you use your high-beam headlamps to
signal a driver in front of you that you want to pass.
It works even if your headlamps are in the automatic
position.
To use it, pull the turn signal lever toward you, then
release it.
If your headlamps are in the automatic position or on
low beam, your high-beam headlamps will turn on.
They'll stay on as long as you hold the lever toward you.
The high-beam indicator on the instrument panel
cluster will come on. Release the lever to return to
normal operation.
3-9
Page 152 of 478

Windshield Wipers
You control the windshield wipers by turning the band
with the wiper symbol on it.
8(Mist):For a single wiping cycle, turn the band to
mist. Hold it there until the wipers start. Then let go. The
wipers will stop after one wipe. If you want more
wipes, hold the band on mist longer.
N(Delay):You can set the wiper speed for a long or
short delay between wipes. This can be very useful
in light rain or snow. Turn the band to choose the delay
time. The closer to the top of the lever, the shorter
the delay.
6(Low Speed):For steady wiping at low speed,
turn the band away from you to the ®rst solid band past
the delay settings.
1(High Speed):For high-speed wiping, turn the
band further, to the second solid band past the
delay settings.
9(Off):To stop the wipers, move the band to off.
Be sure to clear ice and snow from the wiper blades
before using them. If they're frozen to the windshield,
carefully loosen or thaw them. If your blades do become
worn or damaged, get new blades or blade inserts.
Windshield Washer
L
(Washer Fluid):There is a paddle marked with the
windshield washer symbol at the top of the multifunction
lever. To spray washer ¯uid on the windshield, push
the paddle. The wipers will clear the window and then
either stop or return to your preset speed.
{CAUTION:
In freezing weather, do not use your washer
until the windshield is warmed. Otherwise the
washer ¯uid can form ice on the windshield,
blocking your vision.
3-10
Page 153 of 478
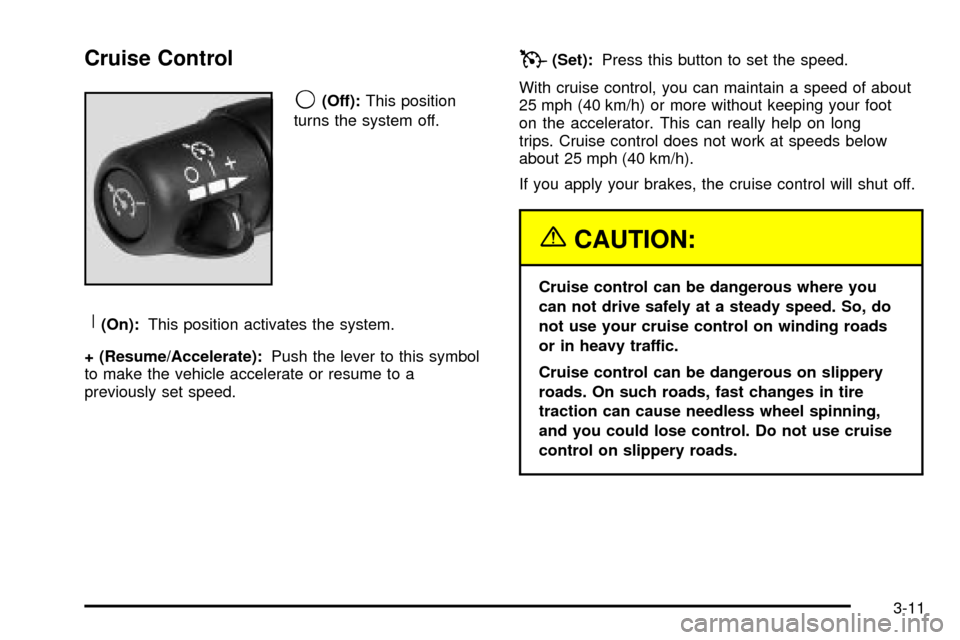
Cruise Control
9
(Off):This position
turns the system off.
R(On):This position activates the system.
+ (Resume/Accelerate):Push the lever to this symbol
to make the vehicle accelerate or resume to a
previously set speed.
T(Set):Press this button to set the speed.
With cruise control, you can maintain a speed of about
25 mph (40 km/h) or more without keeping your foot
on the accelerator. This can really help on long
trips. Cruise control does not work at speeds below
about 25 mph (40 km/h).
If you apply your brakes, the cruise control will shut off.
{CAUTION:
Cruise control can be dangerous where you
can not drive safely at a steady speed. So, do
not use your cruise control on winding roads
or in heavy traffic.
Cruise control can be dangerous on slippery
roads. On such roads, fast changes in tire
traction can cause needless wheel spinning,
and you could lose control. Do not use cruise
control on slippery roads.
3-11
Page 155 of 478

Increasing Speed While Using Cruise
Control
There are two ways to go to a higher speed:
·Use the accelerator pedal to get to the higher
speed. Press the set button at the end of the lever,
then release the button and the accelerator
pedal. You'll now cruise at the higher speed. If the
accelerator pedal is held longer than 60 seconds,
cruise control will turn off.
·Move the cruise switch from on to
resume/accelerate. Hold it there until you get up to
the speed you want, and then release the switch.
To increase your speed in very small amounts,
move the switch brie¯y to resume/accelerate. Each
time you do this, your vehicle will go about
1 mph (1.6 km/h) faster.
Reducing Speed While Using Cruise
Control
·
Press in the button at the end of the lever until you
reach the lower speed you want, then release it.
·To slow down in very small amounts, brie¯y press
the set button. Each time you do this, you'll go
about 1 mph (1.6 km/h) slower.
Passing Another Vehicle While Using
Cruise Control
Use the accelerator pedal to increase your speed.
When you take your foot off the pedal, your vehicle will
slow down to the cruise control speed you set earlier.
3-13
Page 156 of 478

Using Cruise Control on Hills
How well your cruise control will work on hills depends
upon your speed, load and the steepness of the
hills. When going up steep hills, you may want to step
on the accelerator pedal to maintain your speed.
When going downhill, you may have to brake or shift to
a lower gear to keep your speed down. Of course,
applying the brake takes you out of cruise control. Many
drivers ®nd this to be too much trouble and don't use
cruise control on steep hills.
Ending Cruise Control
There are four ways to turn off the cruise control:
·Step lightly on the brake pedal,
·move the cruise control switch to off, or
·shift the transmission to NEUTRAL (N).
·If your vehicle has the Stabilitrakžfeature, cruise
control will turn off if road conditions cause
Stabilitrak
žto activate.
·If the accelerator pedal is held longer than
60 seconds, cruise control will turn off.
The cruise control will turn off automatically if the
traction control system or Stabilitrak
žsystem activate, if
your vehicle is equipped with either feature.
Erasing Speed Memory
When you turn off the cruise control or the ignition, your
cruise control set speed memory is erased.
3-14
Page 157 of 478

Exterior Lamps
The control on the driver's side of your instrument panel
operates the exterior lamps.
The exterior lamp control has four positions:
9(Off):Turn the knob to this position and release it
to turn off all exterior lamps including the DRLs. To turn
any lamps back on when in the off mode, turn the
knob to the desired lamp mode. To return to the AUTO
mode, turn the knob to the off position and release
it. The off mode will also cancel and the lamps will return
to the AUTO when the vehicle is turned off. This
mode is not available for vehicles ®rst sold in Canada.AUTO:Turn the control to this position to put the
system into automatic headlamp mode. The Daytime
Running Lamps (DRL) will also be activated if it is light
enough outside.
;(Parking Lamps):Turn the control to this position
to turn on the parking lamps, together with the
following:
·Parking Lamps
·Sidemarker Lamps
·Taillamps
·License Plate Lamps
·Instrument Panel Lights
2(Headlamps):Turn the control to this position to
turn on the headlamps, together with the previously
listed lamps and lights.
When the vehicle is turned off and the headlamps are in
AUTO, the headlamps may automatically remain on
for a set time. You can change this delay time using the
DIC. See
Driver Information Center (DIC) on page 3-49.
You can switch your headlamps from low to high-beam
by pushing the turn signal/multifunction lever toward
the instrument panel.
3-15
Page 158 of 478

Automatic Headlamp System
When it is dark enough outside and the headlamp
switch is in AUTO, your automatic headlamp system will
turn on your headlamps at the normal brightness
along with other lamps such as the taillamps,
sidemarker, parking lamps, roof marker lamps and the
instrument panel lights. The radio lights will also be dim.
To turn off the automatic headlamp system, turn the
exterior lamps switch to the off position and then
release.
Your vehicle has a light sensor located on the top of the
instrument panel. Be sure it is not covered, or the
system will be on whenever the ignition is on.
The system may also turn on your headlamps when
driving through a parking garage, heavy overcast
weather or a tunnel. This is normal.There is a delay in the transition between the daytime
and nighttime operation of the Daytime Running
Lamps (DRL) and the automatic headlamp systems so
that driving under bridges or bright overhead street
lights does not affect the system. The DRL and
automatic headlamp system will only be affected when
the light sensor sees a change in lighting lasting
longer than the delay.
If you start your vehicle in a dark garage, the automatic
headlamp system will come on immediately. Once
you leave the garage, it will take approximately
one minute for the automatic headlamp system to
change to DRL if it is light outside. During that delay,
your instrument panel cluster may not be as bright
as usual. Make sure your instrument panel brightness
control is in the full bright position. See ªInstrument
Panel Brightnessº under
Interior Lamps on page 3-19.
3-16