remove seats CADILLAC ESCALADE EXT 2009 3.G Owners Manual
[x] Cancel search | Manufacturer: CADILLAC, Model Year: 2009, Model line: ESCALADE EXT, Model: CADILLAC ESCALADE EXT 2009 3.GPages: 546, PDF Size: 4.43 MB
Page 9 of 546

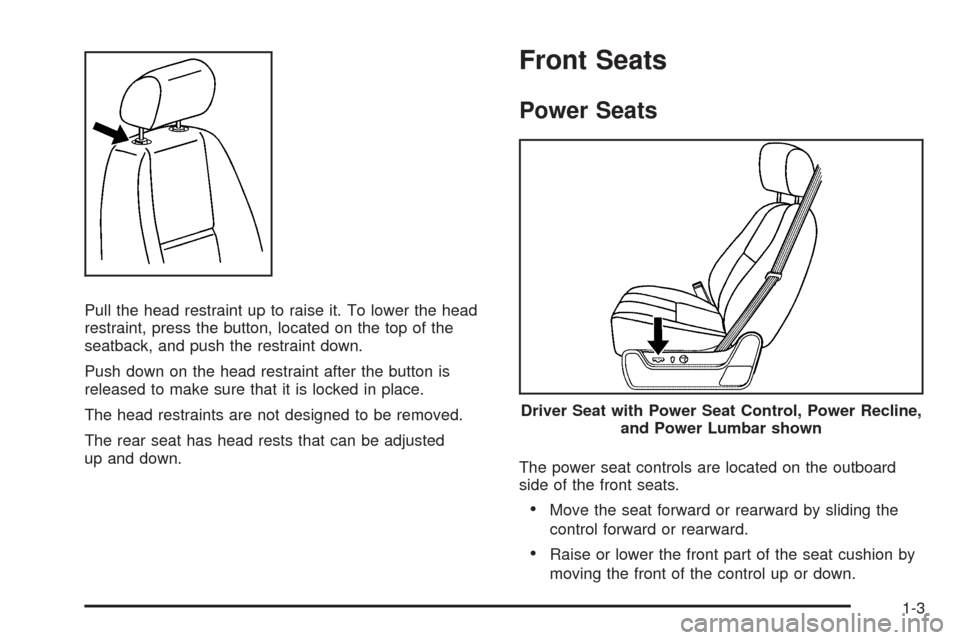
Pull the head restraint up to raise it. To lower the head
restraint, press the button, located on the top of the
seatback, and push the restraint down.
Push down on the head restraint after the button is
released to make sure that it is locked in place.
The head restraints are not designed to be removed.
The rear seat has head rests that can be adjusted
up and down.
Front Seats
Power Seats
The power seat controls are located on the outboard
side of the front seats.
Move the seat forward or rearward by sliding the
control forward or rearward.
Raise or lower the front part of the seat cushion by
moving the front of the control up or down.
Driver Seat with Power Seat Control, Power Recline,
and Power Lumbar shown
1-3
Page 14 of 546

Easy Exit Seat
The control for this feature is located on the driver’s
door between buttons 1 and 2.
With the vehicle in P (Park), the exit position can be
recalled by pressing the exit button. You will hear
a single beep. The driver’s seat will move back.
If the easy exit seat feature is on in the Driver
Information Center (DIC), automatic seat movement will
occur when the key is removed from the ignition.
See “EASY EXIT SEAT” underDIC Vehicle
Customization on page 3-56for more information.
Further programming for the memory seat feature can
be done using the DIC. You can select the automatic
easy exit seat feature or the remote memory seat recall
feature.
For programming information, seeDIC Vehicle
Customization on page 3-56.
Power Reclining Seatbacks
The controls for the power reclining seatback are
located on the outboard side of the front seats behind
the power seat control.
To recline the seatback, tilt the top of the control
rearward.
To bring the seatback forward, tilt the top of the
control forward. Driver’s Seat with Power Seat Control, Power
Recline, and Power Lumbar shown
1-8
Page 35 of 546

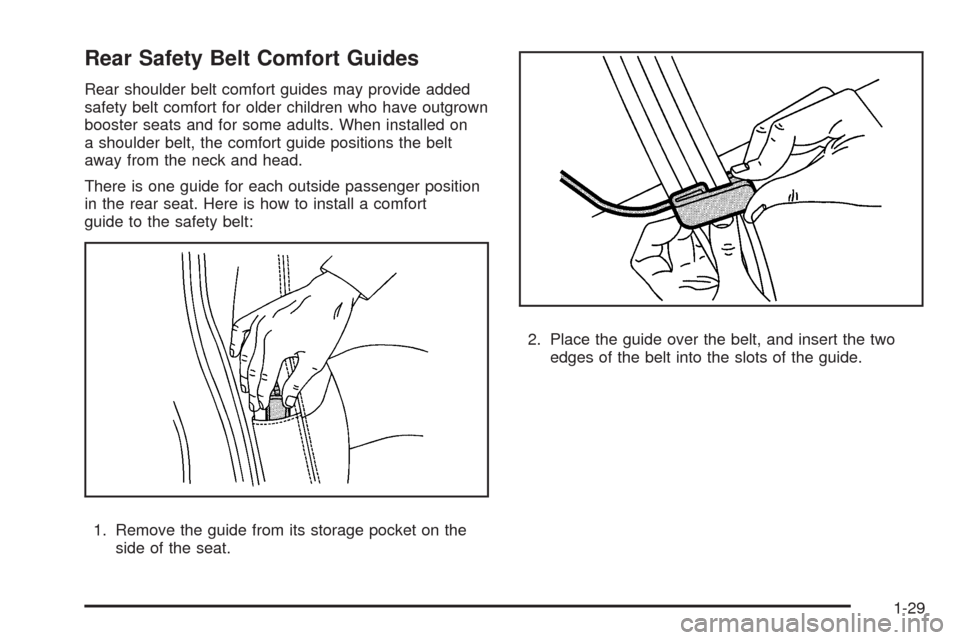
Rear Safety Belt Comfort Guides
Rear shoulder belt comfort guides may provide added
safety belt comfort for older children who have outgrown
booster seats and for some adults. When installed on
a shoulder belt, the comfort guide positions the belt
away from the neck and head.
There is one guide for each outside passenger position
in the rear seat. Here is how to install a comfort
guide to the safety belt:
1. Remove the guide from its storage pocket on the
side of the seat.2. Place the guide over the belt, and insert the two
edges of the belt into the slots of the guide.
1-29
Page 37 of 546

To remove and store the comfort guide, squeeze the
belt edges together so that the safety belt can be
removed from the guide. Slide the guide into its storage
clip on the interior body or storage pocket on the
side of the seat.
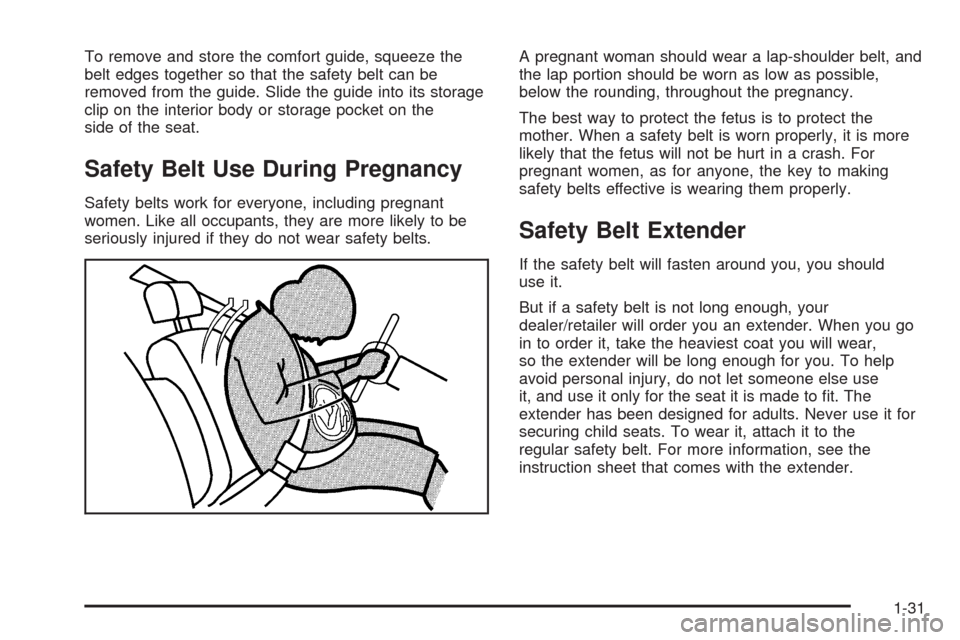
Safety Belt Use During Pregnancy
Safety belts work for everyone, including pregnant
women. Like all occupants, they are more likely to be
seriously injured if they do not wear safety belts.A pregnant woman should wear a lap-shoulder belt, and
the lap portion should be worn as low as possible,
below the rounding, throughout the pregnancy.
The best way to protect the fetus is to protect the
mother. When a safety belt is worn properly, it is more
likely that the fetus will not be hurt in a crash. For
pregnant women, as for anyone, the key to making
safety belts effective is wearing them properly.
Safety Belt Extender
If the safety belt will fasten around you, you should
use it.
But if a safety belt is not long enough, your
dealer/retailer will order you an extender. When you go
in to order it, take the heaviest coat you will wear,
so the extender will be long enough for you. To help
avoid personal injury, do not let someone else use
it, and use it only for the seat it is made to �t. The
extender has been designed for adults. Never use it for
securing child seats. To wear it, attach it to the
regular safety belt. For more information, see the
instruction sheet that comes with the extender.
1-31
Page 83 of 546

To replace the battery:
1. Separate the transmitter with a �at, thin object
inserted into the notch, located above the
metal base.
2. Remove the old battery. Do not use a metal object.
3. Insert the new battery, positive side facing up.
Replace with a CR2032 or equivalent battery.
4. Snap the transmitter back together.
Remote Vehicle Start
This feature allows you to start the engine from outside
of the vehicle. It may also start up the vehicle’s
heating or air conditioning systems and rear window
defogger. Normal operation of the system will return
after the key is turned to the ON/RUN position.
During a remote start, the climate control system will
default to a heating or cooling mode depending on the
outside temperatures.
During a remote start, if your vehicle has an automatic
climate control system and heated seats, the heated
seats will turn on during colder outside temperatures and
will shut off when the key is turned to ON/RUN. If
your vehicle does not have an automatic climate control
system, during remote start, you will need to manually
turn the heated seats on and off. SeeHeated Seats
on page 1-5for additional information.Laws in some communities may restrict the use of
remote starters. For example, some laws may require a
person using the remote start to have the vehicle in
view when doing so. Check local regulations for
any requirements on remote starting of vehicles.
Do not use the remote start feature if your vehicle is low
on fuel. Your vehicle may run out of fuel.
If your vehicle has the remote start feature, the RKE
transmitter functions will have an increased range
of operation. However, the range may be less while the
vehicle is running.
There are other conditions which can affect the
performance of the transmitter, seeRemote Keyless
Entry (RKE) System on page 2-4for additional
information.
/(Remote Start):This button will be on the RKE
transmitter if you have remote start.
To start the vehicle using the remote start feature:
1. Aim the transmitter at the vehicle.
2. Press and release the transmitter’s lock button. The
vehicle’s doors will lock. Immediately press and
hold the transmitter’s remote start button until the
turn signal lights �ash. If you cannot see the
vehicle’s lights, press and hold the remote start
button for two to four seconds. Pressing the remote
start button again after the vehicle has started
will turn the engine off.
2-7
Page 89 of 546

Rear Glass Removal and Storage
{CAUTION:
If the removable rear glass is not stored properly,
it could be thrown about the vehicle in a crash or
sudden maneuver. People in the vehicle could be
injured. Whenever you store the rear glass in the
vehicle, always be sure that it is stored securely in
the Midgate
®storage pocket.
Do not remove the rear glass when the rear defroster is
on. If you remove the rear glass with the rear defroster
on, you may see a discharge spark coming from
the latch area.
To remove the rear glass do the following:
1. Fold the rear seats. SeeRear Seat Operation on
page 1-10for more information. The front seats
may have to be moved forward slightly to allow the
rear seats to fold completely.
Although the rear glass can be removed without
folding the rear seats, you will not be able to access
the rear glass storage pocket. Be sure to fold the
seats before removing the rear glass.2. Squeeze and pull down the latch levers (A), located
near the upper corners of the rear glass, to unlatch.
Once unlatched, the glass-catch release button (C)
will catch the rear glass and prevent it from
falling forward.
2-13
Page 94 of 546

6. Push the rear glass �at against the window frame
and push each latch lever up until it locks. You
should hear a click when each latch lever locks
correctly.
Lowering the Midgate®with the Rear
Glass in Place
The Midgate®can be lowered to allow the cargo area of
your vehicle to extend into the cab. The rear glass
can be either installed in its normal position, or it can be
removed and stored in the rear glass storage pocket.
To lower the Midgate
®, do the following:
1. Fold the rear seats. The front seats might have to
be moved forward slightly to allow the rear seats to
fold. SeeRear Seat Operation on page 1-10for
more information.
2-18
Page 142 of 546

Storage Areas
Glove Box
Lift up on the glove box lever to open it.
Cupholders
Cupholders are located in the center console for the
front passengers and on the back of the center console
for the rear passengers.
Press down and release the access door to use the
front cupholders. Push the door back down to close it.
Pull down on the door located on the back of the
console to use the rear cupholders.
Push down and then back to remove the front cupholder
to remove it for cleaning.
Instrument Panel Storage
For vehicles with a front closed storage area, located on
the instrument panel above the compact disc changer,
open it by pressing the bottom of the lid. Press down on
the lid to close the storage area.
Center Console Storage
The vehicle has a console compartment between the
bucket seats. The console has both an upper and lower
storage bin that can be opened by lifting up on the
latches located at the front of the console lids. An
accessory power outlet may be located inside the
console, seeAccessory Power Outlet(s) on page 3-20.
The rear of the console also has a cupholder that
swings down for the rear seat passengers to use.
Luggage Carrier
For vehicles with a luggage carrier, it can be used to
load things on top of the vehicle.
The luggage carrier has siderails attached to the roof. It
might also have crossrails which can be moved back
and forth to help secure cargo. Tie and secure the load
to the siderails or siderail supports.
Notice:Loading cargo on the luggage carrier that
weighs more than 200 lbs (91 kg) or hangs over
the rear or sides of the vehicle can damage
the vehicle. Load cargo so that it rests on the slats
as far forward as possible and against the side
rails, making sure to fasten it securely.
2-66
Page 180 of 546

A high electrical load occurs when several of the
following are on, such as: headlamps, high beams, fog
lamps, rear window defogger, climate control fan at
high speed, heated seats, engine cooling fans, trailer
loads, and loads plugged into accessory power outlets.
EPM works to prevent excessive discharge of the
battery. It does this by balancing the generator’s output
and the vehicle’s electrical needs. It can increase
engine idle speed to generate more power, whenever
needed. It can temporarily reduce the power demands of
some accessories.
Normally, these actions occur in steps or levels, without
being noticeable. In rare cases at the highest levels
of corrective action, this action may be noticeable to the
driver. If so, a Driver Information Center (DIC)
message might be displayed, such as BATTERY
SAVER ACTIVE, BATTERY VOLTAGE LOW, or LOW
BATTERY. If this message is displayed, it is
recommended that the driver reduce the electrical loads
as much as possible. SeeDIC Warnings and Messages
on page 3-48.
Battery Run-Down Protection
This feature shuts off the dome lamps if they are left
on for more than 10 minutes when the ignition is
in LOCK/OFF. This helps to prevent the battery from
running down.
Accessory Power Outlet(s)
Accessory power outlets can be used to connect
auxiliary electrical equipment, such as a cellular
telephone.
One accessory power outlet is located inside the center
�oor console. Lift up on the lower latch located at the
front of the console lid to access the accessory
power outlet.
There may also be an accessory power outlet located
on the rear of the center �oor console above the
cupholder.
Remove the protective cap to use the accessory power
outlet. When not in use, always cover the accessory
power outlet with the protective cap.
Do not try to put the cigarette lighter in any of the
accessory power outlets.
Notice:If electrical devices are left plugged into a
power outlet, the battery may drain causing the
vehicle not to start or damage to the battery. This
would not be covered by the warranty. Always unplug
all electrical devices when turning off the vehicle.
Certain electrical accessories may not be compatible
with the accessory power outlet and could result
in blown vehicle or adapter fuses. If you experience a
problem see your dealer/retailer for additional
information on accessory power outlets.
3-20
Page 186 of 546

This mode recirculates and helps to quickly cool the air
inside the vehicle. It can be used to help prevent
outside air and odors from entering the vehicle.
The recirculation mode cannot be used with �oor, defog,
or defrost modes. If recirculation is selected with one
of those modes, the indicator light �ashes three
times and then turns off. The air conditioning
compressor also comes on when this mode is activated.
While in recirculation mode the windows may fog
when the weather is cold and damp. To clear the fog,
select either the defog or defrost mode and increase the
fan speed.
The recirculation mode can also be turned off by turning
off the ignition.
Rear Window Defogger
The rear window defogger uses a warming grid to
remove fog from the rear window.
<(Rear Window Defogger):Press to turn the rear
window defogger on or off. It automatically turns off after
it has been activated. The defogger can also be
turned off by turning off the engine. Do not drive the
vehicle until all the windows are clear.Notice:Do not use a razor blade or sharp object to
clear the inside rear window. Do not adhere
anything to the defogger grid lines in the rear glass.
These actions may damage the rear defogger.
Repairs would not be covered by your warranty.
Heated Mirrors:For vehicles with heated outside
rearview mirrors, the mirrors heat to help clear fog or
frost from the surface of the mirror when the rear window
defog button is pressed. SeeOutside Heated Mirrors
on page 2-49.
Heated or Cooled Seats:For vehicles with heated
seats or heated and cooled seats, seeHeated Seats on
page 1-5orHeated and Cooled Seats on page 1-6.
Outlet Adjustment
Your vehicle has air outlets located in the center and on
the side of the instrument panel that allow you to
adjust the direction and amount of air�ow inside the
vehicle. There are also air outlets on the rear of
the center console for rear seat passenger use. Move
the louvers up or down. Use the rotary knob next
to or underneath the outlet to close the louvers. For the
most efficient air�ow and temperature control, keep
the outlet in the fully opened position.
3-26