maintenance schedule CADILLAC ESCALADE EXT 2010 3.G Owners Manual
[x] Cancel search | Manufacturer: CADILLAC, Model Year: 2010, Model line: ESCALADE EXT, Model: CADILLAC ESCALADE EXT 2010 3.GPages: 580, PDF Size: 6.23 MB
Page 2 of 580

2010 Cadillac Escalade EXT Owner ManualM
Service and Appearance Care. . . . . . . . . . . . . . . . . . . 7-1
Service . . . . . . . . . . . . . . . . . . . . . . . . . . . . . . . . . . . . . . . . . . . 7-4
Fuel . . . . . . . . . . . . . . . . . . . . . . . . . . . . . . . . . . . . . . . . . . . . . . 7-6
Checking Things Under the Hood . . . . . . . . . . . . . . . 7-12
All-Wheel Drive . . . . . . . . . . . . . . . . . . . . . . . . . . . . . . . . . 7-47
Rear Axle . . . . . . . . . . . . . . . . . . . . . . . . . . . . . . . . . . . . . . . 7-48
Front Axle . . . . . . . . . . . . . . . . . . . . . . . . . . . . . . . . . . . . . . . 7-49
Headlamp Aiming . . . . . . . . . . . . . . . . . . . . . . . . . . . . . . . 7-50
Bulb Replacement . . . . . . . . . . . . . . . . . . . . . . . . . . . . . . 7-53
Windshield Wiper Blade Replacement . . . . . . . . . . . 7-56
Tires . . . . . . . . . . . . . . . . . . . . . . . . . . . . . . . . . . . . . . . . . . . . 7-57
Appearance Care . . . . . . . . . . . . . . . . . . . . . . . . . . . . . . . 7-96 Vehicle Identification . . . . . . . . . . . . . . . . . . . . . . . . . . . 7-104
Electrical System . . . . . . . . . . . . . . . . . . . . . . . . . . . . . . 7-104
Capacities and Specifications . . . . . . . . . . . . . . . . . . 7-112
Maintenance Schedule . . . . . . . . . . . . . . . . . . . . . . . . . . . 8-1
Maintenance Schedule . . . . . . . . . . . . . . . . . . . . . . . . . . . 8-2
Customer Assistance Information . . . . . . . . . . . . . . . 9-1
Customer Assistance and Information . . . . . . . . . . . . 9-2
Reporting Safety Defects . . . . . . . . . . . . . . . . . . . . . . . . 9-16
Vehicle Data Recording and Privacy . . . . . . . . . . . . . 9-18
Index . . . . . . . . . . . . . . . . . . . . . . . . . . . . . . . . . . . . i-1
Page 30 of 580
You may notice during cooler conditions that the low tire
pressure warning light will appear when the vehicle is
first started and then turn off as you drive. This may be
an early indicator that your tire pressures are getting
low and the tires need to be inflated to the proper
pressure.
Note:The Tire Pressure Monitor can alert you about
low tire pressure, but it does not replace normal monthly
tire maintenance. It is the driver ’s responsibility to
maintain correct tire pressures.
See Tire Pressure Monitor System
on page 7‑66and
Tire Pressure Monitor Operation on page 7‑67.
Engine Oil Life System
The engine oil life system calculates engine oil life
based on vehicle use and displays a DIC message
when it is necessary to change the engine oil and filter.
The oil life system should be reset to 100% only
following an oil change.
Resetting the Oil Life System
1. Display the OIL LIFE REMAINING on the DIC.
2. Press and hold the SET/RESET button on the DIC for more than five seconds. The oil life will change
to 100%.
See Engine Oil Life System on page 7‑18.
Fuel E85 (85% Ethanol)
This vehicle has a yellow fuel cap and can use either
unleaded gasoline or ethanol fuel containing up to 85%
ethanol (E85). See Gasoline Octane
on page 7‑7and
Fuel E85 (85% Ethanol) on page 7‑8.
Driving for Better Fuel Economy
Driving habits can affect fuel mileage. Here are some
driving tips to get the best fuel economy possible.
.Avoid fast starts and accelerate smoothly.
.Brake gradually and avoid abrupt stops.
.Avoid idling the engine for long periods of time.
.When road and weather conditions are
appropriate, use cruise control, if equipped.
.Always follow posted speed limits or drive more
slowly when conditions require.
.Keep vehicle tires properly inflated.
.Combine several trips into a single trip.
.Replace the vehicle's tires with the same TPC
Spec number molded into the tire's sidewall near
the size.
.Follow recommended scheduled maintenance.
1-24
Page 100 of 580

Restraint System Check
Checking the Restraint Systems
Safety Belts
Now and then, check that the safety belt reminder light,
safety belts, buckles, latch plates, retractors, and
anchorages are all working properly.
Look for any other loose or damaged safety belt system
parts that might keep a safety belt system from doing its
job. See your dealer/retailer to have it repaired. Torn or
frayed safety belts may not protect you in a crash.
They can rip apart under impact forces. If a belt is torn
or frayed, get a new one right away.
Make sure the safety belt reminder light is working.
SeeSafety Belt Reminders
on page 4‑27for more
information.
Keep safety belts clean and dry. See Care of Safety
Belts
on page 7‑99.
Airbags
The airbag system does not need regularly scheduled
maintenance or replacement. Make sure the airbag
readiness light is working. See Airbag Readiness Light
on page 4‑28for more information.
Notice: If an airbag covering is damaged, opened,
or broken, the airbag may not work properly. Do not
open or break the airbag coverings. If there are any
opened or broken airbag covers, have the airbag
covering and/or airbag module replaced. For the
location of the airbag modules, see What Makes
an Airbag Inflate?
on page 2‑57. See your dealer/
retailer for service.
2-66
Page 217 of 580
Oil Pressure Light
{WARNING:
Do not keep driving if the oil pressure is low. The
engine can become so hot that it catches fire.
Someone could be burned. Check the oil as soon
as possible and have the vehicle serviced.
Notice: Lack of proper engine oil maintenance
can damage the engine. The repairs would not be
covered by the vehicle warranty. Always follow the
maintenance schedule in this manual for changing
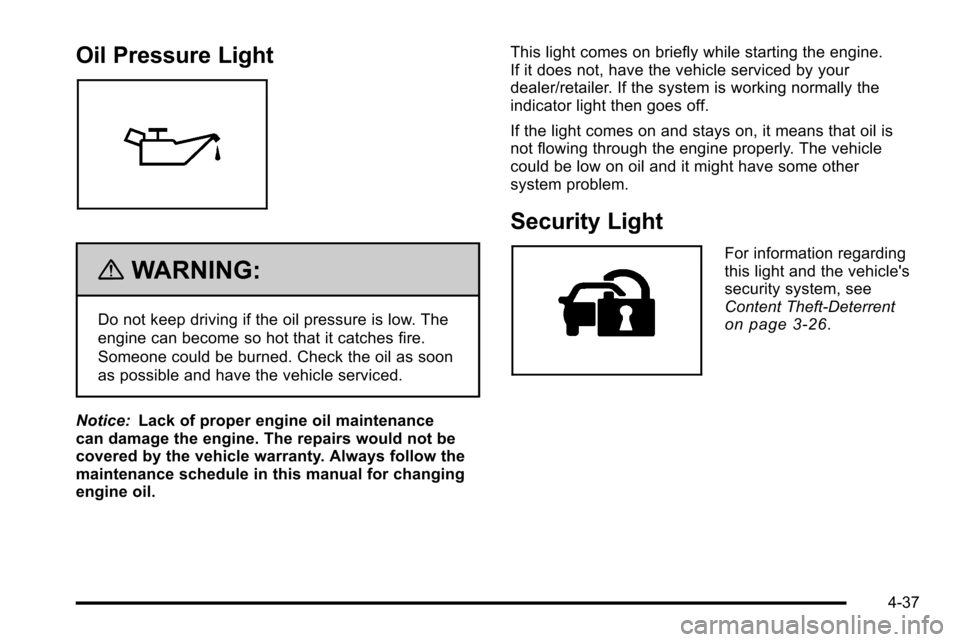
engine oil. This light comes on briefly while starting the engine.
If it does not, have the vehicle serviced by your
dealer/retailer. If the system is working normally the
indicator light then goes off.
If the light comes on and stays on, it means that oil is
not flowing through the engine properly. The vehicle
could be low on oil and it might have some other
system problem.
Security Light
For information regarding
this light and the vehicle's
security system, see
Content Theft-Deterrent
on page 3‑26.
4-37
Page 223 of 580
Vehicle Information Menu Items
T
(Vehicle Information):Press this button to scroll
through the following menu items:
Oil Life
Press the vehicle information button until OIL LIFE
REMAINING displays. This display shows an estimate
of the oil's remaining useful life. If you see 99% OIL
LIFE REMAINING on the display, that means 99% of
the current oil life remains. The engine oil life system
will alert you to change the oil on a schedule consistent
with your driving conditions.
When the remaining oil life is low, the CHANGE
ENGINE OIL SOON message will appear on the
display. See “CHANGE ENGINE OIL SOON” underDIC
Warnings and Messages
on page 4‑48. You should
change the oil as soon as you can. See Engine Oilon
page 7‑15. In addition to the engine oil life system
monitoring the oil life, additional maintenance is
recommended in the Maintenance Schedule in this
manual. See Scheduled Maintenance
on page 8‑3for
more information. Remember, you must reset the OIL LIFE display
yourself after each oil change. It will not reset itself.
Also, be careful not to reset the OIL LIFE display
accidentally at any time other than when the oil has just
been changed. It cannot be reset accurately until the
next oil change. To reset the engine oil life system, see
Engine Oil Life System on page 7‑18.
Units
Press the vehicle information button until UNITS
displays. This display allows you to select between
English or Metric units of measurement. Once in this
display, press the set/reset button to select between
ENGLISH or METRIC units. All of the vehicle
information will then be displayed in the unit of
measurement selected.
4-43
Page 228 of 580
DIC Warnings and Messages
Messages are displayed on the DIC to notify the driver
that the status of the vehicle has changed and that
some action may be needed by the driver to correct the
condition. Multiple messages may appear one after
another.
Some messages may not require immediate action, but
you can press any of the DIC buttons on the instrument
panel to acknowledge that you received the messages
and to clear them from the display.
Some messages cannot be cleared from the DIC
display because they are more urgent. These
messages require action before they can be cleared.
You should take any messages that appear on the
display seriously and remember that clearing the
messages will only make the messages disappear, not
correct the problem.
The following are the possible messages that can be
displayed and some information about them.
BATTERY LOW START VEHICLE
When the vehicle’s battery is severely discharged, this
message will display and four chimes will sound. Start
the vehicle immediately. If the vehicle is not started and
the battery continues to discharge, the climate controls,
heated seats, and audio systems will shut off and the
vehicle may require a jump start. These systems will
function again after the vehicle is started.
CHANGE ENGINE OIL SOON
This message displays when the engine oil needs to
be changed. When you change the engine oil, be sure
to reset the CHANGE ENGINE OIL SOON message.
See Engine Oil Life System
on page 7‑18for
information on how to reset the message. See Engine
Oil
on page 7‑15and Scheduled Maintenanceon
page 8‑3for more information.
DRIVER DOOR OPEN
This message displays and a chime sounds if the driver
door is not fully closed and the vehicle is shifted out of
P (Park). Stop and turn off the vehicle, check the door
for obstructions, and close the door again. Check to see
if the message still appears on the DIC.
4-48
Page 384 of 580

Driving in Water
{WARNING:
Driving through rushing water can be dangerous.
Deep water can sweep your vehicle downstream
and you and your passengers could drown. If it is
only shallow water, it can still wash away the
ground from under your tires, and you could lose
traction and roll the vehicle over. Do not drive
through rushing water.
Heavy rain can mean flash flooding, and flood waters
demand extreme caution.
Find out how deep the water is before driving through
it. Do not try it if it is deep enough to cover the wheel
hubs, axles, or exhaust pipe —you probably will not get
through. Deep water can damage the axle and other
vehicle parts.
If the water is not too deep, drive slowly through it. At
faster speeds, water splashes on the ignition system
and the vehicle can stall. Stalling can also occur if you
get the tailpipe under water. If the tailpipe is under
water, you will never be able to start the engine.
When going through water, remember that when the
brakes get wet, it might take longer to stop. See Driving
in Rain and on Wet Roads on page 6‑25.
After Off-Road Driving
Remove any brush or debris that has collected on
the underbody, chassis, or under the hood. These
accumulations can be a fire hazard.
After operation in mud or sand, have the brake linings
cleaned and checked. These substances can cause
glazing and uneven braking. Check the body structure,
steering, suspension, wheels, tires, and exhaust system
for damage and check the fuel lines and cooling system
for any leakage.
The vehicle requires more frequent service due to
off-road use. Refer to the Maintenance Schedule for
additional information.
Driving at Night
Night driving is more dangerous than day driving
because some drivers are likely to be impaired —by
alcohol or drugs, with night vision problems, or
by fatigue.
Night driving tips include:
.Drive defensively.
.Do not drink and drive.
.Reduce headlamp glare by adjusting the inside
rearview mirror.
6-24
Page 413 of 580
Maintenance When Trailer Towing
The vehicle needs service more often when pulling a
trailer. See this manual's Maintenance Schedule or
Index for more information. Things that are especially
important in trailer operation are automatic transmission
fluid, engine oil, axle lubricant, belts, cooling system
and brake system. It is a good idea to inspect these
before and during the trip.
Check periodically to see that all hitch nuts and bolts
are tight.
Trailer Wiring Harness
Heavy-Duty Trailer Wiring Harness Package
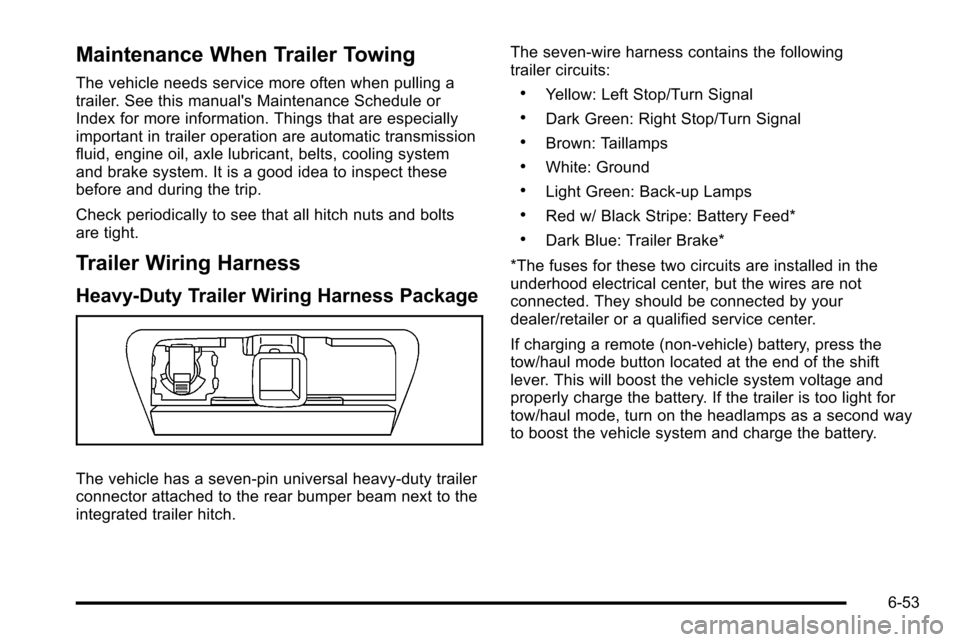
The vehicle has a seven-pin universal heavy-duty trailer
connector attached to the rear bumper beam next to the
integrated trailer hitch.The seven-wire harness contains the following
trailer circuits:
.Yellow: Left Stop/Turn Signal
.Dark Green: Right Stop/Turn Signal
.Brown: Taillamps
.White: Ground
.Light Green: Back-up Lamps
.Red w/ Black Stripe: Battery Feed*
.Dark Blue: Trailer Brake*
*The fuses for these two circuits are installed in the
underhood electrical center, but the wires are not
connected. They should be connected by your
dealer/retailer or a qualified service center.
If charging a remote (non-vehicle) battery, press the
tow/haul mode button located at the end of the shift
lever. This will boost the vehicle system voltage and
properly charge the battery. If the trailer is too light for
tow/haul mode, turn on the headlamps as a second way
to boost the vehicle system and charge the battery.
6-53
Page 434 of 580

Engine Air Cleaner/Filter
SeeEngine Compartment Overviewon page 7‑14for
the location of the engine air cleaner/filter.
Inspect the air cleaner/filter every other oil change and
replace it at the first oil change after each 50,000 mile
(80 000 km) interval. See Scheduled Maintenance
on
page 8‑3for more information. If driving on dusty/dirty
conditions, inspect the filter at each engine oil change.
How to Inspect the Engine Air
Cleaner/Filter
To inspect the air cleaner/filter, remove the engine
air cleaner/filter from the vehicle by following
Steps 1 through 6. When the engine air cleaner/filter
is removed, lightly shake it to release loose dust and
dirt. If the engine air cleaner/filter remains caked with
dirt, a new filter is required. Never use compressed air
to clean the filter.
Replacing the Engine Air Cleaner/Filter
1. Locate the air cleaner/
filter assembly . See
Engine Compartment
Overview
on
page 7‑14.
2. Loosen the four screws on the cover of the housing and lift up the cover.
7-20
Page 436 of 580

Automatic Transmission Fluid
When to Check and Change Automatic
Transmission Fluid
It is usually not necessary to check the transmission
fluid level. The only reason for fluid loss is a
transmission leak or overheating the transmission.
If you suspect a small leak, then use the following
checking procedures to check the fluid level. However,
if there is a large leak, then it may be necessary to have
the vehicle towed to a dealer/retailer service department
and have it repaired before driving the vehicle further.
Notice:Use of the incorrect automatic transmission
fluid may damage the vehicle, and the damages may
not be covered by the vehicle's warranty. Always
use the automatic transmission fluid listed in
Recommended Fluids and Lubricants on page 8‑10.
Change the fluid and filter at the intervals listed in the
Maintenance Schedule. See Scheduled Maintenance
on page 8‑3. Be sure to use the transmission fluid
listed in Recommended Fluids and Lubricantson
page 8‑10.
How to Check Automatic Transmission
Fluid
Notice: Too much or too little fluid can damage your
transmission. Too much can mean that some of the
fluid could come out and fall on hot engine parts or
exhaust system parts, starting a fire. Too little fluid
could cause the transmission to overheat. Be sure
to get an accurate reading if you check your
transmission fluid.
Before checking the fluid level, prepare the vehicle as
follows:
1. Start the engine and park the vehicle on a level surface. Keep the engine running.
2. Apply the parking brake and place the shift lever in P (Park).
3. With your foot on the brake pedal, move the shift lever through each gear range, pausing for about
three seconds in each range. Then, move the shift
lever back to P (Park).
7-22