window CADILLAC ESCALADE EXT 2010 3.G Owner's Manual
[x] Cancel search | Manufacturer: CADILLAC, Model Year: 2010, Model line: ESCALADE EXT, Model: CADILLAC ESCALADE EXT 2010 3.GPages: 580, PDF Size: 6.23 MB
Page 127 of 580

Programming the Power Windows
If the battery on the vehicle has been recharged,
disconnected, or is not working, you will need to
reprogram each front power window for the express-up
feature to work. Before reprogramming, replace or
recharge the vehicle's battery.
To program each front window, follow these steps:1. With the ignition in ACC/ACCESSORY, ON/RUN, or when Retained Accessory Power (RAP) is
active, close all doors.
2. Press and hold the power window switch until the window is fully open.
3. Pull the power window switch up until the window is fully closed.
4. Continue holding the switch up for approximately two seconds after the window is completely closed.
The window is now reprogrammed. Repeat the process
for the other windows.
Window Lockout
o (Window Lockout) : The rear window lockout button
is located on the driver door near the window switches.
Press the right side of the button to disable the rear
window controls. The light on the button will illuminate,
indicating the feature is in use. The rear windows still
can be raised or lowered using the driver window
switches when the lockout feature is active.
To restore power to the rear windows, press the button
again. The light on the button will go out.
Sun Visors
Sun Visors with Slide Rod
Your vehicle may have this feature. Pull the sun visor
down to block glare. Detach the sun visor from the
center mount and slide it along the rod from side-to-side
to cover the driver or passenger side of the front
window. Swing the sun visor to the side to cover the
side window. It can also be moved along the rod from
side-to-side in this position.
3-25
Page 128 of 580

Sun Visors with Fixed Rod and Pull‐out
Extension
Your vehicle may have this feature. Pull the sun visor
down to block glare. Pull the sun visor extender out for
additional coverage. Detach the sun visor from the
center mount and swing it to the side to cover the side
window.
Lighted Visor Vanity Mirror
Your vehicle has lighted visor vanity mirrors on both the
driver's and passenger's sun visors. Pull the sun visor
down and lift the mirror cover to turn the lamps on.
Theft-Deterrent Systems
Vehicle theft is big business, especially in some cities.
This vehicle has theft-deterrent features, however, they
do not make it impossible to steal.
Content Theft-Deterrent
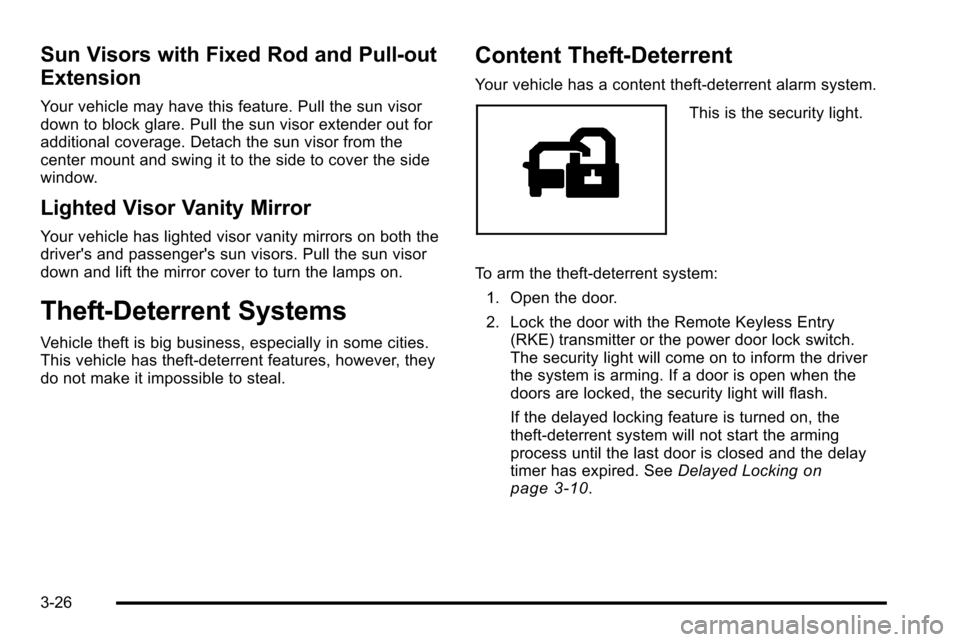
Your vehicle has a content theft-deterrent alarm system.
This is the security light.
To arm the theft-deterrent system: 1. Open the door.
2. Lock the door with the Remote Keyless Entry (RKE) transmitter or the power door lock switch.
The security light will come on to inform the driver
the system is arming. If a door is open when the
doors are locked, the security light will flash.
If the delayed locking feature is turned on, the
theft‐deterrent system will not start the arming
process until the last door is closed and the delay
timer has expired. See Delayed Locking
on
page 3‑10.
3-26
Page 129 of 580

3. Close all doors. The security light should go offafter about 30 seconds. The alarm is not armed
until the security light goes off.
The content theft deterrent system does not
sense if the midgate or tailgate are open or ajar,
therefore, vehicle contents may not be protected if
the midgate is left open or ajar.
If a locked driver door is opened without using the RKE
transmitter, a ten second pre-alarm will occur. The horn
will chirp and the lights will flash. If the key is not placed
in the ignition and turned to START or the door is not
unlocked by pressing the unlock button on the RKE
transmitter during the ten second pre-alarm, the alarm
will go off. Your vehicle's headlamps will flash and the
horn will sound for about 30 seconds, then will turn off
to save the battery power.
The theft-deterrent system will not activate if the doors
are locked with the vehicle's key or the manual door
lock. It activates only if you use the power door lock
switch with the door open or the RKE transmitter. You
should also remember that you can start your vehicle
with the correct ignition key if the alarm has been
set off. To avoid setting off the alarm by accident:
.If you do not want to activate the theft-deterrent
system, the vehicle should be locked with the door
key after the doors are closed.
.Always unlock the doors with the RKE transmitter.
Unlocking a door any other way will set off the
alarm if it is armed.
If you set off the alarm by accident, press unlock on the
RKE transmitter or place the key in the ignition and turn
it to START to turn off the alarm. The alarm will not stop
if you try to unlock a door any other way.
Testing the Alarm
To test the alarm: 1. From inside the vehicle, lower the driver's window and open the driver's door.
2. Activate the system by locking the doors with the power door lock switch while the door is open,
or with the RKE transmitter.
3. Get out of the vehicle, close the door and wait for the security light to go out.
4. Then reach in through the window, unlock the door with the manual door lock and open the door. This
should set off the alarm.
While the alarm is set, the power door unlock switch will
not work.
3-27
Page 134 of 580

D (START) :This is the position that starts the engine.
When the engine starts, release the key. The ignition
switch returns to ON/RUN for driving.
A warning tone will sound when the driver door is
opened, the ignition is in ACC/ACCESSORY or
LOCK/OFF and the key is in the ignition.
Retained Accessory Power (RAP)
The following vehicle accessories can be used for up to
10 minutes after the engine is turned off:
.Audio System
.Power Windows
.OnStar®System (if equipped)
.Sunroof (if equipped)
These features work when the key is in ON/RUN or
ACC/ACCESSORY. Once the key is turned from
ON/RUN to LOCK/OFF, the windows and sunroof
continue to work up to 10 minutes until any door is
opened. The radio continues to work for up to
10 minutes or until the driver door is opened.
Starting the Engine
Move the shift lever to P (Park) or N (Neutral). The
engine will not start in any other position. To restart
the engine when the vehicle is already moving, use
N (Neutral) only.
Notice: Do not try to shift to P (Park) if the vehicle
is moving. If you do, you could damage the
transmission. Shift to P (Park) only when the vehicle
is stopped.
Starting Procedure
1. With your foot off the accelerator pedal, turn the ignition to START. When the engine starts, let
go of the key. The idle speed will slow down
as the engine warms. Do not race the engine
immediately after starting it. Operate the engine
and transmission gently to allow the oil to warm
up and lubricate all moving parts.
3-32
Page 146 of 580

Engine Exhaust
{WARNING:
Engine exhaust contains Carbon Monoxide (CO)
which cannot be seen or smelled. Exposure to CO
can cause unconsciousness and even death.
Exhaust may enter the vehicle if:
.The vehicle idles in areas with poor ventilation
(parking garages, tunnels, deep snow that
may block underbody airflow or tail pipes).
.The exhaust smells or sounds strange or
different.
.The exhaust system leaks due to corrosion or
damage.
.The vehicle’s exhaust system has been
modified, damaged or improperly repaired.
.There are holes or openings in the vehicle
body from damage or after-market
modifications that are not completely sealed.(Continued)
WARNING: (Continued)
If unusual fumes are detected or if it is suspected
that exhaust is coming into the vehicle:
.Drive it only with the windows
completely down.
.Have the vehicle repaired immediately.
Never park the vehicle with the engine running in
an enclosed area such as a garage or a building
that has no fresh air ventilation.
Running the Vehicle While Parked
It is better not to park with the engine running. But if you
ever have to, here are some things to know.
{WARNING:
Idling a vehicle in an enclosed area with poor
ventilation is dangerous. Engine exhaust may
enter the vehicle. Engine exhaust contains
Carbon Monoxide (CO) which cannot be seen
or smelled. It can cause unconsciousness and (Continued)
3-44
Page 149 of 580

Turn Signal Indicator
The vehicle has a turn signal indicator on the mirror. An
arrow on the mirror flashes in the direction of the turn or
lane change.
Park Tilt Mirrors
If the vehicle has the memory package, the passenger
and/or driver mirror tilts to a preselected position when
the vehicle is in R (Reverse). This feature lets the driver
view the curb when parallel parking. The mirror(s) return
to the original position when the vehicle is shifted out of
R (Reverse), or the ignition is turned off or to
OFF/LOCK.
Turn this feature on or off through the Driver Information
Center (DIC). SeeDIC Vehicle Customization
on
page 4‑56for more information.
Outside Convex Mirror
{WARNING:
A convex mirror can make things, like other
vehicles, look farther away than they really are.
If you cut too sharply into the right lane, you could
hit a vehicle on the right. Check the inside mirror
or glance over your shoulder before changing
lanes.
The passenger side mirror is convex shaped. A convex
mirror's surface is curved so more can be seen from the
driver seat.
Outside Heated Mirrors
<(Rear Window Defogger): Press to heat the
mirrors.
See “Rear Window Defogger” underDual Automatic
Climate Control System
on page 4‑20for more
information.
3-47
Page 164 of 580

Do not exceed the maximum vehicle capacity when
loading the vehicle. For more information on vehicle
capacity and loading, seeLoading the Vehicle
on
page 6‑32.
.If small heavy objects are placed on the roof, cut a
piece of 3/8 inch plywood to fit inside the crossrails
and siderails to spread the load. Tie the plywood to
the siderail supports.
.Tie the load and secure it to the crossrails or the
siderail supports. Use the crossrails only to keep
the load from sliding. To move a crossrail, lift the
release lever up, on both sides of the rail. Then
slide the crossrail to the desired position balancing
the force side to side. Press the release lever
down on both sides of the rail, down to tighten it.
Try to slide the crossrail back and forth slightly to
make sure it is tight.
.To carry long items, move the crossrails as far
apart as possible. Tie the load to the crossrails and
the siderails or siderail supports. Also tie the load
to the bumpers, but do not tie the load so tightly
that the crossrails or siderails are damaged.
.After moving a crossrail, be sure it is securely
locked into the siderail.
A Center High-Mounted Stoplamp (CHMSL) is located
above the rear window glass.
Make sure items loaded on the roof of the vehicle do
not block or damage the CHMSL.
Rear Seat Armrest
For vehicle with an armrest/storage compartment
located by the second row seat, pull the loop at the top
of the armrest out to lower the armrest.
Push the button on the front of the armrest and pull the
top up to open the compartment.
Cargo Cover Panels
The vehicle has a three-piece cargo cover system with
cargo panels that can be removed and stored in the
cargo area of the vehicle.
{WARNING:
Improperly stored cargo cover panels could be
thrown about the vehicle during a collision or
sudden maneuver. Someone could be injured.
If a panel is removed, always store it in the proper
storage location. When putting it back, always
make sure that it is securely reattached.
Notice: Exceeding the weight limit of 250 lbs
(113 kg) can damage the cargo covers, and the
repairs would not be covered by the vehicle
warranty. Do not put anything on top of the cargo
covers over the weight limit.
3-62
Page 173 of 580

4. Take the secondary strap and wrap it around thefolded webbing , forming a package. Finally, attach
the hooks to the webbing and place inside the top
box storage compartment.
Cargo Tie Downs
Cargo tie downs in the rear cargo area can be used to
secure cargo.
All-Weather Cargo Area
The vehicle's cargo area can be used in many different
configurations—cargo panels on or off, Midgate®up
or down, rear window in or out. It has features that
help resist the elements and help protect cargo. It is
designed to quickly direct water through the top drain
grates, side rail channels, catch cups, Midgate
®drain,
cargo area floor drains and the rubber cargo mat.
3-71
Page 175 of 580

Top Drain Grates–Removal and
Cleaning
The top drain grates are located near the rear window
on both sides of the vehicle. Clean the grates and
drains if there is a blockage. To remove each drain grate:
1. Remove the cargo panels. See Cargo Cover
Panels
on page 3‑62for more information.
2. Grasp the edges of the grate and pull it out from the vehicle. Flush the drain with clean water.
3-73
Page 186 of 580

Windshield Wipers
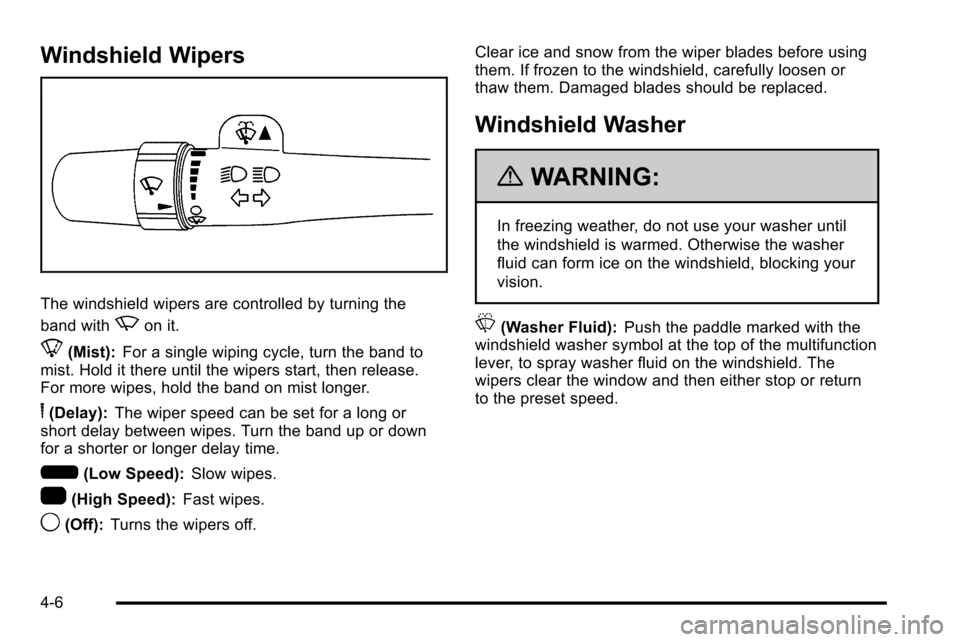
The windshield wipers are controlled by turning the
band with
zon it.
8(Mist):For a single wiping cycle, turn the band to
mist. Hold it there until the wipers start, then release.
For more wipes, hold the band on mist longer.
6(Delay): The wiper speed can be set for a long or
short delay between wipes. Turn the band up or down
for a shorter or longer delay time.
6(Low Speed): Slow wipes.
1(High Speed): Fast wipes.
9(Off):Turns the wipers off. Clear ice and snow from the wiper blades before using
them. If frozen to the windshield, carefully loosen or
thaw them. Damaged blades should be replaced.
Windshield Washer
{WARNING:
In freezing weather, do not use your washer until
the windshield is warmed. Otherwise the washer
fluid can form ice on the windshield, blocking your
vision.
L(Washer Fluid):
Push the paddle marked with the
windshield washer symbol at the top of the multifunction
lever, to spray washer fluid on the windshield. The
wipers clear the window and then either stop or return
to the preset speed.
4-6