key CADILLAC ESCALADE EXT 2010 3.G Owner's Guide
[x] Cancel search | Manufacturer: CADILLAC, Model Year: 2010, Model line: ESCALADE EXT, Model: CADILLAC ESCALADE EXT 2010 3.GPages: 580, PDF Size: 6.23 MB
Page 152 of 580
.A trailer was attached to the vehicle, or a bicycle
or an object was hanging out of the tailgate during
the last drive cycle. Once the attached object is
removed and the tailgate is raised, URPA will
return to normal operation.
.A tow bar is attached to the vehicle.
.The vehicle's bumper is damaged. Take the vehicle
to your dealer/retailer to repair the system.
.Other conditions may affect system performance,
such as vibrations from a jackhammer or the
compression of air brakes on a very large truck.
If the system is still disabled, after driving forward at
least 40 km/h (25 mph), take the vehicle to your dealer/
retailer.
Rear Vision Camera (RVC)
This vehicle may have a Rear Vision Camera system.
Read this entire section before using it.
The rear vision camera system is designed to help
the driver when backing up by displaying a view of the
area behind the vehicle. When the driver shifts the
vehicle into R (Reverse), the video image automatically
appears on the navigation screen. Once the driver shifts
out of R (Reverse), the navigation screen will go back to
the last screen that had been displayed, after a delay.
Turning the Rear Vision Camera System On
or Off
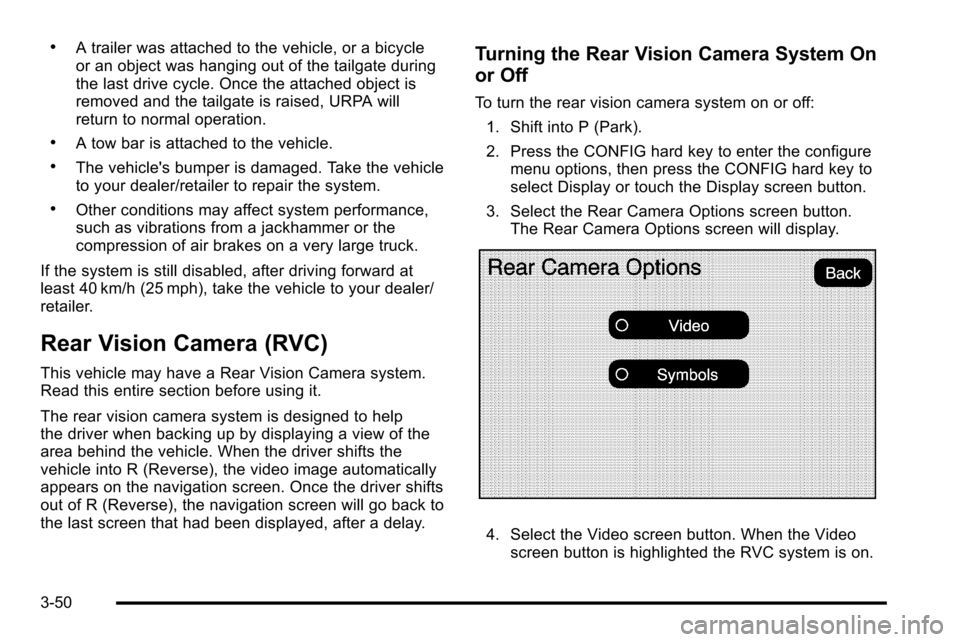
To turn the rear vision camera system on or off: 1. Shift into P (Park).
2. Press the CONFIG hard key to enter the configure menu options, then press the CONFIG hard key to
select Display or touch the Display screen button.
3. Select the Rear Camera Options screen button. The Rear Camera Options screen will display.
4. Select the Video screen button. When the Videoscreen button is highlighted the RVC system is on.
3-50
Page 153 of 580
The delay that is received after shifting out of
R (Reverse) is approximately 10 seconds. The delay
can be cancelled by performing one of the following:
.Pressing a hard key on the navigation system.
.Shifting in to P (Park).
.Reach a vehicle speed of 7 mph (11 km/h).
There is a message on the rear vision camera screen
that states “Check Surroundings for Safety”.
Adjusting the Brightness and Contrast of
the Screen
To adjust the brightness and contrast of the screen,
press the CONFIG hard key while the rear vision
camera image is on the display. Any adjustments made
will only affect the rear vision camera screen.
](Brightness) : Touch the + (plus) or –(minus)
screen buttons to increase or decrease the brightness
of the screen.
_(Contrast) : Touch the + (plus) or –(minus) screen
buttons to increase or decrease the contrast of the
screen.
Symbols
The navigation system may have a feature that lets the
driver view symbols on the navigation screen while
using the rear vision camera. The Ultrasonic Rear Park
Assist (URPA) system must not be disabled to use the caution symbols. If URPA has been disabled and the
symbols have been turned on, the Rear Parking Assist
Symbols Unavailable error message may display. See
Ultrasonic Rear Parking Assist (URPA) on page 3‑48.
The symbols appear when an object has been detected
by the URPA system. The symbol may cover the object
when viewing the navigation screen.
To turn the symbols on or off:
1. Make sure that URPA has not been disabled.
2. Shift into P (Park).
3. Press the CONFIG hard key to enter the configure menu options, then press the CONFIG hard key
repeatedly until Display is selected or touch the
Display screen button.
4. Select the Rear Camera Options screen button. The Rear Camera Options screen will display.
5. Touch the Symbols screen button. The screen button will be highlighted when on.
Rear Vision Camera Error Messages
Service Rear Vision Camera System : This message
can display when the system is not receiving
information it requires from other vehicle systems.
Rear Vision Camera System Unavailable : Displays
when the system is not receiving information it requires
from other vehicle systems.
3-51
Page 178 of 580

Cargo Area Floor Drains
The cargo mat has cut-outs for the four cargo-area floor
drains, located near the sides of the cargo area.
Flush the drains periodically through the cutouts to clear
debris and to allow water to drain from the cargo area.
If the cargo area is extremely dirty, lift up the edges of
the cargo floor mat or take the whole mat out and flush
the drains with water.
Top-Box Storage
The vehicle has top-box storage units on both sides of
the vehicle. The passenger side top box contains the
tools needed to change a flat tire.
Use the key to unlock or lock it. Press the key cylinder
button and swing the lid open. Turn on the cargo lamps,
if the vehicle has them, to light the inside of the cargo
area. SeeExterior Cargo Lamps
on page 4‑16for
more information.
3-76
Page 194 of 580

Cleaning the IntelliBeam®Light Sensor
The light sensor is located
on the inside of the
vehicle in front of the
inside rearview mirror.
Clean the light sensor window, periodically, using glass
cleaner on a soft cloth. Gently wipe the sensor window.
Do not spray glass cleaner directly on the surface of the
sensor window.
Headlamps on Reminder
If a door is open, a reminder chime sounds when the
headlamps or parking lamps are manually turned on
and the key is out of the ignition. To turn off the chime,
turn the headlamp switch to off or AUTO and then back
on, or close and re-open the door. In the AUTO mode,
the headlamps turn off once the ignition is in LOCK/OFF
or remains on until the headlamp delay ends (if enabled
in the DIC). See “Exit Lighting”underDIC Vehicle
Customization on page 4‑56.
Daytime Running Lamps (DRL)
Daytime Running Lamps (DRL) can make it easier for
others to see the front of your vehicle during the day.
Fully functional daytime running lamps are required on
all vehicles first sold in Canada.
The DRL system comes on when the following
conditions are met:
.The ignition is on.
.The exterior lamps control is in AUTO.
.The engine is running.
.The light sensor determines it is daytime.
When the DRL system is on, only the DRL lamps are
on. The taillamps, sidemarker, instrument panel lights,
and other lamps will not be on.
4-14
Page 197 of 580
Dome Lamps
The dome lamps come on when any door is opened.
They turn off after all the doors are closed.
The dome lamps can also be turned on by turning the
instrument panel brightness knob, located on the
instrument panel to the left of the steering column,
clockwise to the farthest position. In this position, the
dome lamps remain on whether a door is opened or
closed.
Dome Lamp Override
The dome lamp override button is located next to the
exterior lamps control.
k(Dome Off):Press the button in and the dome
lamps remain off when a door is opened. Press the
button again to return it to the extended position so
that the dome lamps come on when a door is opened.
Entry/Exit Lighting
The vehicle has an illuminated entry/exit feature.
The dome lamps come on if the dome override button is
in the out position, when a door is opened or the key is
removed from the ignition.
Reading Lamps
If the vehicle has front reading lamps, press the button
located next to the lamp to turn it on or off.
The vehicle may also have reading lamps in other
locations. The lamps cannot be adjusted.
Electric Power Management
The vehicle has Electric Power Management (EPM) that
estimates the battery's temperature and state of charge.
It then adjusts the voltage for best performance and
extended life of the battery.
When the battery's state of charge is low, the voltage is
raised slightly to quickly bring the charge back up.
When the state of charge is high, the voltage is lowered
slightly to prevent overcharging. If the vehicle has a
voltmeter gage or a voltage display on the Driver
Information Center (DIC), you may see the voltage
move up or down. This is normal. If there is a problem,
an alert will be displayed.
The battery can be discharged at idle if the electrical
loads are very high. This is true for all vehicles. This is
because the generator (alternator) may not be spinning
fast enough at idle to produce all the power that is
needed for very high electrical loads.
4-17
Page 210 of 580
Then, after several more seconds, the status indicator
will light either ON or OFF, or either the on or off symbol
to let you know the status of the right front passenger
frontal airbag.
If the word ON or the on symbol is lit on the passenger
airbag status indicator, it means that the right front
passenger frontal airbag is enabled (may inflate).
If the word OFF or the off symbol is lit on the airbag
status indicator, it means that the passenger sensing
system has turned off the right front passenger frontal
airbag.
If, after several seconds, both status indicator lights
remain on, or if there are no lights at all, there may be
a problem with the lights or the passenger sensing
system. See your dealer/retailer for service.
{WARNING:
If the airbag readiness light ever comes on and
stays on, it means that something may be wrong
with the airbag system. To help avoid injury to
yourself or others, have the vehicle serviced right
away. SeeAirbag Readiness Light
on page 4‑28
for more information, including important safety
information.
Charging System Light
This light comes on briefly
when the ignition key is
turned to START, but the
engine is not running, as
a check to show it is
working.
If it does not, have the vehicle serviced by your dealer/
retailer.
The light should go out once the engine starts. If it stays
on, or comes on while driving, there could be a problem
with the charging system. A charging system message
in the Driver Information Center (DIC) can also appear.
See DIC Warnings and Messages
on page 4‑48for
more information. This light could indicate that there are
problems with a generator drive belt, or that there is an
electrical problem. Have it checked right away. If the
vehicle must be driven a short distance with the light on,
turn off accessories, such as the radio and air
conditioner.
4-30
Page 215 of 580
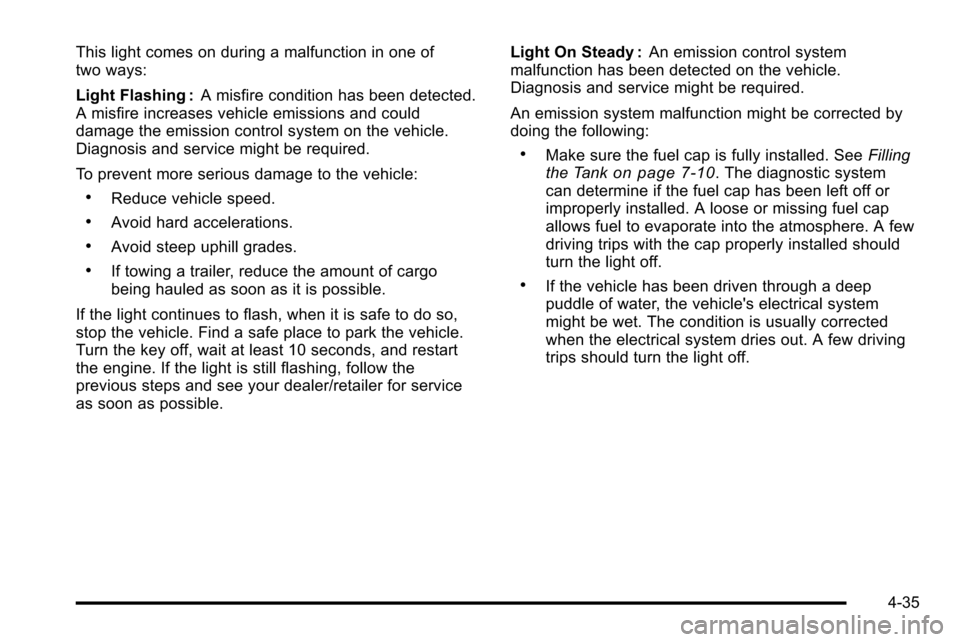
This light comes on during a malfunction in one of
two ways:
Light Flashing :A misfire condition has been detected.
A misfire increases vehicle emissions and could
damage the emission control system on the vehicle.
Diagnosis and service might be required.
To prevent more serious damage to the vehicle:
.Reduce vehicle speed.
.Avoid hard accelerations.
.Avoid steep uphill grades.
.If towing a trailer, reduce the amount of cargo
being hauled as soon as it is possible.
If the light continues to flash, when it is safe to do so,
stop the vehicle. Find a safe place to park the vehicle.
Turn the key off, wait at least 10 seconds, and restart
the engine. If the light is still flashing, follow the
previous steps and see your dealer/retailer for service
as soon as possible. Light On Steady :
An emission control system
malfunction has been detected on the vehicle.
Diagnosis and service might be required.
An emission system malfunction might be corrected by
doing the following:
.Make sure the fuel cap is fully installed. See Filling
the Tankon page 7‑10. The diagnostic system
can determine if the fuel cap has been left off or
improperly installed. A loose or missing fuel cap
allows fuel to evaporate into the atmosphere. A few
driving trips with the cap properly installed should
turn the light off.
.If the vehicle has been driven through a deep
puddle of water, the vehicle's electrical system
might be wet. The condition is usually corrected
when the electrical system dries out. A few driving
trips should turn the light off.
4-35
Page 216 of 580
.Make sure to fuel the vehicle with quality fuel. Poor
fuel quality causes the engine not to run as
efficiently as designed and can cause: stalling after
start-up, stalling when the vehicle is changed into
gear, misfiring, hesitation on acceleration,
or stumbling on acceleration. These conditions
might go away once the engine is warmed up.
If one or more of these conditions occurs, change
the fuel brand used. It will require at least one full
tank of the proper fuel to turn the light off.
SeeGasoline Octane on page 7‑7.
If none of the above have made the light turn off, your
dealer/retailer can check the vehicle. The dealer/retailer
has the proper test equipment and diagnostic tools to fix
any mechanical or electrical problems that might have
developed.Emissions Inspection and Maintenance
Programs
Some state/provincial and local governments have or
might begin programs to inspect the emission control
equipment on the vehicle. Failure to pass this
inspection could prevent getting a vehicle registration.
Here are some things to know to help the vehicle pass
an inspection:
.The vehicle will not pass this inspection if the
check engine light is on with the engine running,
or if the key is in ON/RUN and the light is not on.
.The vehicle will not pass this inspection if the
OBD II (on-board diagnostic) system determines
that critical emission control systems have not
been completely diagnosed by the system. The
vehicle would be considered not ready for
inspection. This can happen if the battery has
recently been replaced or if the battery has run
down. The diagnostic system is designed to
evaluate critical emission control systems during
normal driving. This can take several days of
routine driving. If this has been done and the
vehicle still does not pass the inspection for lack of
OBD II system readiness, your dealer/retailer can
prepare the vehicle for inspection.
4-36
Page 220 of 580
All messages will appear in the DIC display located in
the center of the instrument panel cluster.
The DIC comes on when the ignition is on. After a short
delay, the DIC will display the information that was last
displayed before the engine was turned off.
SeeDIC Operation and Displays
on page 4‑40and
DIC Vehicle Customizationon page 4‑56for the
displays available.
DIC Operation and Displays
The DIC has different displays which can be accessed
by pressing the DIC buttons located on the instrument
panel, next to the steering wheel.
The DIC displays trip, fuel, and vehicle system
information, and warning messages if a system problem
is detected. A digital speedometer also appears at the
bottom of the DIC display. The digital speedometer can
be enabled or disabled. See “DISPLAY DIGITAL
SPEED” underDIC Vehicle Customization
on
page 4‑56for more information.
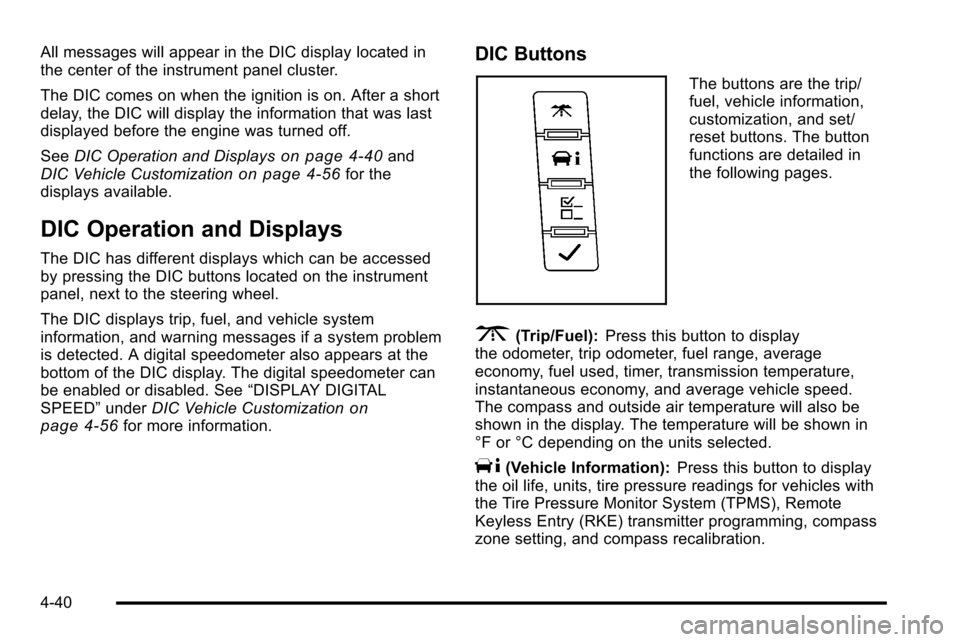
DIC Buttons
The buttons are the trip/
fuel, vehicle information,
customization, and set/
reset buttons. The button
functions are detailed in
the following pages.
3(Trip/Fuel): Press this button to display
the odometer, trip odometer, fuel range, average
economy, fuel used, timer, transmission temperature,
instantaneous economy, and average vehicle speed.
The compass and outside air temperature will also be
shown in the display. The temperature will be shown in
°F or °C depending on the units selected.
T(Vehicle Information): Press this button to display
the oil life, units, tire pressure readings for vehicles with
the Tire Pressure Monitor System (TPMS), Remote
Keyless Entry (RKE) transmitter programming, compass
zone setting, and compass recalibration.
4-40
Page 225 of 580

Relearn Remote Key
This display allows you to match Remote Keyless Entry
(RKE) transmitters to your vehicle. This procedure will
erase all previously learned transmitters. Therefore,
they must be relearned as additional transmitters.
To match an RKE transmitter to your vehicle:1. Press the vehicle information button until PRESS
VTO RELEARN REMOTE KEY displays.
2. Press the set/reset button until REMOTE KEY LEARNING ACTIVE is displayed.
3. Press and hold the lock and unlock buttons on the first transmitter at the same time for about
15 seconds.
On vehicles with memory recall seats, the first
transmitter learned will match driver 1 and the
second will match driver 2.
A chime will sound indicating that the transmitter is
matched. 4. To match additional transmitters at this time, repeat
Step 3.
Each vehicle can have a maximum of eight
transmitters matched to it.
5. To exit the programming mode, you must cycle the key to LOCK/OFF.
Compass Zone Setting
This display allows for setting the compass zone. See
DIC Compasson page 4‑46for more information.
Compass Recalibration
This display allows for calibrating the compass. See
DIC Compasson page 4‑46for more information.
Blank Display
This display shows no information.
4-45