reset CADILLAC ESCALADE EXT 2010 3.G Owners Manual
[x] Cancel search | Manufacturer: CADILLAC, Model Year: 2010, Model line: ESCALADE EXT, Model: CADILLAC ESCALADE EXT 2010 3.GPages: 580, PDF Size: 6.23 MB
Page 26 of 580
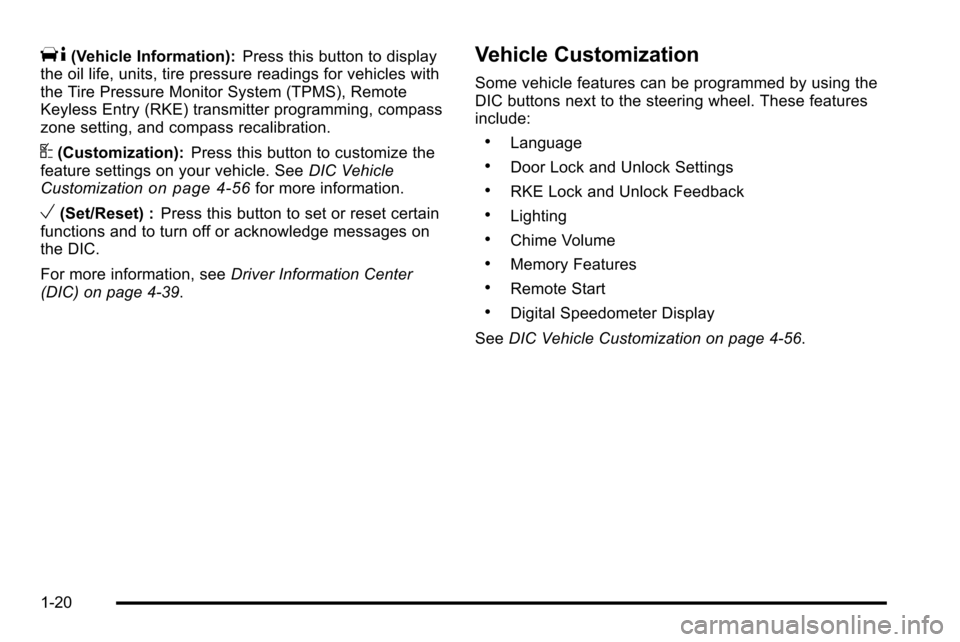
T(Vehicle Information):Press this button to display
the oil life, units, tire pressure readings for vehicles with
the Tire Pressure Monitor System (TPMS), Remote
Keyless Entry (RKE) transmitter programming, compass
zone setting, and compass recalibration.
U(Customization): Press this button to customize the
feature settings on your vehicle. See DIC Vehicle
Customization
on page 4‑56for more information.
V(Set/Reset) : Press this button to set or reset certain
functions and to turn off or acknowledge messages on
the DIC.
For more information, see Driver Information Center
(DIC) on page 4‑39.
Vehicle Customization
Some vehicle features can be programmed by using the
DIC buttons next to the steering wheel. These features
include:
.Language
.Door Lock and Unlock Settings
.RKE Lock and Unlock Feedback
.Lighting
.Chime Volume
.Memory Features
.Remote Start
.Digital Speedometer Display
See DIC Vehicle Customization on page 4‑56.
1-20
Page 30 of 580
You may notice during cooler conditions that the low tire
pressure warning light will appear when the vehicle is
first started and then turn off as you drive. This may be
an early indicator that your tire pressures are getting
low and the tires need to be inflated to the proper
pressure.
Note:The Tire Pressure Monitor can alert you about
low tire pressure, but it does not replace normal monthly
tire maintenance. It is the driver ’s responsibility to
maintain correct tire pressures.
See Tire Pressure Monitor System
on page 7‑66and
Tire Pressure Monitor Operation on page 7‑67.
Engine Oil Life System
The engine oil life system calculates engine oil life
based on vehicle use and displays a DIC message
when it is necessary to change the engine oil and filter.
The oil life system should be reset to 100% only
following an oil change.
Resetting the Oil Life System
1. Display the OIL LIFE REMAINING on the DIC.
2. Press and hold the SET/RESET button on the DIC for more than five seconds. The oil life will change
to 100%.
See Engine Oil Life System on page 7‑18.
Fuel E85 (85% Ethanol)
This vehicle has a yellow fuel cap and can use either
unleaded gasoline or ethanol fuel containing up to 85%
ethanol (E85). See Gasoline Octane
on page 7‑7and
Fuel E85 (85% Ethanol) on page 7‑8.
Driving for Better Fuel Economy
Driving habits can affect fuel mileage. Here are some
driving tips to get the best fuel economy possible.
.Avoid fast starts and accelerate smoothly.
.Brake gradually and avoid abrupt stops.
.Avoid idling the engine for long periods of time.
.When road and weather conditions are
appropriate, use cruise control, if equipped.
.Always follow posted speed limits or drive more
slowly when conditions require.
.Keep vehicle tires properly inflated.
.Combine several trips into a single trip.
.Replace the vehicle's tires with the same TPC
Spec number molded into the tire's sidewall near
the size.
.Follow recommended scheduled maintenance.
1-24
Page 126 of 580

Express-Down/Up Windows
Windows with the express feature allow the windows to
be raised and lowered all the way without holding the
switch.
Press or pull the switch fully and release it to activate
the express feature.
The express mode can be canceled at any time by
briefly pressing or pulling the switch.
Express Window Anti-Pinch Feature
If any object is in the path of the window when the
express‐up is active, the window will stop at the
obstruction and auto‐reverse to a preset factory
position. Weather conditions such as severe icing may
also cause the window to auto‐reverse. The window
will return to normal operation once the obstruction or
condition is removed.
Express Window Anti‐Pinch Override
{WARNING:
If express override is activated, the window will
not reverse automatically. You or others could be
injured and the window could be damaged. Before
you use express override, make sure that all
people and obstructions are clear of the
window path.
In an emergency, the anti‐pinch feature can be
overridden in a supervised mode. Hold the window
switch all the way up to the second position. The
window will rise for as long as the switch is held.
Once the switch is released, the express mode is
re‐activated.
In this mode, the window can still close on an object in
its path. Use care when using the override mode.
3-24
Page 148 of 580

Outside Power Foldaway Mirrors
Controls for the outside
power foldaway mirrors
are located on the driver
door armrest.
Mirror Adjustment
1. Press (A) or (B) to select the driver or passengerside mirror.
2. Press one of the four arrows located on the control pad to adjust the mirror.
3. Press the opposite side to get the control pad to a neutral position.
4. Press (C) to fold the mirrors out to the driving position.
5. Press (D) to fold the mirrors in to the folded position.
Resetting the Power Foldaway Mirrors
Reset the power foldaway mirrors if:
.The mirrors are accidentally obstructed while
folding.
.They are accidentally manually folded/unfolded.
.The mirrors will not stay in the unfolded position.
.The mirrors vibrate at normal driving speeds.
Fold and unfold the mirrors one time using the
mirror controls to reset them to their normal position.
A popping noise may be heard during the resetting of
the power foldaway mirrors. This sound is normal after
a manual folding operation.
Automatic Dimming
Adjust the driver outside mirror for the glare of the
headlamps behind your vehicle. See Automatic
Dimming Rearview Mirror
on page 3‑45for more
information.
3-46
Page 186 of 580
Windshield Wipers
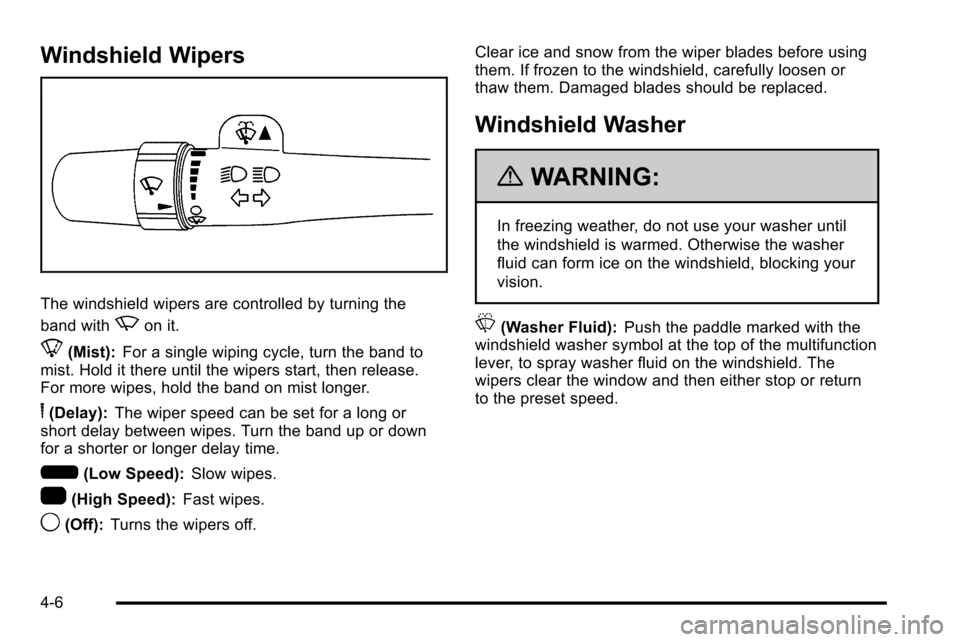
The windshield wipers are controlled by turning the
band with
zon it.
8(Mist):For a single wiping cycle, turn the band to
mist. Hold it there until the wipers start, then release.
For more wipes, hold the band on mist longer.
6(Delay): The wiper speed can be set for a long or
short delay between wipes. Turn the band up or down
for a shorter or longer delay time.
6(Low Speed): Slow wipes.
1(High Speed): Fast wipes.
9(Off):Turns the wipers off. Clear ice and snow from the wiper blades before using
them. If frozen to the windshield, carefully loosen or
thaw them. Damaged blades should be replaced.
Windshield Washer
{WARNING:
In freezing weather, do not use your washer until
the windshield is warmed. Otherwise the washer
fluid can form ice on the windshield, blocking your
vision.
L(Washer Fluid):
Push the paddle marked with the
windshield washer symbol at the top of the multifunction
lever, to spray washer fluid on the windshield. The
wipers clear the window and then either stop or return
to the preset speed.
4-6
Page 189 of 580
Resuming a Set Speed
If the cruise control is set at a desired speed and then
the brakes are applied, this shuts off the cruise control.
But it does not need to be reset.
Once the vehicle speed reaches about 40 km/h
(25 mph) or more, press the +RES button on the
steering wheel. The vehicle returns to the previously set
speed and stays there.
Increasing Speed While Using Cruise
Control
To increase the cruise speed while using cruise control:
.Press and hold the +RES button on the steering
wheel until the desired speed is reached, then
release it.
.To increase vehicle speed in small increments,
press the +RES button. Each time this is done,
the vehicle goes about 1.6 km/h (1 mph) faster.
Reducing Speed While Using Cruise
Control
To reduce the vehicle speed while using cruise control:
.Press and hold the SET–button on the steering
wheel until the desired lower speed is reached,
then release it.
.To slow down in very small amounts, press the
SET– button on the steering wheel briefly.
Each time this is done, the vehicle goes about
1.6 km/h (1 mph) slower.
Passing Another Vehicle While Using
Cruise Control
Use the accelerator pedal to increase the vehicle
speed. When you take your foot off the pedal, the
vehicle will slow down to the previous set cruise speed.
4-9
Page 193 of 580

IntelliBeam®may not turn off the high-beams if the
system cannot detect other vehicle's lamps because of
any of the following:
.The others vehicle's lamp(s) are missing,
damaged, obstructed from view or otherwise
undetected.
.The other vehicle's lamp(s) are covered with dirt,
snow and/or road spray.
.The other vehicle's lamp(s) cannot be detected
due to dense exhaust, smoke, fog, snow, road
spray, mist or other airborne obstructions.
.Your vehicle's windshield is dirty, cracked or
obstructed by something that blocks the view of
the IntelliBeam light sensor.
.Your vehicle's windshield is covered with ice, dirt,
haze or other obstructions.
.Your vehicle is loaded such that the front end of
the vehicle points upward, causing the IntelliBeam
sensor to aim high and not detect headlamps and
taillamps.
.You are driving on winding or hilly roads.
You may need to manually disable or cancel the
high-beam headlamps by turning the low-beam
headlamps on, if any of the above conditions exist.
Disabling and Resetting IntelliBeam®
at the Rearview Mirror
IntelliBeam®can be disabled by using the controls on
the inside rearview mirror.
AUTO
3(On/Off): To disable the system, press this
button on the inside rearview mirror. The IntelliBeam®
indicator will turn off and will not come back on until the
IntelliBeam®button is pressed again.
(Stalk Disable) : When IntelliBeam
®has turned on the
high-beams, pull or push the high-beam stalk. This will
disable IntelliBeam
®. The IntelliBeam®indicator on the
mirror will turn off. To re-enable IntelliBeam®, press the
IntelliBeam®button on the mirror.
A different sensitivity setting is available for dealer
diagnostics. This is done by pushing and holding this
button for 20 seconds until the IntelliBeam
®indicator
light flashes three times. If you accidentally activate
this, the vehicle's setting will automatically be reset
each time the ignition is turned off and then on again.
4-13
Page 212 of 580

Antilock Brake System (ABS)
Warning Light
For vehicles with the
Antilock Brake System
(ABS), this light comes on
briefly when the engine is
started.
If it does not, have the vehicle serviced by your dealer/
retailer. If the system is working normally the indicator
light then goes off.
If the ABS light stays on, turn the ignition off. If the light
comes on while driving, stop as soon as it is safely
possible and turn the ignition off. Then start the engine
again to reset the system. If the ABS light stays on,
or comes on again while driving, the vehicle needs
service. If the regular brake system warning light is not
on, the vehicle still has brakes, but not antilock brakes.
If the regular brake system warning light is also on, the
vehicle does not have antilock brakes and there is a
problem with the regular brakes. See Brake System
Warning Light on page 4‑31.
For vehicles with a Driver Information Center (DIC), see
DIC Warnings and Messages
on page 4‑48for all
brake related DIC messages.
StabiliTrak®Indicator Light
The StabiliTrak indicator
light comes on briefly
when the engine is
started.
If it does not, have the vehicle serviced by your dealer/
retailer. If the system is working normally the indicator
light then goes off.
If the light comes on and stays on while driving, there
might be a problem with the StabiliTrak
®system and
the vehicle may need service. When this warning light is
on, the system is off and does not limit wheel spin.
The light flashes if the system is active and is working
to assist the driver with directional control of the vehicle
in difficult driving conditions.
See StabiliTrak
®Systemon page 6‑6for more
information.
4-32
Page 220 of 580
All messages will appear in the DIC display located in
the center of the instrument panel cluster.
The DIC comes on when the ignition is on. After a short
delay, the DIC will display the information that was last
displayed before the engine was turned off.
SeeDIC Operation and Displays
on page 4‑40and
DIC Vehicle Customizationon page 4‑56for the
displays available.
DIC Operation and Displays
The DIC has different displays which can be accessed
by pressing the DIC buttons located on the instrument
panel, next to the steering wheel.
The DIC displays trip, fuel, and vehicle system
information, and warning messages if a system problem
is detected. A digital speedometer also appears at the
bottom of the DIC display. The digital speedometer can
be enabled or disabled. See “DISPLAY DIGITAL
SPEED” underDIC Vehicle Customization
on
page 4‑56for more information.
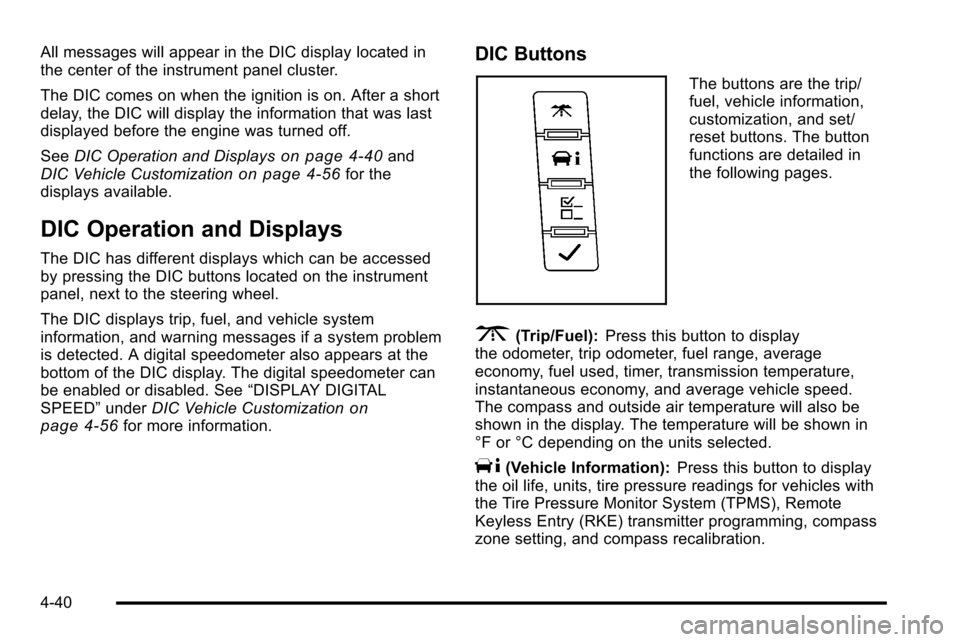
DIC Buttons
The buttons are the trip/
fuel, vehicle information,
customization, and set/
reset buttons. The button
functions are detailed in
the following pages.
3(Trip/Fuel): Press this button to display
the odometer, trip odometer, fuel range, average
economy, fuel used, timer, transmission temperature,
instantaneous economy, and average vehicle speed.
The compass and outside air temperature will also be
shown in the display. The temperature will be shown in
°F or °C depending on the units selected.
T(Vehicle Information): Press this button to display
the oil life, units, tire pressure readings for vehicles with
the Tire Pressure Monitor System (TPMS), Remote
Keyless Entry (RKE) transmitter programming, compass
zone setting, and compass recalibration.
4-40
Page 221 of 580
U(Customization):Press this button to customize the
feature settings on your vehicle. See DIC Vehicle
Customization
on page 4‑56for more information.
V(Set/Reset): Press this button to set or reset certain
functions and to turn off or acknowledge messages on
the DIC.
Trip/Fuel Menu Items
3
(Trip/Fuel): Press this button to scroll through the
following menu items:
Odometer
Press the trip/fuel button until ODOMETER displays.
This display shows the distance the vehicle has been
driven in either miles (mi) or kilometers (km).
To switch between English and metric measurements,
see “Units” later in this section.
Trip Odometer
Press the trip/fuel button until TRIP displays. This
display shows the current distance traveled in either
miles (mi) or kilometers (km) since the last reset for the
trip odometer.
The trip odometer can be reset to zero by pressing the
set/reset button while the trip odometer is displayed.
Fuel Range
Press the trip/fuel button until FUEL RANGE displays.
This display shows the approximate number of
remaining miles (mi) or kilometers (km) the vehicle
can be driven without refueling. The display will show
LOW if the fuel level is low.
The fuel range estimate is based on an average of the
vehicle's fuel economy over recent driving history and
the amount of fuel remaining in the fuel tank. This
estimate will change if driving conditions change. For
example, if driving in traffic and making frequent stops,
this display may read one number, but if the vehicle is
driven on a freeway, the number may change even
though the same amount of fuel is in the fuel tank. This
is because different driving conditions produce different
fuel economies. Generally, freeway driving produces
better fuel economy than city driving. Fuel range cannot
be reset.
Average Economy
Press the trip/fuel button until AVERAGE ECONOMY
displays. This display shows the approximate average
miles per gallon (mpg) or liters per 100 kilometers
(L/100 km). This number is calculated based on the
number of mpg (L/100 km) recorded since the last time
this menu item was reset. To reset AVERAGE
ECONOMY, press and hold the set/reset button.
4-41