wiring CADILLAC SEVILLE 2004 5.G Owners Manual
[x] Cancel search | Manufacturer: CADILLAC, Model Year: 2004, Model line: SEVILLE, Model: CADILLAC SEVILLE 2004 5.GPages: 410, PDF Size: 2.64 MB
Page 71 of 410
Trunk
{CAUTION:
It can be dangerous to drive with the trunk lid
open because carbon monoxide (CO) gas can
come into your vehicle. You can not see or
smell CO. It can cause unconsciousness and
even death. If you must drive with the trunk lid
open or if electrical wiring or other cable
connections must pass through the seal
between the body and the trunk lid:
•Make sure all other windows are shut.
•Turn the fan on your heating or cooling
system to its highest speed and select the
control setting that will force outside air
into your vehicle. See Climate Control
System in the Index.
•If you have air outlets on or under the
instrument panel, open them all the way.
SeeEngine Exhaust on page 2-35.
Trunk Lock Release
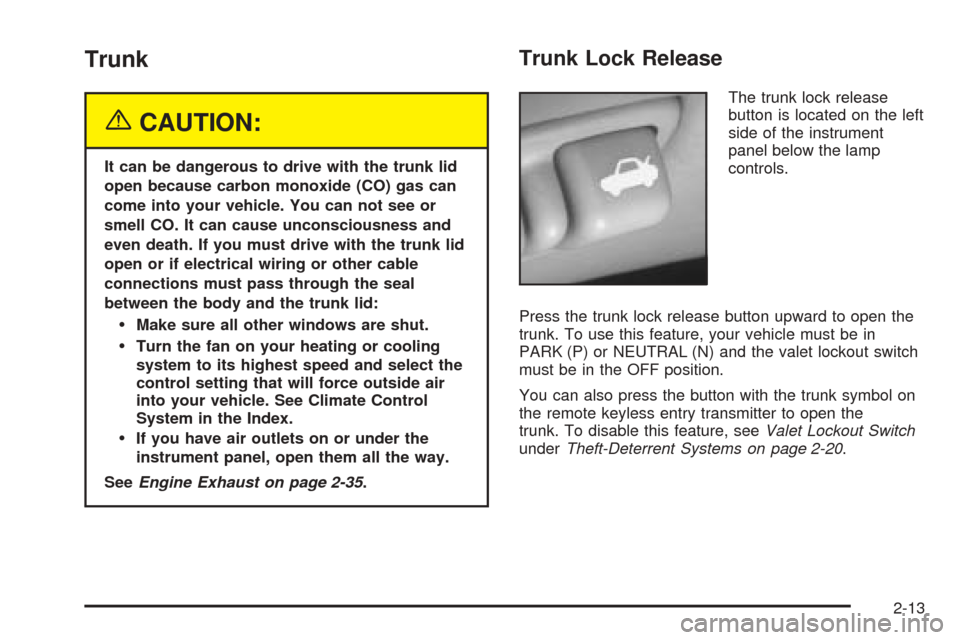
The trunk lock release
button is located on the left
side of the instrument
panel below the lamp
controls.
Press the trunk lock release button upward to open the
trunk. To use this feature, your vehicle must be in
PARK (P) or NEUTRAL (N) and the valet lockout switch
must be in the OFF position.
You can also press the button with the trunk symbol on
the remote keyless entry transmitter to open the
trunk. To disable this feature, seeValet Lockout Switch
underTheft-Deterrent Systems on page 2-20.
2-13
Page 153 of 410
Engine Speed Limiter
This feature prevents the engine from operating at too
many revolutions per minute (rpm). When the engine’s
rpm are critically high, the fuel supply to the engine
is shut off. When the engine speed slows, the fuel
supply will come on again. This helps prevent damage
to the engine.
Safety Belt Reminder Light
When the key is turned to ON or START, a chime will
come on for several seconds to remind people to fasten
their safety belts.
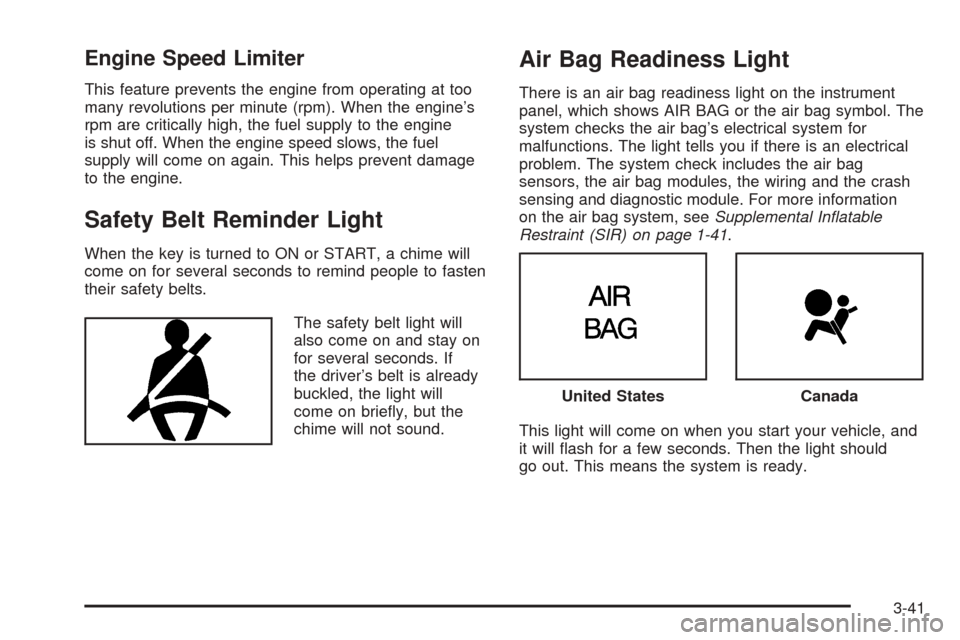
The safety belt light will
also come on and stay on
for several seconds. If
the driver’s belt is already
buckled, the light will
come on briefly, but the
chime will not sound.
Air Bag Readiness Light
There is an air bag readiness light on the instrument
panel, which shows AIR BAG or the air bag symbol. The
system checks the air bag’s electrical system for
malfunctions. The light tells you if there is an electrical
problem. The system check includes the air bag
sensors, the air bag modules, the wiring and the crash
sensing and diagnostic module. For more information
on the air bag system, seeSupplemental In�atable
Restraint (SIR) on page 1-41.
This light will come on when you start your vehicle, and
it will flash for a few seconds. Then the light should
go out. This means the system is ready.
United StatesCanada
3-41
Page 258 of 410
Backing Up
Hold the bottom of the steering wheel with one hand.
Then, to move the trailer to the left, just move that hand
to the left. To move the trailer to the right, move your
hand to the right. Always back up slowly and, if possible,
have someone guide you.
Making Turns
Notice:Making very sharp turns while trailering
could cause the trailer to come in contact with the
vehicle. Your vehicle could be damaged. Avoid
making very sharp turns while trailering.
When you are turning with a trailer, make wider turns than
normal. Do this so your trailer will not strike soft
shoulders, curbs, road signs, trees or other objects. Avoid
jerky or sudden maneuvers. Signal well in advance.
Turn Signals When Towing a Trailer
When you tow a trailer, your vehicle may need a
different turn signal flasher and/or extra wiring. Check
with your dealer. The arrows on your instrument
panel will flash whenever you signal a turn or lane
change. Properly hooked up, the trailer lamps will also
flash, telling other drivers you are about to turn,
change lanes or stop.
When towing a trailer, the arrows on your instrument
panel will flash for turns even if the bulbs on the trailer
are burned out. Thus, you may think drivers behind
you are seeing your signal when they are not. It
is important to check occasionally to be sure the trailer
bulbs are still working.
4-42
Page 262 of 410
Wheel Alignment and Tire Balance..................5-75
Wheel Replacement......................................5-75
Tire Chains..................................................5-77
If a Tire Goes Flat........................................5-77
Changing a Flat Tire.....................................5-78
Compact Spare Tire......................................5-87
Appearance Care............................................5-87
Cleaning the Inside of Your Vehicle.................5-88
Care of Safety Belts......................................5-90
Weatherstrips...............................................5-90
Cleaning the Outside of Your Vehicle..............5-90
Sheet Metal Damage.....................................5-92
Finish Damage.............................................5-92
Underbody Maintenance................................5-93Chemical Paint Spotting.................................5-93
Vehicle Care/Appearance Materials..................5-94
Vehicle Identification......................................5-95
Vehicle Identification Number (VIN).................5-95
Service Parts Identification Label.....................5-95
Electrical System............................................5-96
Add-On Electrical Equipment..........................5-96
Headlamp Wiring..........................................5-96
Windshield Wiper Fuses................................5-96
Power Windows and Other Power Options.......5-96
Fuses and Circuit Breakers............................5-97
Removing the Rear Seat Cushion...................5-99
Capacities and Specifications........................5-104
Section 5 Service and Appearance Care
5-2
Page 316 of 410
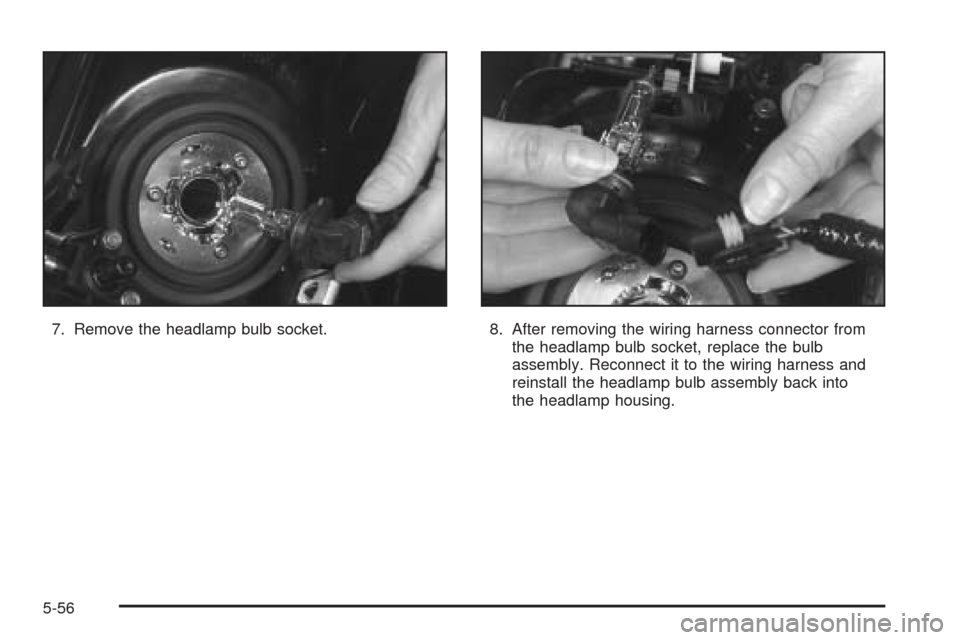
7. Remove the headlamp bulb socket. 8. After removing the wiring harness connector from
the headlamp bulb socket, replace the bulb
assembly. Reconnect it to the wiring harness and
reinstall the headlamp bulb assembly back into
the headlamp housing.
5-56
Page 356 of 410
Electrical System
Add-On Electrical Equipment
Notice:Don’t add anything electrical to your
vehicle unless you check with your dealer first.
Some electrical equipment can damage your vehicle
and the damage wouldn’t be covered by your
warranty. Some add-on electrical equipment can
keep other components from working as they
should.
Your vehicle has an air bag system. Before attempting
to add anything electrical to your vehicle, see
Servicing Your Air Bag-Equipped Vehicle on page 1-50.
Headlamp Wiring
The headlamp wiring has an individual fuse. An
electrical overload will cause the lamps to go on and off,
or in some cases to remain off. If this happens, have
the headlamp wiring checked right away.
Windshield Wiper Fuses
The windshield wiper motor is protected by an internal
circuit breaker. If the wiper motor overheats due to
heavy snow, the wipers will stop until the motor cools
and will then restart.
A fuse powers the wiper motor. If the fuse blows, there
is an electrical problem. Be sure to have it fixed.
Power Windows and Other Power
Options
Circuit breakers protect the power windows and power
seats. When the current load is too heavy, the circuit
breaker opens and closes, protecting the circuit until the
problem is fixed or goes away.
5-96
Page 357 of 410
Fuses and Circuit Breakers
The wiring circuits in your vehicle are protected from
short circuits by a combination of fuses and circuit
breakers. This greatly reduces the chance of fires
caused by electrical problems.
Look at the silver-colored band inside the fuse. If the
band is broken or melted, replace the fuse. Be sure you
replace a bad fuse with a new one of the identical
size and rating. If a fuse should blow, see your dealer
for service immediately.
If you ever have a problem on the road and do not have
a spare fuse, you can “borrow” one that has the same
amperage. Pick some feature of your vehicle that
you can get along without – like the radio or cigarette
lighter – and use its fuse, if it is the correct amperage.
Replace it as soon as you can.
The fuses are located in two fuse blocks, one located
near the engine compartment on the passenger’s
side and the other under the rear seat on the driver’s
side. If a fuse should blow, have your vehicle serviced
by your dealer immediately.
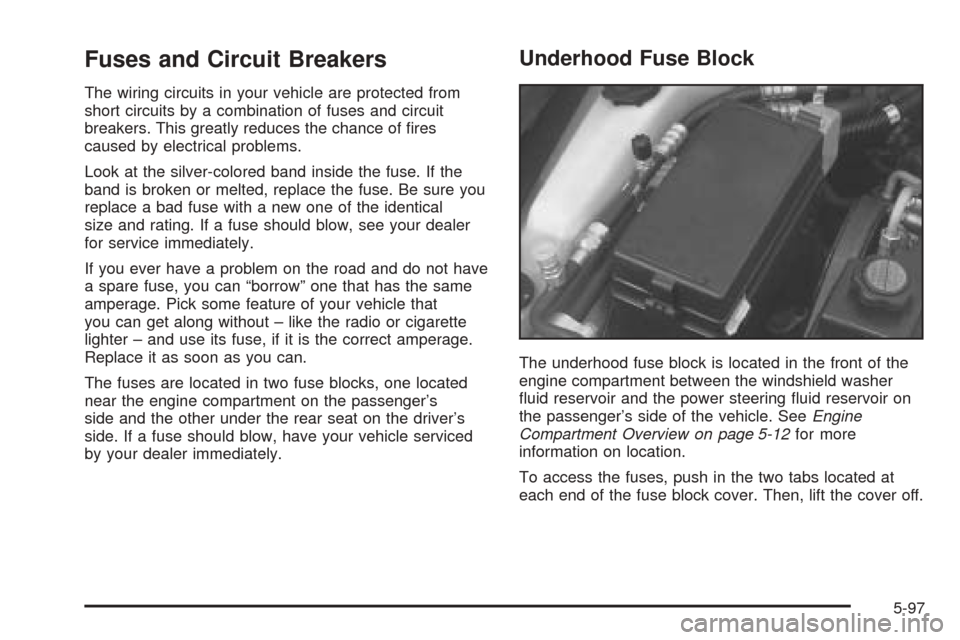
Underhood Fuse Block
The underhood fuse block is located in the front of the
engine compartment between the windshield washer
fluid reservoir and the power steering fluid reservoir on
the passenger’s side of the vehicle. SeeEngine
Compartment Overview on page 5-12for more
information on location.
To access the fuses, push in the two tabs located at
each end of the fuse block cover. Then, lift the cover off.
5-97
Page 399 of 410
Driving (cont.)
Hill and Mountain Roads..............................4-22
In Rain and on Wet Roads...........................4-16
Winter........................................................4-24
Driving on Grades...........................................4-43
Driving on Snow or Ice....................................4-25
Driving Through Deep Standing Water...............4-18
Driving Through Flowing Water.........................4-18
Driving with a Trailer.......................................4-41
Dual Climate Control System............................3-28
E
Electrical System
Add-On Equipment......................................5-96
Fuses and Circuit Breakers...........................5-97
Headlamp Wiring.........................................5-96
Power Windows and Other Power Options......5-96
Removing the Rear Seat Cushion..................5-99
Windshield Wiper Fuses...............................5-96
Emergency Trunk Release Handle.....................2-15
Emissions Inspection and Maintenance
Programs...................................................3-48
Engine
Air Cleaner/Filter.........................................5-18
Battery.......................................................5-41
Check and Service Engine Soon Light............3-46Engine (cont.)
Coolant......................................................5-23
Coolant Heater............................................2-27
Coolant Temperature Gage...........................3-45
Coolant Temperature
Warning Light..........................................3-45
Drive Belt Routing.......................................6-13
Engine Compartment Overview......................5-12
Exhaust.....................................................2-35
Oil .............................................................5-13
Overheating................................................5-26
Starting......................................................2-26
Engine Cooling When Trailer Towing..................4-44
Engine Oil Additives........................................5-16
Engine Speed Limiter......................................3-41
English Metric Display.....................................3-40
Entering Feature Programming..........................3-63
Entry Lighting.................................................3-23
Erasing HomeLink
®Buttons..............................2-48
Event Data Records (EDR)..............................7-10
Exiting Feature Programming............................3-74
Express-Down Window....................................2-17
Express-Up Window........................................2-17
Extender, Safety Belt.......................................1-21
Exterior Lamps...............................................3-16
Exterior Lighting Battery Saver..........................3-21
Exterior Lights at Unlock..................................3-68
5
Page 401 of 410
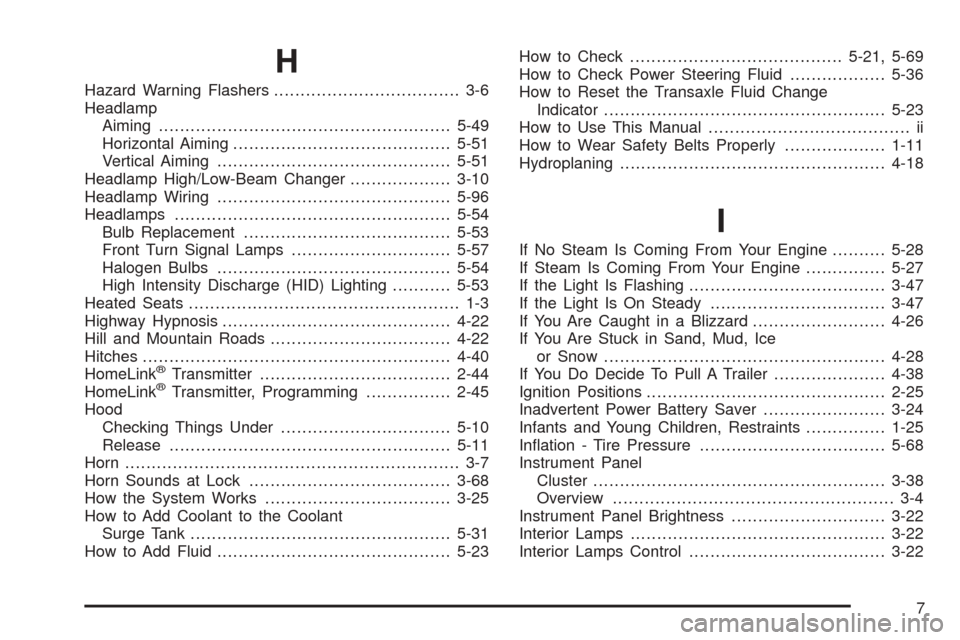
H
Hazard Warning Flashers................................... 3-6
Headlamp
Aiming.......................................................5-49
Horizontal Aiming.........................................5-51
Vertical Aiming............................................5-51
Headlamp High/Low-Beam Changer...................3-10
Headlamp Wiring............................................5-96
Headlamps....................................................5-54
Bulb Replacement.......................................5-53
Front Turn Signal Lamps..............................5-57
Halogen Bulbs............................................5-54
High Intensity Discharge (HID) Lighting...........5-53
Heated Seats................................................... 1-3
Highway Hypnosis...........................................4-22
Hill and Mountain Roads..................................4-22
Hitches..........................................................4-40
HomeLink
®Transmitter....................................2-44
HomeLink®Transmitter, Programming................2-45
Hood
Checking Things Under................................5-10
Release.....................................................5-11
Horn............................................................... 3-7
Horn Sounds at Lock......................................3-68
How the System Works...................................3-25
How to Add Coolant to the Coolant
Surge Tank.................................................5-31
How to Add Fluid............................................5-23How to Check........................................5-21, 5-69
How to Check Power Steering Fluid..................5-36
How to Reset the Transaxle Fluid Change
Indicator.....................................................5-23
How to Use This Manual...................................... ii
How to Wear Safety Belts Properly...................1-11
Hydroplaning..................................................4-18
I
If No Steam Is Coming From Your Engine..........5-28
If Steam Is Coming From Your Engine...............5-27
If the Light Is Flashing.....................................3-47
If the Light Is On Steady.................................3-47
If You Are Caught in a Blizzard.........................4-26
If You Are Stuck in Sand, Mud, Ice
or Snow.....................................................4-28
If You Do Decide To Pull A Trailer.....................4-38
Ignition Positions.............................................2-25
Inadvertent Power Battery Saver.......................3-24
Infants and Young Children, Restraints...............1-25
Inflation - Tire Pressure...................................5-68
Instrument Panel
Cluster.......................................................3-38
Overview..................................................... 3-4
Instrument Panel Brightness.............................3-22
Interior Lamps................................................3-22
Interior Lamps Control.....................................3-22
7