odometer CADILLAC SRX 2006 1.G Owners Manual
[x] Cancel search | Manufacturer: CADILLAC, Model Year: 2006, Model line: SRX, Model: CADILLAC SRX 2006 1.GPages: 456, PDF Size: 2.55 MB
Page 103 of 456

2. Press the shift lever forward to upshift or rearward
to downshift.
The odometer on the instrument panel cluster will
change from the mileage to a number indicating the
requested gear range when moving the shift
lever forward or rearward. SeeSpeedometer and
Odometer on page 3-36for more information on the
odometer.
While using the DSC feature the vehicle will have �rmer
shifting and increased performance. You can use this
for sport driving or when climbing/descending hills
to stay in gear longer or to down shift for more power or
engine braking.
The transmission will only allow you to shift into gears
appropriate for the vehicle speed and engine
Revolutions Per Minute (RPM). The transmission will
not automatically shift to the next higher gear if the
engine rpm is too high.
If shifting is prevented for any reason, the currently
selected gear will �ash multiple times, indicating that the
transmission has not shifted gears.
The transmission will allow you to shift to the gear
selected and will automatically downshift when
the vehicle comes to a stop. This will allow for more
power during take-off and passing.When accelerating your vehicle from a stop in snowy
and icy conditions, you may want to shift into second
gear. A higher gear ratio allows you to gain more traction
on slippery surfaces.
Parking Brake
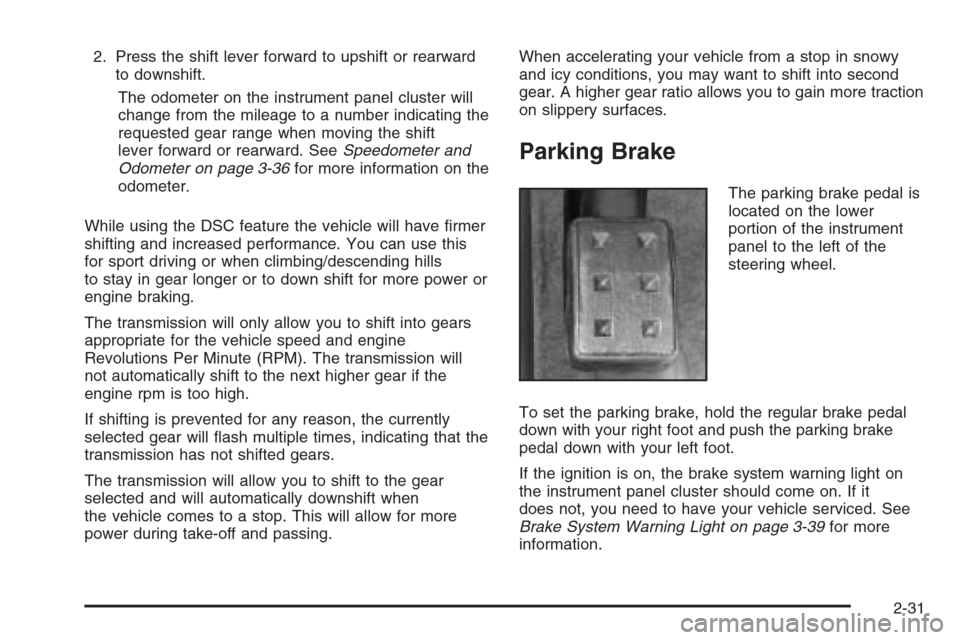
The parking brake pedal is
located on the lower
portion of the instrument
panel to the left of the
steering wheel.
To set the parking brake, hold the regular brake pedal
down with your right foot and push the parking brake
pedal down with your left foot.
If the ignition is on, the brake system warning light on
the instrument panel cluster should come on. If it
does not, you need to have your vehicle serviced. See
Brake System Warning Light on page 3-39for more
information.
2-31
Page 129 of 456

Instrument Panel Overview...............................3-4
Hazard Warning Flashers................................3-6
Other Warning Devices...................................3-6
Horn .............................................................3-6
Tilt Wheel.....................................................3-7
Turn Signal/Multifunction Lever.........................3-7
Turn and Lane-Change Signals........................3-8
Headlamp High/Low-Beam Changer..................3-8
Flash-to-Pass.................................................3-9
Windshield Wipers..........................................3-9
Windshield Washer.......................................3-10
Rear Window Wiper/Washer...........................3-11
Headlamp Washer........................................3-12
Cruise Control..............................................3-12
Headlamps..................................................3-16
Wiper Activated Headlamps............................3-17
Headlamps on Reminder................................3-17
Daytime Running Lamps (DRL).......................3-17
Fog Lamps ..................................................3-19
Exterior Lighting Battery Saver........................3-20
Instrument Panel Brightness...........................3-20
Entry Lighting...............................................3-21
Parade Dimming...........................................3-21
Reading Lamps............................................3-21
Ultrasonic Rear Parking Assist (URPA)............3-22
Accessory Power Outlet(s).............................3-24
Ashtray(s) and Cigarette Lighter......................3-25Climate Controls............................................3-26
Dual Climate Control System..........................3-26
Outlet Adjustment.........................................3-31
Rear Air Conditioning System.........................3-32
Passenger Compartment Air Filter...................3-33
Warning Lights, Gages, and Indicators............3-34
Instrument Panel Cluster................................3-35
Speedometer and Odometer...........................3-36
Trip Odometers............................................3-36
Tachometer.................................................3-37
Engine Speed Limiter....................................3-37
Safety Belt Reminder Light.............................3-37
Airbag Readiness Light..................................3-38
Charging System Light..................................3-39
Brake System Warning Light..........................3-39
Anti-Lock Brake System
Warning Light...........................................3-40
Traction Control System (TCS)
Warning Light...........................................3-41
Engine Coolant Temperature
Warning Light...........................................3-42
Engine Coolant Temperature Gage..................3-42
Tire Pressure Light.......................................3-43
Malfunction Indicator Lamp.............................3-43
Oil Pressure Light.........................................3-46
Sport Mode Light..........................................3-47
Section 3 Instrument Panel
3-1
Page 164 of 456

Speedometer and Odometer
The speedometer lets you see your speed in either
miles per hour (mph) or kilometers per hour (km/h). The
odometer shows how far your vehicle has been
driven, in either miles (used in the United States) or
kilometers (used in Canada).
If your vehicle has to have a new odometer installed,
the new one may read the correct mileage. This is
because your vehicle’s computer has stored the mileage
in memory.
While the Driver Shift Control (DSC) feature is active,
the odometer will change to show the gear range.
SeeAutomatic Transmission Operation on page 2-28for
more information.
Trip Odometers
The trip odometer can record the number of miles or
kilometers traveled for up to two trips.
The trip odometer is part of the Driver Information
Center (DIC). To access the trip odometer, use one of
the following procedures:
Using the Base audio system, do the following:
1. Press the INFO (Information) button located to the
right of the screen to access the DIC menu.
2. Scroll through the menu using the up or down
arrows on the INFO button until you reach Trip
Odometer A or Trip Odometer B.
The selected trip odometer (A or B) will be displayed
at the top of the screen with the accumulated
mileage.
3. Repeat the steps to view the other trip odometer.
You can reset the selected trip odometer by pressing
CLR (Clear) button located in the center of the
INFO button to the right of the screen. The mileage for
that trip odometer will return to zero. Each trip
odometer must be reset individually.
3-36
Page 179 of 456

AVG MPH (AVG KM/H)*
TIMER*
BATTERY VOLTS
ENGINE OIL LIFE*
TRANS FLUID LIFE*
PSI LF TIRE (KPA LF TIRE)
PSI RF TIRE (KPA RF TIRE)
PSI RR TIRE (KPA RR TIRE)
PSI LR TIRE (KPA LR TIRE)
BLANK LINE
*These items can be reset. Each one must be reset
individually. For a detailed description of the menu
items and how to reset them, see “Vehicle Information
Menu Item Descriptions” later in this section.
You can view any of these items at any time, but only
one item can be displayed at a time.
Vehicle Information Menu Item
Descriptions
The following paragraphs contain a more detailed
description of each menu item:
OUTSIDE TEMP:If you select this item, the current
outside temperature is displayed at the top of the
screen. It will be in either degrees Fahrenheit (°F) or
degrees Celsius (°C) depending upon whether the
system is set for English or metric units. If you wish to
change the units, seeDIC Main Menu on page 3-55.
MI TRIP A and B (KM TRIP A and B):For information
on the trip odometers, seeTrip Odometers on
page 3-36.
MILES RANGE (KM RANGE):If you select this item,
the approximate number of remaining miles or
kilometers you can drive without refueling is displayed.
This estimate is based on the current driving conditions
and will change if the driving conditions change. For
example, if you are driving in traffic making frequent
stops, the display may read one number, but if you enter
the freeway, the number may change even though
you still have the same amount of gas in the gas tank.
This is because different driving conditions produce
different fuel economies. Generally, freeway driving
produces better fuel economy than city driving.
3-51
Page 373 of 456

If you need to replace any of your wheels, wheel bolts,
or wheel nuts, replace them only with new GM
original equipment parts. This way, you will be sure to
have the right wheel, wheel bolts, and wheel nuts
for your vehicle.
{CAUTION:
Using the wrong replacement wheels, wheel
bolts, or wheel nuts on your vehicle can be
dangerous. It could affect the braking and
handling of your vehicle, make your tires lose
air and make you lose control. You could have
a collision in which you or others could be
injured. Always use the correct wheel, wheel
bolts, and wheel nuts for replacement.
Notice:The wrong wheel can also cause problems
with bearing life, brake cooling, speedometer or
odometer calibration, headlamp aim, bumper height,
vehicle ground clearance, and tire or tire chain
clearance to the body and chassis.
SeeChanging a Flat Tire on page 5-70for more
information.
Used Replacement Wheels
{CAUTION:
Putting a used wheel on your vehicle is
dangerous. You cannot know how it has been
used or how far it has been driven. It could fail
suddenly and cause a crash. If you have to
replace a wheel, use a new GM original
equipment wheel.
Tire Chains
Notice:Use tire chains only where legal and only
when you must. Use only SAE Class “S” type chains
that are the proper size for your tires. Install them
on the rear axle tires and tighten them as tightly as
possible with the ends securely fastened. Drive
slowly and follow the chain manufacturer’s
instructions. If you can hear the chains contacting
your vehicle, stop and retighten them. If the contact
continues, slow down until it stops. Driving too
fast or spinning the wheels with chains on will
damage your vehicle.
5-69
Page 423 of 456

Maintenance Record
After the scheduled services are performed, record the date, odometer reading, who performed the service, and the
type of services performed in the boxes provided. SeeMaintenance Requirements on page 6-2. Any additional
information fromOwner Checks and Services on page 6-9can be added on the following record pages. You should
retain all maintenance receipts.
Maintenance Record
DateOdometer
ReadingServiced ByMaintenanceIor
MaintenanceIIServices Performed
6-15
Page 424 of 456

Maintenance Record (cont’d)
DateOdometer
ReadingServiced ByMaintenanceIor
MaintenanceIIServices Performed
6-16
Page 425 of 456

Maintenance Record (cont’d)
DateOdometer
ReadingServiced ByMaintenanceIor
MaintenanceIIServices Performed
6-17
Page 426 of 456

Maintenance Record (cont’d)
DateOdometer
ReadingServiced ByMaintenanceIor
MaintenanceIIServices Performed
6-18
Page 451 of 456

Mirrors
Automatic Dimming Rearview with OnStar®.....2-37
Automatic Dimming Rearview with OnStar®
and Compass..........................................2-37
Memory .....................................................2-54
Outside Automatic Dimming Mirror.................2-41
Outside Convex Mirror.................................2-41
Outside Curb View Assist Mirror....................2-41
Outside Power Heated Mirrors.......................2-40
MyGMLink.com................................................ 7-4
N
Navigation/Radio System,
see Navigation Manual...............................3-100
New Vehicle Break-In......................................2-22
Normal Maintenance Replacement Parts............6-14
O
Odometer......................................................3-36
Odometers, Trip..............................................3-36
Off-Road Driving.............................................4-17
Off-Road Recovery..........................................4-14
Oil
Engine.......................................................5-16
Pressure Light.............................................3-46
Oil, Engine Oil Life System..............................5-19
Older Children, Restraints................................1-30
Online Owner Center........................................ 7-4
OnStar
®System, see OnStar®Manual...............2-42
Other Warning Devices...................................... 3-6
Outlet Adjustment............................................3-31
Outlet(s), Accessory Power...............................3-24
Outside
Automatic Dimming Mirror.............................2-41
Convex Mirror.............................................2-41
Curb View Assist Mirror................................2-41
Power Heated Mirrors..................................2-40
Overheated Engine Protection Operating Mode....5-29
Owner Checks and Services.............................. 6-9
Owners, Canadian............................................... ii
9