display CADILLAC SRX 2011 2.G User Guide
[x] Cancel search | Manufacturer: CADILLAC, Model Year: 2011, Model line: SRX, Model: CADILLAC SRX 2011 2.GPages: 498, PDF Size: 7.62 MB
Page 43 of 498
Black plate (9,1)Cadillac SRX Owner Manual - 2011
Keys, Doors and Windows 2-9
5. Press the ignition. When thetransmitter is learned the DIC
display will show that it is ready
to program the next transmitter.
6. Remove the transmitter from the transmitter pocket and
press
Kon the transmitter.
To program additional
transmitters, repeat Steps 4
through 6.
When all additional transmitters
are programmed, press and hold
the ignition for 10 seconds to
exit programming mode.
Starting the Vehicle with a Low
Transmitter Battery
If the transmitter battery is weak,
the DIC may display NO REMOTE
DETECTED when you try to
start the vehicle. The REPLACE
BATTERY IN REMOTE KEY
message may also be displayed
at this time. To start the vehicle:
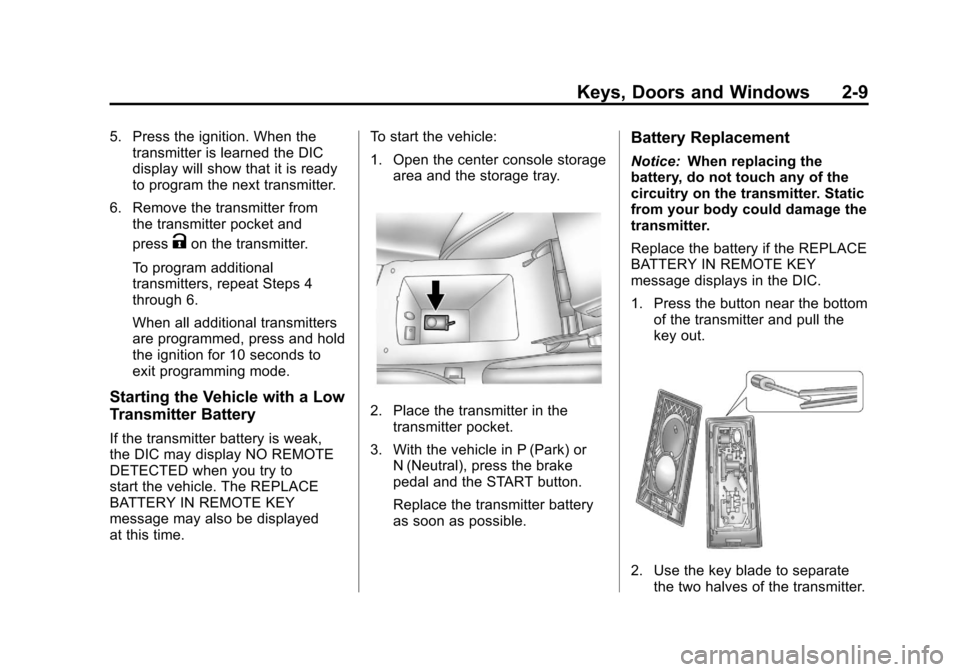
1. Open the center console storage
area and the storage tray.
2. Place the transmitter in thetransmitter pocket.
3. With the vehicle in P (Park) or N (Neutral), press the brake
pedal and the START button.
Replace the transmitter battery
as soon as possible.
Battery Replacement
Notice: When replacing the
battery, do not touch any of the
circuitry on the transmitter. Static
from your body could damage the
transmitter.
Replace the battery if the REPLACE
BATTERY IN REMOTE KEY
message displays in the DIC.
1. Press the button near the bottom of the transmitter and pull the
key out.
2. Use the key blade to separatethe two halves of the transmitter.
Page 51 of 498
Black plate (17,1)Cadillac SRX Owner Manual - 2011
Keys, Doors and Windows 2-17
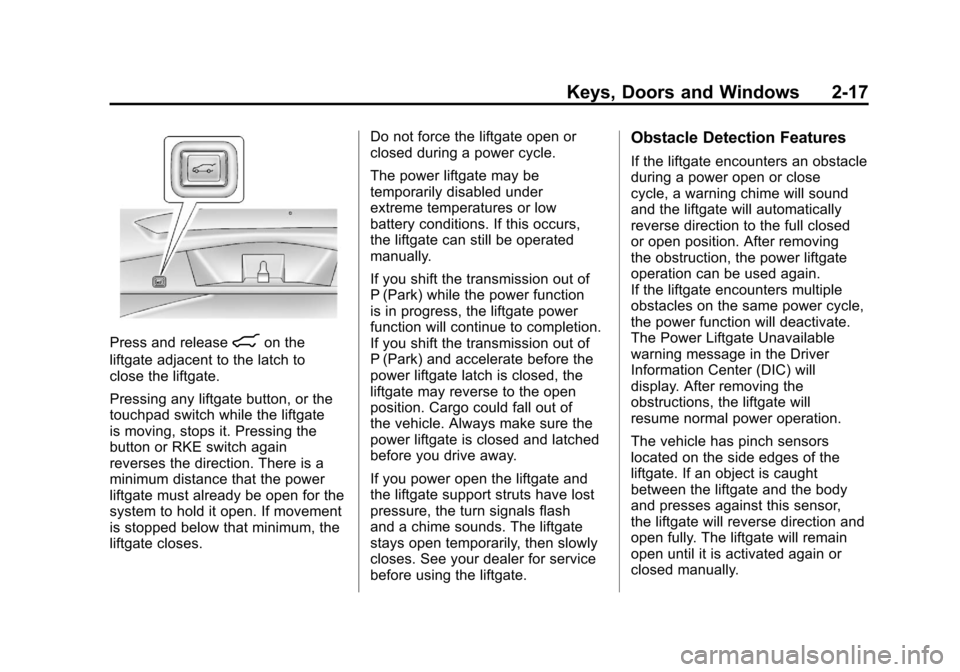
Press and release&on the
liftgate adjacent to the latch to
close the liftgate.
Pressing any liftgate button, or the
touchpad switch while the liftgate
is moving, stops it. Pressing the
button or RKE switch again
reverses the direction. There is a
minimum distance that the power
liftgate must already be open for the
system to hold it open. If movement
is stopped below that minimum, the
liftgate closes. Do not force the liftgate open or
closed during a power cycle.
The power liftgate may be
temporarily disabled under
extreme temperatures or low
battery conditions. If this occurs,
the liftgate can still be operated
manually.
If you shift the transmission out of
P (Park) while the power function
is in progress, the liftgate power
function will continue to completion.
If you shift the transmission out of
P (Park) and accelerate before the
power liftgate latch is closed, the
liftgate may reverse to the open
position. Cargo could fall out of
the vehicle. Always make sure the
power liftgate is closed and latched
before you drive away.
If you power open the liftgate and
the liftgate support struts have lost
pressure, the turn signals flash
and a chime sounds. The liftgate
stays open temporarily, then slowly
closes. See your dealer for service
before using the liftgate.
Obstacle Detection Features
If the liftgate encounters an obstacle
during a power open or close
cycle, a warning chime will sound
and the liftgate will automatically
reverse direction to the full closed
or open position. After removing
the obstruction, the power liftgate
operation can be used again.
If the liftgate encounters multiple
obstacles on the same power cycle,
the power function will deactivate.
The Power Liftgate Unavailable
warning message in the Driver
Information Center (DIC) will
display. After removing the
obstructions, the liftgate will
resume normal power operation.
The vehicle has pinch sensors
located on the side edges of the
liftgate. If an object is caught
between the liftgate and the body
and presses against this sensor,
the liftgate will reverse direction and
open fully. The liftgate will remain
open until it is activated again or
closed manually.
Page 60 of 498
Black plate (26,1)Cadillac SRX Owner Manual - 2011
2-26 Keys, Doors and Windows
Express‐Down/Up Windows
Windows that have the
express‐down/up feature
allow the windows to be lowered
and raised fully without holding
the window switch. Press the
window switch fully and release it to
activate the express‐down feature.
Pull the window switch fully up and
release it to activate the express‐up
feature. The express mode can be
canceled at any time by briefly
pressing, or pulling the switch.
Programming the Power
Windows
Programming the power windows
may be necessary if the vehicle's
battery has been disconnected or
discharged.
If the window will not express up
after power has been restored and
a message is displayed in the Driver
Information Center:
1. Close all doors
2. Place the ignition inACC/ACCESSORY or
ON/RUN/START.
3. From any partial open position, close the window and continue
to pull the switch briefly after the
window has fully closed.
Obstacle Detection Feature
The Obstacle Detection Feature is
part of the express-up feature and is
active:
1. In the middle and upper portionsof the window opening.
2. During window up movements.
3. In ignition OFF during all window up movements and during
express-up window movements
in ignition ON/RUN/START.
If there is something blocking the
window during automatic closing,
the window will reverse direction
for a short distance. Weather
conditions such as extreme cold
and/or ice may cause the window to
auto-reverse. The window will return
to normal operation once the object
or condition is removed.
Page 77 of 498
Black plate (13,1)Cadillac SRX Owner Manual - 2011
Seats and Restraints 3-13
To raise the seatback:
1. Lift the lever on top of theseatback. Raise the seatback
and release the lever. The rear
seatback lock indicator (A)
extends when the seatback is
unlocked.
2. Push the seatback rearward until it locks in the upright
position. The rear seatback lock
indicator (A) retracts when the
seatback is locked in place.
3. Make sure the rear safety belts are not twisted or caught
between the seat cushion and
the seatback.
Reclining the Seatbacks
To recline the seatback:
1. Lift and hold the lever on top ofthe seatback. The rear seatback
lock indicator (A) extends when
the seatback is unlocked. 2. Tilt the seatback rearward, and
then release the lever when
the seatback is in the desired
position. The rear seatback lock
indicator (A) retracts when the
seatback is locked in place.
Heated Rear Seats
{WARNING
If you cannot feel temperature
change or pain to the skin,
the seat heater may cause
burns even at low temperatures.
See the Warning under Heated
Front Seats on page 3‑10.
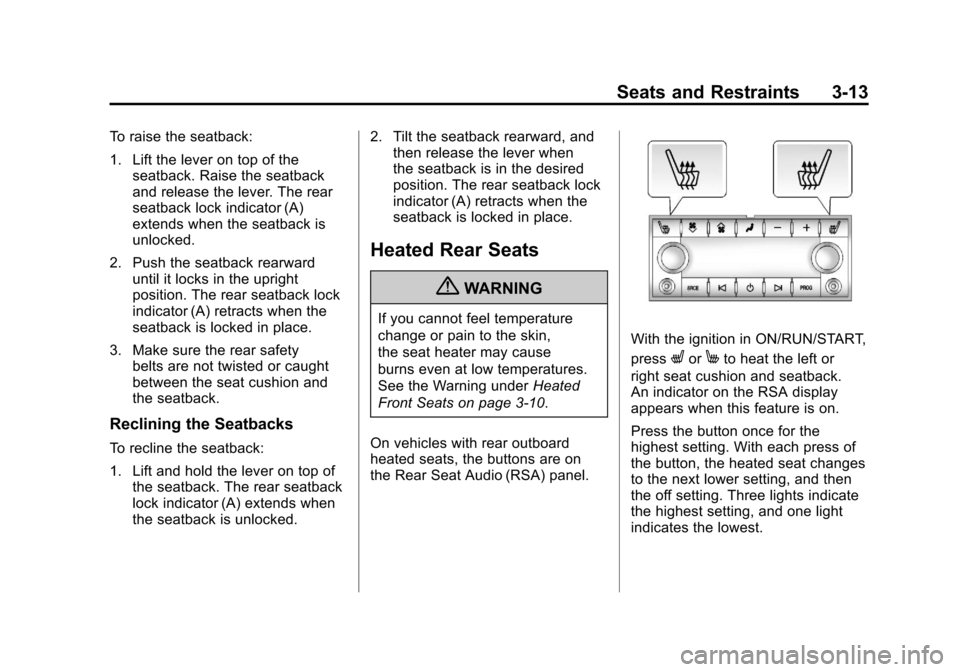
On vehicles with rear outboard
heated seats, the buttons are on
the Rear Seat Audio (RSA) panel.
With the ignition in ON/RUN/START,
press
LorMto heat the left or
right seat cushion and seatback.
An indicator on the RSA display
appears when this feature is on.
Press the button once for the
highest setting. With each press of
the button, the heated seat changes
to the next lower setting, and then
the off setting. Three lights indicate
the highest setting, and one light
indicates the lowest.
Page 147 of 498
Black plate (1,1)Cadillac SRX Owner Manual - 2011
Instruments and Controls 5-1
Instruments and
Controls
Controls
Steering Wheel Adjustment . . . 5-2
Steering Wheel Controls . . . . . . 5-2
Horn . . . . . . . . . . . . . . . . . . . . . . . . . . 5-3
Windshield Wiper/Washer . . . . . 5-3
Rear Window Wiper/Washer . . . . . . . . . . . . . . . . . . . . . . 5-5
Headlamp Washer . . . . . . . . . . . . 5-6
Compass . . . . . . . . . . . . . . . . . . . . . 5-7
Clock (Analog Clock) . . . . . . . . . . 5-7
Clock (Digital Clock) . . . . . . . . . . 5-8
Power Outlets . . . . . . . . . . . . . . . . . 5-9
Cigarette Lighter . . . . . . . . . . . . . . 5-9
Ashtrays . . . . . . . . . . . . . . . . . . . . . 5-10
Warning Lights, Gauges, and
Indicators
Warning Lights, Gauges, and Indicators . . . . . . . . . . . . . . . . . . 5-10
Instrument Cluster . . . . . . . . . . . 5-11
Speedometer . . . . . . . . . . . . . . . . 5-12
Odometer . . . . . . . . . . . . . . . . . . . . 5-12
Tachometer . . . . . . . . . . . . . . . . . . 5-12
Fuel Gauge . . . . . . . . . . . . . . . . . . 5-12 Fuel Economy Gauge
(3.0L Only) . . . . . . . . . . . . . . . . . 5-13
Turbo Gauge (2.8L Only) . . . . 5-14
Engine Coolant Temperature Gauge . . . . . . . . . . . . . . . . . . . . . . 5-15
Safety Belt Reminders . . . . . . . 5-15
Airbag Readiness Light . . . . . . 5-17
Passenger Airbag Status Indicator . . . . . . . . . . . . . . . . . . . . 5-18
Charging System Light . . . . . . 5-19
Malfunction Indicator Lamp . . . . . . . . . . . . . 5-19
Brake System Warning Light . . . . . . . . . . . . . . . . . . . . . . . 5-22
Electric Parking Brake Light . . . . . . . . . . . . . . . . . . . . . . . 5-23
Antilock Brake System (ABS) Warning Light . . . . . . . . . . . . . . 5-23
Traction Off Light . . . . . . . . . . . . 5-24
StabiliTrak
®OFF Light . . . . . . . 5-24
Traction Control System (TCS)/StabiliTrak
®Light . . . . 5-25
Tire Pressure Light . . . . . . . . . . 5-25
Engine Oil Pressure Light . . . . 5-26
Fuel Economy Light . . . . . . . . . 5-26
Low Fuel Warning Light . . . . . . 5-27
Security Light . . . . . . . . . . . . . . . . 5-27
High-Beam On Light . . . . . . . . . 5-27 Adaptive Forward Lighting
(AFL) Light . . . . . . . . . . . . . . . . . 5-27
Front Fog Lamp Light . . . . . . . . 5-28
Lamps On Reminder . . . . . . . . . 5-28
Cruise Control Light . . . . . . . . . 5-28
Information Displays
Driver Information Center (DIC) . . . . . . . . . . . . . . . 5-28
Vehicle Messages
Vehicle Messages . . . . . . . . . . . 5-32
Battery Voltage and ChargingMessages . . . . . . . . . . . . . . . . . . 5-33
Brake System Messages . . . . 5-33
Compass Messages . . . . . . . . . 5-34
Cruise Control Messages . . . . 5-34
Door Ajar Messages . . . . . . . . . 5-34
Engine Cooling System Messages . . . . . . . . . . . . . . . . . . 5-34
Engine Oil Messages . . . . . . . . 5-35
Engine Power Messages . . . . 5-36
Fuel System Messages . . . . . . 5-36
Key and Lock Messages . . . . . 5-36
Lamp Messages . . . . . . . . . . . . . 5-37
Object Detection System Messages . . . . . . . . . . . . . . . . . . 5-37
Ride Control System Messages . . . . . . . . . . . . . . . . . . 5-37
Page 153 of 498
Black plate (7,1)Cadillac SRX Owner Manual - 2011
Instruments and Controls 5-7
SeeWasher Fluid on page 10‑24 for
information on filling the windshield
washer fluid.
{WARNING
In freezing weather, do not
use your washer until the
windshield is warmed. Otherwise
the washer fluid can form ice on
the windshield, blocking your
vision.
Compass
The vehicle may have a compass
display on the Driver Information
Center (DIC). The compass
receives its heading and other
information from Global Positioning
System (GPS) antenna, StabiliTrak,
and vehicle speed information. Avoid covering the GPS antenna
for long periods of time with objects
that may interfere with the antenna's
ability to receive a satellite signal.
See
Multi-Band Antenna on
page 7‑19 for the location of the
vehicle's antennas. The compass
system is designed to operate for a
certain number of miles or degrees
of turn before needing a signal
from the GPS satellites. When the
compass display shows CAL, drive
the vehicle for a short distance in
an open area where it can receive
a GPS signal. The compass system
will automatically determine when
GPS signal is restored and provide
a heading again. See Compass
Messages on page 5‑34 for more
information on the messages that
may be displayed for the compass.
Clock (Analog Clock)
The analog clock is located on the
instrument panel above the radio.
The clock is not connected with any
other vehicle system and runs by
itself. To adjust the clock:
1. Locate the adjustment buttons directly below the clock face.
2. Push and hold either adjustment button to advance or reverse the
clock hands. Holding the buttons
down will cause the clock to
advance faster. Release the
buttons before reaching the
desired time.
3. Push and release the buttons to increase the time by one minute
increments until the desired time
is reached.
Page 154 of 498
Black plate (8,1)Cadillac SRX Owner Manual - 2011
5-8 Instruments and Controls
Clock (Digital Clock)
The infotainment system controls
are used to access the time and
date settings through the menu
system. SeeOperation on page 7‑7
for information about how to use
the menu system. See the separate
navigation system manual for
instructions on how to operate the
digital clock for the navigation
system.
To turn the digital clock on or off:
1. Press the CONFIG button.
2. Select Time and Date Settings.
3. Select Clock Displayed.
4. Press MENU/SELECT to turn the clock on or off.
Setting the Time and Date
1. Press the CONFIG button.
2. Select Time and Date Settings.
3. Select Set Time or Set Date.
4. Turn the MENU/SELECT knob toadjust the highlighted value.
5. Press the MENU/SELECT knob to select the next value.
6. To save the time or date and return to the Time and
Date Settings menu, press
the
0BACK button at any time
or press the MENU/SELECT
knob after adjusting the minutes
or year.
Setting the 12/24 Hour Format
1. Press the CONFIG button.
2. Select Time and Date Settings.
3. Highlight 12/24 Hour Format.
4. Press the MENU/SELECT knob to select the 12 hour or 24 hour
display format.
Setting the Month & Day
Format
1. Press the CONFIG button.
2. Select Time and Date Settings.
3. Highlight Month & Day Format.
4. Press the MENU/SELECT knobto select MM/DD (month/day) or
DD/MM (day/month).
Setting the Auto Time Adjust
1. Press the CONFIG button.
2. Select Time and Date Settings.
3. Highlight Auto Time Adjust.
4. Press the MENU/SELECT knobto turn Auto Time Adjust on
or off.
Page 158 of 498
Black plate (12,1)Cadillac SRX Owner Manual - 2011
5-12 Instruments and Controls
Speedometer
The speedometer shows the
vehicle's speed in either kilometers
per hour (km/h) or miles per
hour (mph).
Odometer
The odometer shows how far the
vehicle has been driven, in either
kilometers or miles.
This vehicle has a tamper-resistant
odometer. If the vehicle needs a
new odometer installed, the new
one is set to the mileage of the old
odometer. If this is not possible, it is
set at zero and a label is put on the
driver door to show the old mileage
reading.
Tachometer
The tachometer displays the
engine speed in revolutions per
minute (rpm).
Notice:If the engine is operated
with the tachometer in the shaded
warning area, the vehicle could
be damaged, and the damages
would not be covered by the
vehicle warranty. Do not operate
the engine with the tachometer
in the shaded warning area.
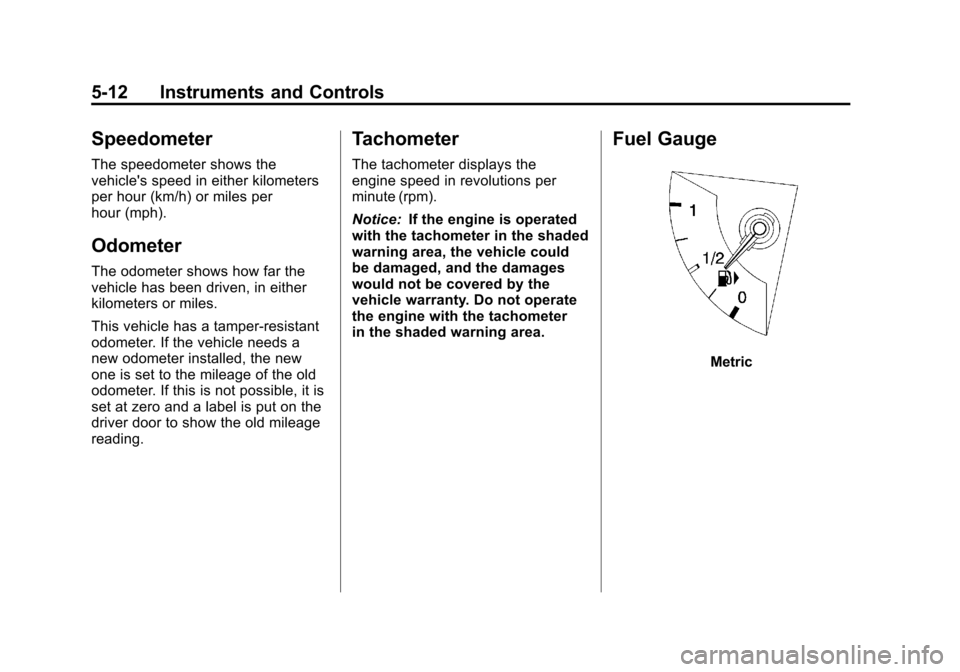
Fuel Gauge
Metric
Page 160 of 498
Black plate (14,1)Cadillac SRX Owner Manual - 2011
5-14 Instruments and Controls
English
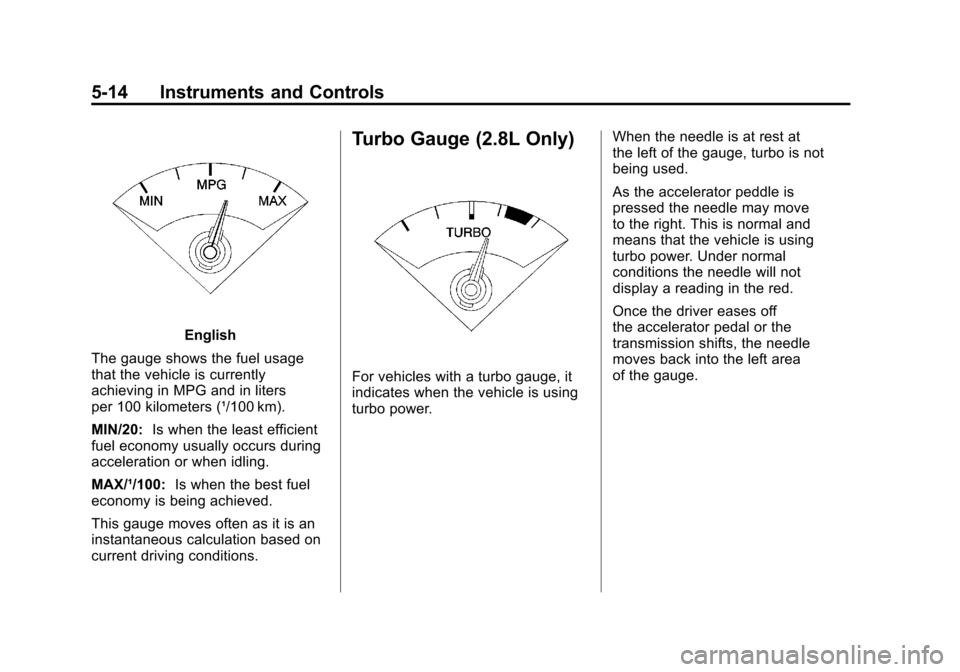
The gauge shows the fuel usage
that the vehicle is currently
achieving in MPG and in liters
per 100 kilometers (¹/100 km).
MIN/20: Is when the least efficient
fuel economy usually occurs during
acceleration or when idling.
MAX/¹/100: Is when the best fuel
economy is being achieved.
This gauge moves often as it is an
instantaneous calculation based on
current driving conditions.
Turbo Gauge (2.8L Only)
For vehicles with a turbo gauge, it
indicates when the vehicle is using
turbo power. When the needle is at rest at
the left of the gauge, turbo is not
being used.
As the accelerator peddle is
pressed the needle may move
to the right. This is normal and
means that the vehicle is using
turbo power. Under normal
conditions the needle will not
display a reading in the red.
Once the driver eases off
the accelerator pedal or the
transmission shifts, the needle
moves back into the left area
of the gauge.
Page 162 of 498
Black plate (16,1)Cadillac SRX Owner Manual - 2011
5-16 Instruments and Controls
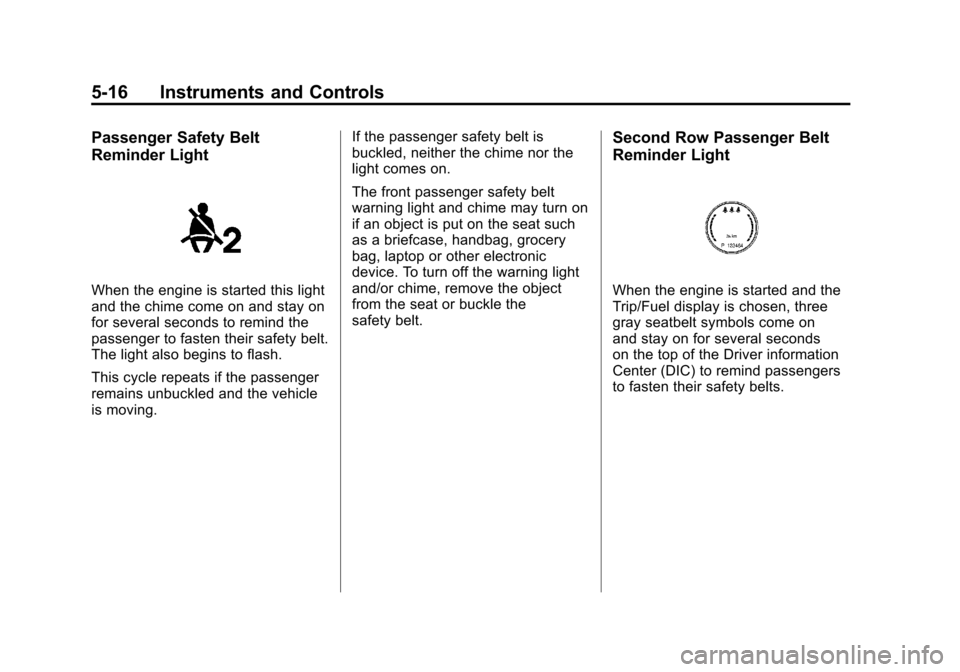
Passenger Safety Belt
Reminder Light
When the engine is started this light
and the chime come on and stay on
for several seconds to remind the
passenger to fasten their safety belt.
The light also begins to flash.
This cycle repeats if the passenger
remains unbuckled and the vehicle
is moving.If the passenger safety belt is
buckled, neither the chime nor the
light comes on.
The front passenger safety belt
warning light and chime may turn on
if an object is put on the seat such
as a briefcase, handbag, grocery
bag, laptop or other electronic
device. To turn off the warning light
and/or chime, remove the object
from the seat or buckle the
safety belt.
Second Row Passenger Belt
Reminder Light
When the engine is started and the
Trip/Fuel display is chosen, three
gray seatbelt symbols come on
and stay on for several seconds
on the top of the Driver information
Center (DIC) to remind passengers
to fasten their safety belts.