display CADILLAC STS 2005 1.G User Guide
[x] Cancel search | Manufacturer: CADILLAC, Model Year: 2005, Model line: STS, Model: CADILLAC STS 2005 1.GPages: 446, PDF Size: 2.58 MB
Page 99 of 446
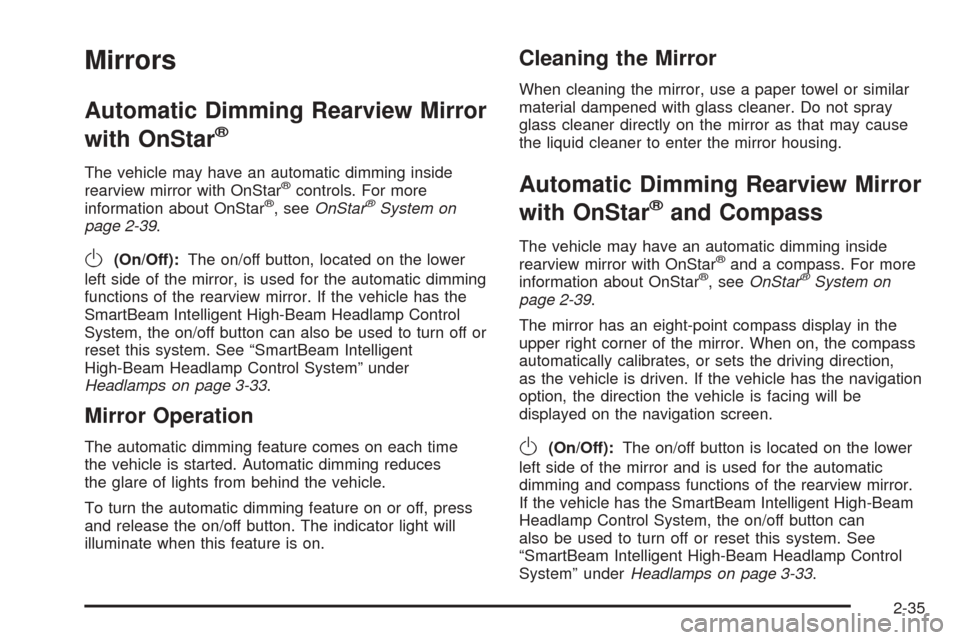
Mirrors
Automatic Dimming Rearview Mirror
with OnStar
®
The vehicle may have an automatic dimming inside
rearview mirror with OnStar®controls. For more
information about OnStar®, seeOnStar®System on
page 2-39.
O(On/Off):The on/off button, located on the lower
left side of the mirror, is used for the automatic dimming
functions of the rearview mirror. If the vehicle has the
SmartBeam Intelligent High-Beam Headlamp Control
System, the on/off button can also be used to turn off or
reset this system. See “SmartBeam Intelligent
High-Beam Headlamp Control System” under
Headlamps on page 3-33.
Mirror Operation
The automatic dimming feature comes on each time
the vehicle is started. Automatic dimming reduces
the glare of lights from behind the vehicle.
To turn the automatic dimming feature on or off, press
and release the on/off button. The indicator light will
illuminate when this feature is on.
Cleaning the Mirror
When cleaning the mirror, use a paper towel or similar
material dampened with glass cleaner. Do not spray
glass cleaner directly on the mirror as that may cause
the liquid cleaner to enter the mirror housing.
Automatic Dimming Rearview Mirror
with OnStar
®and Compass
The vehicle may have an automatic dimming inside
rearview mirror with OnStar®and a compass. For more
information about OnStar®, seeOnStar®System on
page 2-39.
The mirror has an eight-point compass display in the
upper right corner of the mirror. When on, the compass
automatically calibrates, or sets the driving direction,
as the vehicle is driven. If the vehicle has the navigation
option, the direction the vehicle is facing will be
displayed on the navigation screen.
O(On/Off):The on/off button is located on the lower
left side of the mirror and is used for the automatic
dimming and compass functions of the rearview mirror.
If the vehicle has the SmartBeam Intelligent High-Beam
Headlamp Control System, the on/off button can
also be used to turn off or reset this system. See
“SmartBeam Intelligent High-Beam Headlamp Control
System” underHeadlamps on page 3-33.
2-35
Page 100 of 446
Mirror Operation
The automatic dimming feature comes on each time the
vehicle is started.
To turn the automatic dimming feature on or off, press
the on/off button. The indicator light will illuminate
when this feature is on.
Compass Operation
Press the on/off button once to turn the compass on
or off.
When the ignition and the compass feature are on,
the compass will show two character boxes for
approximately two seconds. After two seconds, the
mirror will display the current compass direction.
Compass Calibration
If after two seconds the display does not show a
compass direction, (N for North for example), there may
be a strong magnetic �eld interfering with the compass.
Such interference may be caused by a magnetic
antenna mount, note pad holder, or similar object. If the
letter C appears in the compass window, the compass
may need to be reset or calibrated.The mirror can be calibrated by driving the vehicle in
circles at 5 mph (8 km/h) or less until the display reads
a direction.
The compass can be calibrated by pressing and holding
the on/off button until a C is shown in the compass
display.
Compass Variance
Compass variance is the difference between earth’s
magnetic north and true geographic north. If the mirror
is not adjusted for compass variance, the compass
could give false readings.
The mirror is set in zone eight upon leaving the factory.
It will be necessary to adjust the compass to
compensate for compass variance if the vehicle is
driven outside zone eight. Under certain circumstances,
such as a long distance, cross-country trip, it will be
necessary to adjust the compass variance.
2-36
Page 101 of 446
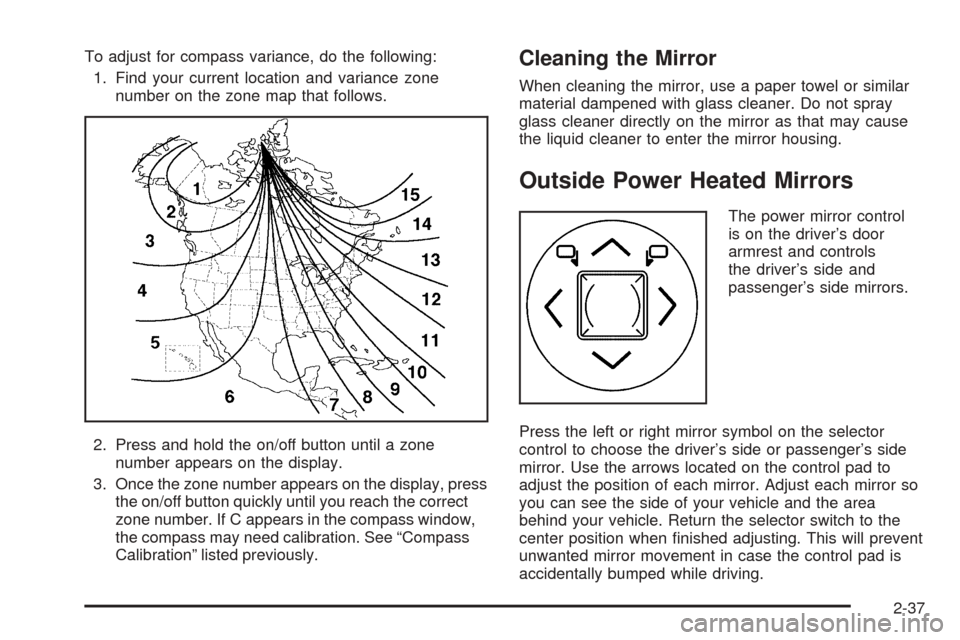
To adjust for compass variance, do the following:
1. Find your current location and variance zone
number on the zone map that follows.
2. Press and hold the on/off button until a zone
number appears on the display.
3. Once the zone number appears on the display, press
the on/off button quickly until you reach the correct
zone number. If C appears in the compass window,
the compass may need calibration. See “Compass
Calibration” listed previously.Cleaning the Mirror
When cleaning the mirror, use a paper towel or similar
material dampened with glass cleaner. Do not spray
glass cleaner directly on the mirror as that may cause
the liquid cleaner to enter the mirror housing.
Outside Power Heated Mirrors
The power mirror control
is on the driver’s door
armrest and controls
the driver’s side and
passenger’s side mirrors.
Press the left or right mirror symbol on the selector
control to choose the driver’s side or passenger’s side
mirror. Use the arrows located on the control pad to
adjust the position of each mirror. Adjust each mirror so
you can see the side of your vehicle and the area
behind your vehicle. Return the selector switch to the
center position when �nished adjusting. This will prevent
unwanted mirror movement in case the control pad is
accidentally bumped while driving.
2-37
Page 111 of 446
Anti-Pinch:If an object is in the path of the sunroof
while it is closing, the anti-pinch feature will detect the
object and stop the sunroof from closing at the point
of the obstruction. The sunroof will then return to
the full-open or vent position. To close the sunroof once
it has re-opened, refer to the two options previously
described under the “Close” feature instructions.
Vehicle Personalization
Your vehicle is equipped with personalization that allows
you to program certain features to a preferred setting
for up to two people. The number of programmable
features varies depending upon which vehicle options
are purchased.
On all vehicles, features such as climate control
settings, radio and XM™ preset settings, exterior lighting
at unlock and remote lock unlock con�rmation and
language have already been programmed for your
convenience. Your vehicle also has an automatic door
locking feature that is always on. You cannot turn
the automatic door locking feature off. See
Programmable Automatic Door Locks on page 2-12.Some vehicles are equipped with additional features
that can be programmed including the seat, steering
column, and outside rearview mirror position.
If your vehicle has the base audio system, the following
information explains the vehicle personalization on
your vehicle.
If your vehicle has the Navigation system, see
“Personalization” in the Index of the Navigation System
manual for information on vehicle personalization.
If your vehicle is equipped with the ability to program
additional personalization features, the driver’s
preferences are recalled by pressing any button on
the keyless access transmitter, 1 or 2 or by selecting
Driver 1 or 2 on the radio display. Certain features can
be programmed not to recall until the ignition is
turned off.
To change feature preferences, use the following
procedure.
2-47
Page 112 of 446
Entering the Personal Settings Menu
To enter the feature programming mode, use the
following procedure:
1. Be sure the ignition is either on, in ACC position, or
in RAP and place the transmission in PARK (P) or
the vehicle speed is less than 6 mph (9 km/h).
2. Press any button on the appropriate keyless access
transmitter to identify yourself as Driver 1 or
Driver 2.
3. Turn on the radio by pressing the power/
volume knob.
4. Press the CNFG radio button or the tune/select
knob located on the right side of the radio to
enter the radio’s main menu.
5. Turn the tune/select knob and scroll to SETUP.
6. Press the tune/select knob to enter the
SETUP menu.
7. Turn the tune/select knob and scroll to PERSONAL
SETTINGS MENU, then press the tune/select knob
to turn the feature on. A check mark appears
after this selection when it is turned on and the
entire list of personalization features will appear.8. Turn the tune/select knob and scroll to the feature
you want to change, then press the tune/select
knob to turn the feature on or off. If the feature is
turned on, a check mark will appear next to
the feature name.
Some features have submenus that show additional
features that can be turned on or off. After entering a
submenu, turn the tune/select knob and scroll to the
feature you want to change, then press the tune/
select knob to turn the feature on or off.
Personal Settings Menu Items
The PERSONAL SETTINGS MENU must be selected
with a check mark to program the personalization
features. If it is not selected, press the tune/select knob
until the check mark appears. If it is selected, the
entire list of features will be available to program.
DRIVER GREETING
This feature allows you to type in a customized name or
greeting that will appear on the display whenever the
corresponding keyless access transmitter, 1 or 2, is used
or Driver 1 or Driver 2 is selected on the radio display.
If a customized name or greeting is not programmed, the
system will show Driver 1 or Driver 2 to correspond
with the numbers on the back of the keyless access
transmitters. In this case, the customized driver greeting
feature is factory shipped as off.
2-48
Page 113 of 446
To turn the driver greeting feature on and to program a
customized name or greeting, use the following
procedure:
1. Enter the PERSONAL SETTINGS MENU by
following the instructions listed previously under
“Entering the Personal Settings Menu.”
2. Turn the tune/select knob until DRIVER GREETING
is highlighted.
3. Press the tune/select knob to turn on the DRIVER
GREETING feature.
You will see a cursor on the screen.
4. Turn the tune/select knob until you reach the �rst
letter you want; the letter will be highlighted. There
is a complete alphabet with both upper and
lower case letters and the numbers zero through
nine. Also included are spaces and other non-letter
characters such as the ampersand (&).
5. Press the tune/select knob once to select the letter.
The letter will then appear on the display and the
cursor will advance to the next letter.
If you make a mistake, press the F5 button, located
on the radio, repeatedly to cycle back through all
of the characters until you reach the character you
wish to change. Then turn the tune/select knob
until the letter you want is highlighted and press the
tune/select knob to select the new letter.6. Repeat Steps 4 and 5 until the name or greeting
you want is complete. You can program up to
16 characters.
The name or greeting you programmed is now set. You
can either exit the programming mode by following
the instructions later in this section or program the next
feature available on your vehicle by pressing the
F6 (BACK) button, located on the radio, to return to the
PERSONAL SETTINGS MENU. You will now see a
check mark next to the driver greeting menu item, which
means that the driver greeting feature is on and a
customized driver greeting is being used.
To turn off the customized driver greeting, and go back
to displaying either Driver 1 or Driver 2, use the
following procedure:
1. Enter the PERSONAL SETTINGS MENU by
following the instructions listed previously under
“Entering the Personal Settings Menu.”
2. Turn the tune/select knob until DRIVER GREETING
is highlighted.
3. Press the tune/select knob to turn on the DRIVER
GREETING feature. The check mark will be cleared
and the customized driver greeting is off.
The only way to correct a customized driver greeting
once you have exited the screen to spell the name, is to
turn the driver greeting feature off, and then turn it
back on.
2-49
Page 129 of 446
Memory Seat, Mirrors and Steering
Wheel
If your vehicle has the memory feature, you can
program and recall memory settings for the following
features for up to two drivers:
The driver’s seat position
The outside rearview mirrors position
The telescopic steering column position, if equipped
The following settings and presets are set automatically:
The language, radio and XM™ presets, tone,
volume, playback mode (AM/FM or CD), last
displayed stations and compact disc position
The last climate control setting
The Head-Up Display (HUD) position, if equipped
Other personalization settings (for example, remote
start settings)
SeeVehicle Personalization on page 2-47.For vehicles with the base audio system, memory
features are programmed and recalled through the radio
from the DRIVER SELECTION and the DRIVER EXIT
SETTINGS submenus. See “Entering the Driver
Selection Submenu” and “Entering the Driver Exit
Settings Submenu” later in this section for more
information on recalling and programming the memory
settings using the base audio system.
For vehicles with the Navigation system, memory
features are programmed and recalled through the
navigation display. See “Personalization” in the Index of
the Navigation System manual for more information
on programming and recalling the memory settings using
the Navigation system.
For vehicles with the Navigation system, you can also
recall the memory features by using voice recognition, if
equipped. See “Voice Recognition” in the Index of the
Navigation System manual for more information.
2-65
Page 135 of 446
Instrument Panel Overview...............................3-4
Hazard Warning Flashers................................3-6
Other Warning Devices...................................3-6
Horn.............................................................3-6
Power Tilt Wheel and Telescopic
Steering Column.........................................3-6
Heated Steering Wheel...................................3-7
Turn Signal/Multifunction Lever.........................3-8
Turn and Lane-Change Signals........................3-8
Headlamp High/Low-Beam Changer..................3-9
Forward Collision Alert (FCA) System................3-9
Flash-to-Pass...............................................3-13
Windshield Wipers........................................3-13
Rainsense™ II Wipers...................................3-14
Windshield Washer.......................................3-15
Headlamp Washer........................................3-16
Cruise Control..............................................3-16
Adaptive Cruise Control.................................3-20
Headlamps..................................................3-33
Wiper Activated Headlamps............................3-37
Headlamps on Reminder................................3-37
Daytime Running Lamps (DRL).......................3-38
Fog Lamps..................................................3-39
Twilight Sentinel
®..........................................3-40
Exterior Lighting Battery Saver........................3-41
Instrument Panel Brightness...........................3-41Entry Lighting...............................................3-42
Parade Dimming...........................................3-42
Reading Lamps............................................3-42
Battery Load Management.............................3-42
Inadvertent Power Battery Saver.....................3-43
Head-Up Display (HUD).................................3-43
Ultrasonic Rear Parking Assist (URPA)............3-47
Accessory Power Outlets...............................3-49
Ashtrays and Cigarette Lighter........................3-49
Climate Controls............................................3-50
Dual Climate Control System..........................3-50
Outlet Adjustment.........................................3-56
Rear Climate Control System.........................3-57
Passenger Compartment Air Filter...................3-58
Warning Lights, Gages, and Indicators............3-60
Instrument Panel Cluster................................3-61
Speedometer and Odometer...........................3-62
Tachometer.................................................3-62
Safety Belt Reminder Light.............................3-62
Airbag Readiness Light..................................3-63
Charging System Light..................................3-64
Brake System Warning Light..........................3-64
Anti-Lock Brake System Warning Light.............3-65
Low Tire Pressure Warning Light....................3-66
Traction Control System (TCS) Warning Light......3-66
Section 3 Instrument Panel
3-1
Page 136 of 446
Engine Coolant Temperature Warning Light......3-67
Engine Coolant Temperature Gage..................3-67
Malfunction Indicator Lamp.............................3-68
Oil Pressure Light.........................................3-70
Security Light...............................................3-71
Fog Lamp Light............................................3-71
Lights On Reminder......................................3-71
Cruise Control Light......................................3-72
Highbeam On Light.......................................3-72
Fuel Gage...................................................3-72
Driver Information Center (DIC).......................3-73
DIC Controls and Displays.............................3-74
DIC Warnings and Messages.........................3-78
Other Messages...........................................3-91Audio System(s).............................................3-92
Setting the Time...........................................3-93
Radio with CD..............................................3-94
Navigation/Radio System..............................3-111
Radio Personalization..................................3-112
Theft-Deterrent Feature................................3-115
Audio Steering Wheel Controls......................3-116
Radio Reception.........................................3-117
Care of Your CDs.......................................3-118
Care of the CD Player.................................3-118
Diversity Antenna System.............................3-118
XM™ Satellite Radio Antenna System............3-118
Section 3 Instrument Panel
3-2
Page 139 of 446
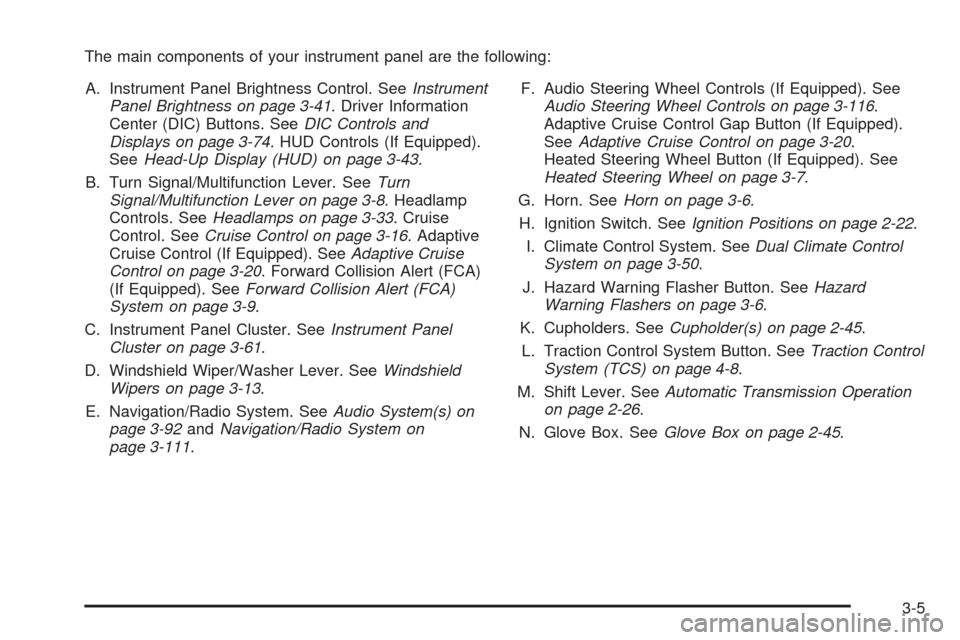
The main components of your instrument panel are the following:
A. Instrument Panel Brightness Control. SeeInstrument
Panel Brightness on page 3-41. Driver Information
Center (DIC) Buttons. SeeDIC Controls and
Displays on page 3-74. HUD Controls (If Equipped).
SeeHead-Up Display (HUD) on page 3-43.
B. Turn Signal/Multifunction Lever. SeeTurn
Signal/Multifunction Lever on page 3-8. Headlamp
Controls. SeeHeadlamps on page 3-33. Cruise
Control. SeeCruise Control on page 3-16. Adaptive
Cruise Control (If Equipped). SeeAdaptive Cruise
Control on page 3-20. Forward Collision Alert (FCA)
(If Equipped). SeeForward Collision Alert (FCA)
System on page 3-9.
C. Instrument Panel Cluster. SeeInstrument Panel
Cluster on page 3-61.
D. Windshield Wiper/Washer Lever. SeeWindshield
Wipers on page 3-13.
E. Navigation/Radio System. SeeAudio System(s) on
page 3-92andNavigation/Radio System on
page 3-111.F. Audio Steering Wheel Controls (If Equipped). See
Audio Steering Wheel Controls on page 3-116.
Adaptive Cruise Control Gap Button (If Equipped).
SeeAdaptive Cruise Control on page 3-20.
Heated Steering Wheel Button (If Equipped). See
Heated Steering Wheel on page 3-7.
G. Horn. SeeHorn on page 3-6.
H. Ignition Switch. SeeIgnition Positions on page 2-22.
I. Climate Control System. SeeDual Climate Control
System on page 3-50.
J. Hazard Warning Flasher Button. SeeHazard
Warning Flashers on page 3-6.
K. Cupholders. SeeCupholder(s) on page 2-45.
L. Traction Control System Button. SeeTraction Control
System (TCS) on page 4-8.
M. Shift Lever. SeeAutomatic Transmission Operation
on page 2-26.
N. Glove Box. SeeGlove Box on page 2-45.
3-5