ESP CADILLAC STS 2009 1.G Owners Manual
[x] Cancel search | Manufacturer: CADILLAC, Model Year: 2009, Model line: STS, Model: CADILLAC STS 2009 1.GPages: 514, PDF Size: 2.73 MB
Page 15 of 514
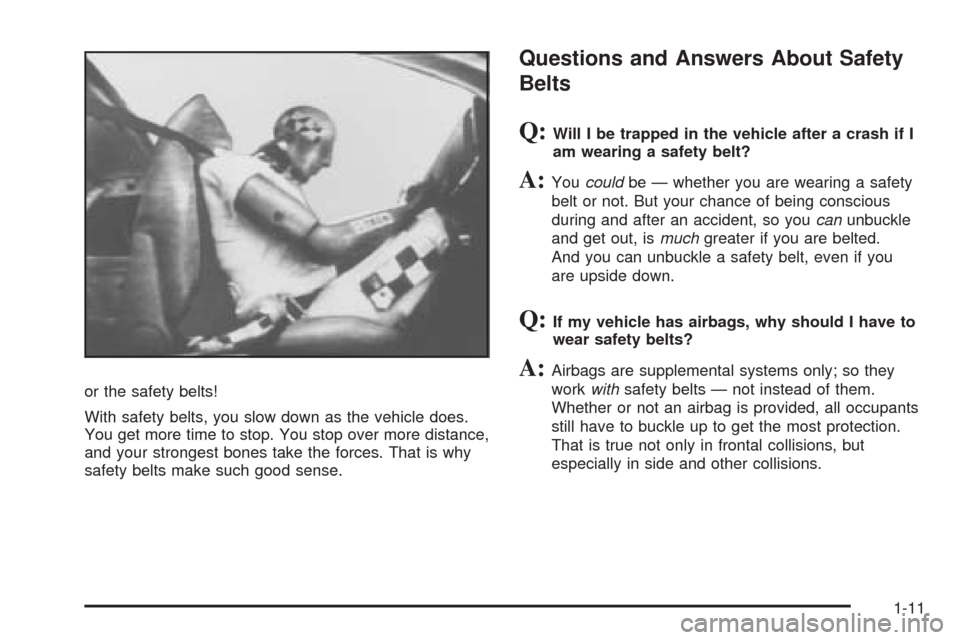
or the safety belts!
With safety belts, you slow down as the vehicle does.
You get more time to stop. You stop over more distance,
and your strongest bones take the forces. That is why
safety belts make such good sense.
Questions and Answers About Safety
Belts
Q:Will I be trapped in the vehicle after a crash if I
am wearing a safety belt?
A:Youcouldbe — whether you are wearing a safety
belt or not. But your chance of being conscious
during and after an accident, so youcanunbuckle
and get out, ismuchgreater if you are belted.
And you can unbuckle a safety belt, even if you
are upside down.
Q:If my vehicle has airbags, why should I have to
wear safety belts?
A:Airbags are supplemental systems only; so they
workwithsafety belts — not instead of them.
Whether or not an airbag is provided, all occupants
still have to buckle up to get the most protection.
That is true not only in frontal collisions, but
especially in side and other collisions.
1-11
Page 79 of 514
G(Trunk):Press and hold to unlock the trunk. If
the engine is running, the shift lever must be in P (Park).
L(Vehicle Locator/Panic Alarm):Press and release
to locate the vehicle. The horn sounds three times and
the turn signal lamps �ash three times. Press and hold
Lfor three seconds to sound the panic alarm. The horn
sounds and the turn signal lamps �ash for 30 seconds.
Press and release
Lagain to cancel the panic alarm.
The vehicle comes with two transmitters. Each
transmitter will have a number on top of it,″1″or″2″.
These numbers correspond to the driver of the vehicle.
For example, the memory seat position for driver 1
will be recalled when using the transmitter labeled″1″,
if enabled through the vehicle personalization. See
Memory Seat, Mirrors and Steering Wheel on page 2-77
andVehicle Personalization on page 2-61.
Programming Transmitters to the
Vehicle
Only keyless access transmitters programmed to
this vehicle will work. If a transmitter is lost or stolen,
a replacement can be purchased and programmed
through your dealer/retailer. The vehicle can be
reprogrammed so that lost or stolen transmitters
no longer work. Each vehicle can have up to
four transmitters programmed to it.
Programming with a Recognized
Transmitter
A new transmitter can be programmed to the vehicle
when there is one recognized transmitter. For vehicles
sold in Canada, two recognized transmitters are
required to program a new transmitter.
1. The vehicle must be off.
2. Both the recognized and new transmitters must be
with you.
3. Insert the vehicle key into the key cylinder located
on the outside of the driver door.
4. Turn the key to the unlock position �ve times within
�ve seconds.
5. The Driver Information Center (DIC) displays
READY FOR FOB 2, 3 or 4.
2-7
Page 85 of 514
Doors and Locks
Door Locks
{CAUTION:
Unlocked doors can be dangerous.
Passengers, especially children, can easily
open the doors and fall out of a moving
vehicle. When a door is locked, the handle
will not open it. You increase the chance of
being thrown out of the vehicle in a crash if
the doors are not locked. So, wear safety
belts properly and lock the doors whenever
you drive.
Young children who get into unlocked vehicles
may be unable to get out. A child can be
overcome by extreme heat and can suffer
permanent injuries or even death from heat
stroke. Always lock your vehicle whenever
you leave it.
Outsiders can easily enter through an
unlocked door when you slow down or stop
your vehicle. Locking your doors can help
prevent this from happening.
There are several ways to lock and unlock your vehicle.From the outside:
Pull the door handle. If you have the keyless
access transmitter, the vehicle recognizes the
transmitter and automatically unlocks the door.
Another way to lock or unlock the vehicle, is to
press the lock or unlock button on the keyless
access transmitter. SeeVehicle Personalization
on page 2-61for information on how to program
the keyless access feature.
From the inside:
Press the power door lock switch located on each
front door. SeePower Door Locks on page 2-13
for more information.
Push down or pull up on the manual door lock knob
for the rear door. The knob is located at the top of
the door panel near the window.
Power Door Locks
The power door lock switches are located on the
front doors.
"(Unlock):Press to unlock the doors.
Q(Lock):Remove the key from the ignition and press
to lock the doors.
2-13
Page 90 of 514
Windows
{CAUTION:
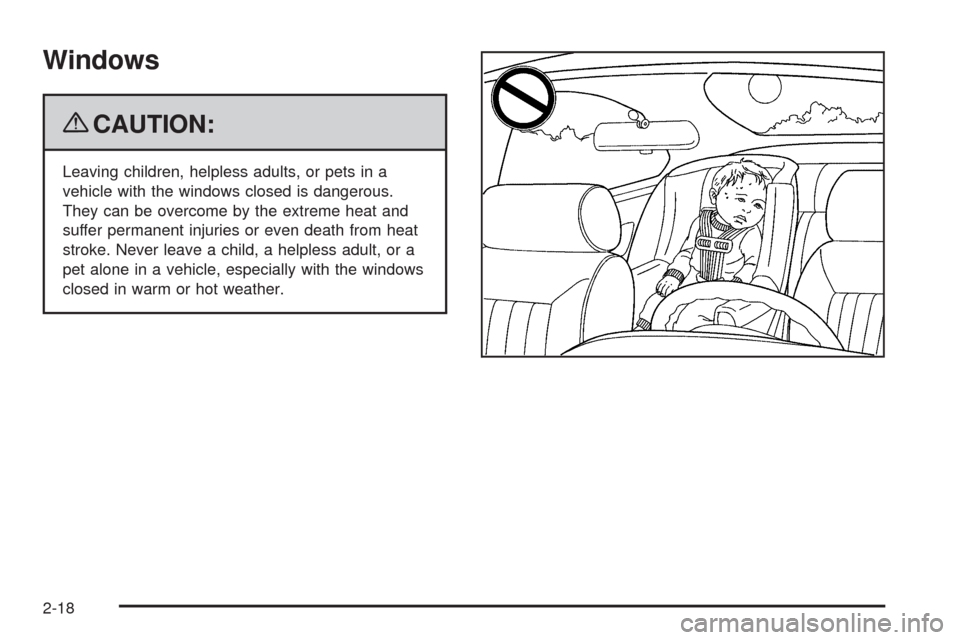
Leaving children, helpless adults, or pets in a
vehicle with the windows closed is dangerous.
They can be overcome by the extreme heat and
suffer permanent injuries or even death from heat
stroke. Never leave a child, a helpless adult, or a
pet alone in a vehicle, especially with the windows
closed in warm or hot weather.
2-18
Page 93 of 514
Window Lockout
o
(Window Lockout):Press to disable the rear
window controls. The light on the button illuminates,
indicating that the feature is in use. The rear windows
can still be raised or lowered using the driver’s window
switches. To restore power to the rear windows, press
the button again.
The front passenger window can be programmed
to be disabled using the window lockout button.
SeeVehicle Personalization on page 2-61.
Secure Car Feature
The windows can be closed by pressing the lock button
on the keyless access transmitter. SeeKeyless Access
System Operation on page 2-5for more information.
If any window is unable to close completely, it reverses
and the horn chirps. See “Anti-Pinch Feature” previously.
The engine must be off to operate this feature.
Sun Visors
Swing down the visor or detach it from the center mount
and move to the side to block out glare. The visors also
have side-to-side slide capability for greater coverage.
Pull the visor down and lift the cover. Move the slide
switch up or down to brighten or dim the lamp.
Theft-Deterrent Systems
Vehicle theft is big business, especially in some cities.
This vehicle has theft-deterrent features, however,
they do not make it impossible to steal.
Theft-Deterrent System
Your vehicle has a theft-deterrent alarm system.
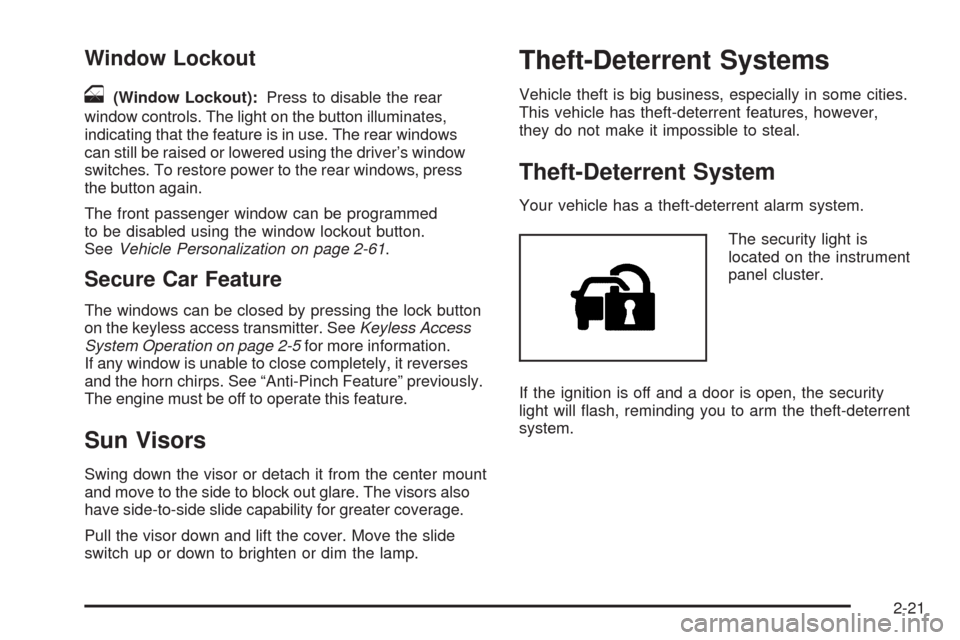
The security light is
located on the instrument
panel cluster.
If the ignition is off and a door is open, the security
light will �ash, reminding you to arm the theft-deterrent
system.
2-21
Page 100 of 514

3. Do not race the engine immediately after starting it.
Operate the engine and transmission gently until
the oil warms up and lubricates all moving parts.
4. If the engine does not start and no DIC message is
displayed, wait 15 seconds before trying again to let
the cranking motor cool down.
If the engine does not start after 5-10 seconds,
especially in very cold weather (below 0°F or−18°C),
it could be �ooded with too much gasoline. Try
pushing the accelerator pedal all the way to the �oor
while cranking for up to 15 seconds maximum.
Notice:Cranking the engine for long periods of
time, by pressing the START button immediately
after cranking has ended, can overheat and damage
the cranking motor, and drain the battery. Wait at
least 15 seconds between each try, to allow the
cranking motor to cool down.When the engine starts, let go of the accelerator.
If the vehicle starts brie�y but then stops again,
do the same thing. This clears the extra gasoline
from the engine.
The vehicle has a Computer-Controlled Cranking
System. This feature assists in starting the engine and
protects components. Once cranking has been initiated,
the engine continues cranking for a few seconds or until
the vehicle starts. If the engine does not start, cranking
automatically stops after 15 seconds to prevent cranking
motor damage. To prevent gear damage, this system
also prevents cranking if the engine is already running.
Notice:The engine is designed to work with the
electronics in the vehicle. If you add electrical parts
or accessories, you could change the way the engine
operates. Before adding electrical equipment, check
with your dealer/retailer. If you do not, the engine
might not perform properly. Any resulting damage
would not be covered by the vehicle warranty.
2-28
Page 116 of 514
When the System Does Not Seem to
Work Properly
If the URPA system will not activate due to a temporary
condition a red light will be shown on the rear URPA
display when the shift lever is moved into R (Reverse).
This occurs under the following conditions:
The ultrasonic sensors are not clean. Keep your
rear bumper free of mud, dirt, snow, ice and slush.
For cleaning instructions, seeWashing Your Vehicle
on page 5-118.
The ultrasonic sensors are not clean. Keep the
vehicle’s rear bumper free of mud, dirt, snow,
ice and slush. For cleaning instructions, see
Washing Your Vehicle on page 5-118.
A trailer was attached to the vehicle, or a bicycle or
an object was hanging out of the trunk during the
last drive cycle, the red light may illuminate in the
rear display. Once the attached object is removed,
URPA will return to normal operation.
The vehicle’s bumper is damaged. Take the vehicle
to your dealer/retailer to repair the system.
Other conditions may affect system performance,
such as vibrations from a jackhammer or the
compression of air brakes on a very large truck.
If the system is still disabled, after driving forward at
least 15 mph (25 km/h), take the vehicle to your
dealer/retailer.
Side Blind Zone Alert (SBZA)
For vehicles with the SBZA system. Read this entire
section before using the system.
The SBZA system operates on a radio frequency
subject to Federal Communications Commission (FCC)
Rules and with Industry Canada.
This device complies with Part 15 of the FCC Rules.
Operation is subject to the following two conditions:
1. This device may not cause harmful interference.
2. This device must accept any interference received,
including interference that may cause undesired
operation.
This device complies with RSS-310 of Industry Canada.
Operation is subject to the following two conditions:
1. This device may not cause harmful interference.
2. This device must accept any interference received,
including interference that may cause undesired
operation.
Frequency of operation: 24.05GHz – 24.25GHz
Field Strength: Not greater than 2.5V/m peak
(0.25V/m average) at a distance of 3m
The manufacturer is not responsible for any radio or TV
interference caused by unauthorized modi�cations to
this equipment. Such modi�cations could void the user’s
authority to operate the equipment.
2-44
Page 125 of 514
The vehicle must have a working electrical system,
including adequate battery power, for the OnStar
equipment to operate. There are other problems OnStar
cannot control that may prevent OnStar from providing
OnStar service at any particular time or place. Some
examples are damage to important parts of the vehicle
in a crash, hills, tall buildings, tunnels, weather or
wireless phone network congestion.
Your Responsibility
Increase the volume of the radio if the OnStar advisor
cannot be heard. If the light next to the OnStar buttons
is red, the system may not be functioning properly.
Press the OnStar button and request a vehicle
diagnostic. If the light appears clear (no light is
appearing), your OnStar subscription has expired and
all services have been deactivated. Press the OnStar
button to con�rm that the OnStar equipment is active.
Universal Home Remote
System
The Universal Home Remote System provides a way to
replace up to three hand-held Radio-Frequency (RF)
transmitters used to activate devices such as garage
door openers, security systems, and home lighting.
This device complies with Part 15 of the FCC Rules.
Operation is subject to the following two conditions:
1. This device may not cause harmful interference.
2. This device must accept any interference received,
including interference that may cause undesired
operation.
This device complies with RSS-210 of Industry Canada.
Operation is subject to the following two conditions:
1. This device may not cause interference.
2. This device must accept any interference received,
including interference that may cause undesired
operation of the device.
Changes or modi�cations to this system by other than
an authorized service facility could void authorization to
use this equipment.
2-53
Page 135 of 514
Personal Settings Menu Items
The PERSONAL SETTINGS MENU must be selected
with a check mark to program the personalization
features. If it is not selected, press the tune/select knob
until the check mark appears. If it is selected, the entire
list of features will be available to program.
DRIVER GREETING
This feature allows you to type in a customized name or
greeting that will appear on the display whenever the
corresponding keyless access transmitter, 1 or 2, is used
or Driver 1 or Driver 2 is selected on the radio display.
If a customized name or greeting is not programmed,
the system will show Driver 1 or Driver 2 to correspond
with the numbers on the back of the keyless access
transmitters. In this case, the customized driver greeting
feature is factory shipped as off.
To turn the driver greeting feature on and to program a
customized name or greeting:
1. Enter the PERSONAL SETTINGS MENU by
following the instructions listed previously under
“Entering the Personal Settings Menu.”
2. Turn the tune/select knob until DRIVER GREETING
is highlighted.3. Press the tune/select knob to turn on the DRIVER
GREETING feature.
You will see a cursor on the screen.
4. Turn the tune/select knob until you reach the
�rst letter you want; the letter will be highlighted.
There is a complete alphabet with both upper and
lower case letters and the numbers zero through
nine. Also included are spaces and other non-letter
characters such as the ampersand (&).
5. Press the tune/select knob once to select the letter.
The letter will then appear on the display and the
cursor will advance to the next letter.
If you make a mistake, press the F5 button, located
on the radio, repeatedly to cycle back through all of
the characters until you reach the character you wish
to change. Then turn the tune/select knob until the
letter you want is highlighted and press the tune/
select knob to select the new letter.
6. Repeat Steps 4 and 5 until the name or greeting
you want is complete. You can program up to
16 characters.
2-63
Page 145 of 514
DOORS UNLOCK IN PARK
The feature allows all of the doors to automatically
unlock when the transmission is shifted into P (Park).
Programmable Modes
Mode 1:ON (default)
Mode 2:OFF
To program the vehicle to a different mode:
1. Enter the PERSONAL SETTINGS MENU by
following the instructions listed previously under
“Entering the Personal Settings Menu.”
2. Turn the tune/select knob until DOORS UNLOCK
IN PARK is highlighted.
3. Press the tune/select knob to switch back and forth
between on and off.
When the mode is turned on, a check mark will
appear next to the feature name.
The mode you selected is now set. You can either exit
the programming mode by following the instructions
later in this section or program the next feature available
on your vehicle.
KEYLESS FT (Front) DOOR UNLOCK
This feature automatically unlocks the appropriate front
door when you approach the vehicle with the keyless
access transmitter and pull the respective door handle.
SeeDoor Locks on page 2-13for more information.
Programmable Modes
Mode 1:ON
Mode 2:OFF (default)
To program the vehicle to a different mode:
1. Enter the PERSONAL SETTINGS MENU by
following the instructions listed previously under
“Entering the Personal Settings Menu.”
2. Turn the tune/select knob until KEYLESS FT DOOR
UNLOCK is highlighted.
3. Press the tune/select knob to switch back and forth
between on and off.
When the mode is turned on, a check mark will
appear next to the feature name.
The mode you selected is now set. You can either exit
the programming mode by following the instructions
later in this section or program the next feature available
on your vehicle.
2-73