ECO mode CADILLAC STS 2011 1.G Owners Manual
[x] Cancel search | Manufacturer: CADILLAC, Model Year: 2011, Model line: STS, Model: CADILLAC STS 2011 1.GPages: 528, PDF Size: 4.96 MB
Page 14 of 528
Black plate (8,1)Cadillac STS Owner Manual - 2011
Memory Features
If the vehicle has the memory feature, you can program
and recall memory settings for the following features for
up to two drivers:
.The driver seat
.The outside rearview mirrors
.The power tilt wheel and telescopic steering
column
The following settings and presets are set automatically:
.The language, radio and XM™ presets, tone,
volume, playback mode (AM/FM or CD), last
displayed stations, and compact disc position
.The last climate control setting
.The Head-Up Display (HUD) position, if your
vehicle has this feature
.Other personalization settings, for example, remote
start settings
See Memory Seat, Mirrors and Steering Wheel
on
page 2‑5and Vehicle Personalizationon
page 3‑59for more information.
For vehicles with the base audio system, memory
features are programmed and recalled using the
radio menu. For vehicles with the Navigation system, memory
features are programmed and recalled using the
navigation display or voice commands. See
“Personalization”
and“Voice Recognition” in the Index
of the Navigation System manual for more information.
Heated Seats (Front)
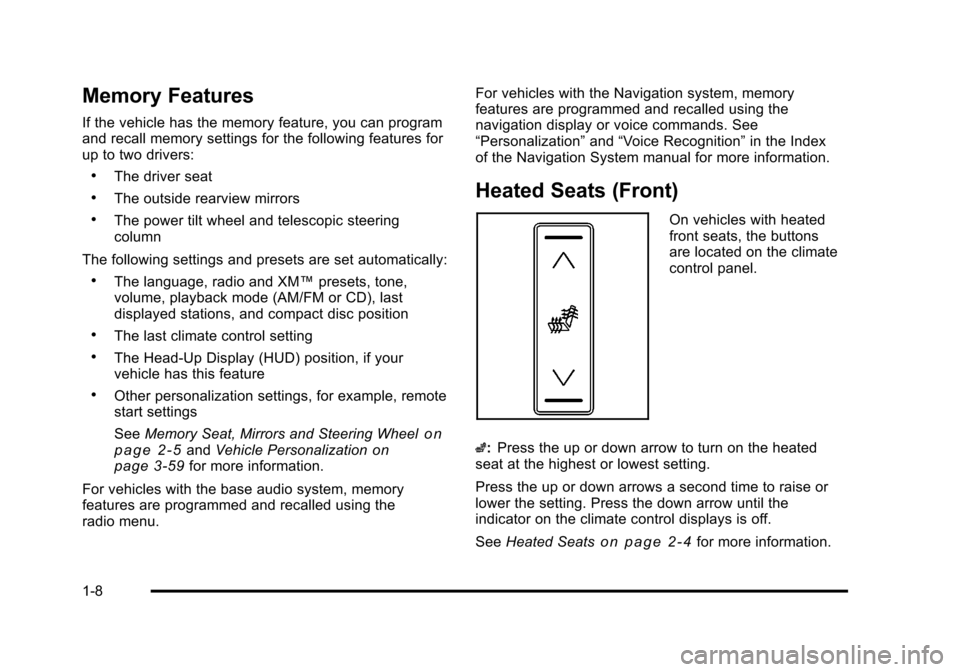
On vehicles with heated
front seats, the buttons
are located on the climate
control panel.
z: Press the up or down arrow to turn on the heated
seat at the highest or lowest setting.
Press the up or down arrows a second time to raise or
lower the setting. Press the down arrow until the
indicator on the climate control displays is off.
See Heated Seats
on page 2‑4for more information.
1-8
Page 38 of 528
Black plate (6,1)Cadillac STS Owner Manual - 2011
For vehicles with the base audio system, memory
features are programmed and recalled through the radio
from the DRIVER SELECTION and the DRIVER EXIT
SETTINGS submenus. See“Entering the Driver
Selection Submenu” and“Entering the Driver Exit
Settings Submenu” later in this section for more
information on recalling and programming the memory
settings using the base audio system.
For vehicles with the Navigation system, memory
features are programmed and recalled through the
navigation display. See “Personalization”in the Index of
the Navigation System manual for more information on
programming and recalling the memory settings using
the Navigation system.
For vehicles with the Navigation system, you can also
recall the memory features by using voice recognition,
if your vehicle has this feature. See “Voice Recognition”
in the Index of the Navigation System manual for more
information.Entering the Driver Selection Submenu
To enter the memory programming mode for your driver
settings:
1. The ignition must be either on, in ACCESSORY, or in RAP and the transmission in P (Park) or the
vehicle speed less than 6 mph (9 km/h).
2. Press any button on the appropriate keyless access transmitter to identify yourself as Driver 1 or
Driver 2.
3. Turn on the radio by pressing the power/ volume knob.
4. Press the CNFG radio button to enter the main menu of the radio.
5. Turn the tune/select knob and scroll to SETUP.
6. Press the tune/select knob to enter the SETUP menu.
7. Turn the tune/select knob and scroll to DRIVER SELECTION.
8. Press the tune/select knob to enter the DRIVER SELECTION submenu. The following items will
appear:
.DRIVER 1
.DRIVER 2
.RECALL DRIVER SETTINGS
.STORE DRIVER SETTINGS
2-6
Page 40 of 528
Black plate (8,1)Cadillac STS Owner Manual - 2011
STORE DRIVER SETTINGS
To store driver settings:1. Adjust your settings for the driver seat, the outside rearview mirrors, and the steering column to a
comfortable driving position.
2. Enter the memory programming mode for your driver settings by following the instructions listed
previously under “Entering the Driver Selection
Submenu.”
3. From the DRIVER SELECTION submenu, turn the tune/select knob to scroll to STORE DRIVER
SETTINGS and press in the knob. Two beeps will
sound to confirm that your driver settings are
saved.
4. Set the HUD position, if your vehicle has this feature, the climate control temperature, fan speed
and mode settings, the radio presets, tone,
volume, playback mode (AM/FM, XM™, or CD),
and compact disc position.
Your memory settings are now programmed.
Any changes that are made to the HUD, audio
system, and climate controls while driving will be
automatically stored when the ignition is turned off.
5. Repeat the procedure for a second driver by programming the other driver number.
Entering the Driver Exit Settings
Submenu
To enter the memory programming mode for your exit
settings:
1. The ignition must be either on, in ACCESSORY, or in RAP and the transmission in P (Park) or
the vehicle speed less than 6 mph (9 km/h).
2. Press any button on the appropriate keyless access transmitter to identify yourself as
Driver 1 or Driver 2.
3. Turn on the radio by pressing the power/ volume knob.
4. Press the CNFG radio button to enter the main menu of the radio.
5. Turn the tune/select knob and scroll to SETUP.
6. Press the tune/select knob to enter the SETUP menu.
7. Turn the tune/select knob and scroll to DRIVER EXIT SETTINGS.
8. Press the tune/select knob to enter the DRIVER EXIT SETTINGS submenu. The following items
will appear:
.RECALL EXIT SETTINGS
.STORE EXIT SETTINGS
2-8
Page 41 of 528
Black plate (9,1)Cadillac STS Owner Manual - 2011
Driver Exit Settings Submenu Items
RECALL EXIT SETTINGS
To recall exit settings:1. Enter the memory programming mode for your exit settings by following the instructions listed
previously under “Entering the Driver Exit Settings
Submenu.”
2. From the DRIVER EXIT SETTINGS submenu, turn the tune/select knob to scroll to RECALL EXIT
SETTINGS and press in the knob.
If the vehicle is in P (Park), one beep will sound
and your previously saved exit position will then be
recalled.
If the vehicle is not in P (Park), three beeps will
sound and your previously saved exit position will
not be recalled.
A memory recall can be stopped by pressing any
memory seat or mirror position button.
If you would like the stored exit positions to be recalled
when your vehicle is in P (Park), the vehicle is off, and
the driver door is opened, see “AUTO EXIT SEAT”and
“AUTO EXIT COLUMN” underVehicle Personalization
on page 3‑59.
STORE EXIT SETTINGS
To store exit settings:
1. Adjust your settings for the driver seat, the outside rearview mirrors, and the steering column to a
comfortable exit position.
2. Enter the memory programming mode for your exit settings by following the instructions listed
previously under “Entering the Driver Exit Settings
Submenu.”
3. From the DRIVER EXIT SETTINGS submenu, turn the tune/select knob to scroll to STORE EXIT
SETTINGS and press in the knob. Two beeps will
sound to confirm that your new exit settings are
saved.
4. Repeat the procedure for a second driver by programming the other driver number.
2-9
Page 97 of 528

Black plate (65,1)Cadillac STS Owner Manual - 2011
{WARNING:
A crash severe enough to inflate the airbags may
have also damaged important functions in the
vehicle, such as the fuel system, brake and
steering systems, etc. Even if the vehicle appears
to be drivable after a moderate crash, there may
be concealed damage that could make it difficult
to safely operate the vehicle.
Use caution if you should attempt to restart the
engine after a crash has occurred.In many crashes severe enough to inflate the airbag,
windshields are broken by vehicle deformation.
Additional windshield breakage may also occur from
the right front passenger airbag..Airbags are designed to inflate only once. After an
airbag inflates, you will need some new parts for
the airbag system. If you do not get them, the
airbag system will not be there to help protect you
in another crash. A new system will include airbag
modules and possibly other parts. The service
manual for your vehicle covers the need to replace
other parts.
.The vehicle has a crash sensing and diagnostic
module which records information after a crash.
See
Vehicle Data Recording and Privacy
on
page 8‑19and Event Data Recorderson
page 8‑19.
.Let only qualified technicians work on the airbag
systems. Improper service can mean that an
airbag system will not work properly. See your
dealer for service.
2-65
Page 122 of 528

Black plate (16,1)Cadillac STS Owner Manual - 2011
Trunk Lid Release
There are three ways to open the trunk lid.
.V(Trunk Lid Release): Press this button located
on the driver's door. The vehicle must be in
P (Park) or N (Neutral) and the valet mode turned
off. To disable valet mode, see Valet Lockout
Switch on page 3‑24.
.Press the trunk lid release button on the keyless
access transmitter. See Keyless Access System
Operation
on page 3‑5. The vehicle must be in
P (Park) or N (Neutral) and the valet mode
turned off.
.Squeeze the trunk release button located on the
rear of the trunk lid above the license plate. If the
vehicle is locked, the keyless access transmitter
must be within three feet (one meter) of the trunk
opening for it to be recognized and allow the trunk
to open. The vehicle must be in P (Park) and the
valet mode turned off.
If your vehicle has lost battery power, you can still
access the trunk by unlocking and lowering the rear
seat pass‐through door and pulling the emergency trunk
release handle.
3-16
Page 135 of 528
Black plate (29,1)Cadillac STS Owner Manual - 2011
Stopping the Engine
Move the shift lever to P (Park) and press the Acc.
button located on the instrument panel. If the shifter is
not in P (Park), the engine shuts off and the vehicle
goes into the Accessory Mode. The DIC displays SHIFT
TO PARK. Once the shifter is moved to P (Park), the
vehicle turns off.
The DIC displays NO FOB, OFF OR RUN?, if the
keyless access transmitter is not detected inside the
vehicle when it is turned off.
SeeDIC Warnings and Messages
on page 4‑76for
more information.
Engine Coolant Heater
The engine coolant heater can provide easier starting
and better fuel economy during engine warm‐up in
cold weather conditions at or below −18°C (0°F).
Vehicles with an engine coolant heater should be
plugged in at least four hours before starting. Some
models have an internal thermostat in the cord which
will prevent engine coolant heater operation at
temperatures above −18°C (0°F).
To Use the Engine Coolant Heater
1. Turn off the engine.
2. Open the hood and unwrap the electrical cord.
The cord is located in the front of the engine
compartment, on the passenger side of the vehicle.
3. You must remove the plastic cap to access the plug.
4. Plug it into a normal, grounded 110-volt AC outlet.
{WARNING:
Plugging the cord into an ungrounded outlet could
cause an electrical shock. Also, the wrong kind of
extension cord could overheat and cause a fire.
You could be seriously injured. Plug the cord into
a properly grounded three-prong 110-volt AC
outlet. If the cord will not reach, use a heavy-duty
three-prong extension cord rated for at least
15 amps.
5. Before starting the engine, be sure to unplug and store the cord as it was before to keep it away from
moving engine parts. If you do not, it could be
damaged.
3-29
Page 138 of 528

Black plate (32,1)Cadillac STS Owner Manual - 2011
Driver Shift Control (DSC)
Notice:If you drive the vehicle at a high rpm
without upshifting while using Driver Shift Control
(DSC), you could damage the vehicle. Always
upshift when necessary while using DSC.
Driver Shift Control (DSC) allows you shift an automatic
transmission similar to a manual transmission. To use
the DSC feature:
1. Move the shift lever to the right from D (Drive) into the DSC area.
When in DSC mode, the
sport symbol will appear
in the Driver Information
Center (DIC).
The vehicle will remain in sport mode if the
shift lever is not moved. Sport mode will shift
automatically but remain in a gear longer then it
would in normal driving mode based on braking
and acceleration. 2. Press the shift lever forward to upshift or rearward
to downshift.
When using the DSC
mode, the number
displayed on the Driver
Information Center (DIC)
indicates the gear that the
transmission is in. See
Driver Information Center
(DIC)
on page 4‑69for
more information on
the DIC.
When starting the vehicle from a stopped condition, only
1 (First) and 2 (Second) gear may be used.
While using the DSC feature the vehicle will have firmer
shifting and increased performance. You can use this
for sport driving or when climbing/descending hills to
stay in gear longer or to down shift for more power or
engine braking.
The transmission will only allow you to shift into
gears appropriate for the vehicle speed and engine
Revolutions Per Minute (RPM). The transmission will
not automatically shift to the next higher gear if the
engine RPM is too high.
3-32
Page 144 of 528

Black plate (38,1)Cadillac STS Owner Manual - 2011
Compass
Compass Operation
PressOto turn the compass on or off.
When the ignition and the compass feature are on, the
mirror displays the compass heading after a few
seconds.
Compass Calibration
If after few seconds, the display does not show a
compass heading (for example, N for North), there may
be a strong magnetic field interfering with the compass.
Interference can be caused by a magnetic antenna
mount, magnetic note pad holder or a similar magnetic
item. If the letter C should ever appear in the compass
window, the compass may need calibration.
The mirror can be calibrated by driving the vehicle in
circles at 5 mph (8 km/h) or less until the display reads a
direction.
The compass can be placed in calibration mode
manually by pressing and holding
Ountil a C is shown
in the compass display.
Compass Variance
The mirror is set to zone eight. If you do not live in zone
eight or drive out of the area, the compass variance
needs to be changed to the appropriate zone.
To adjust for compass variance:
1. Find the current location and variance zone number on the following zone map.
2. Press and holdOuntil a zone number displays.
3-38
Page 160 of 528

Black plate (54,1)Cadillac STS Owner Manual - 2011
Example of Eight Dip Switches with Three PositionsThe panel of switches might not appear exactly as
they do in the examples above, but they should be
similar.
The switch positions on your hand-held transmitter
could be labeled, as follows:
.A switch in the up position could be labeled as
“Up,” “+,” or“On.”
.A switch in the down position could be labeled
as “Down,” “−,” or“Off.”
.A switch in the middle position could be labeled
as “Middle,” “0,” or“Neutral.” 2. Write down the eight to 12 switch settings from left
to right as follows:
.When a switch is in the up position, write “Left.”
.When a switch is in the down position, write
“Right.”
.If a switch is set between the up and down
position, write“Middle.”
The switch settings written down in Step 2 will
now become the button strokes to be entered
into the Universal Home Remote in Step 4. Be
sure to enter the switch settings written down
in Step 2, in order from left to right, into the
Universal Home Remote, when completing
Step 4.
3. From inside your vehicle, first firmly press all three buttons at the same time for about three seconds.
Release the buttons to put the Universal Home
Remote into programming mode.
3-54