headlamp CADILLAC XLR 2005 1.G Owners Manual
[x] Cancel search | Manufacturer: CADILLAC, Model Year: 2005, Model line: XLR, Model: CADILLAC XLR 2005 1.GPages: 438, PDF Size: 3.69 MB
Page 1 of 438
Seats and Restraint Systems........................... 1-1
Front Seats
............................................... 1-2
Safety Belts
.............................................. 1-5
Child Restraints
.......................................1-19
Airbag System
.........................................1-36
Restraint System Check
............................1-48
Features and Controls..................................... 2-1
Keys
........................................................ 2-2
Doors and Locks
....................................... 2-9
Windows
.................................................2-16
Theft-Deterrent Systems
............................2-19
Starting and Operating Your Vehicle
...........2-21
Mirrors
....................................................2-34
OnStar
®System
......................................2-36
HomeLink®Transmitter
.............................2-38
Storage Areas
.........................................2-42
Retractable Hardtop
..................................2-45
Vehicle Personalization
.............................2-54
Instrument Panel............................................. 3-1
Instrument Panel Overview
.......................... 3-4
Climate Controls
......................................3-40
Warning Lights, Gages, and Indicators
........3-46
Driver Information Center (DIC)
..................3-61
Trip Computer
.........................................3-77
Audio System(s)
.......................................3-78Navigation System.......................................... 4-1
Overview
.................................................. 4-2
Features and Controls
................................ 4-4
Navigation Audio System
...........................4-45
Voice Recognition
......................................4-69
Driving Your Vehicle....................................... 5-1
Your Driving, the Road, and Your Vehicle
..... 5-2
Towing
...................................................5-35
Service and Appearance Care.......................... 6-1
Service
..................................................... 6-3
Fuel
......................................................... 6-5
Checking Things Under the Hood
...............6-10
Rear Axle
...............................................6-41
Headlamp Aiming
.....................................6-42
Bulb Replacement
....................................6-44
Windshield Wiper Blade Replacement
.........6-45
Tires
......................................................6-46
Appearance Care
.....................................6-70
Vehicle Identi�cation
.................................6-79
Electrical System
......................................6-80
Capacities and Speci�cations
.....................6-85
Maintenance Schedule..................................... 7-1
Maintenance Schedule
................................ 7-2
Customer Assistance and Information.............. 8-1
Customer Assistance and Information
........... 8-2
Reporting Safety Defects
...........................8-11
Index.................................................................1
2005 Cadillac XLR Owner ManualM
Page 91 of 438

Both mirrors have a heated feature to rid them of snow,
ice, or condensation. They will heat when the rear
window defogger is turned on. See “Rear Window
Defogger” underDual Climate Control System on
page 3-40. If the vehicle has the memory option, the
preferred mirror position can be stored. SeeMemory
Seat, Mirrors and Steering Wheel on page 2-54.
Both mirrors can be manually folded inward by pulling
them toward the vehicle. This feature may be useful
when going through a car wash or a con�ned space.
Push the mirrors away from the vehicle, to the normal
position, before driving.
Outside Automatic Dimming Mirror
The driver’s side mirror will adjust for the glare of
headlamps behind you. This feature is controlled by the
on and off settings on the inside automatic dimming
rearview mirror. SeeAutomatic Dimming Rearview
Mirror with OnStar
®on page 2-34.
Outside Curb View Assist Mirror
The passenger’s side mirror is also capable of
performing the curb view assist feature. This feature will
cause the mirror to tilt to a factory programmed
position when the vehicle is in REVERSE (R). This
feature may be useful in allowing you to view the curb
when you are parallel parking.
If further adjustment is needed after the mirror is tilted,
the mirror switch may be used. The mirror will then
return to this new position when the vehicle is shifted
into REVERSE (R).
When the vehicle is shifted out of REVERSE (R) and
a �ve-second delay has occurred, the passenger’s side
mirror will return to its original position.
This feature can be enabled/disabled through the
Driver Information Center (DIC). See “Park Assist” under
DIC Vehicle Personalization on page 3-73for more
information.
2-35
Page 113 of 438
Instrument Panel Overview...............................3-4
Hazard Warning Flashers................................3-6
Other Warning Devices...................................3-6
Horn.............................................................3-6
Power Tilt Wheel and Telescopic Steering
Column......................................................3-7
Turn Signal/Multifunction Lever.........................3-7
Turn and Lane-Change Signals........................3-8
Headlamp High/Low-Beam Changer..................3-8
Flash-to-Pass.................................................3-9
Windshield Wipers..........................................3-9
Rainsense™ Wipers......................................3-10
Windshield Washer.......................................3-12
Headlamp Washer........................................3-12
Cruise Control..............................................3-12
Adaptive Cruise Control.................................3-16
Exterior Lamps.............................................3-28
Wiper Activated Headlamps............................3-29
Headlamps on Reminder................................3-29
Daytime Running Lamps (DRL).......................3-30
Fog Lamps..................................................3-31
Twilight Sentinel
®..........................................3-31
Exterior Lighting Battery Saver........................3-32
Instrument Panel Brightness...........................3-32
Courtesy Lamps...........................................3-33
Entry/Exit Lighting.........................................3-33
Reading Lamps............................................3-33Battery Run-Down Protection..........................3-33
Head-Up Display (HUD).................................3-34
Ultrasonic Rear Parking Assist (URPA)............3-37
Accessory Power Outlets...............................3-38
Ashtrays and Cigarette Lighter........................3-39
Climate Controls............................................3-40
Dual Climate Control System..........................3-40
Outlet Adjustment.........................................3-45
Passenger Compartment Air Filter...................3-45
Warning Lights, Gages, and Indicators............3-46
Instrument Panel Cluster................................3-46
Speedometer and Odometer...........................3-48
Trip Odometer..............................................3-48
Tachometer.................................................3-48
Safety Belt Reminder Light.............................3-48
Airbag Readiness Light..................................3-49
Airbag Off Light............................................3-50
Voltmeter Gage............................................3-51
Brake System Warning Light..........................3-52
Anti-Lock Brake System Warning Light.............3-53
Traction Control System (TCS) Warning Light......3-53
Engine Coolant Temperature Gage..................3-54
Tire Pressure Light.......................................3-55
Malfunction Indicator Lamp.............................3-55
Engine Oil Pressure Gage.............................3-58
Section 3 Instrument Panel
3-1
Page 119 of 438
Power Tilt Wheel and Telescopic
Steering Column
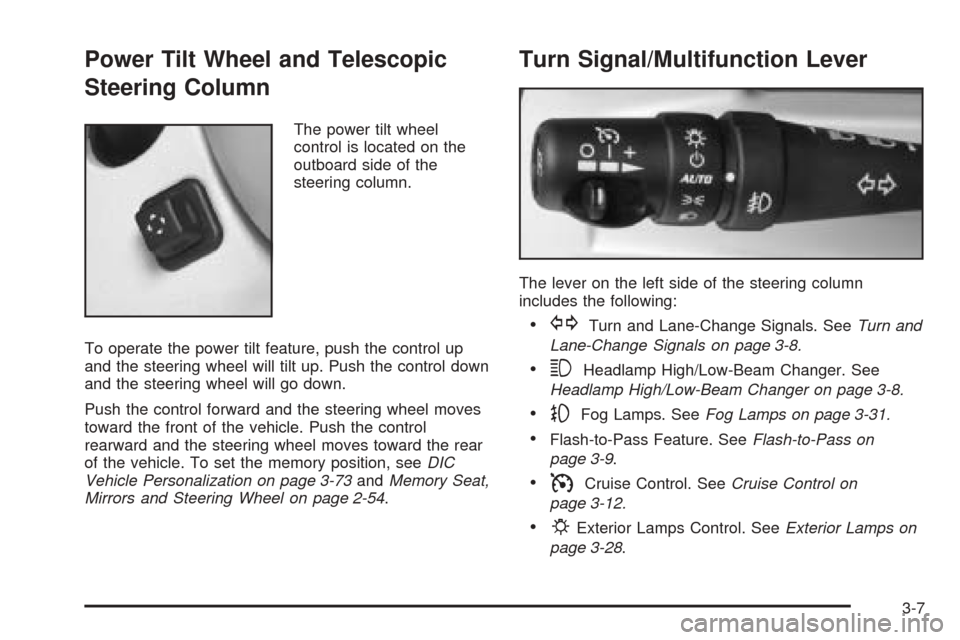
The power tilt wheel
control is located on the
outboard side of the
steering column.
To operate the power tilt feature, push the control up
and the steering wheel will tilt up. Push the control down
and the steering wheel will go down.
Push the control forward and the steering wheel moves
toward the front of the vehicle. Push the control
rearward and the steering wheel moves toward the rear
of the vehicle. To set the memory position, seeDIC
Vehicle Personalization on page 3-73andMemory Seat,
Mirrors and Steering Wheel on page 2-54.
Turn Signal/Multifunction Lever
The lever on the left side of the steering column
includes the following:
GTurn and Lane-Change Signals. SeeTurn and
Lane-Change Signals on page 3-8.
3Headlamp High/Low-Beam Changer. See
Headlamp High/Low-Beam Changer on page 3-8.
-Fog Lamps. SeeFog Lamps on page 3-31.
Flash-to-Pass Feature. SeeFlash-to-Pass on
page 3-9.
ICruise Control. SeeCruise Control on
page 3-12.
PExterior Lamps Control. SeeExterior Lamps on
page 3-28.
3-7
Page 120 of 438
Turn and Lane-Change Signals
The turn signal has two upward (for right) and two
downward (for left) positions. These positions allow you
to signal a turn or a lane change.
To signal a turn, move the multifunction lever all the
way up or down. When the turn is �nished, the lever will
return automatically.
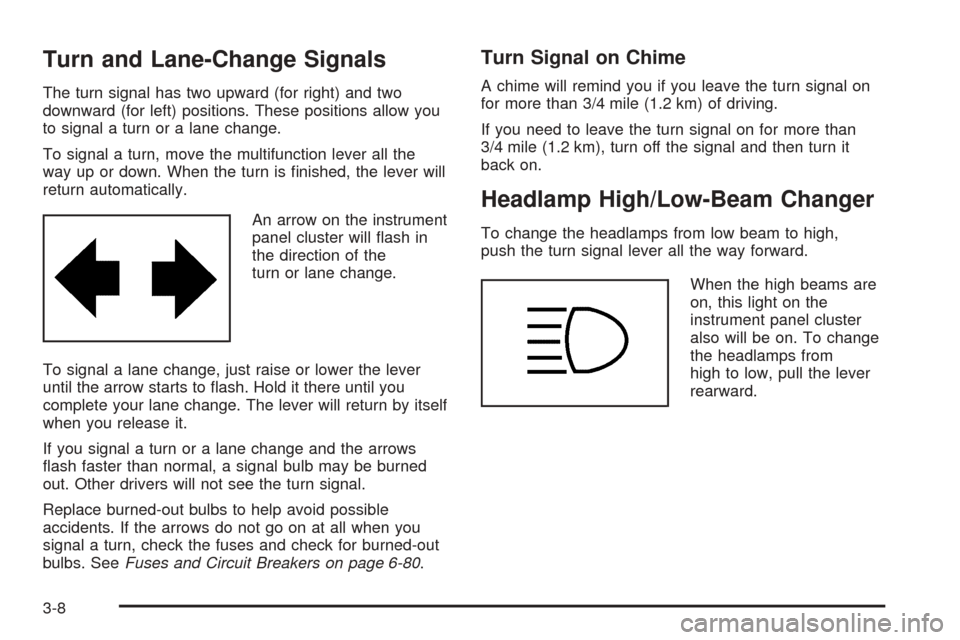
An arrow on the instrument
panel cluster will �ash in
the direction of the
turn or lane change.
To signal a lane change, just raise or lower the lever
until the arrow starts to �ash. Hold it there until you
complete your lane change. The lever will return by itself
when you release it.
If you signal a turn or a lane change and the arrows
�ash faster than normal, a signal bulb may be burned
out. Other drivers will not see the turn signal.
Replace burned-out bulbs to help avoid possible
accidents. If the arrows do not go on at all when you
signal a turn, check the fuses and check for burned-out
bulbs. SeeFuses and Circuit Breakers on page 6-80.
Turn Signal on Chime
A chime will remind you if you leave the turn signal on
for more than 3/4 mile (1.2 km) of driving.
If you need to leave the turn signal on for more than
3/4 mile (1.2 km), turn off the signal and then turn it
back on.
Headlamp High/Low-Beam Changer
To change the headlamps from low beam to high,
push the turn signal lever all the way forward.
When the high beams are
on, this light on the
instrument panel cluster
also will be on. To change
the headlamps from
high to low, pull the lever
rearward.
3-8
Page 121 of 438
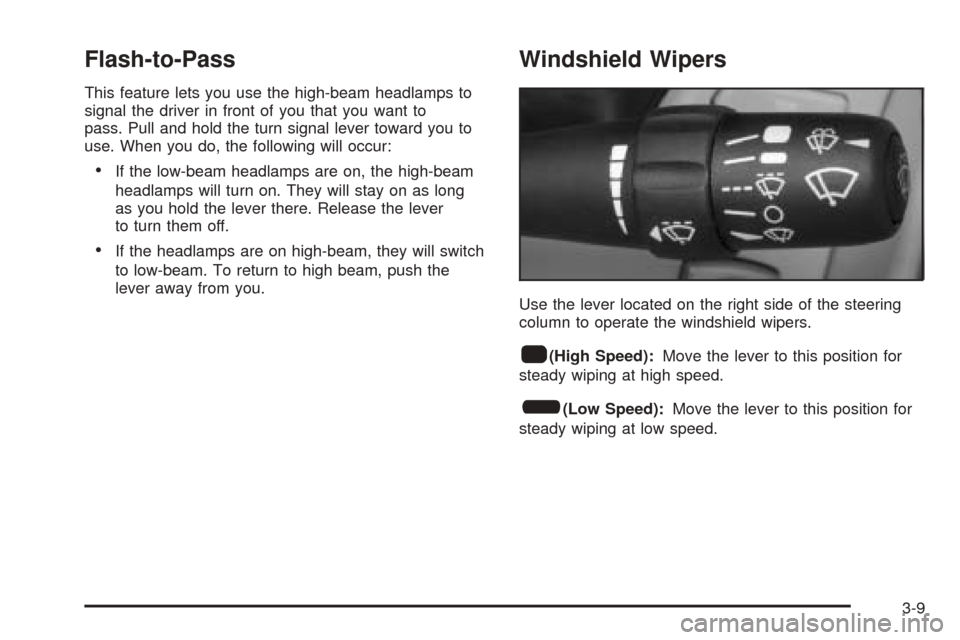
Flash-to-Pass
This feature lets you use the high-beam headlamps to
signal the driver in front of you that you want to
pass. Pull and hold the turn signal lever toward you to
use. When you do, the following will occur:
If the low-beam headlamps are on, the high-beam
headlamps will turn on. They will stay on as long
as you hold the lever there. Release the lever
to turn them off.
If the headlamps are on high-beam, they will switch
to low-beam. To return to high beam, push the
lever away from you.
Windshield Wipers
Use the lever located on the right side of the steering
column to operate the windshield wipers.
1(High Speed):Move the lever to this position for
steady wiping at high speed.
6(Low Speed):Move the lever to this position for
steady wiping at low speed.
3-9
Page 123 of 438
The Rainsense™ system can be activated by moving
the wiper lever up to the delay position and turning
the delay adjust band to one of the �ve sensitivity levels.
The bottom delay adjust position is the lowest sensitivity
setting, level one. This allows more rain or snow to
collect on the windshield between wipes. Turning the
delay adjust band away from you to the higher sensitivity
levels allows less rain or snow to collect on the
windshield between wipes.
The top position is the highest sensitivity setting, level
�ve. A single wipe will occur each time you turn the
delay adjust band to a higher sensitivity level to indicate
that the sensitivity level has been increased.
Notice:Going through an automatic car wash with
the wipers on can damage them. Turn the wipers
off when going through an automatic car wash.The mist and wash cycles operate as normal and are not
affected by the Rainsense™ function. The Rainsense™
system can be overridden at any time by manually
changing the wiper control to low or high speed.
When Rainsense™ is active, the headlamps will turn on
automatically. If it is dark, they will remain on. See
“Wiper-Activated Headlamps” underExterior Lamps on
page 3-28for more information.
Notice:Do not place stickers or other items on the
exterior glass surface directly in front of the
moisture sensor. Doing this could cause the
moisture sensor to malfunction.
3-11
Page 124 of 438
Windshield Washer
K(Washer Fluid):The lever on the right side of the
steering column also controls the windshield washer.
There is a button at the end of the lever. To spray
washer �uid on the windshield, press the button and
hold it. The washer will spray until you release the
button. The wipers will continue to clear the window for
about six seconds after the button is released and
then stop or return to your preset speed.
{CAUTION:
In freezing weather, do not use your washer
until the windshield is warmed. Otherwise the
washer �uid can form ice on the windshield,
blocking your vision.
If the �uid in the windshield washer �uid reservoir is
low, the message LOW WASHER FLUID will appear on
the Driver Information Center (DIC) display. It will
take 60 seconds after the bottle is re�lled for this
message to turn off. For information on the correct
washer �uid mixture to use, seeWindshield Washer
Fluid on page 6-32andRecommended Fluids and
Lubricants on page 7-11.
Headlamp Washer
Every fourth time the windshield washer button is
pressed, washer �uid will clean the headlamps.
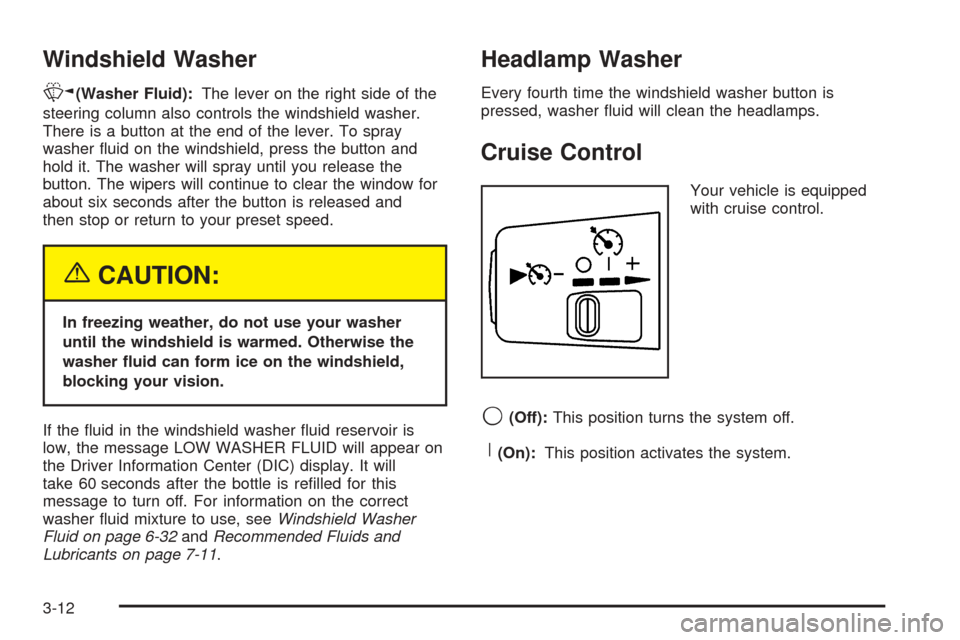
Cruise Control
Your vehicle is equipped
with cruise control.
9(Off):This position turns the system off.
R(On):This position activates the system.
3-12
Page 141 of 438
The exterior lamp band has four positions:
O(Off):Turning the band to this position turns off
all lamps.
AUTO (Automatic):Turning the band to this position
sets the exterior lamps in automatic mode. AUTO mode
will turn the exterior lamps on and off depending on
how much light is available outside the vehicle.
To override AUTO mode, turn the control to off.
To reset to AUTO mode turn the control to exterior
lamps and then back to AUTO. Automatic mode will also
reset when your vehicle is turned off and then back
on again when the control is left in the AUTO position.
;(Parking Lamp):Turning the band to this position
turns on the parking lamps together with the following:
Sidemarker Lamps
Taillamps
License Plate Lamps
Instrument Panel Lights
The parking brake indicator light will come on and stay
on when the parking lamps are on with the engine
off and the ignition to ACC.
5(Headlamps):Turning the control to this position
turns on the headlamps, together with the previously
listed lamps and lights.
Wiper Activated Headlamps
This feature activates the headlamps and parking lamps
after the windshield wipers have been in use for
approximately six seconds.
When the exterior lamp control has been turned off or is
in the parking lamp position and the wiper control is
on delay, low speed or high speed, the HEADLAMPS
SUGGESTED message will appear on the Driver
Information Center (DIC).
When the ignition is turned off, the wiper-activated
headlamps will immediately turn off.
Headlamps on Reminder
A warning chime will sound if the exterior lamp control
is left on in either the headlamp or parking lamp position
and the driver’s door is opened with the ignition off.
3-29
Page 142 of 438
Daytime Running Lamps (DRL)
Daytime Running Lamps (DRL) can make it easier for
others to see the front of your vehicle during the
day. DRL can be helpful in many different driving
conditions, but they can be especially helpful in the short
periods after dawn and before sunset. Fully functional
daytime running lamps are required on all vehicles
�rst sold in Canada.
The DRL system will make the front turn signal lamps
come on when the following conditions are met:
It is still daylight and the ignition is on,
the exterior lamp control is in the off position and
the transmission is not in PARK (P).
When DRL are on, only the front turn signal lamps will
be on. No other exterior lamps such as the parking
lamps, taillamps, etc. will be on when the DRL are being
used. Your instrument panel will not be lit up either.
When it is dark enough outside, the front turn signal
lamps will turn off and normal low-beam headlamps will
turn on.When it is bright enough outside, the regular lamps will
go off, and the front turn signal lamps will take over.
If you start your vehicle in a dark garage, the automatic
headlamp system will come on immediately. Once
you leave the garage, it will take approximately
one minute for the automatic headlamp system to
change to DRL if it is light outside. During that delay,
your instrument panel cluster may not be as bright
as usual. Make sure your instrument panel brightness
knob is in the full bright position. SeeInstrument
Panel Brightness on page 3-32for more information.
If it is dark enough outside and the exterior lamp control
is off, a HEADLAMPS SUGGESTED message will
display on the Driver’s Information Center (DIC). This
message informs the driver that turning on the exterior
lamps is recommended.
Turning the exterior lamp control to off a second time,
or turning on the headlamps will remove the
HEADLAMPS SUGGESTED message. If the parking
lamps or the fog lamps were turned on instead,
the HEADLAMPS SUGGESTED message will continue
to be displayed.
As with any vehicle, you should turn on the regular
headlamp system when you need it.
3-30