rear view mirror CADILLAC XLR 2005 1.G Owners Manual
[x] Cancel search | Manufacturer: CADILLAC, Model Year: 2005, Model line: XLR, Model: CADILLAC XLR 2005 1.GPages: 438, PDF Size: 3.69 MB
Page 1 of 438
Seats and Restraint Systems........................... 1-1
Front Seats
............................................... 1-2
Safety Belts
.............................................. 1-5
Child Restraints
.......................................1-19
Airbag System
.........................................1-36
Restraint System Check
............................1-48
Features and Controls..................................... 2-1
Keys
........................................................ 2-2
Doors and Locks
....................................... 2-9
Windows
.................................................2-16
Theft-Deterrent Systems
............................2-19
Starting and Operating Your Vehicle
...........2-21
Mirrors
....................................................2-34
OnStar
®System
......................................2-36
HomeLink®Transmitter
.............................2-38
Storage Areas
.........................................2-42
Retractable Hardtop
..................................2-45
Vehicle Personalization
.............................2-54
Instrument Panel............................................. 3-1
Instrument Panel Overview
.......................... 3-4
Climate Controls
......................................3-40
Warning Lights, Gages, and Indicators
........3-46
Driver Information Center (DIC)
..................3-61
Trip Computer
.........................................3-77
Audio System(s)
.......................................3-78Navigation System.......................................... 4-1
Overview
.................................................. 4-2
Features and Controls
................................ 4-4
Navigation Audio System
...........................4-45
Voice Recognition
......................................4-69
Driving Your Vehicle....................................... 5-1
Your Driving, the Road, and Your Vehicle
..... 5-2
Towing
...................................................5-35
Service and Appearance Care.......................... 6-1
Service
..................................................... 6-3
Fuel
......................................................... 6-5
Checking Things Under the Hood
...............6-10
Rear Axle
...............................................6-41
Headlamp Aiming
.....................................6-42
Bulb Replacement
....................................6-44
Windshield Wiper Blade Replacement
.........6-45
Tires
......................................................6-46
Appearance Care
.....................................6-70
Vehicle Identi�cation
.................................6-79
Electrical System
......................................6-80
Capacities and Speci�cations
.....................6-85
Maintenance Schedule..................................... 7-1
Maintenance Schedule
................................ 7-2
Customer Assistance and Information.............. 8-1
Customer Assistance and Information
........... 8-2
Reporting Safety Defects
...........................8-11
Index.................................................................1
2005 Cadillac XLR Owner ManualM
Page 57 of 438
Keys...............................................................2-2
Keyless Access System...................................2-4
Keyless Access System Operation....................2-5
Doors and Locks.............................................2-9
Door Locks....................................................2-9
Power Door Locks........................................2-11
Automatic Door Locks...................................2-12
Programmable Automatic Door Unlock.............2-12
Lockout Protection........................................2-12
Trunk..........................................................2-13
Windows........................................................2-16
Power Windows............................................2-17
Sun Visors...................................................2-18
Theft-Deterrent Systems..................................2-19
Theft-Deterrent System..................................2-19
Valet Lockout Switch.....................................2-21
Starting and Operating Your Vehicle................2-21
New Vehicle Break-In....................................2-21
Ignition Positions..........................................2-22
Retained Accessory Power (RAP)...................2-22
Starting Your Engine.....................................2-23
Engine Coolant Heater..................................2-24
Automatic Transmission Operation...................2-25
Parking Brake..............................................2-28
Shifting Into Park (P).....................................2-30
Shifting Out of Park (P).................................2-31
Parking Over Things That Burn.......................2-32Engine Exhaust............................................2-32
Running Your Engine While You Are Parked.......2-33
Mirrors...........................................................2-34
Automatic Dimming Rearview Mirror
with OnStar
®............................................2-34
Outside Power Heated Mirrors........................2-34
Outside Automatic Dimming Mirror..................2-35
Outside Curb View Assist Mirror.....................2-35
Outside Convex Mirror...................................2-36
OnStar
®System.............................................2-36
HomeLink®Transmitter...................................2-38
Programming the HomeLink®Transmitter.........2-39
Storage Areas................................................2-42
Glove Box...................................................2-42
Cupholder(s)................................................2-42
Center Console Storage Area.........................2-42
Map Pocket.................................................2-43
Floor Mats...................................................2-43
Rear Storage Area........................................2-44
Convenience Net..........................................2-44
Retractable Hardtop........................................2-45
Lowering the Retractable Hardtop...................2-45
Raising the Retractable Hardtop......................2-46
Vehicle Personalization...................................2-54
Memory Seat, Mirrors and Steering Wheel.......2-54
Section 2 Features and Controls
2-1
Page 90 of 438
Mirrors
Automatic Dimming Rearview Mirror
with OnStar
®
Your vehicle has an automatic dimming inside rearview
mirror. The mirror also contains OnStar®controls.
For more information about OnStar®, seeOnStar®
System on page 2-36.
O(On/Off):This button, located on the lower left side
of the mirror, is for the automatic dimming functions.
Mirror Operation
The automatic dimming feature is active each time the
vehicle is started.
To turn the automatic dimming feature on or off, press
and release the on/off button. The indicator light will
illuminate when this feature is active.
Cleaning the Mirror
When cleaning the mirror, use a paper towel or similar
material dampened with glass cleaner. Do not spray
glass cleaner directly on the mirror as that may cause
the liquid cleaner to enter the mirror housing.
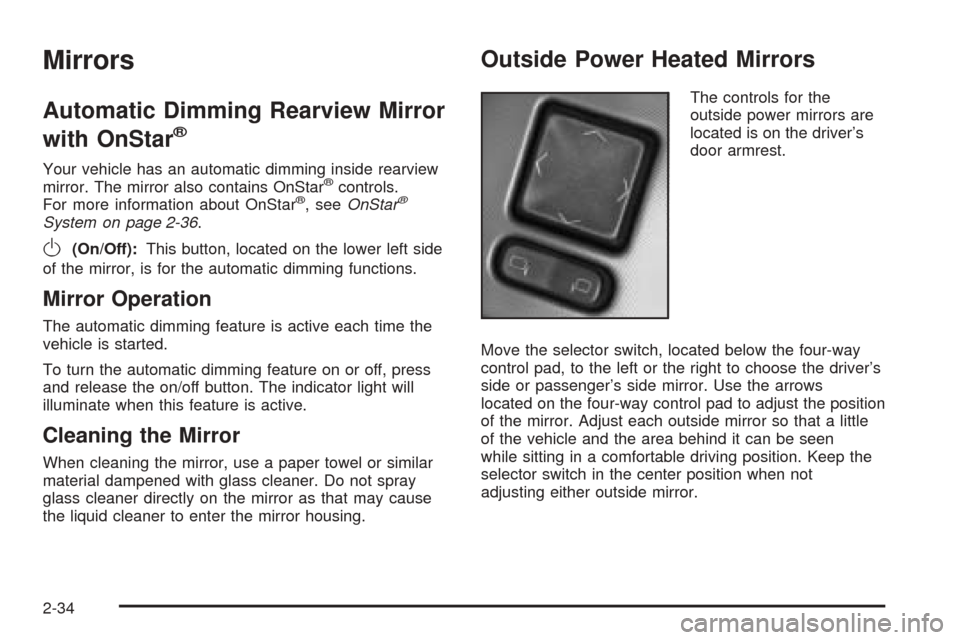
Outside Power Heated Mirrors
The controls for the
outside power mirrors are
located is on the driver’s
door armrest.
Move the selector switch, located below the four-way
control pad, to the left or the right to choose the driver’s
side or passenger’s side mirror. Use the arrows
located on the four-way control pad to adjust the position
of the mirror. Adjust each outside mirror so that a little
of the vehicle and the area behind it can be seen
while sitting in a comfortable driving position. Keep the
selector switch in the center position when not
adjusting either outside mirror.
2-34
Page 91 of 438

Both mirrors have a heated feature to rid them of snow,
ice, or condensation. They will heat when the rear
window defogger is turned on. See “Rear Window
Defogger” underDual Climate Control System on
page 3-40. If the vehicle has the memory option, the
preferred mirror position can be stored. SeeMemory
Seat, Mirrors and Steering Wheel on page 2-54.
Both mirrors can be manually folded inward by pulling
them toward the vehicle. This feature may be useful
when going through a car wash or a con�ned space.
Push the mirrors away from the vehicle, to the normal
position, before driving.
Outside Automatic Dimming Mirror
The driver’s side mirror will adjust for the glare of
headlamps behind you. This feature is controlled by the
on and off settings on the inside automatic dimming
rearview mirror. SeeAutomatic Dimming Rearview
Mirror with OnStar
®on page 2-34.
Outside Curb View Assist Mirror
The passenger’s side mirror is also capable of
performing the curb view assist feature. This feature will
cause the mirror to tilt to a factory programmed
position when the vehicle is in REVERSE (R). This
feature may be useful in allowing you to view the curb
when you are parallel parking.
If further adjustment is needed after the mirror is tilted,
the mirror switch may be used. The mirror will then
return to this new position when the vehicle is shifted
into REVERSE (R).
When the vehicle is shifted out of REVERSE (R) and
a �ve-second delay has occurred, the passenger’s side
mirror will return to its original position.
This feature can be enabled/disabled through the
Driver Information Center (DIC). See “Park Assist” under
DIC Vehicle Personalization on page 3-73for more
information.
2-35
Page 122 of 438
&(Delay):Move the lever to this position to activate
the Rainsense™ function. Adjustments in this region
change the sensitivity of the Rainsense™ system.
9(Off):Move the lever to this position to turn off the
windshield wipers.
8(Mist):Move the lever all the way down to mist and
release for a single wiping cycle. The windshield
wipers will stop after one wipe. If you want more wipes,
hold the band on mist longer.
Heavy snow or ice can overload the wipers. If this
occurs, a circuit breaker will stop the wipers until the
motor cools. So, be sure to clear any ice and snow from
the windshield wiper blades before using them. If the
wiper blades are frozen to the windshield, carefully
loosen them or warm the windshield before turning the
wipers on. If your blades do become worn or
damaged, get new blades or blade inserts.
Rainsense™ Wipers
Your vehicle has Rainsense™ wipers. The moisture
sensor for this feature is mounted on the interior side of
the windshield below the rearview mirror and is used
to automatically operate the wipers by monitoring
the amount of moisture build-up on the windshield.
Wipes occur as needed to clear the windshield
depending on driving conditions and the sensitivity
setting. In light rain or snow, fewer wipes will occur. In
heavy rain or snow, wipes will occur more frequently.
The Rainsense™ wipers operate in a delay mode
as well as a continuous low or high speed as needed. If
the system is left on for long periods of time, occasional
wipes may occur without any moisture on the
windshield. This is normal and indicates that the
Rainsense™ system is activated.
The Rainsense™ system is also sensitive to vibration.
The system may activate if something hits the
windshield or if the vehicle hits a bump.
3-10
Page 145 of 438
Courtesy Lamps
When any door or the trunk lid is opened, the interior
lamps will go on unless it is bright outside.
You can also turn on the courtesy lamps by pressing
the interior lamp button on the right side of the
instrument panel cluster.
Entry/Exit Lighting
With entry lighting, the interior lamps will come on when
entering the vehicle. The interior lamps will come on
for about 20 seconds when the engine is turned off.
You can turn exit and entry lighting off by quickly turning
the courtesy lamps on and off.
Reading Lamps
Your inside rearview mirror includes two reading lamps.
The lamps will go on when a door is opened. When
the doors are closed, each lamp can be turned on
individually by pressing the button for that lamp.
Battery Run-Down Protection
Your vehicle has a feature to help prevent you from
draining the battery in case the underhood lamp, vanity
mirror lamps, cargo lamps, reading lamps, console
or glove box lamps are accidentally left on or in case
something is plugged into the accessory power outlet or
cigarette lighter. If you leave any of these lamps on,
they will automatically time-out after about 20 minutes.
To reset it, all of the above lamps must be turned
off or the ignition key must be in ON.
3-33
Page 149 of 438
Ultrasonic Rear Parking Assist
(URPA)
Ultrasonic Rear Parking Assist can help you to
determine how close an object is to your rear bumper
within a given area, making parking easier.
{CAUTION:
Even with the Ultrasonic Rear Park Assist
system, the driver must check carefully before
backing up. The system does not operate above
typical backing speeds of 3 mph (5 km/h) while
parking. And, the system does not detect
objects that are more than 5 feet (1.5 meters)
behind the vehicle.
So, unless you check carefully behind you
before and when you back up, you could strike
children, pedestrians, bicyclists or pets behind
you, and they could be injured or killed.
Whether or not you are using rear park assist,
always check carefully behind your vehicle
before you back up and then watch closely as
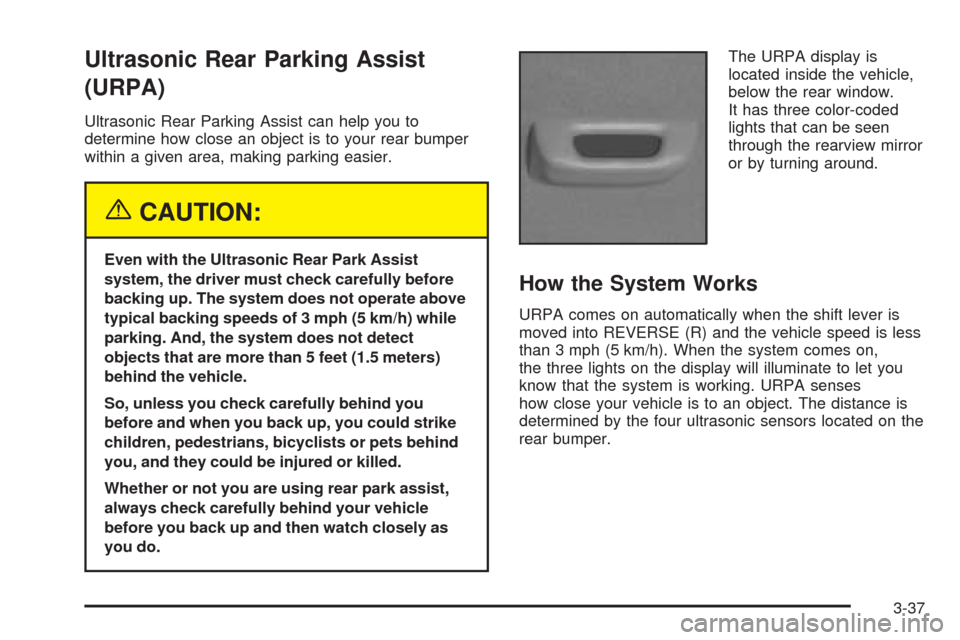
you do.The URPA display is
located inside the vehicle,
below the rear window.
It has three color-coded
lights that can be seen
through the rearview mirror
or by turning around.
How the System Works
URPA comes on automatically when the shift lever is
moved into REVERSE (R) and the vehicle speed is less
than 3 mph (5 km/h). When the system comes on,
the three lights on the display will illuminate to let you
know that the system is working. URPA senses
how close your vehicle is to an object. The distance is
determined by the four ultrasonic sensors located on the
rear bumper.
3-37
Page 156 of 438
Defogging and Defrosting
Fog on the inside of windows is a result of high humidity
(moisture) condensing on the cool window glass. This
can be minimized if the climate control system is used
properly. There are two modes to clear fog or frost from
your windshield. Use the �oor/defog mode to clear the
windows of fog or moisture and warm the passengers.
Use defrost to remove fog or frost from the windshield
more quickly.
-(Floor/Defog):Press the mode button until the
defog mode appears on the display. This mode directs
the air between the windshield, �oor outlets and
side windows. When you select this mode, the system
turns off recirculation and runs the air-conditioning
compressor unless the outside temperature is near or
below freezing. The recirculation mode cannot be
selected while in the �oor/defog mode.
1(Defrost):Press this button to direct most of the
air to the windshield, with some air directed to the
side windows. In this mode, the system will automatically
turn off the recirculation and run the air-conditioning
compressor, unless the outside temperature is near or
below freezing. Recirculation cannot be selected while in
the defrost mode. Do not drive the vehicle until all the
windows are clear.
Rear Window Defogger
The rear window defogger uses a warming grid to
remove fog or frost from the rear window.
The rear window defogger will only work when the
engine is running.
=(Rear Window Defogger):Press this button to
turn the rear window defogger on or off. Be sure to clear
as much snow from the rear window as possible.
The rear window defogger will turn off approximately
10 minutes after the button is pressed when traveling less
than 30 mph (48 km/h). If turned on again, the defogger
will only run for approximately �ve minutes before turning
off. The defogger can also be turned off by pressing the
button again or by turning off the engine.
The heated outside rearview mirrors will heat to help
clear fog or frost from the surface of the mirrors
when the rear window defogger is on.
The rear window defogger and heated mirrors are
automatically disabled when the retractable hardtop is
moving or down.
Notice:Don’t use anything sharp on the inside of
the rear window. If you do, you could cut or damage
the warming grid, and the repairs wouldn’t be
covered by your warranty. Do not attach a temporary
vehicle license, tape, a decal or anything similar to
the defogger grid.
3-44
Page 289 of 438
Here are some tips on night driving.
Drive defensively.
Do not drink and drive.
Adjust your inside rearview mirror to reduce the
glare from headlamps behind you.
Since you cannot see as well, you may need to
slow down and keep more space between you
and other vehicles.
Slow down, especially on higher speed roads. Your
headlamps can light up only so much road ahead.
In remote areas, watch for animals.
If you are tired, pull off the road in a safe place
and rest.
No one can see as well at night as in the daytime. But
as we get older these differences increase. A
50-year-old driver may require at least twice as much
light to see the same thing at night as a 20-year-old.
What you do in the daytime can also affect your
night vision. For example, if you spend the day in bright
sunshine you are wise to wear sunglasses. Your
eyes will have less trouble adjusting to night. But if you
are driving, do not wear sunglasses at night. They
may cut down on glare from headlamps, but they also
make a lot of things invisible.You can be temporarily blinded by approaching
headlamps. It can take a second or two, or even several
seconds, for your eyes to re-adjust to the dark. When
you are faced with severe glare, as from a driver
who does not lower the high beams, or a vehicle with
misaimed headlamps, slow down a little. Avoid
staring directly into the approaching headlamps.
Keep your windshield and all the glass on your vehicle
clean — inside and out. Glare at night is made much
worse by dirt on the glass. Even the inside of the glass
can build up a �lm caused by dust. Dirty glass makes
lights dazzle and �ash more than clean glass would,
making the pupils of your eyes contract repeatedly.
Remember that your headlamps light up far less of a
roadway when you are in a turn or curve. Keep
your eyes moving; that way, it is easier to pick out dimly
lighted objects. Just as your headlamps should be
checked regularly for proper aim, so should your eyes
be examined regularly. Some drivers suffer from
night blindness — the inability to see in dim light — and
are not even aware of it.
5-17
Page 295 of 438

Highway Hypnosis
Is there actually such a condition as highway hypnosis?
Or is it just plain falling asleep at the wheel? Call it
highway hypnosis, lack of awareness, or whatever.
There is something about an easy stretch of road with
the same scenery, along with the hum of the tires on the
road, the drone of the engine, and the rush of the
wind against the vehicle that can make you sleepy. Do
not let it happen to you! If it does, your vehicle can
leave the road in less than a second, and you could
crash and be injured.
What can you do about highway hypnosis? First, be
aware that it can happen.
Then here are some tips:
Make sure your vehicle is well ventilated, with a
comfortably cool interior.
Keep your eyes moving. Scan the road ahead and
to the sides. Check your rearview mirrors and your
instruments frequently.
If you get sleepy, pull off the road into a rest,
service, or parking area and take a nap, get some
exercise, or both. For safety, treat drowsiness
on the highway as an emergency.
Hill and Mountain Roads
Driving on steep hills or mountains is different from
driving in �at or rolling terrain.
5-23