service indicator CADILLAC XLR 2005 1.G Owners Manual
[x] Cancel search | Manufacturer: CADILLAC, Model Year: 2005, Model line: XLR, Model: CADILLAC XLR 2005 1.GPages: 438, PDF Size: 3.69 MB
Page 1 of 438
Seats and Restraint Systems........................... 1-1
Front Seats
............................................... 1-2
Safety Belts
.............................................. 1-5
Child Restraints
.......................................1-19
Airbag System
.........................................1-36
Restraint System Check
............................1-48
Features and Controls..................................... 2-1
Keys
........................................................ 2-2
Doors and Locks
....................................... 2-9
Windows
.................................................2-16
Theft-Deterrent Systems
............................2-19
Starting and Operating Your Vehicle
...........2-21
Mirrors
....................................................2-34
OnStar
®System
......................................2-36
HomeLink®Transmitter
.............................2-38
Storage Areas
.........................................2-42
Retractable Hardtop
..................................2-45
Vehicle Personalization
.............................2-54
Instrument Panel............................................. 3-1
Instrument Panel Overview
.......................... 3-4
Climate Controls
......................................3-40
Warning Lights, Gages, and Indicators
........3-46
Driver Information Center (DIC)
..................3-61
Trip Computer
.........................................3-77
Audio System(s)
.......................................3-78Navigation System.......................................... 4-1
Overview
.................................................. 4-2
Features and Controls
................................ 4-4
Navigation Audio System
...........................4-45
Voice Recognition
......................................4-69
Driving Your Vehicle....................................... 5-1
Your Driving, the Road, and Your Vehicle
..... 5-2
Towing
...................................................5-35
Service and Appearance Care.......................... 6-1
Service
..................................................... 6-3
Fuel
......................................................... 6-5
Checking Things Under the Hood
...............6-10
Rear Axle
...............................................6-41
Headlamp Aiming
.....................................6-42
Bulb Replacement
....................................6-44
Windshield Wiper Blade Replacement
.........6-45
Tires
......................................................6-46
Appearance Care
.....................................6-70
Vehicle Identi�cation
.................................6-79
Electrical System
......................................6-80
Capacities and Speci�cations
.....................6-85
Maintenance Schedule..................................... 7-1
Maintenance Schedule
................................ 7-2
Customer Assistance and Information.............. 8-1
Customer Assistance and Information
........... 8-2
Reporting Safety Defects
...........................8-11
Index.................................................................1
2005 Cadillac XLR Owner ManualM
Page 84 of 438
Some automatic downshifts may occur to maintain
minimum engine speed. This will only occur if you leave
the vehicle in too high of a gear range for the speed
the vehicle is traveling. For example, if you have been
driving in �fth gear range and come to a stop without
manually downshifting, �fth gear range will continue to
display in the HUD. The transmission will automatically
downshift to second gear. As you begin to drive
and accelerate, the transmission will automatically
upshift as quickly as possible to the selected �fth
gear range.
In higher gear ranges, an automatic downshift will
occur if you press the accelerator pedal to the �oor.
This feature provides you with adequate acceleration
capabilities if you forget to downshift manually.
Automatic upshifts and downshifts will not display in
the HUD.
Driver shift control is available while the cruise control is
engaged. The shift behavior of the transmission will
react differently than when cruise control is not engaged.
This is not a malfunction and is necessary to allow
proper operation of the cruise control.
To return to fully automatic operation, move the shift
lever to the right and back into the AUTOMATIC
OVERDRIVE (D).Parking Brake
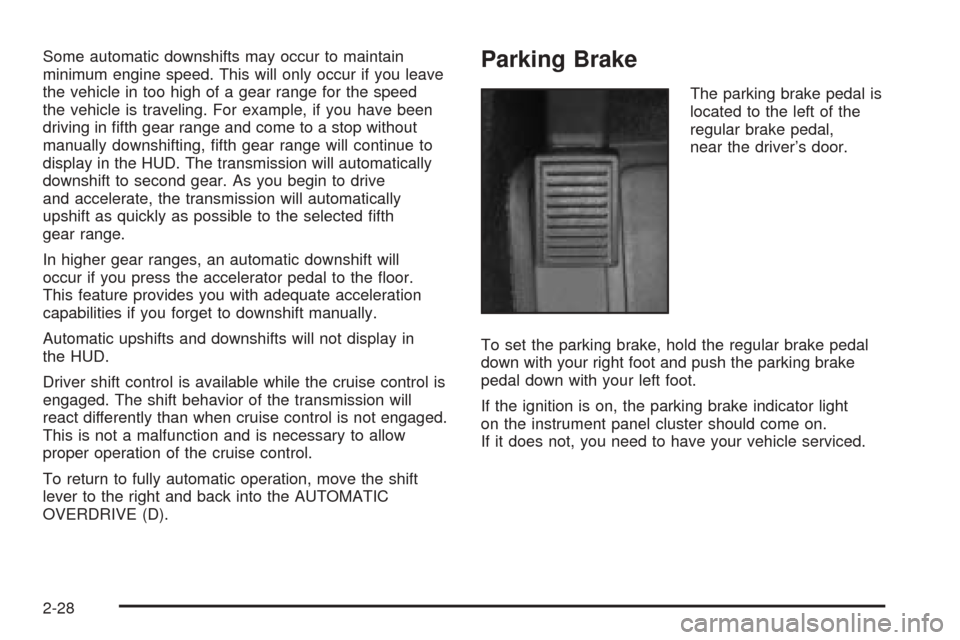
The parking brake pedal is
located to the left of the
regular brake pedal,
near the driver’s door.
To set the parking brake, hold the regular brake pedal
down with your right foot and push the parking brake
pedal down with your left foot.
If the ignition is on, the parking brake indicator light
on the instrument panel cluster should come on.
If it does not, you need to have your vehicle serviced.
2-28
Page 85 of 438
When you move out of PARK (P) or NEUTRAL (N) and
the engine is running, the parking brake should
release. If the parking brake has not been fully released
and you try to drive off with the parking brake on, the
parking brake indicator light will come on and stay on.
If the parking brake does not fully release, you can
manually release the pedal. However, be sure to read
the following paragraphs:
{CAUTION:
Always shift to PARK (P) before pulling the
manual release lever. If your hand or arm is
in the way of the pedal you could be hurt.
The pedal springs back quickly. Keep your
hand and arm away when you use the manual
release lever.
Before releasing the manual parking brake, be sure to
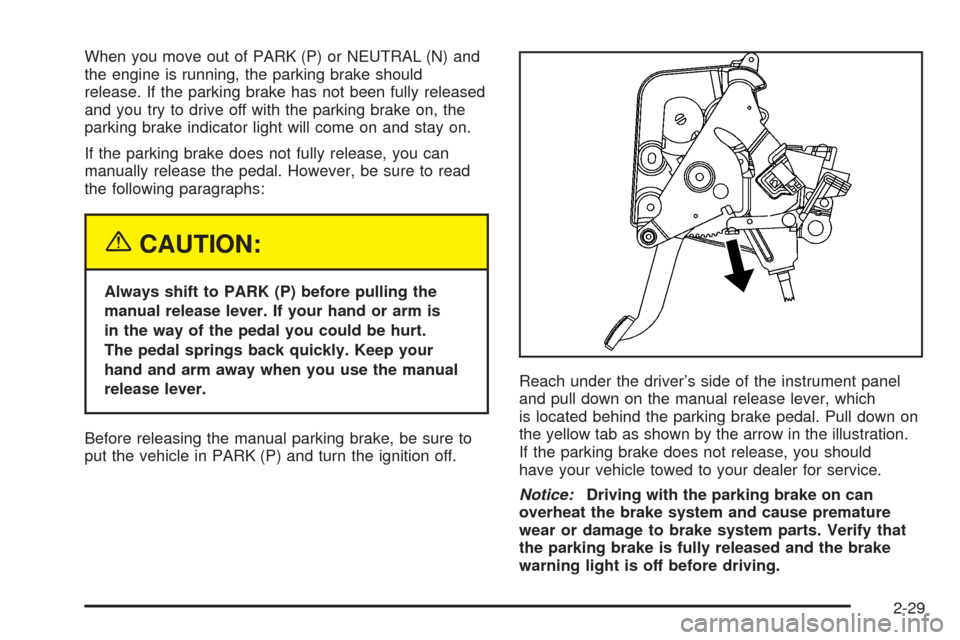
put the vehicle in PARK (P) and turn the ignition off.Reach under the driver’s side of the instrument panel
and pull down on the manual release lever, which
is located behind the parking brake pedal. Pull down on
the yellow tab as shown by the arrow in the illustration.
If the parking brake does not release, you should
have your vehicle towed to your dealer for service.
Notice:Driving with the parking brake on can
overheat the brake system and cause premature
wear or damage to brake system parts. Verify that
the parking brake is fully released and the brake
warning light is off before driving.
2-29
Page 167 of 438
Tire Pressure Light
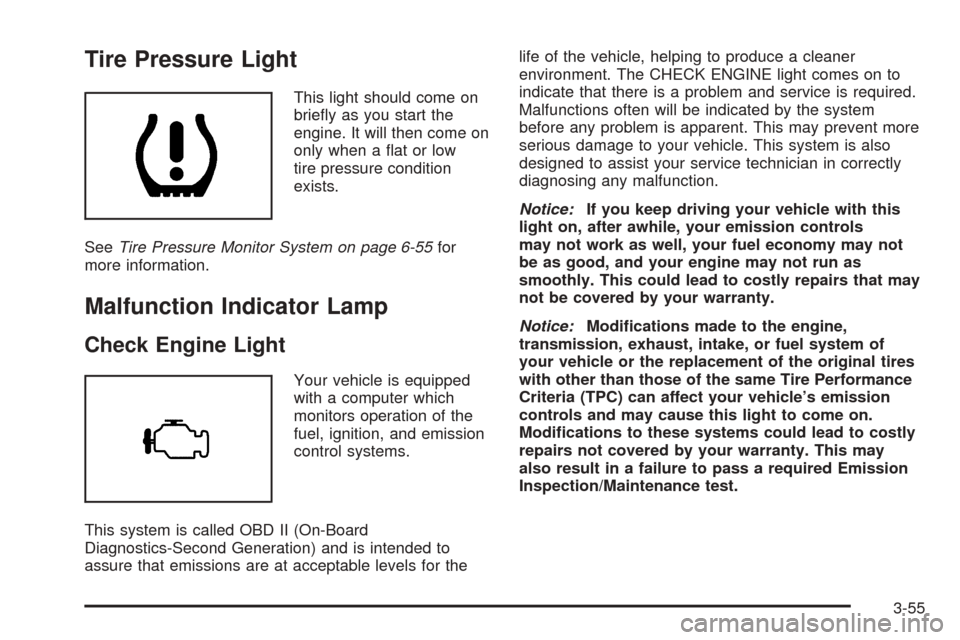
This light should come on
brie�y as you start the
engine. It will then come on
only when a �at or low
tire pressure condition
exists.
SeeTire Pressure Monitor System on page 6-55for
more information.
Malfunction Indicator Lamp
Check Engine Light
Your vehicle is equipped
with a computer which
monitors operation of the
fuel, ignition, and emission
control systems.
This system is called OBD II (On-Board
Diagnostics-Second Generation) and is intended to
assure that emissions are at acceptable levels for thelife of the vehicle, helping to produce a cleaner
environment. The CHECK ENGINE light comes on to
indicate that there is a problem and service is required.
Malfunctions often will be indicated by the system
before any problem is apparent. This may prevent more
serious damage to your vehicle. This system is also
designed to assist your service technician in correctly
diagnosing any malfunction.
Notice:If you keep driving your vehicle with this
light on, after awhile, your emission controls
may not work as well, your fuel economy may not
be as good, and your engine may not run as
smoothly. This could lead to costly repairs that may
not be covered by your warranty.
Notice:Modi�cations made to the engine,
transmission, exhaust, intake, or fuel system of
your vehicle or the replacement of the original tires
with other than those of the same Tire Performance
Criteria (TPC) can affect your vehicle’s emission
controls and may cause this light to come on.
Modi�cations to these systems could lead to costly
repairs not covered by your warranty. This may
also result in a failure to pass a required Emission
Inspection/Maintenance test.
3-55
Page 176 of 438
DIC Warnings and Messages
These messages will appear if there is a problem
sensed in one of your vehicle’s systems. You must then
press RESET to clear the display screen for further
use. However, be sure to take any message that
appears on the display screen seriously and remember
that pressing the RESET button will only make the
message disappear, not the problem.
DIC messages can also be displayed in English,
French, German, Italian and Spanish.
ABS ACTIVE:When your anti-lock system is adjusting
brake pressure to help avoid a braking skid, the ABS
ACTIVE message will be displayed.
Slippery road conditions may exist if this message is
displayed, so adjust your driving accordingly. The
message may stay on for a few seconds after the
system stops adjusting brake pressure.
BATTERY SAVER ACTIVE:This message is displayed
when the vehicle has detected that the battery voltage
is dropping beyond a reasonable point. The battery
saver system will start reducing certain features of the
vehicle that you may not be able to notice. At the
point that features are disabled, this message is
displayed. It means that the vehicle is trying to save the
charge in the battery. Turn off unnecessary accessories
to allow the battery to recharge.CHANGE OIL NOW:This means that the life of the
engine oil has expired. SeeScheduled Maintenance on
page 7-4. After an oil change, the Oil Life Indicator
must be reset. SeeOil Life Indicator on page 3-77and
Engine Oil Life System on page 6-16.
CHARGE SYSTEM FAULT:This message will display
when a problem with the charging system has been
detected. Have your vehicle serviced by your GM dealer.
CHECK GAS CAP:This message will appear if the
gas cap has not been fully tightened. You should
recheck your gas cap to ensure that it is on properly.
CLEAN RADAR CRUISE:This message indicates the
ACC system is disabled because the radar is blocked and
cannot detect vehicles in your path. It may also activate
during heavy rain or due to road spray. To clean the
system, see “Adaptive Cruise Control (ACC)” underTurn
Signal/Multifunction Lever on page 3-7.
CLOSE CARGO DIVIDER:This message indicates that
the cargo divider is not in place. Open the trunk and
make sure the cargo divider is secure and no objects are
on the divider. SeeRear Storage Area on page 2-44
for more information.
3-64
Page 314 of 438
Additives
To provide cleaner air, all gasolines in the United States
are now required to contain additives that will help
prevent engine and fuel system deposits from forming,
allowing your emission control system to work properly. In
most cases, you should not have to add anything to your
fuel. However, some gasolines contain only the minimum
amount of additive required to meet U.S. Environmental
Protection Agency regulations. General Motors
recommends that you buy gasolines that are advertised
to help keep fuel injectors and intake valves clean. If your
vehicle experiences problems due to dirty injectors or
valves, try a different brand of gasoline. Also, your GM
dealer has additives that will help correct and prevent
most deposit-related problems.
Gasolines containing oxygenates, such as ethers and
ethanol, and reformulated gasolines may be available in
your area to contribute to clean air. General Motors
recommends that you use these gasolines, particularly if
they comply with the speci�cations described earlier.
Notice:Your vehicle was not designed for fuel that
contains methanol. Do not use fuel containing
methanol. It can corrode metal parts in your fuel
system and also damage the plastic and rubber
parts. That damage would not be covered under
your warranty.Some gasolines that are not reformulated for low
emissions may contain an octane-enhancing additive
called methylcyclopentadienyl manganese
tricarbonyl (MMT); ask the attendant where you buy
gasoline whether the fuel contains MMT. General Motors
does not recommend the use of such gasolines.
Fuels containing MMT can reduce the life of spark plugs
and the performance of the emission control system
may be affected. The malfunction indicator lamp
may turn on. If this occurs, return to your authorized
GM dealer for service.
Fuels in Foreign Countries
If you plan on driving in another country outside the
United States or Canada, the proper fuel may be hard
to �nd. Never use leaded gasoline or any other fuel
not recommended in the previous text on fuel. Costly
repairs caused by use of improper fuel would not
be covered by your warranty.
To check the fuel availability, ask an auto club, or
contact a major oil company that does business in the
country where you will be driving.
6-6
Page 325 of 438
How to Reset the Engine Oil Life
System and the Oil Life Indicator
The Engine Oil Life System calculates when to change
your engine oil and �lter based on vehicle use.
Anytime your oil is changed, reset the system so it can
calculate when the next oil change is required. If a
situation occurs where you change your oil prior to a
CHANGE OIL NOW message in the DIC being
turned on, reset the system.
After the oil has been changed, the CHANGE OIL NOW
message and the oil life indicator must be reset. To
reset the message use the following procedure:
1. Press the up or down arrow to scroll the DIC to
show OIL LIFE.
2. Once the XXX% ENGINE OIL LIFE menu item is
highlighted, press and hold the RESET button until
the percentage shows 100%.
If the percentage does not return to 100% or if the
CHANGE OIL NOW message comes back on
when you start your vehicle, the engine oil
life system has not reset. Repeat the procedure.
What to Do with Used Oil
Used engine oil contains certain elements that may be
unhealthy for your skin and could even cause cancer.
Do not let used oil stay on your skin for very long. Clean
your skin and nails with soap and water, or a good
hand cleaner. Wash or properly dispose of clothing or
rags containing used engine oil. See the manufacturer’s
warnings about the use and disposal of oil products.
Used oil can be a threat to the environment. If you
change your own oil, be sure to drain all the oil from the
�lter before disposal. Never dispose of oil by putting it in
the trash, pouring it on the ground, into sewers, or into
streams or bodies of water. Instead, recycle it by taking it
to a place that collects used oil. If you have a problem
properly disposing of your used oil, ask your dealer, a
service station or a local recycling center for help.
6-17
Page 350 of 438
What to Use
To add lubricant when the level is low, use SAE 75W–90
Synthetic Gear Lubricant (GM Part No. 12378261) or
equivalent meeting GM Speci�cation 9986115. To
completely re�ll after draining, add 4 ounces (118 ml) of
Limited-Slip Differential Lubricant Additive (GM Part
No. 1052358) or equivalent. Then �ll to the bottom of the
�ller plug hole with the Synthetic Gear Lubricant.
Headlamp Aiming
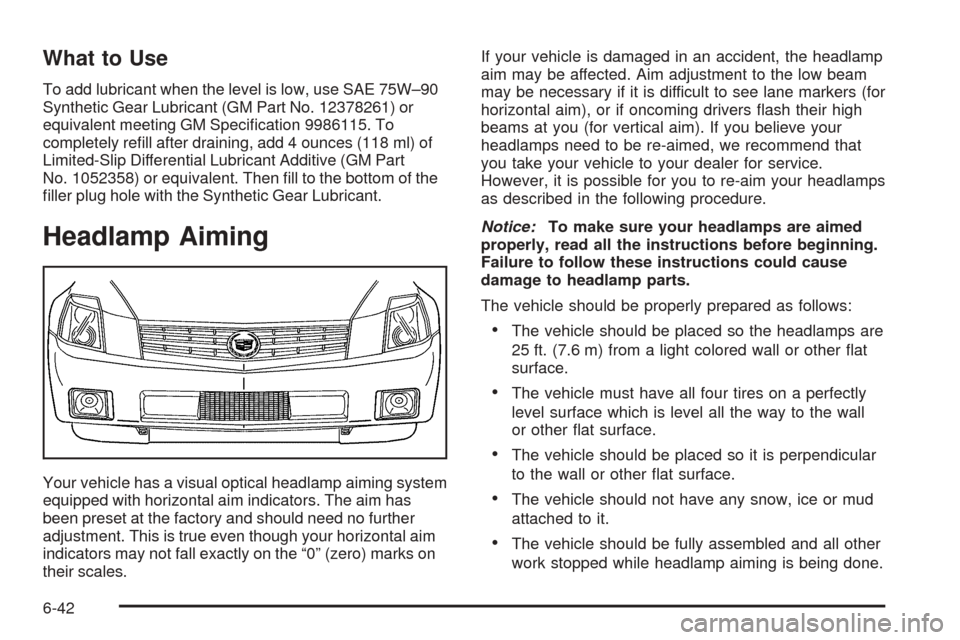
Your vehicle has a visual optical headlamp aiming system
equipped with horizontal aim indicators. The aim has
been preset at the factory and should need no further
adjustment. This is true even though your horizontal aim
indicators may not fall exactly on the “0” (zero) marks on
their scales.If your vehicle is damaged in an accident, the headlamp
aim may be affected. Aim adjustment to the low beam
may be necessary if it is difficult to see lane markers (for
horizontal aim), or if oncoming drivers �ash their high
beams at you (for vertical aim). If you believe your
headlamps need to be re-aimed, we recommend that
you take your vehicle to your dealer for service.
However, it is possible for you to re-aim your headlamps
as described in the following procedure.
Notice:To make sure your headlamps are aimed
properly, read all the instructions before beginning.
Failure to follow these instructions could cause
damage to headlamp parts.
The vehicle should be properly prepared as follows:
The vehicle should be placed so the headlamps are
25 ft. (7.6 m) from a light colored wall or other �at
surface.
The vehicle must have all four tires on a perfectly
level surface which is level all the way to the wall
or other �at surface.
The vehicle should be placed so it is perpendicular
to the wall or other �at surface.
The vehicle should not have any snow, ice or mud
attached to it.
The vehicle should be fully assembled and all other
work stopped while headlamp aiming is being done.
6-42
Page 366 of 438
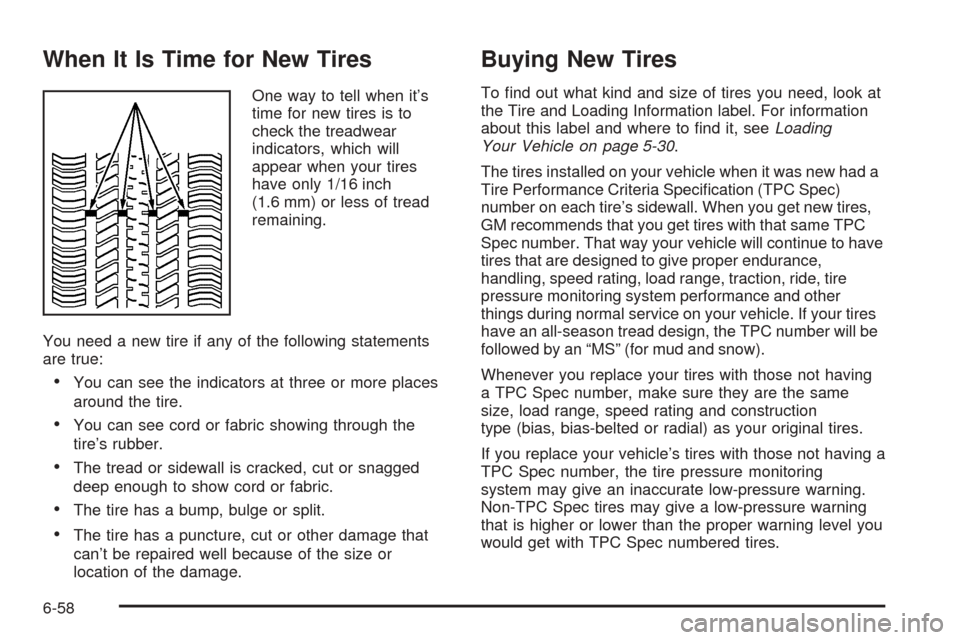
When It Is Time for New Tires
One way to tell when it’s
time for new tires is to
check the treadwear
indicators, which will
appear when your tires
have only 1/16 inch
(1.6 mm) or less of tread
remaining.
You need a new tire if any of the following statements
are true:
You can see the indicators at three or more places
around the tire.
You can see cord or fabric showing through the
tire’s rubber.
The tread or sidewall is cracked, cut or snagged
deep enough to show cord or fabric.
The tire has a bump, bulge or split.
The tire has a puncture, cut or other damage that
can’t be repaired well because of the size or
location of the damage.
Buying New Tires
To �nd out what kind and size of tires you need, look at
the Tire and Loading Information label. For information
about this label and where to �nd it, seeLoading
Your Vehicle on page 5-30.
The tires installed on your vehicle when it was new had a
Tire Performance Criteria Speci�cation (TPC Spec)
number on each tire’s sidewall. When you get new tires,
GM recommends that you get tires with that same TPC
Spec number. That way your vehicle will continue to have
tires that are designed to give proper endurance,
handling, speed rating, load range, traction, ride, tire
pressure monitoring system performance and other
things during normal service on your vehicle. If your tires
have an all-season tread design, the TPC number will be
followed by an “MS” (for mud and snow).
Whenever you replace your tires with those not having
a TPC Spec number, make sure they are the same
size, load range, speed rating and construction
type (bias, bias-belted or radial) as your original tires.
If you replace your vehicle’s tires with those not having a
TPC Spec number, the tire pressure monitoring
system may give an inaccurate low-pressure warning.
Non-TPC Spec tires may give a low-pressure warning
that is higher or lower than the proper warning level you
would get with TPC Spec numbered tires.
6-58
Page 431 of 438
Lamps (cont.)
Exterior......................................................3-28
Exterior Lighting Battery Saver......................3-32
Fog ...........................................................3-31
Reading.....................................................3-33
Twilight Sentinel
®........................................3-31
LATCH System
Child Restraints...........................................1-28
Securing a Child Restraint Designed for the
LATCH System........................................1-30
Lifting Your Vehicle, Tires.................................6-64
Light
Airbag Off..................................................3-50
Airbag Readiness........................................3-49
Anti-Lock Brake System Warning...................3-53
Brake System Warning.................................3-52
Fog Lamp..................................................3-59
Highbeam On.............................................3-59
Lights On Reminder.....................................3-59
Malfunction Indicator....................................3-55
Safety Belt Reminder...................................3-48
Security.....................................................3-59
TCS Warning Light......................................3-53
Tire Pressure..............................................3-55
Traction Control System (TCS) Warning..........3-53Lighting
Entry/Exit...................................................3-33
Limited-Slip Rear Axle....................................... 5-9
Lockout Protection..........................................2-12
Locks
Door........................................................... 2-9
Lockout Protection.......................................2-12
Power Door................................................2-11
Loss of Control...............................................5-15
Lowering the Retractable Hardtop......................2-45
Lumbar
Power Controls............................................. 1-2
M
Magnetic Ride Control....................................... 5-9
Maintenance Schedule
Additional Required Services........................... 7-6
At Each Fuel Fill........................................... 7-8
At Least Once a Month.................................. 7-8
At Least Once a Year.................................... 7-9
Introduction.................................................. 7-2
Maintenance Footnotes.................................. 7-7
Maintenance Record....................................7-14
Maintenance Requirements............................. 7-2
7