change time CADILLAC XLR V 2007 1.G Owners Manual
[x] Cancel search | Manufacturer: CADILLAC, Model Year: 2007, Model line: XLR V, Model: CADILLAC XLR V 2007 1.GPages: 512, PDF Size: 3.84 MB
Page 3 of 512

GENERAL MOTORS, GM, the GM Emblem,
CADILLAC, the CADILLAC Crest & Wreath, and
the name XLR are registered trademarks of
General Motors Corporation.
This manual includes the latest information at the
time it was printed. We reserve the right to
make changes after that time to the product
without notice. For vehicles �rst sold in Canada,
substitute the name “General Motors of Canada
Limited” for Cadillac Motor Car Division whenever
it appears in this manual.This manual describes features that may be
available in this model, but your vehicle may not
have all of them. For example, more than one
entertainment system may be offered or your
vehicle may have been ordered without a front
passenger or rear seats.
Keep this manual in the vehicle, so it will be there
if it is needed while you are on the road. If the
vehicle is sold, leave this manual in the vehicle.
Canadian Owners
A French language copy of this manual can be
obtained from your dealer or from:
Helm, Incorporated
P.O. Box 07130
Detroit, MI 48207
Litho in U.S.A.
Part No. 15865979 A First Printing
©2006 General Motors Corporation. All Rights Reserved.
3
Page 31 of 512
Infants and Young Children
Everyone in a vehicle needs protection! This
includes infants and all other children. Neither the
distance traveled nor the age and size of the
traveler changes the need, for everyone, to use
safety restraints. In fact, the law in every state
in the United States and in every Canadian
province says children up to some age must be
restrained while in a vehicle.{CAUTION:
Children can be seriously injured or
strangled if a shoulder belt is wrapped
around their neck and the safety belt
continues to tighten. Never leave children
unattended in a vehicle and never allow
children to play with the safety belts.
Every time infants and young children ride in
vehicles, they should have the protection provided
by appropriate restraints. Young children should
not use the vehicle’s adult safety belts alone,
unless there is no other choice. Instead, they need
to use a child restraint.
31
Page 72 of 512
Battery Replacement
Under normal use, the battery in your keyless
access transmitter should last about three years.
You can tell the battery is weak if the transmitter
will not work at the normal range in any location. If
you have to get close to your vehicle before the
transmitter works, it is probably time to change the
battery.
A weak battery may also cause the DIC to display
NO FOB DETECTED when you try to start the
vehicle. If this happens, place the transmitter in the
glove box transmitter pocket with the buttons facing
to the right. Then, with the vehicle in PARK (P) or
NEUTRAL (N), press the brake pedal and the
START button. Although this will start the vehicle, it
is recommended that you replace the transmitter
battery as soon as possible. The DIC may display
FOB BATTERY LOW.
Notice:When replacing the battery, use care
not to touch any of the circuitry. Static
from your body transferred to these surfaces
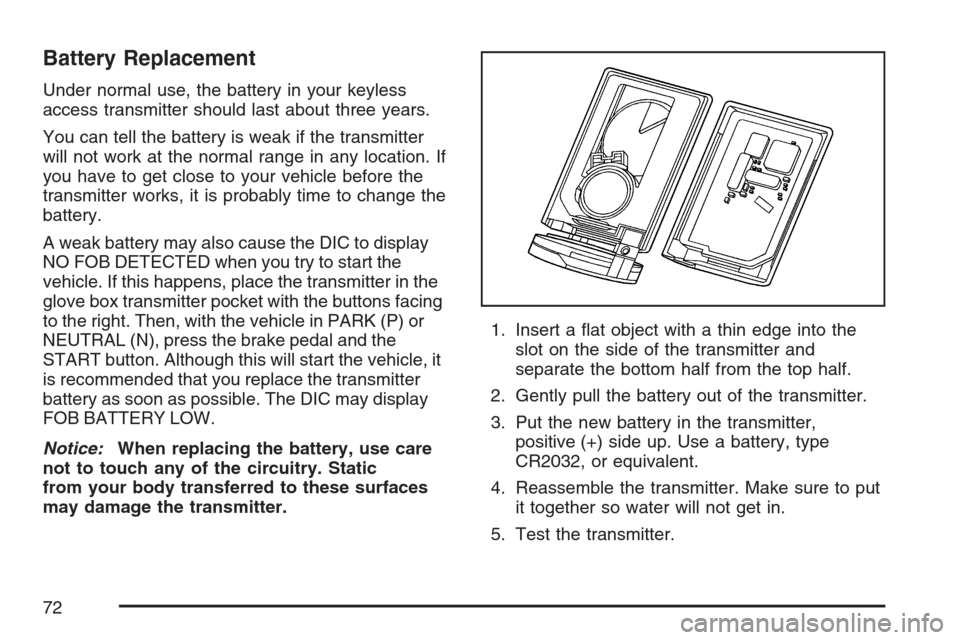
may damage the transmitter.1. Insert a �at object with a thin edge into the
slot on the side of the transmitter and
separate the bottom half from the top half.
2. Gently pull the battery out of the transmitter.
3. Put the new battery in the transmitter,
positive (+) side up. Use a battery, type
CR2032, or equivalent.
4. Reassemble the transmitter. Make sure to put
it together so water will not get in.
5. Test the transmitter.
72
Page 91 of 512
Notice:Cranking the engine for long periods
of time, by pressing the START button
immediately after cranking has ended, can
overheat and damage the cranking motor, and
drain the battery. Wait at least 15 seconds
between each try, to allow the cranking motor
to cool down.
Your vehicle has a Computer-Controlled Cranking
System. This feature assists in starting the
engine and protects components. Once cranking
has been initiated, the engine continues cranking
for a few seconds or until the vehicle starts. If
the engine does not start, cranking automatically
be stops after 15 seconds to prevent cranking
motor damage. To prevent gear damage,
this system also prevents cranking if the engine is
already running.
Notice:Your engine is designed to work with
the electronics in your vehicle. If you add
electrical parts or accessories, you could
change the way the engine operates. Before
adding electrical equipment, check with
your dealer. If you do not, your engine might
not perform properly. Any resulting damage
would not be covered by your vehicle’s
warranty.Stopping Your Engine
Move the shift lever to PARK (P) and press the
Acc. (Off/Accessory) button located on the
instrument panel. If the shifter is not in PARK (P),
the engine shuts off and the vehicle goes into
the Accessory Mode. The DIC displays″SHIFT TO
PARK″. Once the shifter is moved to PARK (P),
the vehicle turns off.
If the keyless access transmitter is not detected
inside the vehicle when it is turned to off, the DIC
displays NO FOB – OFF OR RUN?.
SeeDIC Warnings and Messages on page 206for
more information.
91
Page 116 of 512
Programming Universal Home
Remote — Rolling Code
Rolling code garage door openers are used for
garage doors produced after 1996 and are
code protected. Rolling code means the coded
signal is changed every time your remote control
garage door opener is used.
Programming a rolling code garage door opener
involves time-sensitive actions, so read the
entire procedure before you begin. If you do not
follow these actions, the device will time out
and you will have to repeat the procedure.
Follow these steps to program up to three
channels:
1. Press the two outside buttons at the same
time for one to two seconds, and immediately
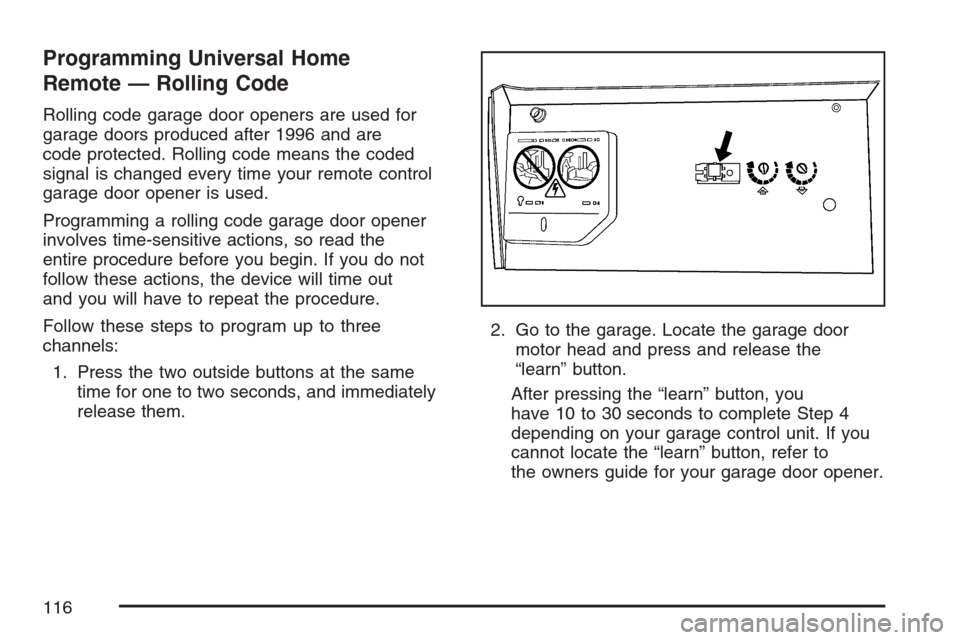
release them.2. Go to the garage. Locate the garage door
motor head and press and release the
“learn” button.
After pressing the “learn” button, you
have 10 to 30 seconds to complete Step 4
depending on your garage control unit. If you
cannot locate the “learn” button, refer to
the owners guide for your garage door opener.
116
Page 135 of 512
Instrument Panel Overview........................ 138
Hazard Warning Flashers.......................... 140
Other Warning Devices............................. 140
Horn.......................................................... 140
Power Tilt Wheel and Telescopic
Steering Column.................................... 141
Turn Signal/Multifunction Lever.................. 141
Turn and Lane-Change Signals................. 142
Headlamp High/Low-Beam Changer.......... 143
Flash-to-Pass............................................ 143
Windshield Wipers..................................... 144
Rainsense™ Wipers.................................. 145
Windshield Washer.................................... 146
Headlamp Washer..................................... 146
Cruise Control........................................... 147
Adaptive Cruise Control............................. 150
Exterior Lamps.......................................... 164
Wiper Activated Headlamps....................... 166
Headlamps on Reminder........................... 166
Daytime Running Lamps (DRL)................. 166
Adaptive Forward Lighting System............. 167
Fog Lamps................................................ 168
Twilight Sentinel
®...................................... 168Exterior Lighting Battery Saver.................. 169
Instrument Panel Brightness...................... 170
Courtesy Lamps........................................ 170
Entry/Exit Lighting...................................... 170
Reading Lamps......................................... 171
Battery Run-Down Protection..................... 171
Head-Up Display (HUD)............................ 171
Ultrasonic Rear Parking
Assist (URPA)........................................ 175
Accessory Power Outlet(s)........................ 177
Ashtray(s) and Cigarette Lighter................ 178
Climate Controls......................................... 178
Dual Climate Control System..................... 178
Outlet Adjustment...................................... 184
Passenger Compartment Air Filter............. 184
Warning Lights, Gages, and Indicators..... 185
Instrument Panel Cluster........................... 186
Speedometer and Odometer...................... 187
Trip Odometer........................................... 187
Tachometer............................................... 187
Safety Belt Reminder Light........................ 187
Airbag Readiness Light............................. 188
Section 3 Instrument Panel
135
Page 152 of 512

{CAUTION:
On winding roads, Adaptive Cruise
Control may not detect a vehicle
ahead. You could crash into a vehicle
ahead of you. Do not use Adaptive
Cruise Control on winding roads.
Adaptive Cruise Control may not have
time to slow your vehicle enough to
avoid a crash when you are driving in
conditions where vehicles may
suddenly slow or stop ahead of you,
enter your lane, or cross your vehicle’s
path. If you are driving in these
conditions, do not use Adaptive Cruise
Control. The warning beep and alert
symbol may indicate that you are
driving in conditions where Adaptive
Cruise Control should not be used. See
“Alerting the Driver” in this section.
CAUTION: (Continued)
CAUTION: (Continued)
On slippery roads, fast changes in tire
traction can cause needless wheel
spinning, and you could lose control.
Do not use cruise control on slippery
roads.
When weather limits visibility, such as
when in fog, rain, or snow conditions,
Adaptive Cruise Control performance
is limited. There may not be enough
distance to adapt to the changing
traffic conditions. Do not use cruise
control when visibility is low.
Some of the Adaptive
Cruise controls are
located on the end of
the multifunction lever.
152
Page 155 of 512
Your vehicle will not reach the set speed until the
system determines there is not a vehicle in
front of you. At that point, your vehicle speed will
increase to the set speed.
Decreasing Set Speed While Using
Adaptive Cruise Control
Press in the set/decrease button on the end of the
lever until you reach the lower speed you want,
then release it.
To slow down in very small amounts, brie�y press
the set/decrease button. Each time you do this,
your set speed will be 1 mph (1.6 km/h) slower.
Resuming a Set Speed
Suppose you set your Adaptive Cruise Control at
a desired speed and then you apply the brake.
This will disengage the Adaptive Cruise Control.
But you do not need to reset it.
Once you are going about 25 mph (40 km/h) or
more, you can move the Adaptive Cruise Control
switch brie�y from on to resume/increase.
Adaptive Cruise Control will be engaged with the
previously chosen set speed.
Selecting the Follow Distance (GAP)
When the system detects a slower moving vehicle,
it will adjust your vehicle’s speed and maintain
the follow distance (gap) you select.
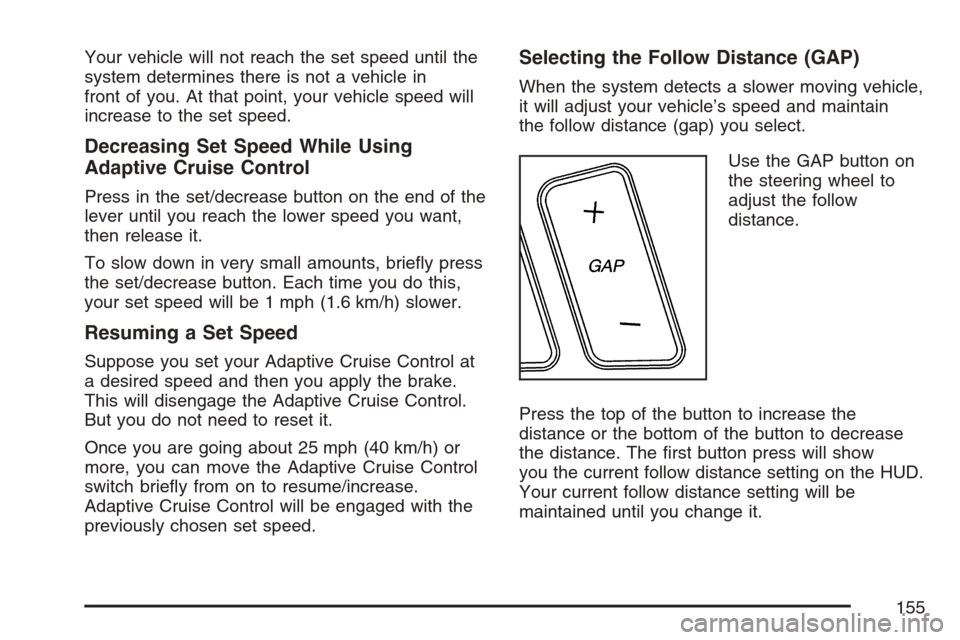
Use the GAP button on
the steering wheel to
adjust the follow
distance.
Press the top of the button to increase the
distance or the bottom of the button to decrease
the distance. The �rst button press will show
you the current follow distance setting on the HUD.
Your current follow distance setting will be
maintained until you change it.
155
Page 167 of 512
When it is bright enough outside, the regular
lamps go off, and the front turn signal lamps take
over. If you start your vehicle in a dark garage,
the automatic headlamp system comes on
immediately. Once you leave the garage, it takes
about one minute for the automatic headlamp
system to change to DRL if it is light outside.
During that delay, the instrument panel cluster
might not be as bright as usual. Make sure
the instrument panel brightness knob is in the full
bright position. SeeInstrument Panel Brightness
on page 170for more information.
If it is dark enough outside and the exterior lamp
control is off, a HEADLAMPS SUGGESTED
message displays on the Driver’s Information
Center (DIC). This message informs the driver that
turning on the exterior lamps is recommended.
SeeDIC Warnings and Messages on page 206.Turn the exterior lamp control off a second time,
or turn on the headlamps to turn off the
HEADLAMPS SUGGESTED message in the DIC.
If the parking lamps or the fog lamps were
turned on instead, the HEADLAMPS SUGGESTED
message continues to display.
As with any vehicle, you should turn on the
regular headlamp system when needed.
Adaptive Forward Lighting System
The Adaptive Forward Lighting System (AFS)
swivels the headlamps horizontally to provide
greater road illumination while turning. AFS will
operate when the vehicle speed is greater than
2 mph (3 km/h). AFS will not operate when
the transmission is in REVERSE (R). AFS is not
immediately operable after starting the vehicle;
driving a short distance is required to calibrate the
AFS. To enable AFS, set the exterior lamp
switch on the multifunction lever to the AUTO
position. Moving the switch out of the AUTO
position will deactivate the system. SeeExterior
Lamps on page 164.
167
Page 171 of 512

Reading Lamps
Your inside rearview mirror includes two reading
lamps. The lamps will go on when a door is
opened. When the doors are closed, each lamp
can be turned on individually by pressing the
button for that lamp.
Battery Run-Down Protection
Your vehicle has a feature to help prevent the
battery from being drained, in case the underhood
lamp, vanity mirror lamps, cargo lamps, reading
lamps, console, or glove box lamps are
accidentally left on, or something is left plugged
into the accessory power outlet or cigarette lighter.
If any of the accessory lamps are left on, they
will automatically time-out after about 20 minutes.
To reset the battery protection, all of the above
lamps must be turned off or the ignition must be in
the Acc position.
Head-Up Display (HUD)
{CAUTION:
If the HUD image is too bright, or too high
in your �eld of view, it may take you more
time to see things you need to see when it
is dark outside. Be sure to keep the HUD
image dim and placed low in your �eld
of view.
The Head-Up Display (HUD) allows you to see
some of the driver information that appears
on your instrument panel cluster.
The information may be displayed in English or
metric units and appears as an image focused out
toward the front of your vehicle. To change
from English to metric units, seeDriver Information
Center (DIC) on page 203.
171