ECU CADILLAC XT4 2023 Workshop Manual
[x] Cancel search | Manufacturer: CADILLAC, Model Year: 2023, Model line: XT4, Model: CADILLAC XT4 2023Pages: 476, PDF Size: 5.37 MB
Page 254 of 476

Cadillac XT4 Owner Manual (GMNA-Localizing-U.S./Canada/Mexico-
16412876) - 2023 - CRC - 3/25/22
Driving and Operating 253
Check the heater cord for
damage. If it is damaged,
do not use it. See your
dealer for a replacement.
Inspect the cord for
damage yearly.
3. Plug it into a normal, grounded 110-volt AC
outlet.
{Warning
Improper use of the heater
cord or an extension cord
can damage the cord and
may result in overheating
and fire.
.Plug the cord into a
three-prong electrical
utility receptacle that is
protected by a ground
fault detection function.
An ungrounded outlet
could cause an electric
shock.
.Use a weatherproof,
heavy-duty, 15 amp-rated
extension cord if needed.
(Continued)
Warning (Continued)
Failure to use the
recommended extension
cord in good operating
condition, or using a
damaged heater or
extension cord, could
make it overheat and
cause a fire, property
damage, electric shock,
and injury.
.Do not operate the vehicle
with the heater cord
permanently attached to
the vehicle. Possible
heater cord and
thermostat damage could
occur.
.While in use, do not let the
heater cord touch vehicle
parts or sharp edges.
Never close the hood on
the heater cord.
.Before starting the
vehicle, unplug the cord,
reattach the cover to the
plug, and securely fasten(Continued)
Warning (Continued)
the cord. Keep the cord
away from any moving
parts.
4. Before starting the engine, be sure to unplug and
store the cord as it was
before to keep it away
from moving engine parts.
If you do not it could be
damaged.
The length of time the heater
should remain plugged in
depends on several factors.
Ask a dealer in the area where
you will be parking the vehicle
for the best advice on this.
Retained Accessory
Power (RAP)
When the vehicle is turned
from on to off, the following
features (if equipped) will
continue to function for up to
10 minutes, or until the driver
door is opened. These
Page 317 of 476

Cadillac XT4 Owner Manual (GMNA-Localizing-U.S./Canada/Mexico-
16412876) - 2023 - CRC - 3/25/22
316 Driving and Operating
attachments, safety chains,
electrical connectors, lamps,
tires, and mirrors. See Towing
Equipment0322. If the trailer
has electric brakes, start the
combination moving and then
manually apply the trailer
brake controller to check that
the trailer brakes work. During
the trip, occasionally check
that the cargo and trailer are
secure and that the lamps and
any trailer brakes are working.
Towing with a Stability
Control System
When towing, the stability
control system might be
heard. The system reacts to
vehicle movement caused by
the trailer, which mainly occurs
during cornering. This is
normal when towing heavier
trailers.
Following Distance
Stay at least twice as far
behind the vehicle ahead as
you would when driving without a trailer. This can help
to avoid heavy braking and
sudden turns.
Passing
More passing distance is
needed when towing a trailer.
The combination of the vehicle
and trailer will not accelerate
as quickly and is much longer
than the vehicle alone. It is
necessary to go much farther
beyond the passed vehicle
before returning to the lane.
Pass on level roadways. Avoid
passing on hills if possible.
Backing Up
Hold the bottom of the
steering wheel with one hand.
To move the trailer to the left,
move that hand to the left. To
move the trailer to the right,
move that hand to the right.
Always back up slowly and,
if possible, have someone
guide you.
Making Turns
Caution
Turn more slowly and make
wider arcs when towing a
trailer to prevent damage to
your vehicle. Making very
sharp turns could cause the
trailer to contact the vehicle.
Make wider turns than normal
when towing, so the trailer will
not go over soft shoulders,
over curbs, or strike road
signs, trees, or other objects.
Always signal turns well in
advance. Do not steer or brake
suddenly.
Driving on Grades
Reduce speed and shift to a
lower gear before starting
down a long or steep downhill
grade. If the transmission is
not shifted down, the brakes
may overheat and result in
reduced braking efficiency.
Page 342 of 476

Cadillac XT4 Owner Manual (GMNA-Localizing-U.S./Canada/Mexico-
16412876) - 2023 - CRC - 3/25/22
Vehicle Care 341
1. Turn the pressure capslowly counterclockwise.
If a hiss is heard, wait for
that to stop. A hiss means
there is still some
pressure left.
2. Keep turning the pressure cap slowly and remove it.
3. If topping off the level inthe coolant surge tank, add
the proper mixture until
the level reaches the mark
on the front of the tank
and replace the cap.
Operate the vehicle.
Repeat steps 1–3, as
necessary.
If filling the system (such
as after servicing), follow
the Automatic Coolant
Service Fill Instructions.
Caution
If the pressure cap is not
tightly installed, coolant loss
and engine damage may
occur. Be sure the cap is
properly and tightly secured.
Automatic Coolant
Service Fill Instructions
This feature assists in filling
and removing air from the
cooling system after service of
components or when coolant
is added after being too low. To activate the fill and air
removal process:
1. With a cold system, add coolant to the indicated
mark on the surge tank.
2. Replace the cap on the surge tank.
3. Connect the vehicle to a battery charger.
4. Turn the ignition to Service Mode. See Ignition
Positions 0247.
5. Turn off the air conditioning.
6. Set the parking brake.
7. At the same time, press the accelerator and the
brake for automatic
transmission vehicles for
two seconds, then release.
At the end of the cycle, check
the coolant level in the surge
tank and add coolant if it is
low. Turn off the vehicle, allow
the Electronic Control Module
(ECM) to go to sleep, about
2 minutes, and repeat
Steps 3-7.
Page 350 of 476

Cadillac XT4 Owner Manual (GMNA-Localizing-U.S./Canada/Mexico-
16412876) - 2023 - CRC - 3/25/22
Vehicle Care 349
5. Push the new bladeassembly securely on the
wiper arm until the release
lever clicks into place.
6. Start the engine and the rear wiper will return to its
normal position.
Windshield
Replacement
HUD System
If equipped, the windshield is
part of the HUD system. If the
windshield must be replaced,
get one that is designed for
HUD or the HUD image may
look out of focus.
Driver Assistance
Systems
When a windshield
replacement is needed and the
vehicle is equipped with a
front-looking camera sensor
for the Driver Assistance
Systems, the windshield must
be installed according to GM
specifications for these systems to work properly. If it
is not, there may be
unexpected behavior and/or
messages from these
systems.
Acoustic Windshield
The vehicle is equipped with
an acoustic windshield. If the
windshield needs to be
replaced, be sure to get an
acoustic windshield so you will
continue to have the benefits
an acoustic windshield can
provide.
Gas Strut(s)
Your vehicle may be equipped
with gas strut(s) to provide
assistance in lifting and
holding open the hood/trunk/
liftgate system in full open
position.
{Warning
If the gas struts that hold
open the hood, trunk, and/or
liftgate fail, you or others
(Continued)
Warning (Continued)
could be seriously injured.
Take the vehicle to your
dealer for service
immediately. Visually inspect
the gas struts for signs of
wear, cracks, or other
damage periodically. Check
to make sure the hood/
trunk/liftgate is held open
with enough force. If struts
are failing to hold the hood/
trunk/liftgate, do not
operate. Have the vehicle
serviced.
Caution
Do not apply tape or hang
any objects from gas struts.
Also do not push down or
pull on gas struts. This may
cause damage to the
vehicle.
See Maintenance Schedule
0 425.
Page 389 of 476

Cadillac XT4 Owner Manual (GMNA-Localizing-U.S./Canada/Mexico-
16412876) - 2023 - CRC - 3/25/22
388 Vehicle Care
Warning (Continued)
it has been driven may be
unknown. It could fail
suddenly and cause a crash.
When replacing wheels, use
a new GM original
equipment wheel.
Caution
The wrong wheel can also
cause problems with bearing
life, brake cooling,
speedometer or odometer
calibration, headlamp aim,
bumper height, vehicle
ground clearance, and tire or
tire chain clearance to the
body and chassis.
Tire Chains
{Warning
If the vehicle has 235/60R18
or 245/45R20 size tires, do
not use tire chains. There is(Continued)
Warning (Continued)
not enough clearance. Tire
chains used on a vehicle
without the proper amount
of clearance can cause
damage to the brakes,
suspension, or other vehicle
parts. The area damaged by
the tire chains could cause
loss of control and a crash.
Use another type of traction
device only if its
manufacturer recommends
it for the vehicle's tire size
combination and road
conditions. Follow that
manufacturer's instructions.
To avoid vehicle damage,
drive slow and readjust or
remove the traction device if
it contacts the vehicle. Do
not spin the wheels. If
traction devices are used,
install them on the front
tires.
Caution
If the vehicle is equipped
with a tire size other than
235/60R18 or 245/45R20,
use tire chains only where
legal and only when
necessary. Use low profile
chains that add no more
than 12 mm thickness to the
tire tread and inner sidewall.
Use chains that are the
proper size for the tires.
Install them on the tires of
the front axle. Do not use
chains on the tires of the
rear axle. Tighten them as
tightly as possible with the
ends securely fastened.
Drive slowly and follow the
chain manufacturer's
instructions. If the chains
contact the vehicle, stop and
retighten them. If the
contact continues, slow
down until it stops. Driving(Continued)
Page 408 of 476

Cadillac XT4 Owner Manual (GMNA-Localizing-U.S./Canada/Mexico-
16412876) - 2023 - CRC - 3/25/22
Vehicle Care 407
Warning (Continued)
eyes or on your skin, flush
the place with water and get
medical help immediately.
{Warning
Fans or other moving engine
parts can injure you badly.
Keep your hands away from
moving parts once the
engine is running.
5. Connect one end of the red positive (+) cable to the
discharged battery
positive (+) terminal.
6. Connect the other end of the red positive (+) cable to
the good battery
positive (+) terminal.
7. Connect one end of the black negative (–) cable to
the good battery negative
(–) terminal. 8. Connect the other end of
the black negative (–) cable
to the discharged battery
negative (–) terminal on the
driver side shock tower.
9. Start the engine in the vehicle with the good
battery and run the engine
at idle speed for at least
four minutes.
10. Try to start the vehicle that had the dead battery.
If it will not start after a
few tries, it probably needs
service.
Jumper Cable Removal
Reverse the sequence exactly
when removing the jumper
cables.
After starting the disabled
vehicle and removing the
jumper cables, allow it to idle
for several minutes.
Towing the
Vehicle
Transporting a
Disabled Vehicle
Caution
Incorrectly transporting a
disabled vehicle may cause
damage to the vehicle. Use
proper tire straps to secure
the vehicle to the flatbed
tow truck. Do not strap or
hook to any frame,
underbody, or suspension
component not specified
below. Do not move vehicles
with drive axle tires on the
ground. Damage is not
covered by the vehicle
warranty.
Caution
The vehicle may be equipped
with an electric parking
brake and/or an electronic (Continued)
Page 411 of 476

Cadillac XT4 Owner Manual (GMNA-Localizing-U.S./Canada/Mexico-
16412876) - 2023 - CRC - 3/25/22
410 Vehicle Care
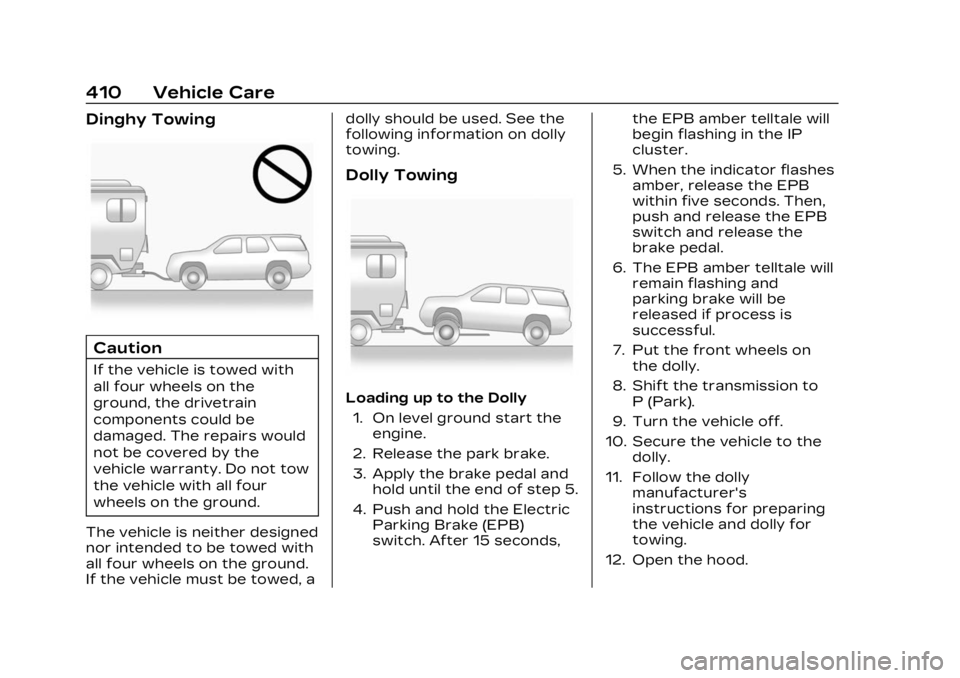
Dinghy Towing
Caution
If the vehicle is towed with
all four wheels on the
ground, the drivetrain
components could be
damaged. The repairs would
not be covered by the
vehicle warranty. Do not tow
the vehicle with all four
wheels on the ground.
The vehicle is neither designed
nor intended to be towed with
all four wheels on the ground.
If the vehicle must be towed, a dolly should be used. See the
following information on dolly
towing.
Dolly Towing
Loading up to the Dolly
1. On level ground start the engine.
2. Release the park brake.
3. Apply the brake pedal and hold until the end of step 5.
4. Push and hold the Electric Parking Brake (EPB)
switch. After 15 seconds, the EPB amber telltale will
begin flashing in the IP
cluster.
5. When the indicator flashes amber, release the EPB
within five seconds. Then,
push and release the EPB
switch and release the
brake pedal.
6. The EPB amber telltale will remain flashing and
parking brake will be
released if process is
successful.
7. Put the front wheels on the dolly.
8. Shift the transmission to P (Park).
9. Turn the vehicle off.
10. Secure the vehicle to the dolly.
11. Follow the dolly manufacturer's
instructions for preparing
the vehicle and dolly for
towing.
12. Open the hood.
Page 412 of 476

Cadillac XT4 Owner Manual (GMNA-Localizing-U.S./Canada/Mexico-
16412876) - 2023 - CRC - 3/25/22
Vehicle Care 411
13. Disconnect the negative (-)terminal connector from
the 12–volt battery.
14. Close and latch the hood.
Unloading from the Dolly 1. On level ground open the hood.
2. Connect the negative (-) terminal connector to the
12–volt battery.
3. Close the hood.
4. Follow the dolly manufacturer's
instructions for preparing
the vehicle and dolly for
unloading.
5. Unsecure the vehicle from the dolly.
6. Start the engine.
7. Shift the transmission to R (Reverse).
8. Drive vehicle off of the dolly.
9. Shift the transmission to P (Park).
10. Apply the brake pedal and hold until step 12. 11. Push and hold the EPB
switch for 5 seconds.
12. The EPB amber telltale in the IP cluster will go out.
13. Apply and release Parking Brake by pushing the EPB
switch.
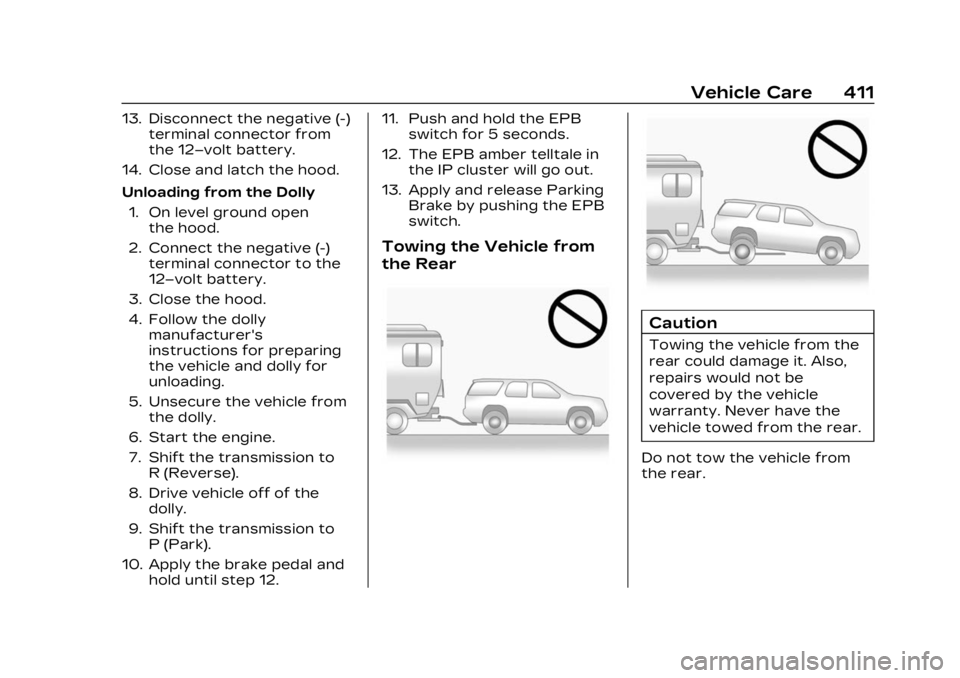
Towing the Vehicle from
the Rear
Caution
Towing the vehicle from the
rear could damage it. Also,
repairs would not be
covered by the vehicle
warranty. Never have the
vehicle towed from the rear.
Do not tow the vehicle from
the rear.
Page 423 of 476

Cadillac XT4 Owner Manual (GMNA-Localizing-U.S./Canada/Mexico-
16412876) - 2023 - CRC - 3/25/22
422 Vehicle Care
3. Make sure the floor mat isproperly secured in place.
Verify the floor mat does
not interfere with the
pedals.
Cleaning Rubber Floor
Mats (All-Weather Mats
and Floor Liners)
See “Vinyl/Rubber” under
Interior Care 0417 for
important cleaning
information.
Page 427 of 476

Cadillac XT4 Owner Manual (GMNA-Localizing-U.S./Canada/Mexico-
16412876) - 2023 - CRC - 3/25/22
426 Service and Maintenance
may also be needed if you
notice reduced airflow,
windows fogging up,
or odors. Your local GM
Service location can help you
determine when it is the
right time to replace your
filter.
Every 96 000 km (60,000 mi)
.Replace spark plugs. Inspect
spark plug wires and/or
boots.
Every 161 000 km
(100,000 mi)
.Replace hood and/or body
lift support gas struts. Or
every 10 years, whichever
comes first. See Gas Strut(s)
0 349.
Every 240 000 km
(150,000 mi)
.Change rear axle fluid,
if equipped with AWD. Do
not directly power wash the
transfer case and/or front/
rear axle output seals. High
pressure water can
overcome the seals and contaminate the transfer
case fluid. Contaminated
fluid will decrease the life of
the transfer case and/or
axles and should be
replaced.
.Drain and fill engine cooling
system. Or every six years,
whichever comes first. See
Cooling System
0338.
Severe Conditions
Requiring More Frequent
Maintenance*
.Public service, military,
or commercial use vehicles
to include the following:
‐ Ambulances, police cars,
and emergency rescue
vehicles.
‐ Civilian vehicles such as
light duty pick-up trucks,
SUVs, and passenger cars
that are used in military
applications.
‐ Recovery vehicles such as
tow trucks and flatbed
single vehicle carriers or any vehicle that is
consistently used in towing
trailers or other loads.
‐ High use commercial
vehicles such as courier
delivery vehicles, private
security patrol vehicles,
or any vehicles that
operate on a 24–hour
basis.
‐ Any vehicle consistently
operated in a high sand or
dust environment such as
those used on oil pipelines
and similar applications.
.Vehicles that are regularly
used for short trips of 6 km
(4 mi) or less.
The oil life indicator will show
you when to change the oil
and filter. Under severe
conditions the indicator may
come on before 12 000 km
(7,500 mi).
* Footnote: Under extreme
driving conditions listed
above, it may be necessary
to replace your spark plugs
at more frequent intervals.