change wheel CADILLAC XT5 2020 User Guide
[x] Cancel search | Manufacturer: CADILLAC, Model Year: 2020, Model line: XT5, Model: CADILLAC XT5 2020Pages: 384, PDF Size: 6.52 MB
Page 137 of 384
136 INSTRUMENTS AND CONTROLS
Passive Door Lock
This setting specifies if the vehicle will
automatically lock, or lock and
provide an alert after all the doors are
closed, and you walk away from the
vehicle with the RKE transmitter. See
Remote Keyless Entry (RKE) System
Operation010.
Touch Off, On with Horn Chirp, or On.
Remote Left in Vehicle Alert
This feature sounds an alert when the
RKE transmitter is left in the vehicle.
This menu also enables Remote No
Longer in Vehicle Alert.
Touch Off or On.
Seating Position
Touch and the following may display:
. Seat Entry Memory
. Seat Exit Memory
Seat Entry Memory
This feature automatically recalls the
previously stored 1 or 2 button
positions when the ignition is changed
from off to on or ACC/ACCESSORY.
See Memory Seats 046. Touch Off or On.
Seat Exit Memory
This feature automatically recalls the
previously stored exit button positions
when the ignition is changed from on
or ACC/ACCESSORY to off if the driver
door is open or opened. See
Memory
Seats 046.
Touch Off or On.
Teen Driver
See “Teen Driver” under“Settings ”in
the infotainment manual.
Valet Mode
This will lock the infotainment system
and steering wheel controls. It may
also limit access to vehicle storage
locations, if equipped.
To enable valet mode:
1. Enter a four-digit code on the keypad.
2. Touch Enter to go to the confirmation screen.
3. Re-enter the four-digit code. Touch Lock or Unlock to lock or
unlock the system. Touch Back to go
back to the previous menu.
Page 145 of 384
144 LIGHTING
If after signaling a turn or lane
change, the arrow flashes rapidly or
does not come on, a signal bulb may
be burned out.
Replace any burned out bulbs. If a
bulb is not burned out, check the fuse.
SeeFuses and Circuit Breakers 0274.
Cornering Lamps
Cornering lamps automatically come
on when all of the following occur:
.
The low-beam headlamps are on.
. The turn signals are activated or
the steering wheel is at a turning
angle.
. The vehicle speed is below
40 km/h (25 mph).
Interior Lighting
Instrument Panel
Illumination Control
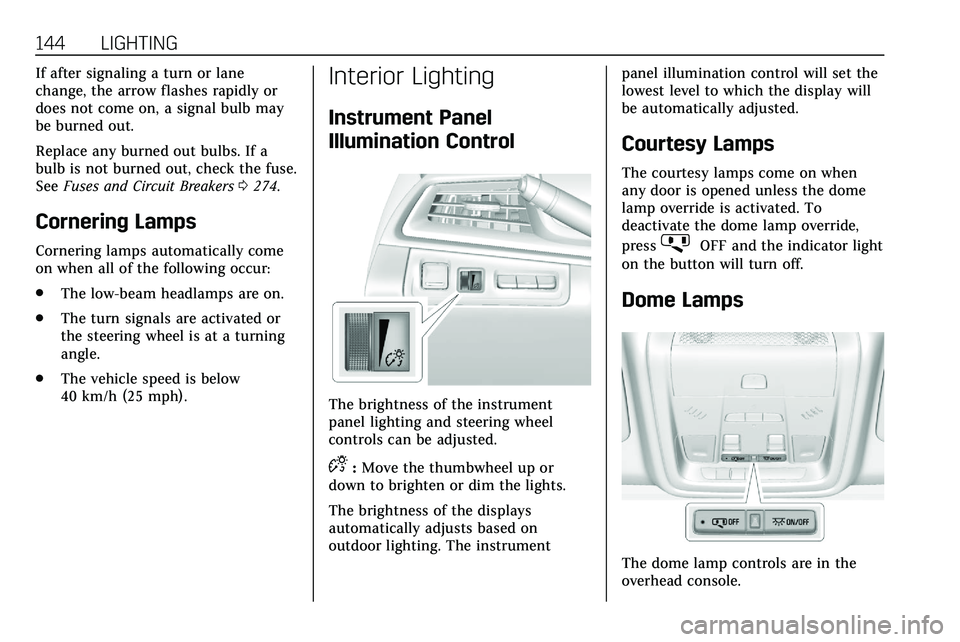
The brightness of the instrument
panel lighting and steering wheel
controls can be adjusted.
D:Move the thumbwheel up or
down to brighten or dim the lights.
The brightness of the displays
automatically adjusts based on
outdoor lighting. The instrument panel illumination control will set the
lowest level to which the display will
be automatically adjusted.
Courtesy Lamps
The courtesy lamps come on when
any door is opened unless the dome
lamp override is activated. To
deactivate the dome lamp override,
press
jOFF and the indicator light
on the button will turn off.
Dome Lamps
The dome lamp controls are in the
overhead console.
Page 159 of 384
158 DRIVING AND OPERATING
Driving and
Operating
Driving Information
Driving for Better FuelEconomy . . . . . . . . . . . . . . . . . . . . . . . . 159
Distracted Driving . . . . . . . . . . . . . . . . 159
Defensive Driving . . . . . . . . . . . . . . . . 160
Drunk Driving . . . . . . . . . . . . . . . . . . . . 160
Control of a Vehicle . . . . . . . . . . . . . . 160
Braking . . . . . . . . . . . . . . . . . . . . . . . . . . . . 161
Steering . . . . . . . . . . . . . . . . . . . . . . . . . . . 161
Off-Road Recovery . . . . . . . . . . . . . . . . 162
Loss of Control . . . . . . . . . . . . . . . . . . . 162
Off-Road Driving . . . . . . . . . . . . . . . . . 163
Driving on Wet Roads . . . . . . . . . . . 167
Hill and Mountain Roads . . . . . . . . 168
Winter Driving . . . . . . . . . . . . . . . . . . . . 168
If the Vehicle Is Stuck . . . . . . . . . . . 170
Vehicle Load Limits . . . . . . . . . . . . . . 170
Starting and Operating
New Vehicle Break-In . . . . . . . . . . . . 174
Ignition Positions . . . . . . . . . . . . . . . . 174
Starting the Engine . . . . . . . . . . . . . . 176
Stop/Start System . . . . . . . . . . . . . . . . 177
Engine Heater . . . . . . . . . . . . . . . . . . . . 178 Retained Accessory
Power (RAP) . . . . . . . . . . . . . . . . . . . . 180
Shifting Into Park . . . . . . . . . . . . . . . . 180
Shifting out of Park . . . . . . . . . . . . . . 180
Parking over Things That Burn . . . . . . . . . . . . . . . . . . . . . . . 182
Active Fuel Management . . . . . . . . 182
Extended Parking . . . . . . . . . . . . . . . . . 183
Engine Exhaust
Engine Exhaust . . . . . . . . . . . . . . . . . . . 183
Running the Vehicle While Parked . . . . . . . . . . . . . . . . . . . . . . . . . . . 183
Automatic Transmission
Automatic Transmission . . . . . . . . . 184
Manual Mode . . . . . . . . . . . . . . . . . . . . . 188
Drive Systems
All-Wheel Drive . . . . . . . . . . . . . . . . . . 190
Brakes
Electric Brake Boost . . . . . . . . . . . . . . 190
Antilock Brake System (ABS) . . . . 190
Electric Parking Brake . . . . . . . . . . . . 191
Brake Assist . . . . . . . . . . . . . . . . . . . . . . . 192
Hill Start Assist (HSA) . . . . . . . . . . . 193
Ride Control Systems
Traction Control/ElectronicStability Control . . . . . . . . . . . . . . . . 193
Driver Mode Control . . . . . . . . . . . . . 195
Cruise Control
Cruise Control . . . . . . . . . . . . . . . . . . . . 196
Adaptive Cruise Control . . . . . . . . . 198
Driver Assistance Systems
Driver Assistance Systems . . . . . . . 207
Assistance Systems for Parking
or Backing . . . . . . . . . . . . . . . . . . . . . . . 208
Rear Pedestrian Alert . . . . . . . . . . . . 216
Assistance Systems for Driving . . . . . . . . . . . . . . . . . . . . . . . . . . 217
Forward Collision Alert (FCA) System . . . . . . . . . . . . . . . . . . . . . . . . . . 217
Automatic Emergency Braking (AEB) . . . . . . . . . . . . . . . . . . . 220
Front Pedestrian Braking (FPB) System . . . . . . . . . . . . . . . . . . . . . . . . . . 221
Night Vision System . . . . . . . . . . . . . 223
Side Blind Zone Alert (SBZA) . . . . 226
Lane Change Alert (LCA) . . . . . . . . 226
Lane Keep Assist (LKA) . . . . . . . . . . 228
Fuel
Top Tier Fuel . . . . . . . . . . . . . . . . . . . . . 230
Recommended Fuel (2.0L L4
Engine) . . . . . . . . . . . . . . . . . . . . . . . . . . 230
Recommended Fuel (3.6L V6 Engine) . . . . . . . . . . . . . . . . . . . . . . 230
Prohibited Fuels . . . . . . . . . . . . . . . . . . 231
Fuels in Foreign Countries . . . . . . . 231
Fuel Additives . . . . . . . . . . . . . . . . . . . . 231
Page 164 of 384
DRIVING AND OPERATING 163
Defensive drivers avoid most skids by
taking reasonable care suited to
existing conditions, and by not
overdriving those conditions. But
skids are always possible.
If the vehicle starts to slide, follow
these suggestions:
.Ease your foot off the accelerator
pedal and steer the way you want
the vehicle to go. The vehicle may
straighten out. Be ready for a
second skid if it occurs.
. Slow down and adjust your driving
according to weather conditions.
Stopping distance can be longer
and vehicle control can be affected
when traction is reduced by water,
snow, ice, gravel, or other material
on the road. Learn to recognize
warning clues —such as enough
water, ice, or packed snow on the
road to make a mirrored surface
— and slow down when you have
any doubt.
. Try to avoid sudden steering,
acceleration, or braking, including
reducing vehicle speed by shifting to a lower gear. Any sudden
changes could cause the tires to
slide.
Remember: Antilock brakes help avoid
only the braking skid.
Off-Road Driving
All-Wheel Drive vehicles can be used
for off-road driving. Vehicles without
All-Wheel Drive and vehicles not
equipped with All Terrain (AT) or
On-Off Road (OOR) tires must not be
driven off-road except on a level, solid
surface. To contact the tire
manufacturer for more information
about the original equipment tires, see
the Limited Warranty and Owner
Assistance Information manual.
Controlling the vehicle is the key to
successful off-road driving. One of the
best ways to control the vehicle is to
control the speed.
{Warning
When driving off-road, bouncing
and quick changes in direction can
easily throw you out of position.
This could cause you to lose control
and crash. You and your passengers
should always wear seat belts.
Before Driving Off-Road
. Have all necessary maintenance
and service work completed.
. Fuel the vehicle, fill fluid levels,
and check inflation pressure in all
tires, including the spare,
if equipped.
. Read all the information about
All-Wheel Drive vehicles in this
manual.
. Make sure all underbody shields,
if equipped, are properly attached.
. Know the local laws that apply to
off-road driving.
Page 167 of 384
166 DRIVING AND OPERATING
3.2. Stay clear of the path thevehicle would take if it
rolled downhill.
. Avoid turns that take the vehicle
across the incline of the hill. A hill
that can be driven straight up or
down might be too steep to drive
across. Driving across an incline
puts more weight on the downhill
wheels which could cause a
downhill slide or a rollover.
. Surface conditions can be a
problem. Loose gravel, muddy
spots, or even wet grass can cause
the tires to slip sideways, downhill.
If the vehicle slips sideways, it can
hit something that will trip it –a
rock, a rut, etc. –and roll over.
. Hidden obstacles can make the
steepness of the incline more
severe. If a rock is driven across
with the uphill wheels, or if the
downhill wheels drop into a rut or
depression, the vehicle can tilt
even more. .
If an incline must be driven
across, and the vehicle starts to
slide, turn downhill. This should
help straighten out the vehicle and
prevent the side slipping.
{Warning
Getting out of the vehicle on the
downhill side when stopped across
an incline is dangerous. If the
vehicle rolls over, you could be
crushed or killed. Always get out on
the uphill side of the vehicle and
stay well clear of the rollover path.
Driving in Mud, Sand, Snow,
or Ice
Use a low gear when driving in mud –
the deeper the mud, the lower the
gear. Keep the vehicle moving to avoid
getting stuck.
Traction changes when driving on
sand. On loose sand, such as on
beaches or sand dunes, the tires tend
to sink into the sand. This affects steering, accelerating, and braking.
Drive at a reduced speed and avoid
sharp turns or abrupt maneuvers.
Traction is reduced on hard packed
snow and ice and it is easy to lose
control. Reduce vehicle speed when
driving on hard packed snow and ice.
{Warning
Driving on frozen lakes, ponds,
or rivers can be dangerous. Ice
conditions vary greatly and the
vehicle could fall through the ice;
you and your passengers could
drown. Drive your vehicle on safe
surfaces only.
Driving in Water
{Warning
Driving through rushing water can
be dangerous. Deep water can
sweep your vehicle downstream and
you and your passengers could
drown. If it is only shallow water, it
(Continued)
Page 171 of 384

170 DRIVING AND OPERATING
This keeps the battery charged to
restart the vehicle and to signal for
help with the headlamps. Do this as
little as possible, to save fuel.
If the Vehicle Is Stuck
Slowly and cautiously spin the wheels
to free the vehicle when stuck in sand,
mud, ice, or snow.
If stuck too severely for the traction
system to free the vehicle, turn the
traction system off and use the
rocking method. SeeTraction Control/
Electronic Stability Control 0193.
{Warning
If the vehicle's tires spin at high
speed, they can explode, and you or
others could be injured. The vehicle
can overheat, causing an engine
compartment fire or other damage.
Spin the wheels as little as possible
and avoid going above 56 km/h
(35 mph). For All-Wheel Drive (AWD), select
Off-Road or AWD mode. See
Driver
Mode Control 0195 and
All-Wheel Drive 0190.
Rocking the Vehicle to Get it Out
Turn the steering wheel left and right
to clear the area around the front
wheels. Turn off any traction system.
Shift back and forth between
R (Reverse) and a low forward gear,
spinning the wheels as little as
possible. To prevent transmission
wear, wait until the wheels stop
spinning before shifting gears. Release
the accelerator pedal while shifting,
and press lightly on the accelerator
pedal when the transmission is in
gear. Slowly spinning the wheels in
the forward and reverse directions
causes a rocking motion that could
free the vehicle. If that does not get
the vehicle out after a few tries, it
might need to be towed out. If the
vehicle does need to be towed out, see
Towing the Vehicle 0319.
Vehicle Load Limits
It is very important to know how
much weight the vehicle can carry.
This weight is called the vehicle
capacity weight and includes the
weight of all occupants, cargo, and
all nonfactory-installed options.
Two labels on the vehicle may
show how much weight it may
properly carry, the Tire and
Loading Information label and the
Certification/Tire label.
{Warning
Do not load the vehicle any
heavier than the Gross Vehicle
Weight Rating (GVWR),
or either the maximum front or
rear Gross Axle Weight Rating
(GAWR). This can cause
systems to break and change
the way the vehicle handles.
This could cause loss of control
and a crash. Overloading can
(Continued)
Page 191 of 384
190 DRIVING AND OPERATING
Drive Systems
All-Wheel Drive
Vehicles with this feature can operate
in All-Wheel Drive (AWD) Mode. See
Driver Mode Control0195.
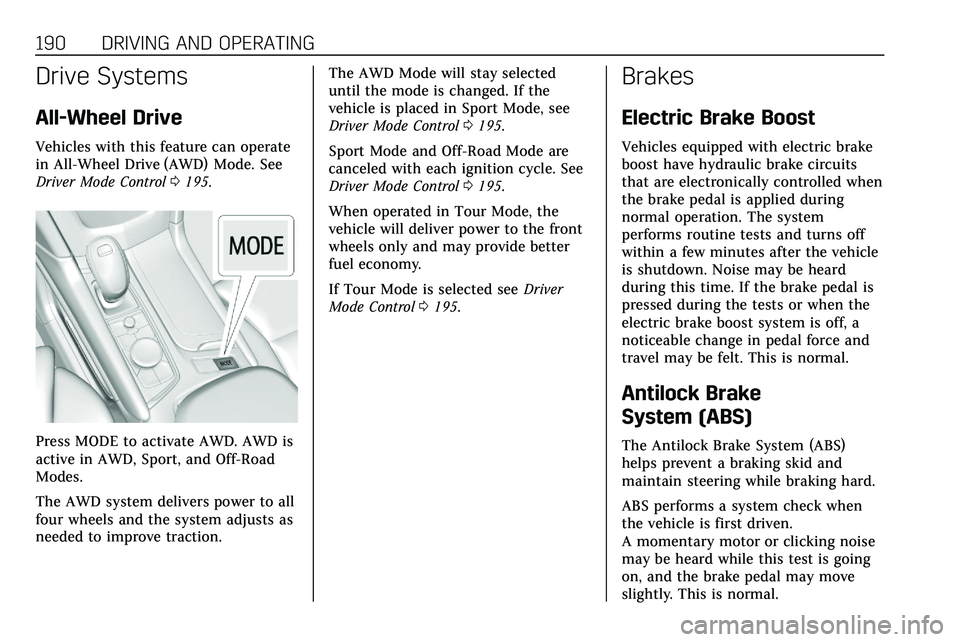
Press MODE to activate AWD. AWD is
active in AWD, Sport, and Off-Road
Modes.
The AWD system delivers power to all
four wheels and the system adjusts as
needed to improve traction. The AWD Mode will stay selected
until the mode is changed. If the
vehicle is placed in Sport Mode, see
Driver Mode Control
0195.
Sport Mode and Off-Road Mode are
canceled with each ignition cycle. See
Driver Mode Control 0195.
When operated in Tour Mode, the
vehicle will deliver power to the front
wheels only and may provide better
fuel economy.
If Tour Mode is selected see Driver
Mode Control 0195.
Brakes
Electric Brake Boost
Vehicles equipped with electric brake
boost have hydraulic brake circuits
that are electronically controlled when
the brake pedal is applied during
normal operation. The system
performs routine tests and turns off
within a few minutes after the vehicle
is shutdown. Noise may be heard
during this time. If the brake pedal is
pressed during the tests or when the
electric brake boost system is off, a
noticeable change in pedal force and
travel may be felt. This is normal.
Antilock Brake
System (ABS)
The Antilock Brake System (ABS)
helps prevent a braking skid and
maintain steering while braking hard.
ABS performs a system check when
the vehicle is first driven.
A momentary motor or clicking noise
may be heard while this test is going
on, and the brake pedal may move
slightly. This is normal.
Page 197 of 384
196 DRIVING AND OPERATING
hold the current gear after a quick
release of a heavily applied accelerator
pedal. This provides greater engine
braking and enhanced vehicle control.
When PAL is activated, there may be
an additional green gear symbol which
appears in the instrument cluster
display. SeeGear Shifting Light 0119.
AWD : AWD Mode provides drive
torque to all four wheels. Select AWD
to improve traction and control on
slippery road surfaces, such as gravel,
sand, wet pavement, snow, and ice.
When in AWD Mode, the AWD Mode
indicator light will be on. For more
information on AWD Mode, see
All-Wheel Drive 0190.
Snow/Ice (FWD Vehicles Only) :
Snow/Ice Mode improves vehicle
acceleration on snow and ice covered
roads.
Off-Road (AWD Vehicles Only) : Use
this mode for off-road recreational
driving. Choosing Off-Road Mode also
engages AWD Mode. For more
information on Off-Road Mode, see
Off-Road Driving.Cruise Control
{Warning
Cruise control can be dangerous
where you cannot drive safely at a
steady speed. Do not use cruise
control on winding roads or in
heavy traffic.
Cruise control can be dangerous on
slippery roads. On such roads, fast
changes in tire traction can cause
excessive wheel slip, and you could
lose control. Do not use cruise
control on slippery roads.
With cruise control, a speed of about
40 km/h (25 mph) or more can be
maintained without keeping your foot
on the accelerator. Cruise control does
not work at speeds below about
40 km/h (25 mph).
If the Traction Control/StabiliTrak/
Electronic Stability Control (ESC)
system begins to limit wheel spin
while using cruise control, the cruise control automatically disengages. See
Traction Control/Electronic Stability
Control
0193. If a collision alert
occurs when cruise control is
activated, cruise control is disengaged.
See Forward Collision Alert (FCA)
System 0217. When road conditions
allow cruise control to be safely used,
it can be turned back on.
Cruise control will disengage if either
TCS or StabiliTrak/ESC is turned off.
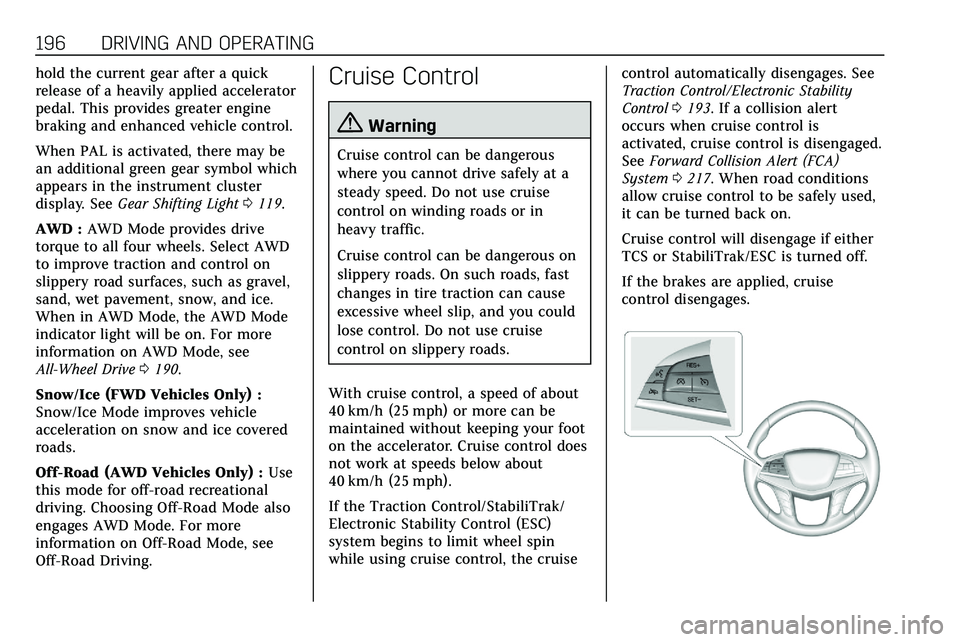
If the brakes are applied, cruise
control disengages.
Page 200 of 384

DRIVING AND OPERATING 199
works like regular cruise control. ACC
uses camera and radar sensors. See
Radio Frequency Statement0358.
If a vehicle is detected in your path,
ACC can apply acceleration or limited,
moderate braking to maintain the
selected following gap. To disengage
ACC, apply the brake. If ACC is
controlling your vehicle speed when
the traction control system (TCS) or
StabiliTrak/Electronic Stability Control
(ESC) system activates, the ACC may
automatically disengage. See Traction
Control/Electronic Stability Control
0 193. When road conditions allow
ACC to be safely used, the ACC can be
turned back on.
ACC will not engage if the TCS or
StabiliTrak/ESC system is disabled.
{Warning
ACC has limited braking ability and
may not have time to slow the
vehicle down enough to avoid a
collision with another vehicle you
are following. This can occur when
(Continued)
Warning (Continued)
vehicles suddenly slow or stop
ahead, or enter your lane. Also see
“Alerting the Driver”in this section.
Complete attention is always
required while driving and you
should be ready to take action and
apply the brakes. See Defensive
Driving 0160.
{Warning
ACC will not detect or brake for
children, pedestrians, animals,
or other objects.
Do not use ACC when:
. On winding and hilly roads or
when the sensors are blocked
by snow, ice, or dirt. The
system may not detect a
vehicle ahead. Keep the entire
front of the vehicle clean.
(Continued)
Warning (Continued)
.Visibility is low, such as in
fog, rain, or snow conditions.
ACC performance is limited
under these conditions.
. On slippery roads where fast
changes in tire traction can
cause excessive wheel slip.
J:Press to turn the system on or
off. The indicator turns white on the
instrument cluster when ACC is
turned on.
Page 203 of 384
202 DRIVING AND OPERATING
.To increase vehicle speed in small
increments, briefly press RES+. For
each press, the vehicle goes
1 km/h (1 mph) faster.
. To increase vehicle speed in larger
increments, hold RES+. While
holding RES+, the vehicle speed
increases to the next 5 km/h
(5 mph) step, then continues to
increase by 5 km/h (5 mph) at
a time.
The set speed can also be increased
while the vehicle is stopped.
. If stopped with the brake applied,
press RES+ until the desired set
speed is displayed.
. If ACC is holding the vehicle at a
stop and there is another vehicle
directly ahead, pressing RES+ will
increase the set speed. Pressing
RES+ when there is no longer a
vehicle ahead will cause the ACC
to resume.
When it is determined that there is no
vehicle ahead or the vehicle ahead is
beyond the selected following gap,
then the vehicle speed will increase to
the set speed. The speedometer reading can be
displayed in either English or metric
units. See
Instrument Cluster 0108.
The increment value used depends on
the units displayed.
Reducing Speed While ACC is at a
Set Speed
If ACC is already activated, do one of
the following:
. Use the brake to get to the desired
lower speed. Release the brake and
press SET– . The vehicle will now
cruise at the lower speed.
. Press and hold SET– until the
desired lower speed is reached,
then release it.
. To decrease the vehicle speed in
smaller increments, briefly press
SET− to the first detent. For each
press, the vehicle goes about
1 km/h (1 mph) slower.
. To decrease the vehicle speed in
larger increments, press and hold
SET−. While holding SET−, the
vehicle speed decreases to the
next 5 km/h (5 mph) step, then
continues to decrease by 5 km/h
(5 mph) at a time. .
To decrease speed while the
vehicle is stopped, press SET−
until the desired set speed is
displayed.
The speedometer reading can be
displayed in either English or metric
units. See Instrument Cluster 0108.
The increment value used depends on
the units displayed.
Selecting the Follow Distance Gap
When a slower moving vehicle is
detected ahead within the selected
following gap, ACC will adjust the
vehicle's speed and attempt to
maintain the follow distance gap
selected.
Press
[on the steering wheel to
adjust the following gap. Each press
cycles the gap button through three
settings: Far, Medium, or Near.
When pressed, the current gap setting
displays briefly on the instrument
cluster and HUD. The gap setting will
be maintained until it is changed.
Since each gap setting corresponds to
a following time (Far, Medium,
or Near), the following distance will