change wheel CADILLAC XT5 2020 Owner's Guide
[x] Cancel search | Manufacturer: CADILLAC, Model Year: 2020, Model line: XT5, Model: CADILLAC XT5 2020Pages: 384, PDF Size: 6.52 MB
Page 216 of 384
DRIVING AND OPERATING 215
Warning (Continued)
APA does not detect or avoid traffic
that is behind or alongside of the
vehicle. Always be prepared to stop
the vehicle during the parking
maneuver.
Press
Oon the center stack to enable
the system to search for a parking
space that is large enough and within
1.5 m (5 ft) of the vehicle. The vehicle
speed must be below
30 km/h (18 mph). The system cannot:
. Detect whether it is a legal parking
space.
. Park exactly lined up with the
vehicle next to it if the spot is
approached at an angle or if the
parking space is angled.
. Park exactly centered in a spot
that is marked too large.
. Always detect short curbs.
When enabled, APA searches for
parallel parking spaces to the right of
the vehicle. To search for a parking
space to the left, turn on the left turn signal or, if available, change the side
selection in the infotainment display.
To switch the parking mode between
parallel and perpendicular, press and
hold
Oduring the search process or,
if available, change the parking mode
in the infotainment display.
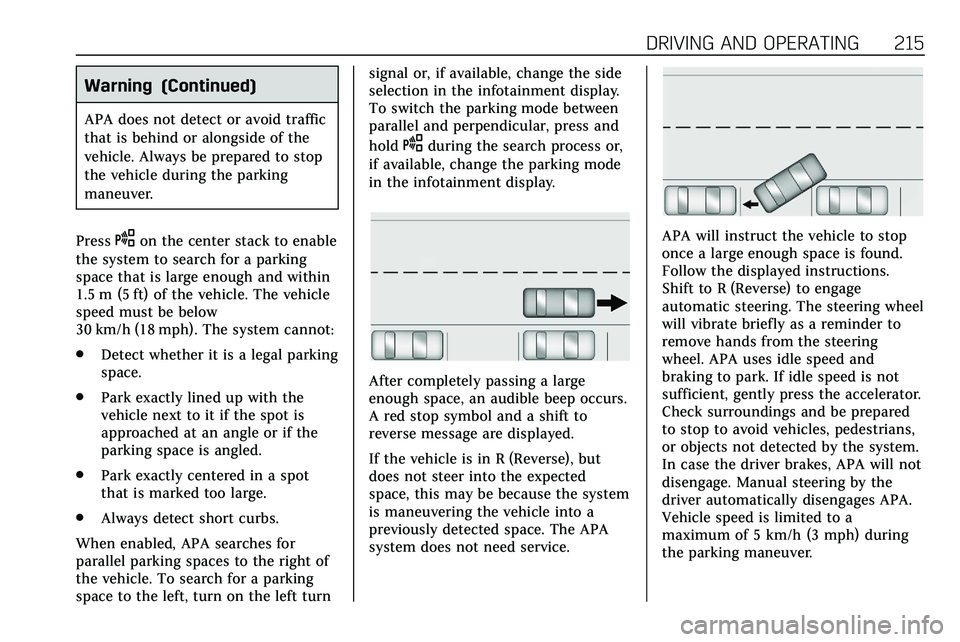
After completely passing a large
enough space, an audible beep occurs.
A red stop symbol and a shift to
reverse message are displayed.
If the vehicle is in R (Reverse), but
does not steer into the expected
space, this may be because the system
is maneuvering the vehicle into a
previously detected space. The APA
system does not need service.
APA will instruct the vehicle to stop
once a large enough space is found.
Follow the displayed instructions.
Shift to R (Reverse) to engage
automatic steering. The steering wheel
will vibrate briefly as a reminder to
remove hands from the steering
wheel. APA uses idle speed and
braking to park. If idle speed is not
sufficient, gently press the accelerator.
Check surroundings and be prepared
to stop to avoid vehicles, pedestrians,
or objects not detected by the system.
In case the driver brakes, APA will not
disengage. Manual steering by the
driver automatically disengages APA.
Vehicle speed is limited to a
maximum of 5 km/h (3 mph) during
the parking maneuver.
Page 220 of 384
DRIVING AND OPERATING 219
Without Head-Up Display
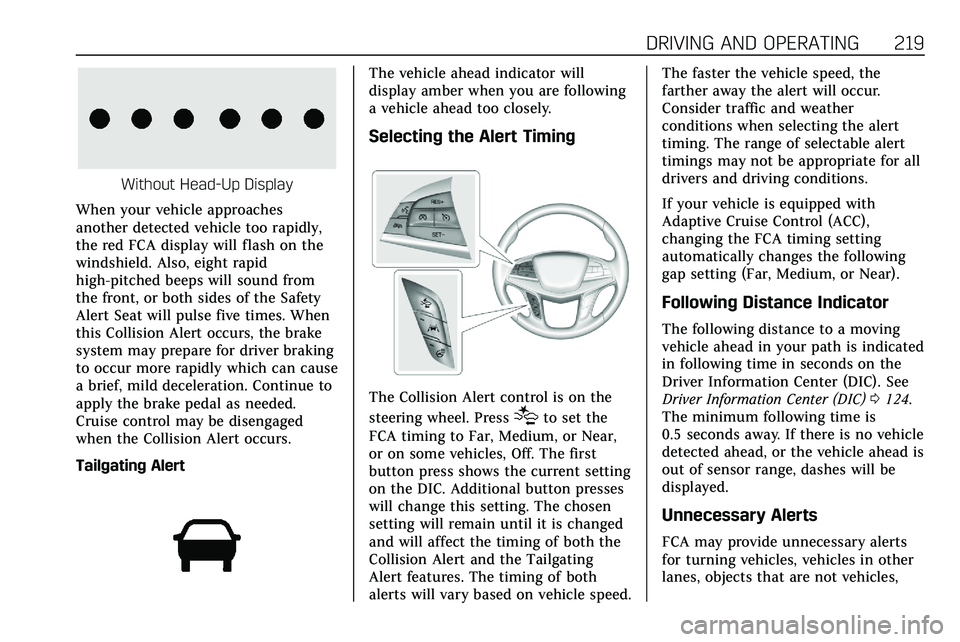
When your vehicle approaches
another detected vehicle too rapidly,
the red FCA display will flash on the
windshield. Also, eight rapid
high-pitched beeps will sound from
the front, or both sides of the Safety
Alert Seat will pulse five times. When
this Collision Alert occurs, the brake
system may prepare for driver braking
to occur more rapidly which can cause
a brief, mild deceleration. Continue to
apply the brake pedal as needed.
Cruise control may be disengaged
when the Collision Alert occurs.
Tailgating Alert
The vehicle ahead indicator will
display amber when you are following
a vehicle ahead too closely.
Selecting the Alert Timing
The Collision Alert control is on the
steering wheel. Press
[to set the
FCA timing to Far, Medium, or Near,
or on some vehicles, Off. The first
button press shows the current setting
on the DIC. Additional button presses
will change this setting. The chosen
setting will remain until it is changed
and will affect the timing of both the
Collision Alert and the Tailgating
Alert features. The timing of both
alerts will vary based on vehicle speed. The faster the vehicle speed, the
farther away the alert will occur.
Consider traffic and weather
conditions when selecting the alert
timing. The range of selectable alert
timings may not be appropriate for all
drivers and driving conditions.
If your vehicle is equipped with
Adaptive Cruise Control (ACC),
changing the FCA timing setting
automatically changes the following
gap setting (Far, Medium, or Near).
Following Distance Indicator
The following distance to a moving
vehicle ahead in your path is indicated
in following time in seconds on the
Driver Information Center (DIC). See
Driver Information Center (DIC)
0124.
The minimum following time is
0.5 seconds away. If there is no vehicle
detected ahead, or the vehicle ahead is
out of sensor range, dashes will be
displayed.
Unnecessary Alerts
FCA may provide unnecessary alerts
for turning vehicles, vehicles in other
lanes, objects that are not vehicles,
Page 230 of 384

DRIVING AND OPERATING 229
{Warning
Using LKA while towing a trailer or
on slippery roads could cause loss
of control of the vehicle and a
crash. Turn the system off.
How the System Works
LKA uses a camera sensor installed on
the windshield ahead of the rearview
mirror to detect lane markings. It may
provide brief steering assist if it
detects an unintended lane departure.
It may further provide an audible alert
or the driver seat may pulse indicating
that a lane marking has been crossed.
To turn LKA on and off, press
Aon
the steering wheel. If equipped, the
indicator light on the button comes
on when LKA is on and turns off
when LKA is disabled.
When on,
Ais white, if equipped,
indicating that the system is not ready
to assist.
Ais green if LKA is ready
to assist. LKA may assist by gently
turning the steering wheel if the
vehicle approaches a detected lane marking.
Ais amber when
assisting. It may also provide a Lane
Departure Warning (LDW) alert by
flashing
Aamber if the vehicle
crosses a detected lane marking.
Additionally, there may be three
beeps, or the driver seat may pulse
three times, on the right or left,
depending on the lane departure
direction.
Take Steering
The LKA system does not
continuously steer the vehicle. If LKA
does not detect active driver steering,
an alert and chime may be provided.
Steer the vehicle to dismiss. LKA may
become temporarily unavailable after
repeated take steering alerts.
When the System Does Not
Seem to Work Properly
The system performance may be
affected by:
. Close vehicles ahead.
. Sudden lighting changes, such as
when driving through tunnels.
. Banked roads. .
Roads with poor lane markings,
such as two-lane roads.
A camera blocked message may
display if the camera is blocked. Some
driver assistance systems may have
reduced performance or not work at
all. An LKA or LDW unavailable
message may display if the systems
are temporarily unavailable. This
message could be due to a blocked
camera. The LKA system does not
need service. Clean the outside of the
windshield behind the rearview mirror.
LKA assistance and/or LDW alerts
may occur due to tar marks, shadows,
cracks in the road, temporary or
construction lane markings, or other
road imperfections. This is normal
system operation; the vehicle does not
need service. Turn LKA off if these
conditions continue.
Page 259 of 384
258 VEHICLE CARE
an oil change is not necessary for up
to a year. The engine oil and filter
must be changed at least once a year
and at this time the system must be
reset. Your dealer has trained service
people who will perform this work and
reset the system. It is also important
to check the oil regularly over the
course of an oil drain interval and
keep it at the proper level.
If the system is ever reset accidentally,
the oil must be changed at 5 000 km
(3,000 mi) since the last oil change.
Remember to reset the oil life system
whenever the oil is changed.
How to Reset the Engine Oil Life
System
Reset the system whenever the engine
oil is changed so that the system can
calculate the next engine oil change.
To reset the system:1. Using the DIC controls on the right side of the steering wheel,
display REMAINING OIL LIFE on
the DIC. See Driver Information
Center (DIC) 0124. When
remaining oil life is low, the CHANGE ENGINE OIL SOON
message will appear on the
display.
2. Press SEL on the DIC controls and hold SEL down for a few
seconds to clear the CHANGE
ENGINE OIL SOON message and
reset the oil life at 100%.
Be careful not to reset the oil life
display accidentally at any time
other than after the oil is
changed. It cannot be reset
accurately until the next oil
change.
The oil life system can also be reset as
follows: 1. Display REMAINING OIL LIFE on the DIC. See Driver Information
Center (DIC) 0124.
2. Fully press and release the accelerator pedal three times
within five seconds.
If the CHANGE ENGINE OIL
SOON message is not on, the
system is reset. The system is reset when the
CHANGE ENGINE OIL SOON message
is off.
If the CHANGE ENGINE OIL SOON
message comes back on when the
vehicle is started, the engine oil life
system has not been reset. Repeat the
procedure.
Automatic Transmission
Fluid
A transmission fluid leak is the only
reason for fluid loss. If a leak occurs,
take the vehicle to your dealer and
have it repaired as soon as possible.
Caution
Use of the incorrect automatic
transmission fluid may damage the
vehicle, and the damage may not be
covered by the vehicle warranty.
Always use the correct automatic
transmission fluid. See
Recommended Fluids and Lubricants
0
342.
Page 260 of 384
VEHICLE CARE 259
See your dealer to have the fluid and
filter changed at the intervals listed in
theMaintenance Schedule 0332.
Engine Air Filter Life
System
If equipped, this feature provides the
engine air filter’s remaining life and
best timing for a change. The timing
to change an engine air filter depends
on driving and environmental
conditions.
When to Change the Engine Air
Filter
When the Driver Information Center
(DIC) displays a message to replace
the engine air filter at the next oil
change, follow this timing.
When the DIC displays a message to
replace the engine air filter soon,
replace the engine air filter at the
earliest convenience.
The system must be reset after the
engine air filter is changed.
If the DIC displays a message to check
the engine air filter system, see your
dealer.
How to Reset the Engine Air
Filter Life System
To reset:
1. Place the vehicle in P (Park).
2. Display the Air Filter Life on the DIC. See Driver Information Center
(DIC) 0124.
3. Press SELon the steering wheel
to move to the Reset/Disable
display area. Select Reset then
press SELfor several seconds.
4. Press SELto confirm the reset.
Engine Air Cleaner/Filter
The engine air cleaner/filter is in the
engine compartment on the passenger
side of the vehicle. See Engine
Compartment Overview 0252.
When to Inspect/Replace the
Engine Air Cleaner/Filter
If the vehicle is not equipped with the
engine air filter life system, see
Maintenance Schedule 0332.
How to Inspect/Replace the
Engine Air Cleaner/Filter
Do not start the engine or have the
engine running with the engine air
cleaner/filter housing open. Before
removing the engine air cleaner/filter,
make sure that the engine air cleaner/
filter housing and nearby components
are free of dirt and debris. Remove the
engine air cleaner/filter. Do not clean
the engine air cleaner/filter or
components with water or
compressed air.
To inspect or replace the engine air
cleaner/filter:
Page 268 of 384
VEHICLE CARE 267
Warning (Continued)
crash. When the brake wear
warning sound is heard, have the
vehicle serviced.
Caution
Continuing to drive with worn-out
brake pads could result in costly
brake repair.
Some driving conditions or climates
can cause a brake squeal when the
brakes are first applied or lightly
applied. This does not mean
something is wrong with the brakes.
Properly torqued wheel nuts are
necessary to help prevent brake
pulsation. When tires are rotated,
inspect brake pads for wear and
evenly tighten wheel nuts in the
proper sequence to torque
specifications. See Capacities and
Specifications 0346. Brake pads should be replaced as
complete sets.
Brake Pedal Travel
See your dealer if the brake pedal does
not return to normal height, or if
there is a rapid increase in pedal
travel. This could be a sign that brake
service may be required.
Replacing Brake System Parts
Always replace brake system parts
with new, approved replacement parts.
If this is not done, the brakes may not
work properly. The braking
performance expected can change in
many other ways if the wrong
replacement brake parts are installed
or if parts are improperly installed.
Brake Fluid
The brake master cylinder reservoir is
filled with GM approved DOT 3 brake
fluid as indicated on the reservoir cap.
See
Engine Compartment Overview
0 252 for the location of the reservoir.
Checking Brake Fluid
With the vehicle in P (Park) on a level
surface, the brake fluid level should be
between the minimum and maximum
marks on the brake fluid reservoir.
There are only two reasons why the
brake fluid level in the reservoir may
go down:
. Normal brake lining wear. When
new linings are installed, the fluid
level goes back up.
. A fluid leak in the brake hydraulic
system. Have the brake hydraulic
system fixed. With a leak, the
brakes will not work well.
Always clean the brake fluid reservoir
cap and the area around the cap
before removing it.
Do not top off the brake fluid. Adding
fluid does not correct a leak. If fluid is
added when the linings are worn,
there will be too much fluid when
Page 284 of 384

VEHICLE CARE 283
All-Season Tires
This vehicle may come with all-season
tires. These tires are designed to
provide good overall performance on
most road surfaces and weather
conditions. Original equipment tires
designed to GM's specific tire
performance criteria have a TPC
specification code molded onto the
sidewall. Original equipment
all-season tires can be identified by
the last two characters of this TPC
code, which will be“MS.”
Consider installing winter tires on the
vehicle if frequent driving on snow or
ice-covered roads is expected.
All-season tires provide adequate
performance for most winter driving
conditions, but they may not offer the
same level of traction or performance
as winter tires on snow or ice-covered
roads. See Winter Tires 0283.
Winter Tires
This vehicle was not originally
equipped with winter tires. Winter
tires are designed for increased
traction on snow and ice-covered roads. Consider installing winter tires
on the vehicle if frequent driving on
ice or snow covered roads is expected.
See your dealer for details regarding
winter tire availability and proper tire
selection. Also, see
Buying New Tires
0 297.
With winter tires, there may be
decreased dry road traction, increased
road noise, and shorter tread life.
After changing to winter tires, be alert
for changes in vehicle handling and
braking.
If using winter tires:
. Use tires of the same brand and
tread type on all four wheel
positions.
. Use only radial ply tires of the
same size, load range, and speed
rating as the original equipment
tires.
Winter tires with the same speed
rating as the original equipment tires
may not be available for H, V, W, Y,
and ZR speed rated tires. If winter
tires with a lower speed rating are
chosen, never exceed the tire's
maximum speed capability.
Summer Tires
This vehicle may come with 235/
65R18 or 235/55R20 high performance
summer tires. These tires have a
special tread and compound that are
optimized for maximum dry and wet
road performance. This special tread
and compound will have decreased
performance in cold climates, and on
ice and snow. It is recommended that
winter tires be installed on the vehicle
if frequent driving at temperatures
below approximately 5 °C (40 °F) or on
ice or snow covered roads is expected.
See Winter Tires 0283.
Caution
High performance summer tires
have rubber compounds that lose
flexibility and may develop surface
cracks in the tread area at
temperatures below −7 °C (20 °F).
Always store high performance
summer tires indoors and at
temperatures above −7 °C (20 °F)
when not in use. If the tires have
(Continued)
Page 298 of 384
VEHICLE CARE 297
change or tire rotation to prevent
corrosion or rust buildup. Do not
get grease on the wheel mounting
surface or on the wheel nuts or
bolts.
When It Is Time for New
Tires
Factors such as maintenance,
temperatures, driving speeds, vehicle
loading, and road conditions affect the
wear rate of the tires.
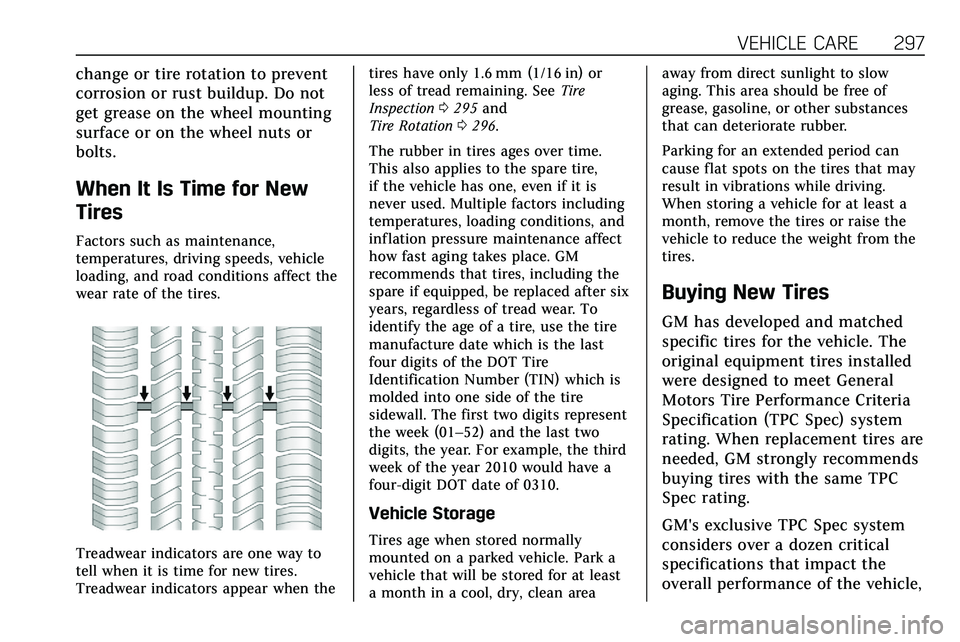
Treadwear indicators are one way to
tell when it is time for new tires.
Treadwear indicators appear when thetires have only 1.6 mm (1/16 in) or
less of tread remaining. See
Tire
Inspection 0295 and
Tire Rotation 0296.
The rubber in tires ages over time.
This also applies to the spare tire,
if the vehicle has one, even if it is
never used. Multiple factors including
temperatures, loading conditions, and
inflation pressure maintenance affect
how fast aging takes place. GM
recommends that tires, including the
spare if equipped, be replaced after six
years, regardless of tread wear. To
identify the age of a tire, use the tire
manufacture date which is the last
four digits of the DOT Tire
Identification Number (TIN) which is
molded into one side of the tire
sidewall. The first two digits represent
the week (01–52) and the last two
digits, the year. For example, the third
week of the year 2010 would have a
four-digit DOT date of 0310.
Vehicle Storage
Tires age when stored normally
mounted on a parked vehicle. Park a
vehicle that will be stored for at least
a month in a cool, dry, clean area away from direct sunlight to slow
aging. This area should be free of
grease, gasoline, or other substances
that can deteriorate rubber.
Parking for an extended period can
cause flat spots on the tires that may
result in vibrations while driving.
When storing a vehicle for at least a
month, remove the tires or raise the
vehicle to reduce the weight from the
tires.
Buying New Tires
GM has developed and matched
specific tires for the vehicle. The
original equipment tires installed
were designed to meet General
Motors Tire Performance Criteria
Specification (TPC Spec) system
rating. When replacement tires are
needed, GM strongly recommends
buying tires with the same TPC
Spec rating.
GM's exclusive TPC Spec system
considers over a dozen critical
specifications that impact the
overall performance of the vehicle,
Page 304 of 384

VEHICLE CARE 303
{Warning
Lifting a vehicle and getting under
it to do maintenance or repairs is
dangerous without the appropriate
safety equipment and training. If a
jack is provided with the vehicle, it
is designed only for changing a flat
tire. If it is used for anything else,
you or others could be badly injured
or killed if the vehicle slips off the
jack. If a jack is provided with the
vehicle, only use it for changing a
flat tire.
If a tire goes flat, avoid further tire
and wheel damage by driving slowly
to a level place, well off the road,
if possible. Turn on the hazard
warning flashers. See Hazard Warning
Flashers 0143.
{Warning
Changing a tire can be dangerous.
The vehicle can slip off the jack and
roll over or fall causing injury or
(Continued)
Warning (Continued)
death. Find a level place to change
the tire. To help prevent the vehicle
from moving:
1. Set the parking brake firmly.
2. Put an automatictransmission in P (Park) or a
manual transmission in
1 (First) or R (Reverse).
3. Turn off the engine and do not restart while the vehicle
is raised.
4. Do not allow passengers to remain in the vehicle.
5. Place wheel blocks, if equipped, on both sides of
the tire at the opposite corner
of the tire being changed.
This vehicle may come with a jack
and spare tire or a tire sealant and
compressor kit. To use the jacking
equipment to change a spare tire
safely, follow the instructions below.
Then see Tire Changing 0310. To use the tire sealant and compressor kit,
see
Tire Sealant and Compressor Kit
0 304.
When the vehicle has a flat tire (2),
use the following example as a guide
to assist you in the placement of
wheel blocks (1), if equipped.
1. Wheel Block (If Equipped)
2. Flat Tire
The following information explains
how to repair or change a tire.
Page 312 of 384

VEHICLE CARE 311
4. Turn the wing nut (4)counterclockwise to remove the
jack (1), wheel wrench (2), and
strap (3). Place the tool container
near the tire being changed.5. Remove the nut retaining thespare tire.
6. Remove the spare tire and place it next to the tire being changed.
Removing the Flat Tire and
Installing the Spare Tire
1. Do a safety check beforeproceeding. See If a Tire Goes Flat
0 302.
2. Turn the wheel wrench
counterclockwise to loosen all
the wheel nuts, but do not
remove them yet.
3. Place the jack near the flat tire.
Caution
Make sure that the jack lift head is
in the correct position or you may
damage your vehicle. The repairs
would not be covered by your
warranty.