turn signal CADILLAC XT5 2020 User Guide
[x] Cancel search | Manufacturer: CADILLAC, Model Year: 2020, Model line: XT5, Model: CADILLAC XT5 2020Pages: 384, PDF Size: 6.52 MB
Page 142 of 384

LIGHTING 141
Turning On and Enabling IntelliBeam
To enable the IntelliBeam system,
press the button on the end of the
turn signal lever when the exterior
lamp control is in the AUTO or
2
position.
Driving with IntelliBeam
The system only activates the high
beams when driving over 40 km/h
(25 mph).
The blue high-beam on light appears
on the instrument cluster when the
high beams are on.
There is a sensor near the top center
of the windshield that automatically
controls the system. Keep this area of
the windshield clear of debris to allow
for best system performance.The high-beam headlamps remain on,
under the automatic control, until one
of the following situations occurs:
.
The system detects an
approaching vehicle's headlamps.
. The system detects a preceding
vehicle's taillamps.
. The outside light is bright enough
that high-beam headlamps are not
required.
. The vehicle's speed drops below
20 km/h (12 mph).
. The IntelliBeam system is disabled
by the button on the turn signal
lever. If this happens, press the
button on the end of the turn
signal lever when the exterior
lamp control is in the AUTO or
2
position to reactivate the
IntelliBeam system. The
instrument cluster light will come
on to indicate the IntelliBeam is
reactivated.
The high beams may not turn off
automatically if the system cannot
detect another vehicle's lamps because
of any of the following: .
The other vehicle's lamps are
missing, damaged, obstructed from
view, or otherwise undetected.
. The other vehicle's lamps are
covered with dirt, snow, and/or
road spray.
. The other vehicle's lamps cannot
be detected due to dense exhaust,
smoke, fog, snow, road spray, mist,
or other airborne obstructions.
. The vehicle's windshield is dirty,
cracked, or obstructed by
something that blocks the view of
the light sensor.
. The vehicle is loaded such that the
front end points upward, causing
the light sensor to aim high and
not detect headlamps and
taillamps.
. The vehicle is being driven on
winding or hilly roads.
The automatic high-beam headlamps
may need to be disabled if any of the
above conditions exist.
Page 143 of 384

142 LIGHTING
Exterior Lamps Off
Reminder
A warning chime sounds if the driver
door is opened while the ignition is off
and the exterior lamps are on.
Headlamp High/Low-Beam
Changer
3:Push the turn signal lever away
from you and release, to turn the high
beams on. To return to low beams,
push the lever again or pull it toward
you and release.
This indicator light turns on in the
instrument cluster when the
high-beam headlamps are on.
Flash-to-Pass
To flash the high beams, pull the turn
signal lever toward you, and release.
Daytime Running
Lamps (DRL)
DRL can make it easier for others to
see the front of your vehicle during
the day. Fully functional DRL are
required on all vehicles first sold in
Canada.
The dedicated DRL will come on when
all of the following conditions are met:
. The ignition is on.
. The exterior lamp control is
in AUTO.
. The light sensor determines it is
daytime.
. The parking brake is released or
the vehicle is not in P (Park).
When the DRL are on, the taillamps,
sidemarker lamps, and other lamps
will not be on.
The DRL turn off when the headlamps
are turned to
Oor the ignition is off.
For vehicles first sold in Canada, the
DRL can only be turned off when the
vehicle is parked.
Automatic Headlamp
System
When the exterior lamp control is set
to AUTO and it is dark enough
outside, the headlamps come on
automatically.
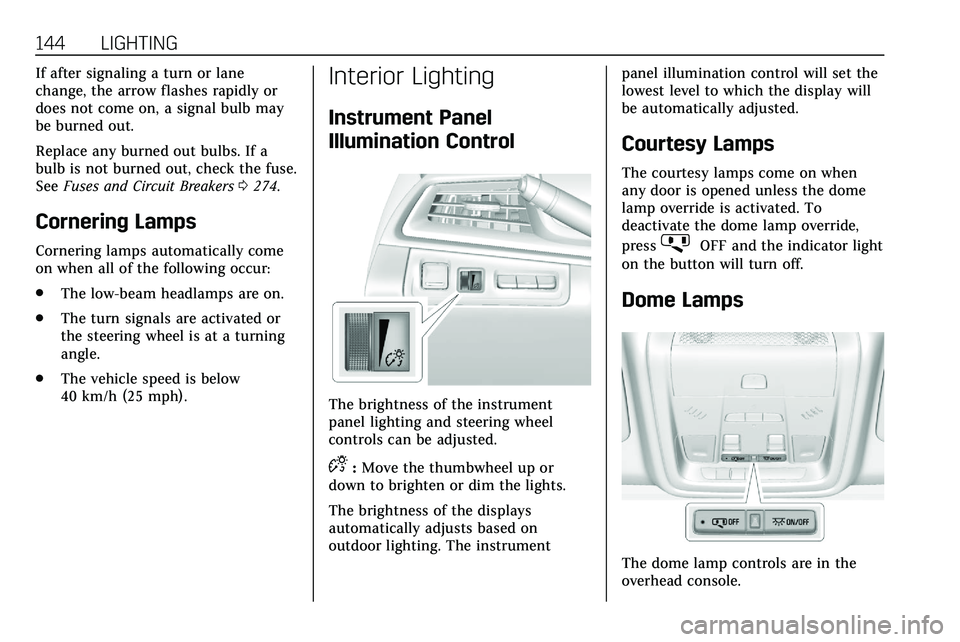
There is a light sensor on top of the
instrument panel. Do not cover the
sensor.
The system may also turn on the
headlamps when driving through a
parking garage or tunnel.
If the vehicle is started in a dark
garage, the automatic headlamp
system comes on immediately. If it is
Page 144 of 384

LIGHTING 143
light outside when the vehicle leaves
the garage, there is a slight delay
before the automatic headlamp
system changes to the Daytime
Running Lamps (DRL). During that
delay, the instrument cluster may not
be as bright as usual. Make sure the
instrument panel brightness control is
in the full bright position. See
Instrument Panel Illumination Control
0144.
When it is bright enough outside, the
headlamps will turn off or may change
to DRL.
The automatic headlamp system turns
off when the exterior lamp control is
turned to
Oor the ignition is off.
For vehicles sold in Canada, this
control only works when the
transmission is in P (Park).
Lights On with Wipers
If the windshield wipers are activated
in daylight with the engine on, and
the exterior lamp control is in AUTO,
the headlamps, parking lamps, and
other exterior lamps come on. The
transition time for the lamps coming
on varies based on wiper speed. When the wipers are not operating, these
lamps turn off. Move the exterior
lamp control to
Oor;to disable
this feature.
Hazard Warning Flashers
|: Touch|on the center stack to
make the front and rear turn signal
lamps flash on and off. Touch again to
turn the flashers off.
The hazard warning flashers turn on
automatically if the airbags deploy.
Turn and Lane-Change
Signals
Move the lever all the way up or down
to signal a turn.
An arrow on the instrument cluster
flashes in the direction of the turn or
lane change.
Raise or lower the lever until the
arrow starts to flash to signal a lane
change. Hold it there until the lane
change is completed. If the lever is
briefly pressed and released, the turn
signal flashes three times.
The turn and lane-change signal can
be turned off manually by moving the
lever back to its original position.
Page 145 of 384

144 LIGHTING
If after signaling a turn or lane
change, the arrow flashes rapidly or
does not come on, a signal bulb may
be burned out.
Replace any burned out bulbs. If a
bulb is not burned out, check the fuse.
SeeFuses and Circuit Breakers 0274.
Cornering Lamps
Cornering lamps automatically come
on when all of the following occur:
.
The low-beam headlamps are on.
. The turn signals are activated or
the steering wheel is at a turning
angle.
. The vehicle speed is below
40 km/h (25 mph).
Interior Lighting
Instrument Panel
Illumination Control
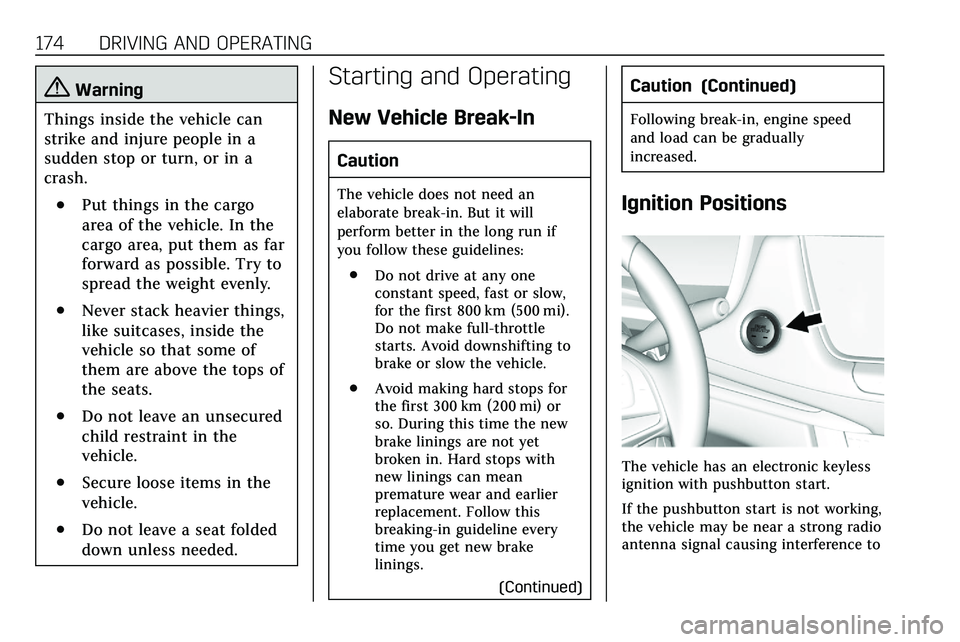
The brightness of the instrument
panel lighting and steering wheel
controls can be adjusted.
D:Move the thumbwheel up or
down to brighten or dim the lights.
The brightness of the displays
automatically adjusts based on
outdoor lighting. The instrument panel illumination control will set the
lowest level to which the display will
be automatically adjusted.
Courtesy Lamps
The courtesy lamps come on when
any door is opened unless the dome
lamp override is activated. To
deactivate the dome lamp override,
press
jOFF and the indicator light
on the button will turn off.
Dome Lamps
The dome lamp controls are in the
overhead console.
Page 170 of 384

DRIVING AND OPERATING 169
.Turn on Traction Control. See
Traction Control/Electronic Stability
Control 0193.
. Antilock Brake System (ABS)
improves vehicle stability during
hard stops, but the brakes should
be applied sooner than when on
dry pavement. See Antilock Brake
System (ABS) 0190.
. Allow greater following distance
and watch for slippery spots. Icy
patches can occur on otherwise
clear roads in shaded areas. The
surface of a curve or an overpass
can remain icy when the
surrounding roads are clear. Avoid
sudden steering maneuvers and
braking while on ice.
. Turn off cruise control.
. Select All-Wheel Drive (AWD)
Mode for vehicles equipped with
AWD. Select Snow/Ice Mode for
FWD only vehicles. See Driver
Mode Control 0195 and
All-Wheel Drive 0190.Blizzard Conditions
Stop the vehicle in a safe place and
signal for help. Stay with the vehicle
unless there is help nearby. If possible,
use Roadside Service. See Roadside
Service 0353. To get help and keep
everyone in the vehicle safe:
. Turn on the hazard warning
flashers.
. Tie a red cloth to an outside
mirror.
{Warning
Snow can trap engine exhaust
under the vehicle. This may cause
exhaust gases to get inside. Engine
exhaust contains carbon monoxide
(CO), which cannot be seen or
smelled. It can cause
unconsciousness and even death.
If the vehicle is stuck in snow:
. Clear snow from the base of
the vehicle, especially any
blocking the exhaust pipe.
(Continued)
Warning (Continued)
.Open a window about 5 cm
(2 in) on the vehicle side that
is away from the wind, to
bring in fresh air.
. Fully open the air outlets on
or under the instrument
panel.
. Adjust the climate control
system to circulate the air
inside the vehicle and set the
fan speed to the highest
setting. See “Climate Control
Systems.”
For more information about CO, see
Engine Exhaust 0183.
To save fuel, run the engine for short
periods to warm the vehicle and then
shut the engine off and partially close
the window. Moving about to keep
warm also helps.
If it takes time for help to arrive,
when running the engine, push the
accelerator pedal slightly so the
engine runs faster than the idle speed.
Page 171 of 384

170 DRIVING AND OPERATING
This keeps the battery charged to
restart the vehicle and to signal for
help with the headlamps. Do this as
little as possible, to save fuel.
If the Vehicle Is Stuck
Slowly and cautiously spin the wheels
to free the vehicle when stuck in sand,
mud, ice, or snow.
If stuck too severely for the traction
system to free the vehicle, turn the
traction system off and use the
rocking method. SeeTraction Control/
Electronic Stability Control 0193.
{Warning
If the vehicle's tires spin at high
speed, they can explode, and you or
others could be injured. The vehicle
can overheat, causing an engine
compartment fire or other damage.
Spin the wheels as little as possible
and avoid going above 56 km/h
(35 mph). For All-Wheel Drive (AWD), select
Off-Road or AWD mode. See
Driver
Mode Control 0195 and
All-Wheel Drive 0190.
Rocking the Vehicle to Get it Out
Turn the steering wheel left and right
to clear the area around the front
wheels. Turn off any traction system.
Shift back and forth between
R (Reverse) and a low forward gear,
spinning the wheels as little as
possible. To prevent transmission
wear, wait until the wheels stop
spinning before shifting gears. Release
the accelerator pedal while shifting,
and press lightly on the accelerator
pedal when the transmission is in
gear. Slowly spinning the wheels in
the forward and reverse directions
causes a rocking motion that could
free the vehicle. If that does not get
the vehicle out after a few tries, it
might need to be towed out. If the
vehicle does need to be towed out, see
Towing the Vehicle 0319.
Vehicle Load Limits
It is very important to know how
much weight the vehicle can carry.
This weight is called the vehicle
capacity weight and includes the
weight of all occupants, cargo, and
all nonfactory-installed options.
Two labels on the vehicle may
show how much weight it may
properly carry, the Tire and
Loading Information label and the
Certification/Tire label.
{Warning
Do not load the vehicle any
heavier than the Gross Vehicle
Weight Rating (GVWR),
or either the maximum front or
rear Gross Axle Weight Rating
(GAWR). This can cause
systems to break and change
the way the vehicle handles.
This could cause loss of control
and a crash. Overloading can
(Continued)
Page 175 of 384

174 DRIVING AND OPERATING
{Warning
Things inside the vehicle can
strike and injure people in a
sudden stop or turn, or in a
crash.
.Put things in the cargo
area of the vehicle. In the
cargo area, put them as far
forward as possible. Try to
spread the weight evenly.
.Never stack heavier things,
like suitcases, inside the
vehicle so that some of
them are above the tops of
the seats.
.Do not leave an unsecured
child restraint in the
vehicle.
.Secure loose items in the
vehicle.
.Do not leave a seat folded
down unless needed.
Starting and Operating
New Vehicle Break-In
Caution
The vehicle does not need an
elaborate break-in. But it will
perform better in the long run if
you follow these guidelines: . Do not drive at any one
constant speed, fast or slow,
for the first 800 km (500 mi).
Do not make full-throttle
starts. Avoid downshifting to
brake or slow the vehicle.
. Avoid making hard stops for
the first 300 km (200 mi) or
so. During this time the new
brake linings are not yet
broken in. Hard stops with
new linings can mean
premature wear and earlier
replacement. Follow this
breaking-in guideline every
time you get new brake
linings.
(Continued)
Caution (Continued)
Following break-in, engine speed
and load can be gradually
increased.
Ignition Positions
The vehicle has an electronic keyless
ignition with pushbutton start.
If the pushbutton start is not working,
the vehicle may be near a strong radio
antenna signal causing interference to
Page 216 of 384

DRIVING AND OPERATING 215
Warning (Continued)
APA does not detect or avoid traffic
that is behind or alongside of the
vehicle. Always be prepared to stop
the vehicle during the parking
maneuver.
Press
Oon the center stack to enable
the system to search for a parking
space that is large enough and within
1.5 m (5 ft) of the vehicle. The vehicle
speed must be below
30 km/h (18 mph). The system cannot:
. Detect whether it is a legal parking
space.
. Park exactly lined up with the
vehicle next to it if the spot is
approached at an angle or if the
parking space is angled.
. Park exactly centered in a spot
that is marked too large.
. Always detect short curbs.
When enabled, APA searches for
parallel parking spaces to the right of
the vehicle. To search for a parking
space to the left, turn on the left turn signal or, if available, change the side
selection in the infotainment display.
To switch the parking mode between
parallel and perpendicular, press and
hold
Oduring the search process or,
if available, change the parking mode
in the infotainment display.
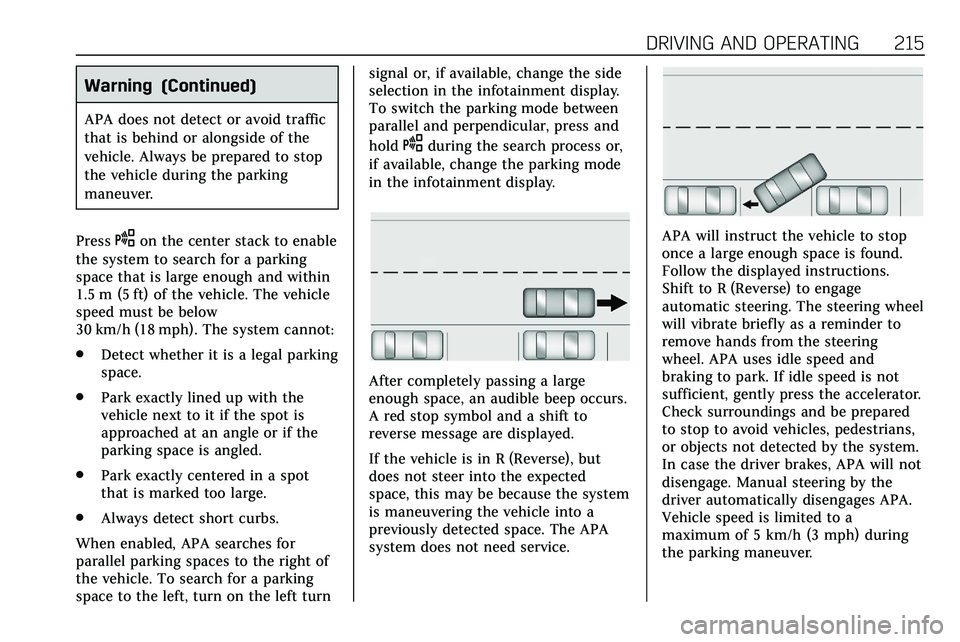
After completely passing a large
enough space, an audible beep occurs.
A red stop symbol and a shift to
reverse message are displayed.
If the vehicle is in R (Reverse), but
does not steer into the expected
space, this may be because the system
is maneuvering the vehicle into a
previously detected space. The APA
system does not need service.
APA will instruct the vehicle to stop
once a large enough space is found.
Follow the displayed instructions.
Shift to R (Reverse) to engage
automatic steering. The steering wheel
will vibrate briefly as a reminder to
remove hands from the steering
wheel. APA uses idle speed and
braking to park. If idle speed is not
sufficient, gently press the accelerator.
Check surroundings and be prepared
to stop to avoid vehicles, pedestrians,
or objects not detected by the system.
In case the driver brakes, APA will not
disengage. Manual steering by the
driver automatically disengages APA.
Vehicle speed is limited to a
maximum of 5 km/h (3 mph) during
the parking maneuver.
Page 225 of 384

224 DRIVING AND OPERATING
With the Front Pedestrian Braking
system turned on, Night Vision
provides a red Head-Up Display (HUD)
alert when the system detects that the
vehicle is approaching a pedestrian
ahead too quickly. In addition, an alert
beeps or the Safety Alert Seat pulses,
if equipped. SeeFront Pedestrian
Braking (FPB) System 0221.
{Warning
The system does not detect all
objects or the vehicle distance from
objects. The system may not
provide a warning with enough time
to help avoid a crash.
1. Low-Beam Headlamps
2. High-Beam Headlamps
3. Night Vision System
By selecting a view on the instrument
cluster, the Night Vision image can be
displayed. See Instrument Cluster 0108
. The Night Vision system can operate
only if:
. The ignition is on.
. The vehicle is in P (Park) or a
forward gear.
. It is dark enough outside.
. The headlamps are on, except
when parked. Adjust the instrument panel
brightness to make the image no
brighter than necessary. Turn the
image off by selecting another view
on the instrument cluster.
Warm objects, such as pedestrians,
animals, and other moving vehicles,
should appear whiter on the Night
Vision display. Cold objects, such as
the sky, signs, and parked vehicles,
should appear darker. Night Vision
only shows objects that are warmer or
colder than the surroundings. It does
not detect brake lamps, turn signals,
emergency flashers, traffic lights,
or sign information.
Use this system as an aid by
occasionally glancing at the image. Do
not stare at the image or use the
image under well-lit conditions.
{Warning
Do not stare at the image while
driving as this might cause
important objects ahead not to be
seen. You could crash, and you or
others could be injured.
Page 227 of 384

226 DRIVING AND OPERATING
still looks blurry, use a soft wet cloth
to gently clean the sensor camera lens
and dry thoroughly. The sensor is
behind the lower front grille below the
driver side headlamp.
The camera must also be aligned to
work correctly. If the camera needs
adjustment, see your dealer. Do not
attempt to adjust the camera yourself.
Side Blind Zone
Alert (SBZA)
If equipped, the SBZA system is a
lane-changing aid that assists drivers
with avoiding crashes that occur with
moving vehicles in the side blind zone
(or spot) areas. When the vehicle is in
a forward gear, the left or right side
mirror display will light up if a moving
vehicle is detected in that blind zone.
If the turn signal is activated and a
vehicle is also detected on the same
side, the display will flash as an extra
warning not to change lanes. Since
this system is part of the Lane Change
Alert (LCA) system, read the entire
LCA section before using this feature.
Lane Change Alert (LCA)
If equipped, the LCA system is a
lane-changing aid that assists drivers
with avoiding lane change crashes
that occur with moving vehicles in the
side blind zone (or spot) areas or with
vehicles rapidly approaching these
areas from behind. The LCA warning
display will light up in the
corresponding outside side mirror and
will flash if the turn signal is on.
{Warning
LCA does not alert the driver to
vehicles outside of the system
detection zones, pedestrians,
bicyclists, or animals. It may not
provide alerts when changing lanes
under all driving conditions. Failure
to use proper care when changing
lanes may result in injury, death,
or vehicle damage. Before making a
lane change, always check mirrors,
glance over your shoulder, and use
the turn signals.LCA Detection Zones
1. SBZA Detection Zone
2. LCA Detection Zone
The LCA sensor covers a zone of
approximately one lane over from
both sides of the vehicle, or 3.5 m
(11 ft). The height of the zone is
approximately between 0.5 m (1.5 ft)
and 2 m (6 ft) off the ground. The Side
Blind Zone Alert (SBZA) warning area
starts at approximately the middle of
the vehicle and goes back 5 m (16 ft).
Drivers are also warned of vehicles
rapidly approaching from up to 70 m
(230 ft) behind the vehicle.