turn signal CADILLAC XT5 2020 Owner's Manual
[x] Cancel search | Manufacturer: CADILLAC, Model Year: 2020, Model line: XT5, Model: CADILLAC XT5 2020Pages: 384, PDF Size: 6.52 MB
Page 7 of 384
6 INTRODUCTION
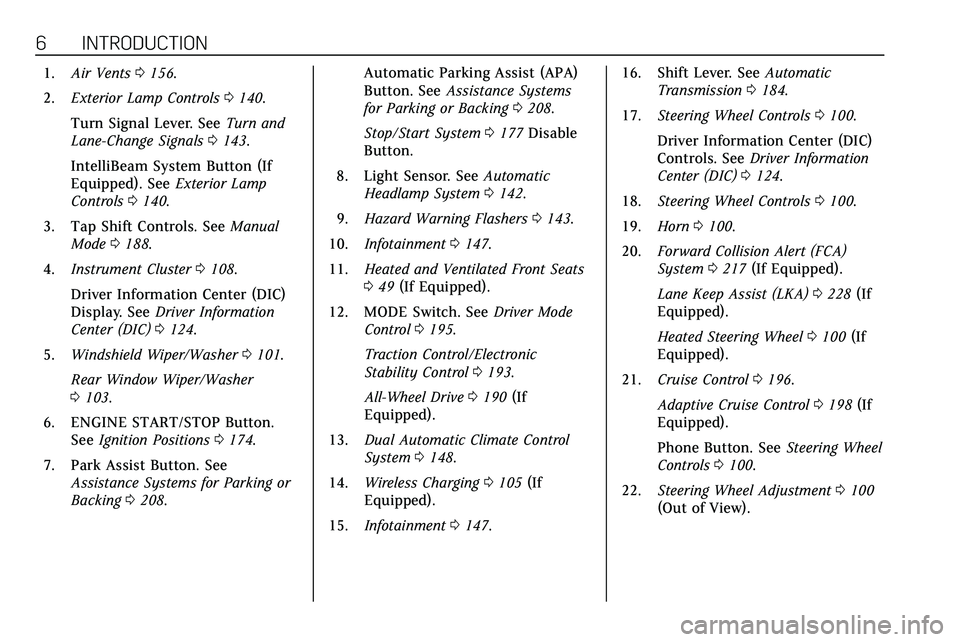
1.Air Vents 0156.
2. Exterior Lamp Controls 0140.
Turn Signal Lever. See Turn and
Lane-Change Signals 0143.
IntelliBeam System Button (If
Equipped). See Exterior Lamp
Controls 0140.
3. Tap Shift Controls. See Manual
Mode 0188.
4. Instrument Cluster 0108.
Driver Information Center (DIC)
Display. See Driver Information
Center (DIC) 0124.
5. Windshield Wiper/Washer 0101.
Rear Window Wiper/Washer
0 103.
6. ENGINE START/STOP Button. See Ignition Positions 0174.
7. Park Assist Button. See Assistance Systems for Parking or
Backing 0208. Automatic Parking Assist (APA)
Button. See
Assistance Systems
for Parking or Backing 0208.
Stop/Start System 0177 Disable
Button.
8. Light Sensor. See Automatic
Headlamp System 0142.
9. Hazard Warning Flashers 0143.
10. Infotainment 0147.
11. Heated and Ventilated Front Seats
049 (If Equipped).
12. MODE Switch. See Driver Mode
Control 0195.
Traction Control/Electronic
Stability Control 0193.
All-Wheel Drive 0190 (If
Equipped).
13. Dual Automatic Climate Control
System 0148.
14. Wireless Charging 0105 (If
Equipped).
15. Infotainment 0147. 16. Shift Lever. See
Automatic
Transmission 0184.
17. Steering Wheel Controls 0100.
Driver Information Center (DIC)
Controls. See Driver Information
Center (DIC) 0124.
18. Steering Wheel Controls 0100.
19. Horn 0100.
20. Forward Collision Alert (FCA)
System 0217 (If Equipped).
Lane Keep Assist (LKA) 0228 (If
Equipped).
Heated Steering Wheel 0100 (If
Equipped).
21. Cruise Control 0196.
Adaptive Cruise Control 0198 (If
Equipped).
Phone Button. See Steering Wheel
Controls 0100.
22. Steering Wheel Adjustment 0100
(Out of View).
Page 11 of 384
10 KEYS, DOORS, AND WINDOWS
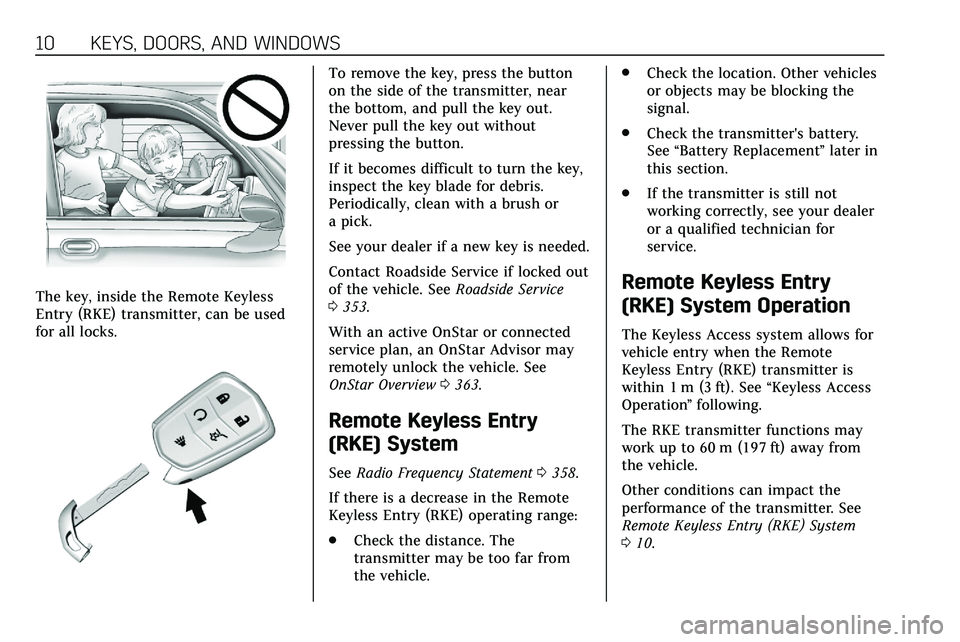
The key, inside the Remote Keyless
Entry (RKE) transmitter, can be used
for all locks.
To remove the key, press the button
on the side of the transmitter, near
the bottom, and pull the key out.
Never pull the key out without
pressing the button.
If it becomes difficult to turn the key,
inspect the key blade for debris.
Periodically, clean with a brush or
a pick.
See your dealer if a new key is needed.
Contact Roadside Service if locked out
of the vehicle. SeeRoadside Service
0 353.
With an active OnStar or connected
service plan, an OnStar Advisor may
remotely unlock the vehicle. See
OnStar Overview 0363.
Remote Keyless Entry
(RKE) System
See Radio Frequency Statement 0358.
If there is a decrease in the Remote
Keyless Entry (RKE) operating range:
. Check the distance. The
transmitter may be too far from
the vehicle. .
Check the location. Other vehicles
or objects may be blocking the
signal.
. Check the transmitter's battery.
See “Battery Replacement ”later in
this section.
. If the transmitter is still not
working correctly, see your dealer
or a qualified technician for
service.
Remote Keyless Entry
(RKE) System Operation
The Keyless Access system allows for
vehicle entry when the Remote
Keyless Entry (RKE) transmitter is
within 1 m (3 ft). See “Keyless Access
Operation ”following.
The RKE transmitter functions may
work up to 60 m (197 ft) away from
the vehicle.
Other conditions can impact the
performance of the transmitter. See
Remote Keyless Entry (RKE) System
0 10.
Page 12 of 384
KEYS, DOORS, AND WINDOWS 11
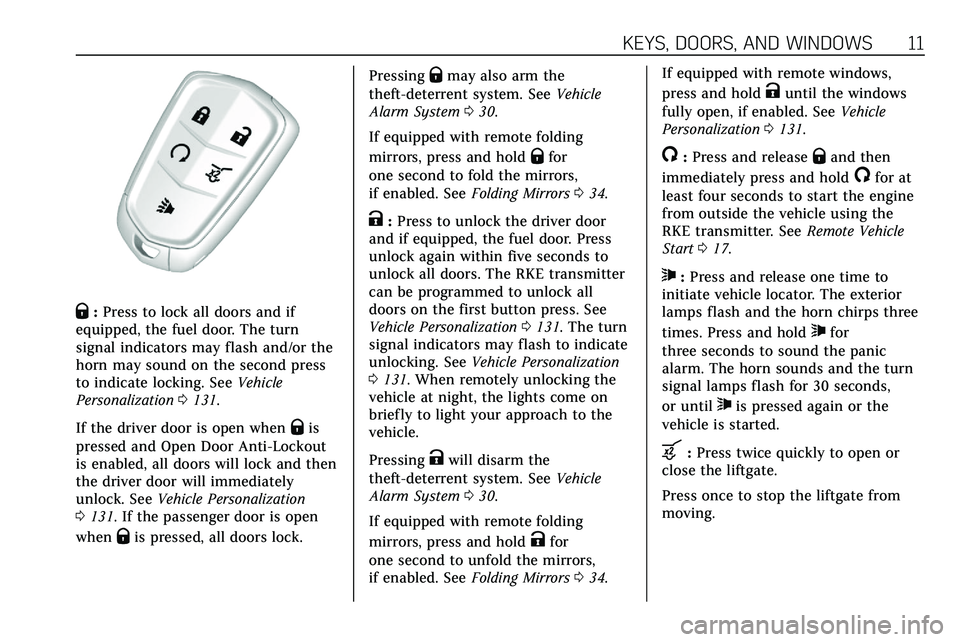
Q:Press to lock all doors and if
equipped, the fuel door. The turn
signal indicators may flash and/or the
horn may sound on the second press
to indicate locking. See Vehicle
Personalization 0131.
If the driver door is open when
Qis
pressed and Open Door Anti-Lockout
is enabled, all doors will lock and then
the driver door will immediately
unlock. See Vehicle Personalization
0 131. If the passenger door is open
when
Qis pressed, all doors lock. Pressing
Qmay also arm the
theft-deterrent system. See Vehicle
Alarm System 030.
If equipped with remote folding
mirrors, press and hold
Qfor
one second to fold the mirrors,
if enabled. See Folding Mirrors 034.
K:Press to unlock the driver door
and if equipped, the fuel door. Press
unlock again within five seconds to
unlock all doors. The RKE transmitter
can be programmed to unlock all
doors on the first button press. See
Vehicle Personalization 0131. The turn
signal indicators may flash to indicate
unlocking. See Vehicle Personalization
0 131. When remotely unlocking the
vehicle at night, the lights come on
briefly to light your approach to the
vehicle.
Pressing
Kwill disarm the
theft-deterrent system. See Vehicle
Alarm System 030.
If equipped with remote folding
mirrors, press and hold
Kfor
one second to unfold the mirrors,
if enabled. See Folding Mirrors 034. If equipped with remote windows,
press and hold
Kuntil the windows
fully open, if enabled. See Vehicle
Personalization 0131.
/:Press and releaseQand then
immediately press and hold
/for at
least four seconds to start the engine
from outside the vehicle using the
RKE transmitter. See Remote Vehicle
Start 017.
7:Press and release one time to
initiate vehicle locator. The exterior
lamps flash and the horn chirps three
times. Press and hold
7for
three seconds to sound the panic
alarm. The horn sounds and the turn
signal lamps flash for 30 seconds,
or until
7is pressed again or the
vehicle is started.
b: Press twice quickly to open or
close the liftgate.
Press once to stop the liftgate from
moving.
Page 19 of 384
18 KEYS, DOORS, AND WINDOWS
Starting the Engine Using Remote
Start1. Press and release
Qon the RKE
transmitter.
2. Immediately press and hold
/
for at least four seconds or until
the turn signal lamps flash. The
turn signal lamps flashing
confirms the request to remote
start the vehicle has been
received.
During the remote start the
doors will be locked and the
parking lamps will remain on as
long as the engine is running.
The engine will shut off after
15 minutes unless a time
extension is done or the ignition
is turned on.
3. With the RKE transmitter in the vehicle, press the brake pedal
and start the vehicle to drive.
Extending Engine Run Time
The engine run time can also be
extended by another 15 minutes,
if during the first 15 minutes
Steps 1 and 2 are repeated while the engine is still running. An extension
can be requested 30 seconds after
starting. This provides a total of
30 minutes.
The remote start can only be
extended once.
When the remote start is extended,
the second 15-minute period is added
on to the first 15 minutes for a total
of 30 minutes.
A maximum of two remote starts, or a
remote start with an extension, are
allowed between ignition cycles.
The ignition must be turned on and
then off before the remote start
procedure can be used again.
Canceling a Remote Start
To cancel a remote start, do any of
the following:
.
Press and hold
/until the
parking lamps turn off.
. Turn on the hazard warning
flashers.
. Turn the vehicle on and then off. Conditions in Which Remote Start
Will Not Work
The remote start will not operate if
any of the following occur:
.
The RKE transmitter is in the
vehicle.
. The ignition is on.
. The hood is not closed.
. The hazard warning flashers
are on.
. There is an emission control
system malfunction.
. The engine coolant temperature is
too high.
. The oil pressure is low.
. Two remote vehicle starts or a
start with an extension have
already been used.
. The vehicle is not in P (Park).
Page 27 of 384
26 KEYS, DOORS, AND WINDOWS
liftgate will reverse direction and open
fully. The liftgate will remain open
until it is activated again or closed
manually.
Setting the 3/4 Mode
To change the position the liftgate
stops at when opening:1. Select MAX or 3/4 mode and power open the liftgate.
2. Stop the liftgate movement at the desired height by pressing
any liftgate button. Manually
adjust the liftgate position if
needed.
3. Press and hold
lnext to the
pull cup on the outside of the
liftgate until the turn signals
flash and a beep sounds. This
indicates the setting has been
recorded.
The liftgate cannot be set below a
minimum programmable height.
If there is no light flash or sound,
then the height adjustment may be
too low.
Manual Operation
Select OFF to manually operate the
liftgate.
Caution
Attempting to move the liftgate too
quickly and with excessive force
may result in damage to the
vehicle.
Operate the liftgate manually with a
smooth motion and moderate speed.
The system includes a feature which
limits the manual closing speed to
protect the components.
To unlock the liftgate, press
Kon the
power door lock switch or press
Kon
the Remote Keyless Entry (RKE)
transmitter twice within five seconds.
See Remote Keyless Entry (RKE) System
Operation 010.
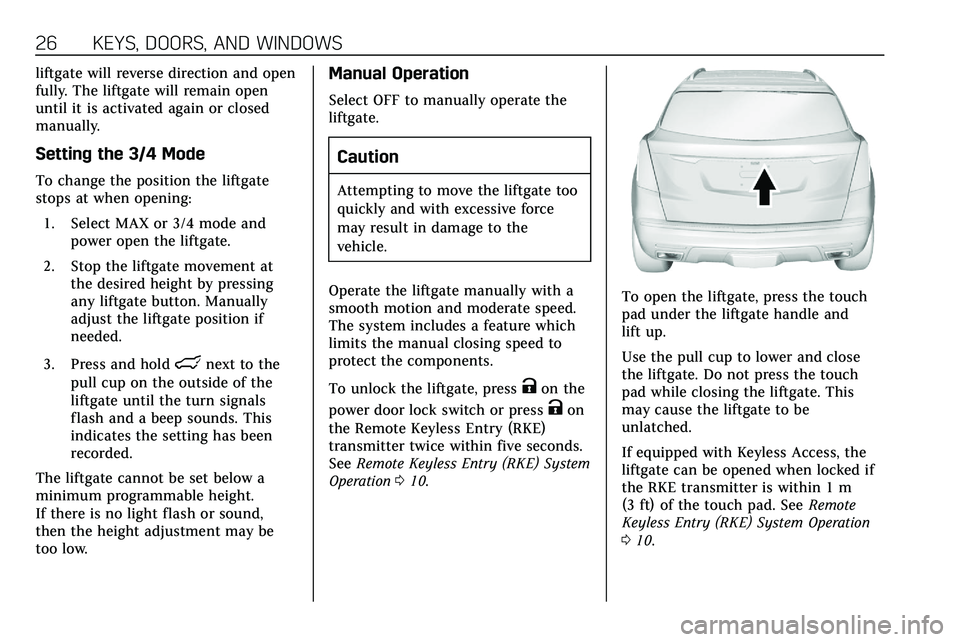
To open the liftgate, press the touch
pad under the liftgate handle and
lift up.
Use the pull cup to lower and close
the liftgate. Do not press the touch
pad while closing the liftgate. This
may cause the liftgate to be
unlatched.
If equipped with Keyless Access, the
liftgate can be opened when locked if
the RKE transmitter is within 1 m
(3 ft) of the touch pad. See Remote
Keyless Entry (RKE) System Operation
0 10.
Page 31 of 384
30 KEYS, DOORS, AND WINDOWS
Vehicle Security
This vehicle has theft-deterrent
features; however, they do not make
the vehicle impossible to steal.
Vehicle Alarm System
This vehicle has an anti-theft alarm
system.
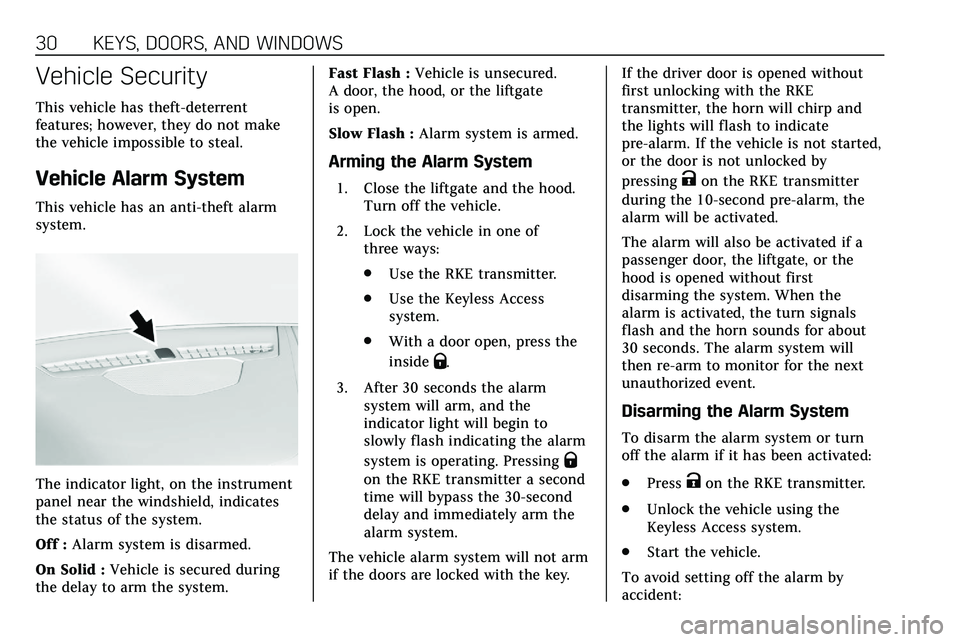
The indicator light, on the instrument
panel near the windshield, indicates
the status of the system.
Off :Alarm system is disarmed.
On Solid : Vehicle is secured during
the delay to arm the system. Fast Flash :
Vehicle is unsecured.
A door, the hood, or the liftgate
is open.
Slow Flash : Alarm system is armed.
Arming the Alarm System
1. Close the liftgate and the hood.
Turn off the vehicle.
2. Lock the vehicle in one of three ways:
.Use the RKE transmitter.
. Use the Keyless Access
system.
. With a door open, press the
inside
Q.
3. After 30 seconds the alarm system will arm, and the
indicator light will begin to
slowly flash indicating the alarm
system is operating. Pressing
Q
on the RKE transmitter a second
time will bypass the 30-second
delay and immediately arm the
alarm system.
The vehicle alarm system will not arm
if the doors are locked with the key. If the driver door is opened without
first unlocking with the RKE
transmitter, the horn will chirp and
the lights will flash to indicate
pre-alarm. If the vehicle is not started,
or the door is not unlocked by
pressing
Kon the RKE transmitter
during the 10-second pre-alarm, the
alarm will be activated.
The alarm will also be activated if a
passenger door, the liftgate, or the
hood is opened without first
disarming the system. When the
alarm is activated, the turn signals
flash and the horn sounds for about
30 seconds. The alarm system will
then re-arm to monitor for the next
unauthorized event.
Disarming the Alarm System
To disarm the alarm system or turn
off the alarm if it has been activated:
. Press
Kon the RKE transmitter.
. Unlock the vehicle using the
Keyless Access system.
. Start the vehicle.
To avoid setting off the alarm by
accident:
Page 35 of 384
34 KEYS, DOORS, AND WINDOWS
Memory Mirrors
The vehicle may have memory
mirrors. SeeMemory Seats 046.
Side Blind Zone Alert (SBZA)
The vehicle may have SBZA. See Side
Blind Zone Alert (SBZA) 0226.
Lane Change Alert (LCA)
The vehicle may have LCA. See Lane
Change Alert (LCA) 0226.
Turn Signal Indicator
The vehicle may have a turn signal
indicator lamp built into the mirror
housing. The turn signal lamp flashes
when the turn signals or hazard
flashers are used.
Puddle Light
The vehicle may have a puddle light
on the mirror housings. The light will
illuminate the ground when the door
is opened.Folding Mirrors
Manual Folding Mirrors
If equipped, manually fold the mirrors
inward toward the vehicle to prevent
damage when going through an
automatic car wash. Push the mirror
outward to return it to the original
position.
Power Folding Mirrors
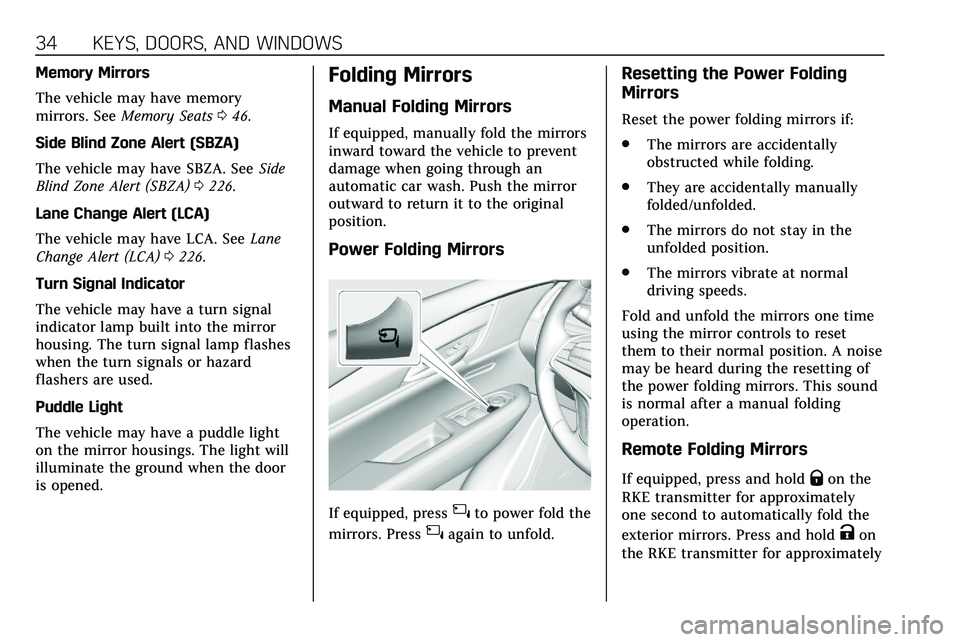
If equipped, press{to power fold the
mirrors. Press
{again to unfold.
Resetting the Power Folding
Mirrors
Reset the power folding mirrors if:
. The mirrors are accidentally
obstructed while folding.
. They are accidentally manually
folded/unfolded.
. The mirrors do not stay in the
unfolded position.
. The mirrors vibrate at normal
driving speeds.
Fold and unfold the mirrors one time
using the mirror controls to reset
them to their normal position. A noise
may be heard during the resetting of
the power folding mirrors. This sound
is normal after a manual folding
operation.
Remote Folding Mirrors
If equipped, press and holdQon the
RKE transmitter for approximately
one second to automatically fold the
exterior mirrors. Press and hold
Kon
the RKE transmitter for approximately
Page 105 of 384
104 INSTRUMENTS AND CONTROLS
windshield wiper is performing low or
high speed wipes. If the rear wiper
control is off, the transmission is in
R (Reverse), and the front windshield
wiper is performing INT wipes, then
the rear wiper automatically performs
INT wipes.
This feature can be turned on or off.
SeeVehicle Personalization 0131.
The windshield washer reservoir is
used for the windshield, rear window,
and rear mirror camera, if equipped.
See Rear Camera Mirror 035. Check
the fluid level in the reservoir if either
washer is not working. See Washer
Fluid 0266.
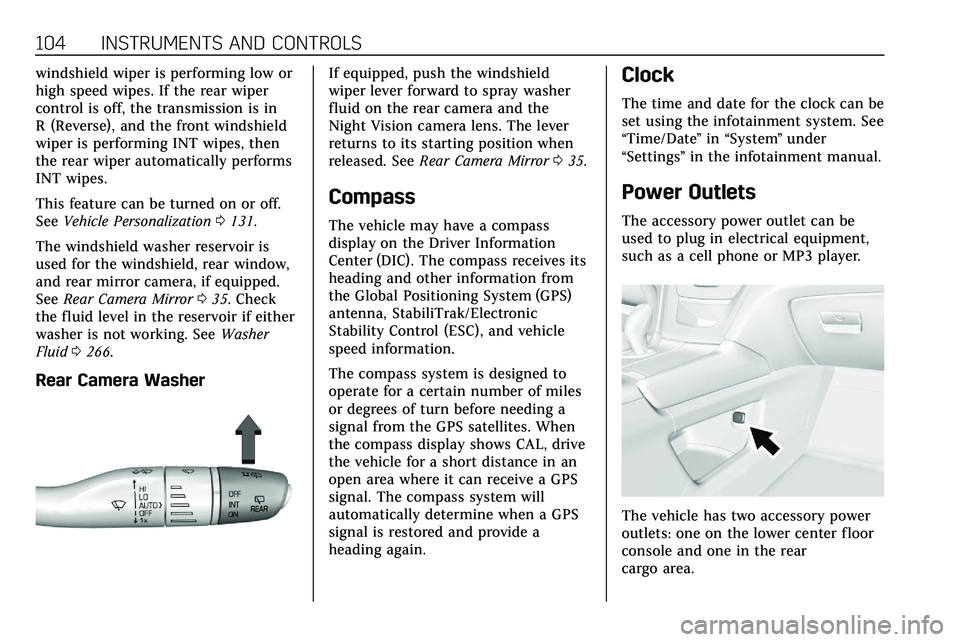
Rear Camera Washer
If equipped, push the windshield
wiper lever forward to spray washer
fluid on the rear camera and the
Night Vision camera lens. The lever
returns to its starting position when
released. See Rear Camera Mirror 035.
Compass
The vehicle may have a compass
display on the Driver Information
Center (DIC). The compass receives its
heading and other information from
the Global Positioning System (GPS)
antenna, StabiliTrak/Electronic
Stability Control (ESC), and vehicle
speed information.
The compass system is designed to
operate for a certain number of miles
or degrees of turn before needing a
signal from the GPS satellites. When
the compass display shows CAL, drive
the vehicle for a short distance in an
open area where it can receive a GPS
signal. The compass system will
automatically determine when a GPS
signal is restored and provide a
heading again.
Clock
The time and date for the clock can be
set using the infotainment system. See
“Time/Date ”in “System ”under
“Settings ”in the infotainment manual.
Power Outlets
The accessory power outlet can be
used to plug in electrical equipment,
such as a cell phone or MP3 player.
The vehicle has two accessory power
outlets: one on the lower center floor
console and one in the rear
cargo area.
Page 120 of 384
INSTRUMENTS AND CONTROLS 119
If both the ABS warning light and the
brake system warning light are on,
ABS is not functioning and there is a
problem with the regular brakes. See
your dealer for service.
SeeBrake System Warning Light 0117.
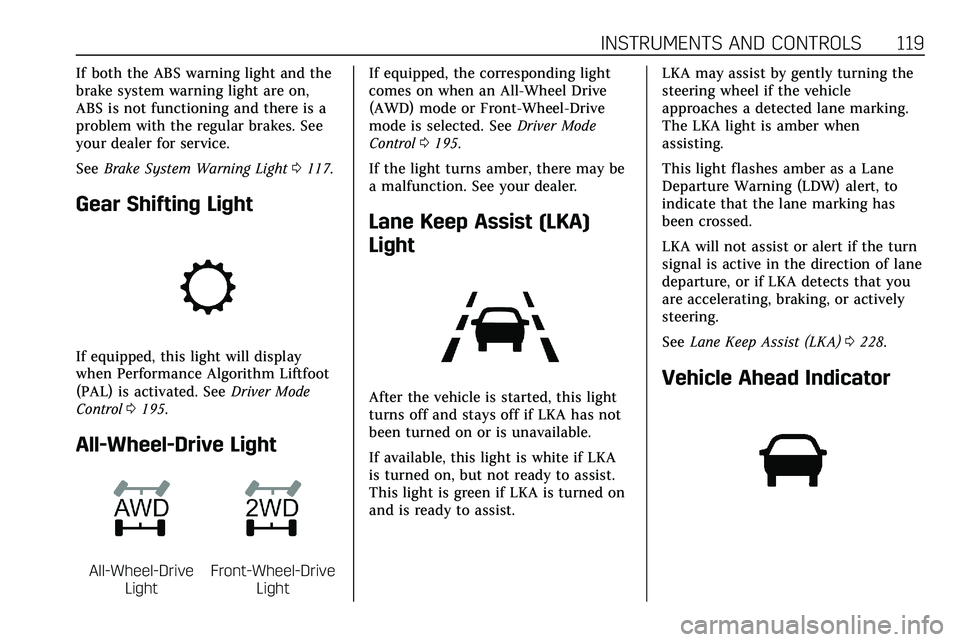
Gear Shifting Light
If equipped, this light will display
when Performance Algorithm Liftfoot
(PAL) is activated. See Driver Mode
Control 0195.
All-Wheel-Drive Light
All-Wheel-Drive
LightFront-Wheel-Drive Light If equipped, the corresponding light
comes on when an All-Wheel Drive
(AWD) mode or Front-Wheel-Drive
mode is selected. See
Driver Mode
Control 0195.
If the light turns amber, there may be
a malfunction. See your dealer.
Lane Keep Assist (LKA)
Light
After the vehicle is started, this light
turns off and stays off if LKA has not
been turned on or is unavailable.
If available, this light is white if LKA
is turned on, but not ready to assist.
This light is green if LKA is turned on
and is ready to assist. LKA may assist by gently turning the
steering wheel if the vehicle
approaches a detected lane marking.
The LKA light is amber when
assisting.
This light flashes amber as a Lane
Departure Warning (LDW) alert, to
indicate that the lane marking has
been crossed.
LKA will not assist or alert if the turn
signal is active in the direction of lane
departure, or if LKA detects that you
are accelerating, braking, or actively
steering.
See
Lane Keep Assist (LKA) 0228.Vehicle Ahead Indicator
Page 141 of 384
140 LIGHTING
Lighting
Exterior Lighting
Exterior Lamp Controls . . . . . . . . . . 140
Exterior Lamps Off Reminder . . . 142
Headlamp High/Low-BeamChanger . . . . . . . . . . . . . . . . . . . . . . . . . . 142
Flash-to-Pass . . . . . . . . . . . . . . . . . . . . . 142
Daytime Running Lamps (DRL) . . . . . . . . . . . . . . . . . . . . 142
Automatic Headlamp System . . . 142
Hazard Warning Flashers . . . . . . . . 143
Turn and Lane-Change Signals . . . . . . . . . . . . . . . . . . . . . . . . . . . 143
Cornering Lamps . . . . . . . . . . . . . . . . . 144
Interior Lighting
Instrument Panel Illumination Control . . . . . . . . . . . . . . . . . . . . . . . . . . 144
Courtesy Lamps . . . . . . . . . . . . . . . . . . 144
Dome Lamps . . . . . . . . . . . . . . . . . . . . . 144
Reading Lamps . . . . . . . . . . . . . . . . . . . 145
Lighting Features
Entry Lighting . . . . . . . . . . . . . . . . . . . . 145
Exit Lighting . . . . . . . . . . . . . . . . . . . . . . 145
Battery Power Protection . . . . . . . . 146
Exterior Lighting Battery Saver . . . . . . . . . . . . . . . . . . . . . . . . . . . . . 146
Exterior Lighting
Exterior Lamp Controls
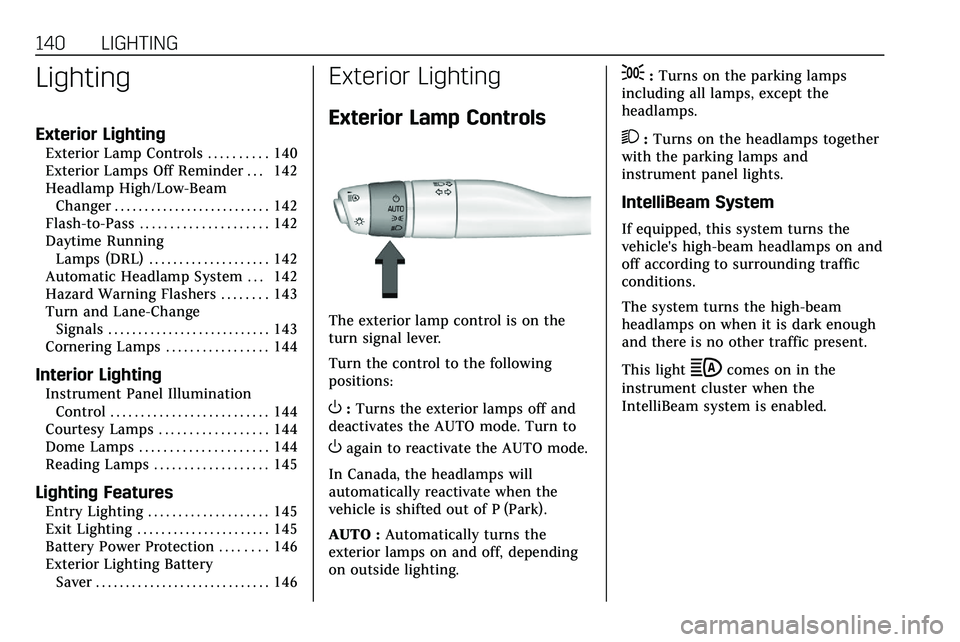
The exterior lamp control is on the
turn signal lever.
Turn the control to the following
positions:
O:Turns the exterior lamps off and
deactivates the AUTO mode. Turn to
Oagain to reactivate the AUTO mode.
In Canada, the headlamps will
automatically reactivate when the
vehicle is shifted out of P (Park).
AUTO : Automatically turns the
exterior lamps on and off, depending
on outside lighting.
;: Turns on the parking lamps
including all lamps, except the
headlamps.
2: Turns on the headlamps together
with the parking lamps and
instrument panel lights.
IntelliBeam System
If equipped, this system turns the
vehicle's high-beam headlamps on and
off according to surrounding traffic
conditions.
The system turns the high-beam
headlamps on when it is dark enough
and there is no other traffic present.
This light
bcomes on in the
instrument cluster when the
IntelliBeam system is enabled.