instrument panel CHEVROLET ASTRO 2004 Owners Manual
[x] Cancel search | Manufacturer: CHEVROLET, Model Year: 2004, Model line: ASTRO, Model: CHEVROLET ASTRO 2004Pages: 382, PDF Size: 2.73 MB
Page 1 of 382
Seats and Restraint Systems........................... 1-1
Front Seats
............................................... 1-2
Rear Seats
............................................... 1-7
Safety Belts
.............................................1-13
Child Restraints
.......................................1-35
Air Bag System
.......................................1-63
Restraint System Check
............................1-70
Features and Controls..................................... 2-1
Keys
........................................................ 2-2
Doors and Locks
....................................... 2-6
Windows
.................................................2-14
Theft-Deterrent Systems
............................2-16
Starting and Operating Your Vehicle
...........2-17
Mirrors
....................................................2-30
HomeLink
žTransmitter
.............................2-31
Storage Areas
.........................................2-34
Instrument Panel............................................. 3-1
Instrument Panel Overview
.......................... 3-2
Climate Controls
......................................3-18
Warning Lights, Gages and Indicators
.........3-23
Audio System(s)
.......................................3-38
Driving Your Vehicle....................................... 4-1
Your Driving, the Road, and Your Vehicle
..... 4-2
Towing
...................................................4-29Service and Appearance Care.......................... 5-1
Service
..................................................... 5-3
Fuel
......................................................... 5-4
Checking Things Under the Hood
................. 5-9
All-Wheel Drive
........................................5-47
Rear Axle
...............................................5-48
Front Axle
...............................................5-48
Bulb Replacement
....................................5-49
Windshield Wiper Blade Replacement
.........5-56
Tires
......................................................5-56
Appearance Care
.....................................5-86
Vehicle Identi®cation
.................................5-95
Electrical System
......................................5-95
Capacities and Speci®cations
...................5-102
Normal Maintenance Replacement Parts
....5-104
Maintenance Schedule..................................... 6-1
Maintenance Schedule
................................ 6-2
Customer Assistance and Information.............. 7-1
Customer Assistance and Information
........... 7-2
Reporting Safety Defects
...........................7-10
Index................................................................ 1
2004 Chevrolet Astro Owner ManualM
Page 4 of 382
Vehicle Damage Warnings
Also, in this book you will ®nd these notices:
Notice:These mean there is something that could
damage your vehicle.
A notice will tell you about something that can damage
your vehicle. Many times, this damage would not be
covered by your warranty, and it could be costly. But the
notice will tell you what to do to help avoid the
damage.
When you read other manuals, you might see
CAUTION and NOTICE warnings in different colors or in
different words.
You'll also see warning labels on your vehicle. They use
the same words, CAUTION or NOTICE.
Vehicle Symbols
Your vehicle has components and labels that use
symbols instead of text. Symbols, used on your vehicle,
are shown along with the text describing the operation
or information relating to a speci®c component, control,
message, gage or indicator.
If you need help ®guring out a speci®c name of a
component, gage or indicator, reference the
following topics:
·Seats and Restraint Systems in Section 1
·Features and Controls in Section 2
·Instrument Panel Overview in Section 3
·Climate Controls in Section 3
·Warning Lights, Gages and Indicators in Section 3
·Audio System(s) in Section 3
·Engine Compartment Overview in Section 5
iv
Page 22 of 382
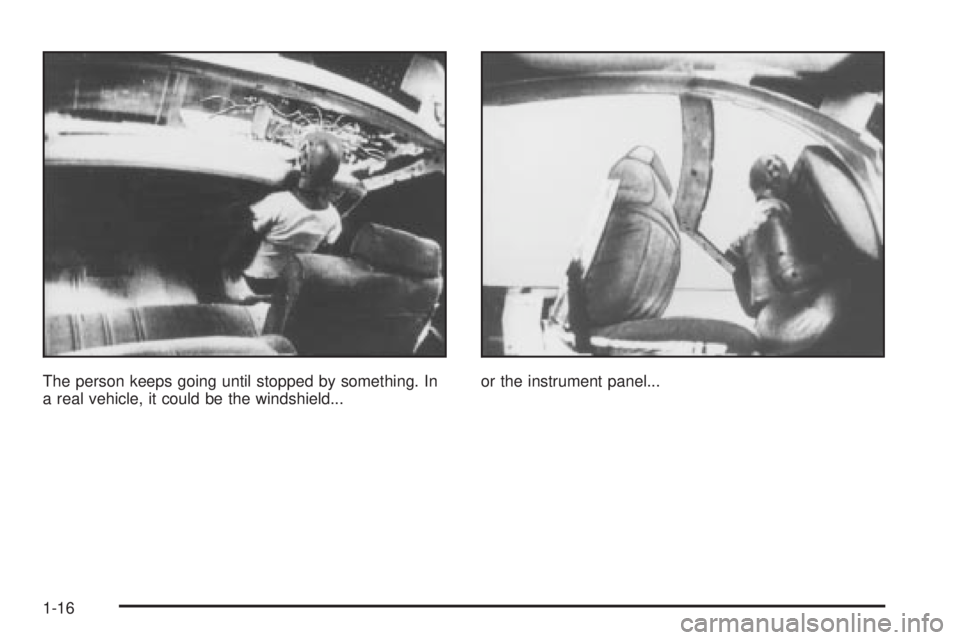
The person keeps going until stopped by something. In
a real vehicle, it could be the windshield...or the instrument panel...
1-16
Page 71 of 382
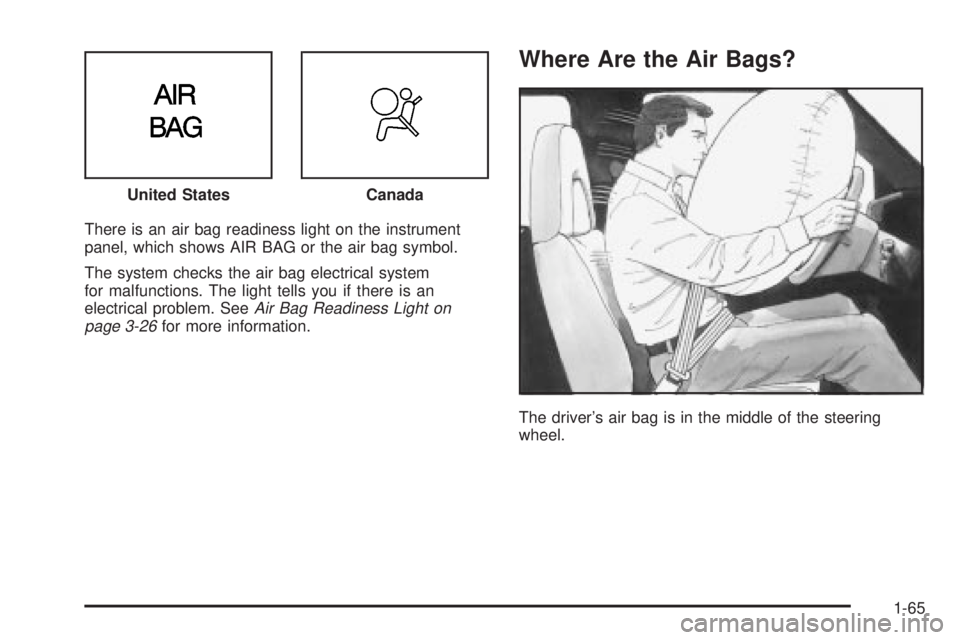
There is an air bag readiness light on the instrument
panel, which shows AIR BAG or the air bag symbol.
The system checks the air bag electrical system
for malfunctions. The light tells you if there is an
electrical problem. See
Air Bag Readiness Light on
page 3-26for more information.
Where Are the Air Bags?
The driver's air bag is in the middle of the steering
wheel. United States
Canada
1-65
Page 72 of 382
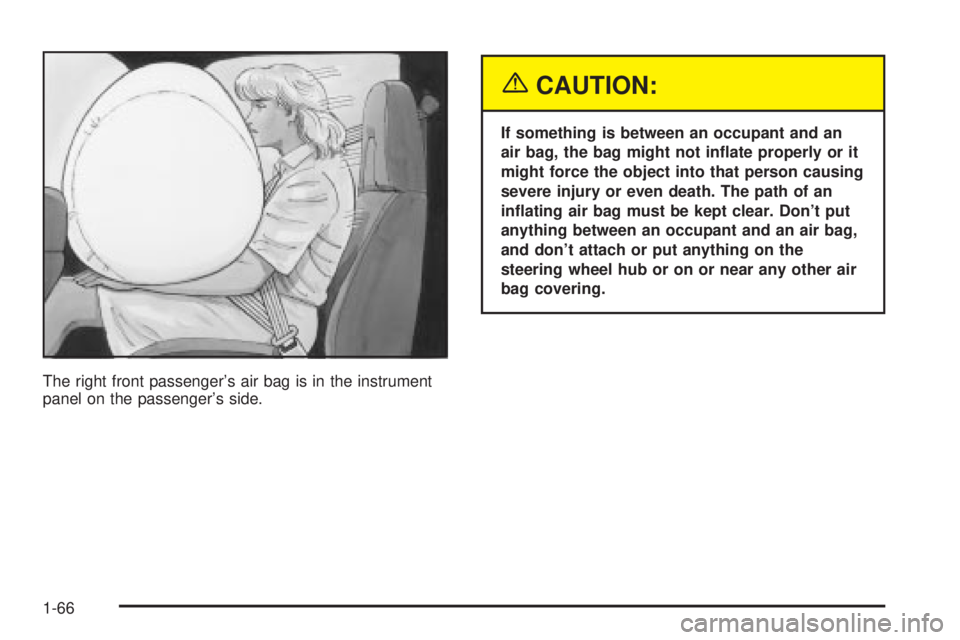
The right front passenger's air bag is in the instrument
panel on the passenger's side.
{CAUTION:
If something is between an occupant and an
air bag, the bag might not in¯ate properly or it
might force the object into that person causing
severe injury or even death. The path of an
in¯ating air bag must be kept clear. Don't put
anything between an occupant and an air bag,
and don't attach or put anything on the
steering wheel hub or on or near any other air
bag covering.
1-66
Page 73 of 382
When Should an Air Bag In¯ate?
An air bag is designed to in¯ate in a moderate to severe
frontal, or near-frontal crash. The air bag will in¯ate
only if the impact speed is above the system's designed
ªthreshold levelº. If your vehicle goes straight into a
wall that doesn't move or deform, the threshold level is
about 9 to 16 mph (14 to 26 mph/h). The threshold
level can vary, however, with speci®c vehicle design, so
that it can be somewhat above or below this range. If
your vehicle strikes something that will move or deform,
such as a parked car, the threshold level will be
higher. The air bag is not designed to in¯ate in rollovers,
rear impacts, or in many side impacts because in¯ation
would not help the occupant.
In any particular crash, no one can say whether an air
bag should have in¯ated simply because of the damage
to a vehicle or because of what the repair costs were.
In¯ation is determined by the angle of the impact
and how quickly the vehicle slows down in frontal or
near-frontal impacts.
What Makes an Air Bag In¯ate?
In an impact of sufficient severity, the air bag sensing
system detects that the vehicle is in a crash. The
sensing system triggers a release of gas from the
in¯ator, which in¯ates the air bag. The in¯ator, air bag,
and related hardware are all part of the air bag
modules inside the steering wheel and in the instrument
panel in front of the right front passenger.
How Does an Air Bag Restrain?
In moderate to severe frontal or near-frontal collisions,
even belted occupants can contact the steering wheel or
the instrument panel. Air bags supplement the
protection provided by safety belts. Air bags distribute
the force of the impact more evenly over the occupant's
upper body, stopping the occupant more gradually.
But air bags would not help you in many types of
collisions, including rollovers, rear impacts and many
side impacts, primarily because an occupant's motion is
not toward those air bags. Air bags should never be
regarded as anything more than a supplement to safety
belts, and then only in moderate to severe frontal or
near-frontal collisions.
1-67
Page 74 of 382
What Will You See After an
Air Bag In¯ates?
After an air bag in¯ates, it quickly de¯ates, so quickly
that some people may not even realize the air bag
in¯ated. Some components of the air bag module ± the
steering wheel hub for the driver's air bag, or the
instrument panel for the right front passenger's
bag ± will be hot for a short time. The parts of the bag
that come into contact with you may be warm, but
not too hot to touch. There will be some smoke and dust
coming from the vents in the de¯ated air bags. Air
bag in¯ation doesn't prevent the driver from seeing or
being able to steer the vehicle, nor does it stop
people from leaving the vehicle.
{CAUTION:
When an air bag in¯ates, there is dust in the
air. This dust could cause breathing problems
for people with a history of asthma or other
breathing trouble. To avoid this, everyone in
the vehicle should get out as soon as it is safe
to do so. If you have breathing problems but
can't get out of the vehicle after an air bag
in¯ates, then get fresh air by opening a
window or a door. If you experience breathing
problems following an air bag deployment, you
should seek medical attention.
1-68
Page 75 of 382
·Air bags are designed to in¯ate only once. After
they in¯ate, you'll need some new parts for your
air bag system. If you don't get them, the air
bag system won't be there to help protect you in
another crash. A new system will include air
bag modules and possibly other parts. The service
manual for your vehicle covers the need to
replace other parts.
·Your vehicle is equipped with a crash sensing and
diagnostic module, which records information
about the air bag system. The module records
information about the readiness of the system, when
the system commands air bag in¯ation and
driver's safety belt usage at deployment. The
module also records speed, engine rpm, brake and
throttle data.
·Let only quali®ed technicians work on your air bag
system. Improper service can mean that your air
bag system won't work properly. See your dealer for
service.
Notice:If you damage the covering for the driver's
or the right front passenger's air bag, the bag
may not work properly. You may have to replace the
air bag module in the steering wheel or both the
air bag module and the instrument panel for
the right front passenger's air bag. Do not open or
break the air bag coverings.
Servicing Your Air Bag-Equipped
Vehicle
Air bags affect how your vehicle should be serviced.
There are parts of the air bag system in several places
around your vehicle. You don't want the system to
in¯ate while someone is working on your vehicle. Your
dealer and the service manual have information
about servicing your vehicle and the air bag system. To
purchase a service manual, see
Service Publications
Ordering Information on page 7-11.
{CAUTION:
For up to 10 minutes after the ignition key is
turned off and the battery is disconnected, an
air bag can still in¯ate during improper
service. You can be injured if you are close to
an air bag when it in¯ates. Avoid wires
wrapped with yellow tape or yellow
connectors. They are probably part of the air
bag system. Be sure to follow proper service
procedures, and make sure the person
performing work for you is quali®ed to do so.
The air bag system does not need regular maintenance.
1-69
Page 90 of 382
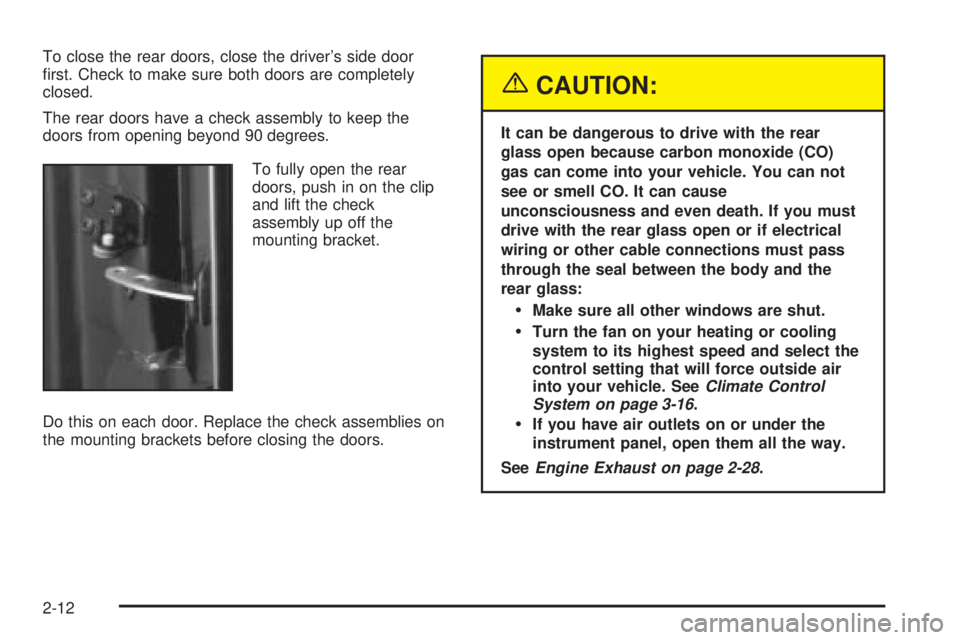
To close the rear doors, close the driver's side door
®rst. Check to make sure both doors are completely
closed.
The rear doors have a check assembly to keep the
doors from opening beyond 90 degrees.
To fully open the rear
doors, push in on the clip
and lift the check
assembly up off the
mounting bracket.
Do this on each door. Replace the check assemblies on
the mounting brackets before closing the doors.
{CAUTION:
It can be dangerous to drive with the rear
glass open because carbon monoxide (CO)
gas can come into your vehicle. You can not
see or smell CO. It can cause
unconsciousness and even death. If you must
drive with the rear glass open or if electrical
wiring or other cable connections must pass
through the seal between the body and the
rear glass:
·Make sure all other windows are shut.
·Turn the fan on your heating or cooling
system to its highest speed and select the
control setting that will force outside air
into your vehicle. See
Climate Control
System on page 3-16.
·If you have air outlets on or under the
instrument panel, open them all the way.
See
Engine Exhaust on page 2-28.
2-12
Page 101 of 382
If you manually select SECOND (2), the transmission
will drive in second gear. You may use this feature
for reducing torque to the rear wheels when you
are trying to start your vehicle from a stop on slippery
road surfaces.
FIRST (1):This position gives you even more power
(but lower fuel economy) than SECOND (2). You
can use it on very steep hills, or in deep snow or mud.
If the shift selector lever is put in FIRST (1), the
transmission won't shift into ®rst gear until the vehicle is
going slow enough.
Notice:Spinning the tires or holding the vehicle in
one place on a hill using only the accelerator
pedal may damage the transmission. If you are
stuck, do not spin the tires. When stopping on a hill,
use the brakes to hold the vehicle in place.
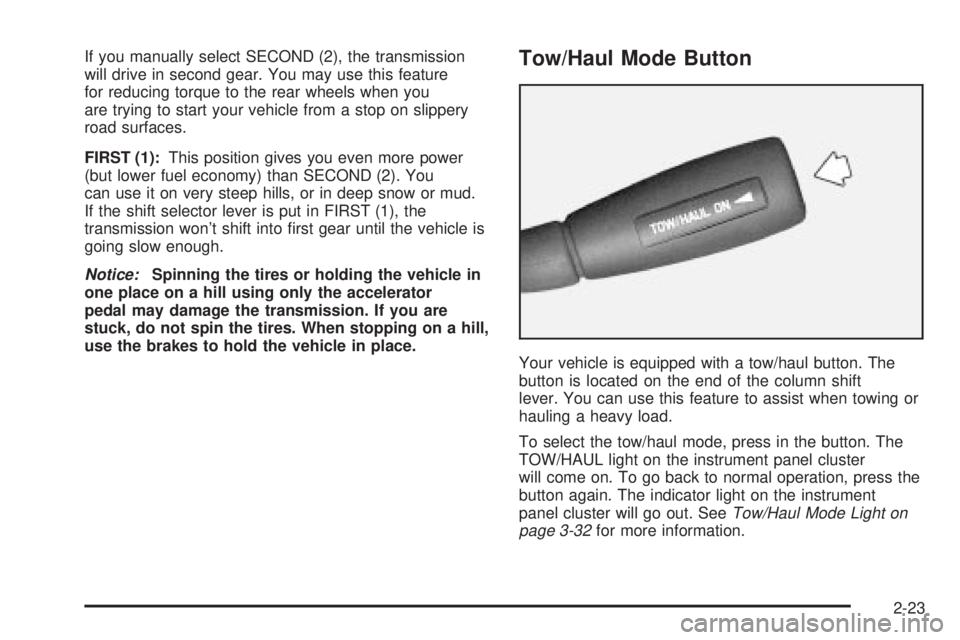
Tow/Haul Mode Button
Your vehicle is equipped with a tow/haul button. The
button is located on the end of the column shift
lever. You can use this feature to assist when towing or
hauling a heavy load.
To select the tow/haul mode, press in the button. The
TOW/HAUL light on the instrument panel cluster
will come on. To go back to normal operation, press the
button again. The indicator light on the instrument
panel cluster will go out. See
Tow/Haul Mode Light on
page 3-32for more information.
2-23